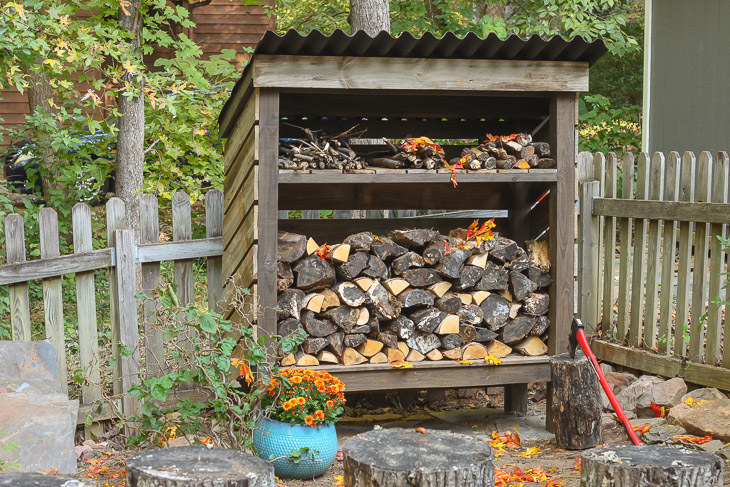

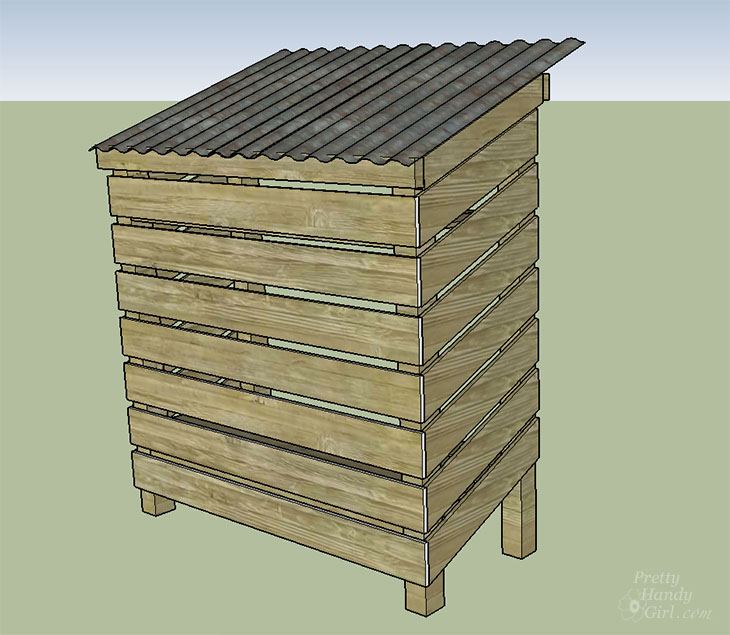
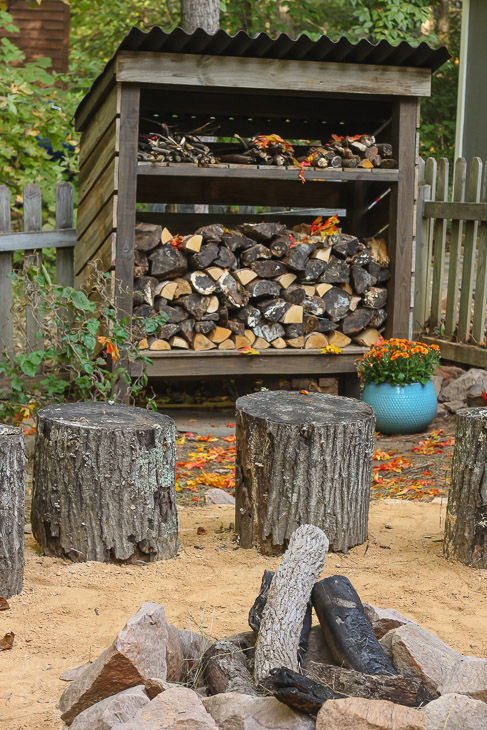
Welcome! I’m really excited to share with you the plans for How to Build a Wood Storage Shed today. This project is sure to dress up your fire pit area or create a nice spot to store and preserve firewood for your home. Learn how to build your own wood shed.
My neighbor emailed me the other day to ask if I wanted any salvage wood from their privacy fence. I gladly picked through her wood and scored some nice rustic fence pickets that I used for building this wood storage shed.
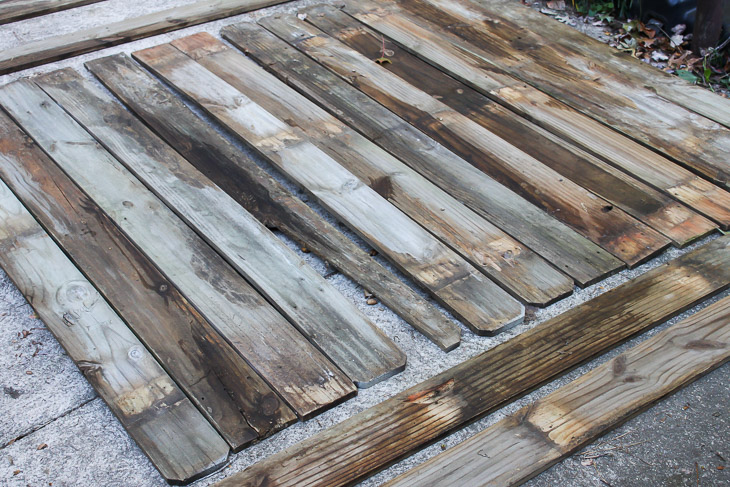
If you don’t have a nice neighbor getting rid of their old fencing check on Craig’s List or at your nearest Habit ReStore. If you can’t score used pickets you can buy them or substitute plywood for the shelves.
Ready to get building? Let’s get to it!
Wood Storage Shed Materials:
- Drill
- Hammer
- Circular saw (or hand saw)
- Miter saw (or hand saw)
- 3″ exterior decking wood screws
- 4- 4″ x 4″ x 6′ pressure treated posts
- 6 – 2″ x 4″ x 10′ pressure treated studs
- 21 – 5/8″ x 6″ x 6′ pressure treated fence pickets
- Nailgun (or hammer)
- 2″ Finish nails
- 1 – Corrugated Roofing Sheet
- Roof nails
- Waterproof washers for nails
- Clamp
- Tape measure
- Pencil
- Level
- Sander
- Sandpaper
Optional:
- Kreg Jig to drill pocket holes
- Deck stain
- Paint brush
Cut List:
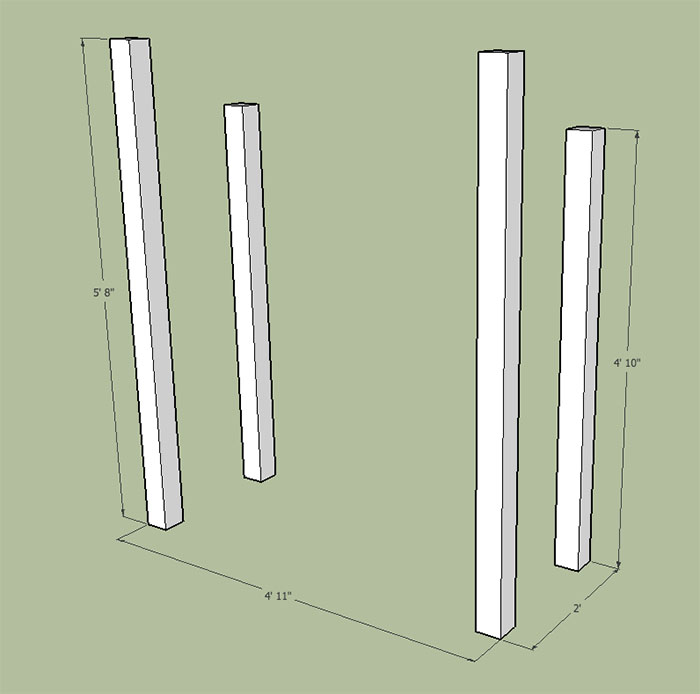
- 2 – 4″ x 4″ cut to 58″
- 2 – 4″ x 4″ cut to 68″
- 4 – 2″ x 4″ cut to 53″
- 5 – 2″ x 4″ cut to 21″
- 2 – 2″ x 4″ cut to 63″
- 1 – 2″ x 4″ cut to 60″
- 2 – 5/8″ x 6″ cut to 59″
- 2 – 5/8″ x 6″ cut to 53″
- 9 – 5/8″ x 6″ cut to 24″
- 7 – 5/8″ x 6′ cut to 60″
- 2 – Angled 2″ x 4″ cut at 22.5˚ angle to width to be determined*
- 14 – Angled 5/8″ x 6″cut at 22.5˚ angle to width to be determined*
*I highly recommend cutting your angled pieces as you go. Measure and mark based on your structure as 4″x4″ posts can angle and twist slightly.
How to Build a Wood Storage Shed Preparation:
Pre-cut your lumber.
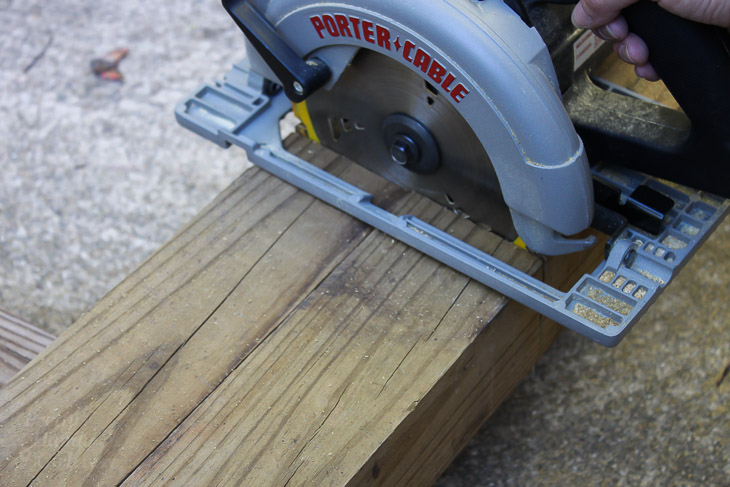
To cut your 4″ x 4″ posts, measure and mark all sides of the 4″ x 4″. Clamp two together and cut one side.
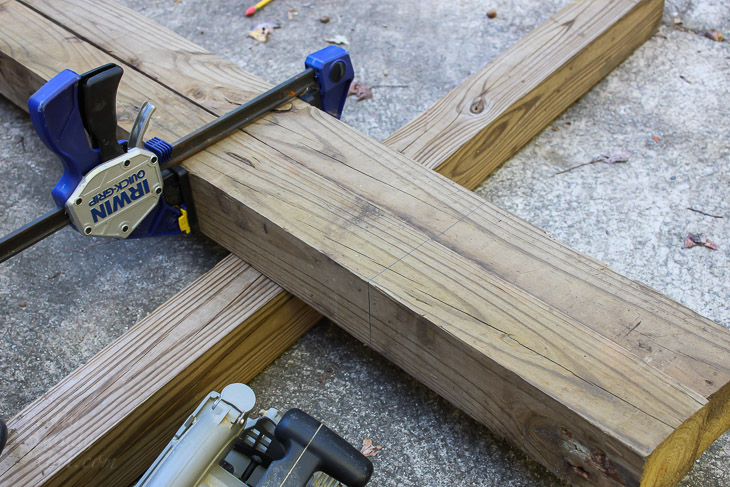
Flip the 4″ x 4″ over to complete your cut. This will give you two posts the exact same height.
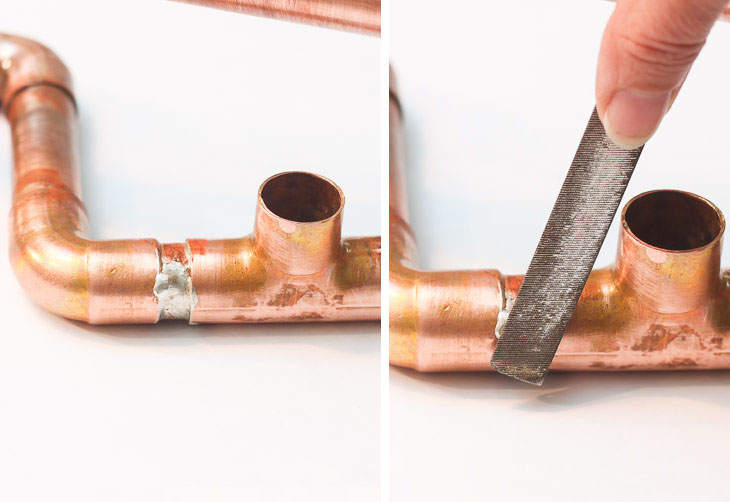
Sand any splinters or rough edges.
Build a Wood Storage Shed Instructions:
Line up your 4″ x 4″ posts as shown. You will probably need to lay them on their sides while building the frame. Having a buddy around would be helpful, but you can also use clamps to help hold your boards as you assemble.
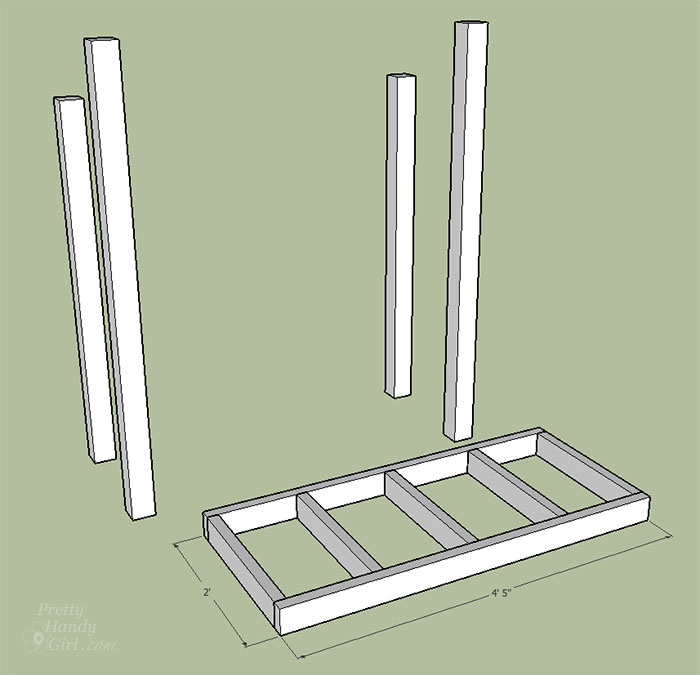
Build the bottom shelf structure using two 53″ studs and five 21″ studs. Use wood screws to secure the 21″ stud through the face of the 53″ studs.
Drill pocket holes into both ends of two 53″ 2×4 studs. (Alternatively, you could just drive the screws in at an angle since they will be on the underside of your supports.) Secure these two 2×4’s to the 4×4 posts at 47″ from the ground.
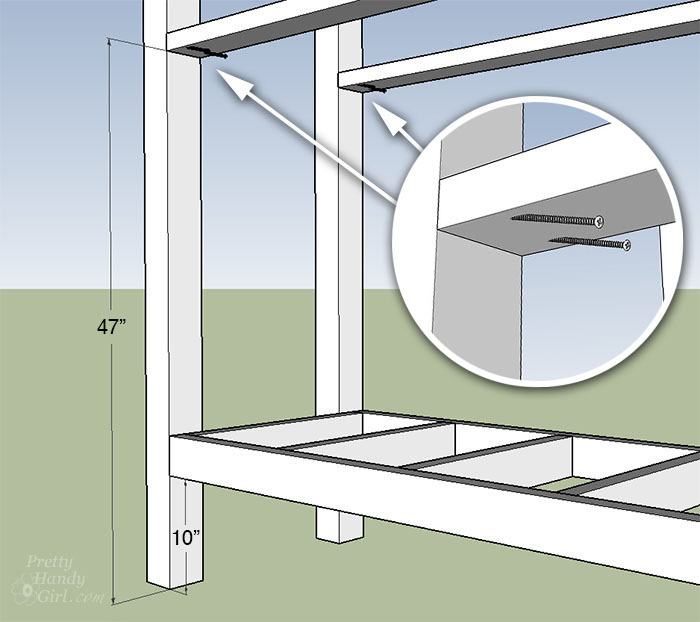
Secure the bottom shelf structure to the 4×4 posts, 10″ from the ground using wood screws.
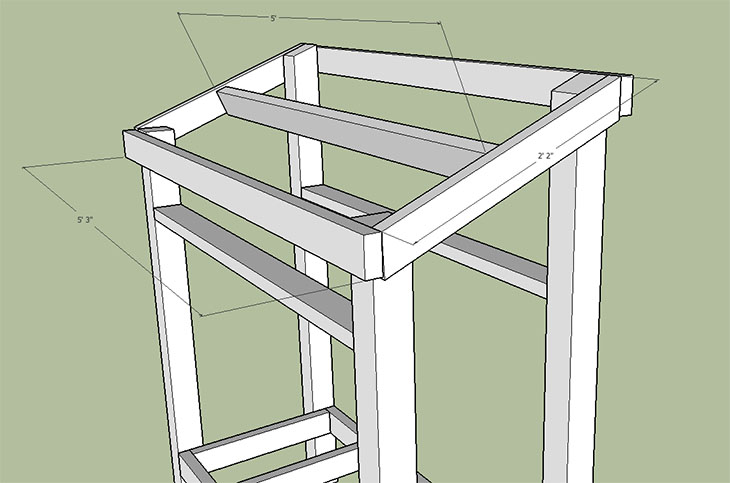
Cut one end of two 2″ x 4″ studs at a 22.5˚ angle. Mark the cut length against the 4×4 posts and cut the other end at the same angle. Secure both angled 2×4’s to the outside of the top of your structure.
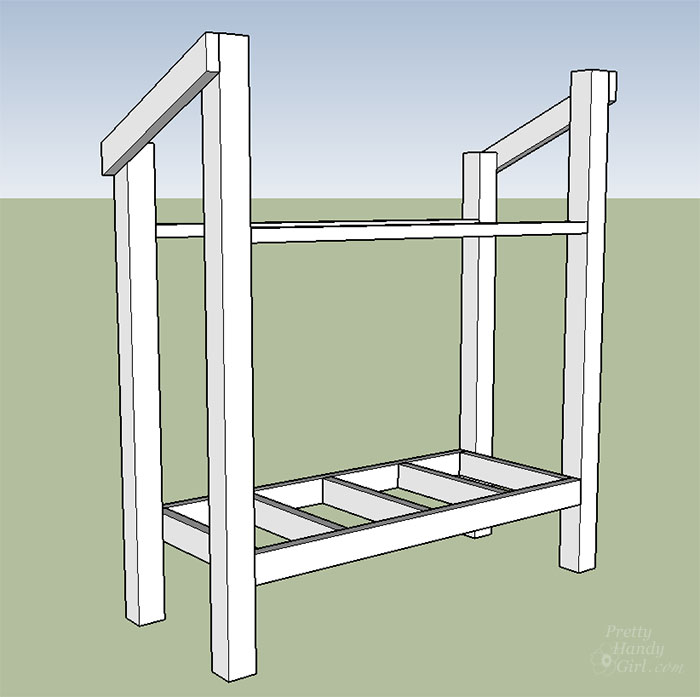
Use a handsaw to trim the top off the front 4×4 posts flush surface with the angled 2×4’s.

This will leave you with a flush surface for the roofing material to rest on later. Attach the two 63″ 2×4’s to the front and back of your structure.
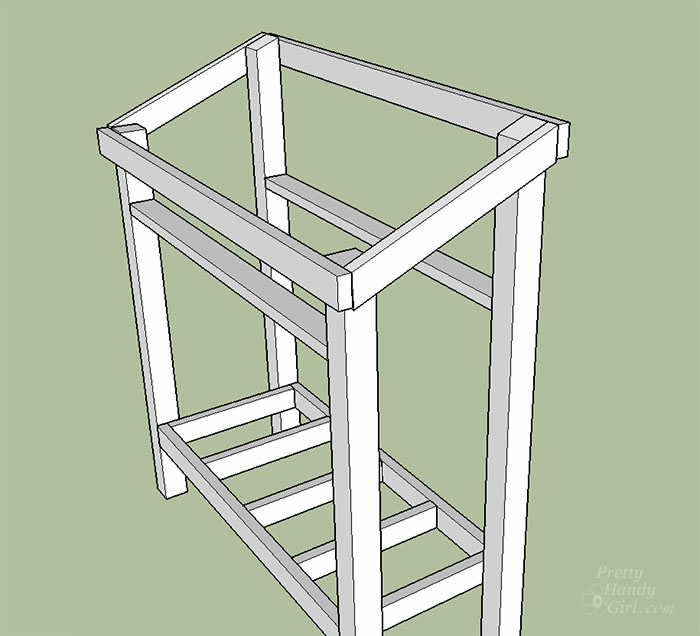
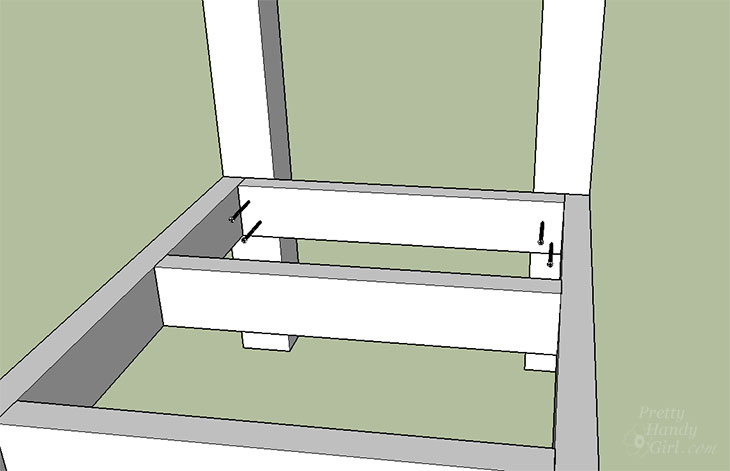
Secure the 60″ 2×4 to the center of the roof structure as shown below:
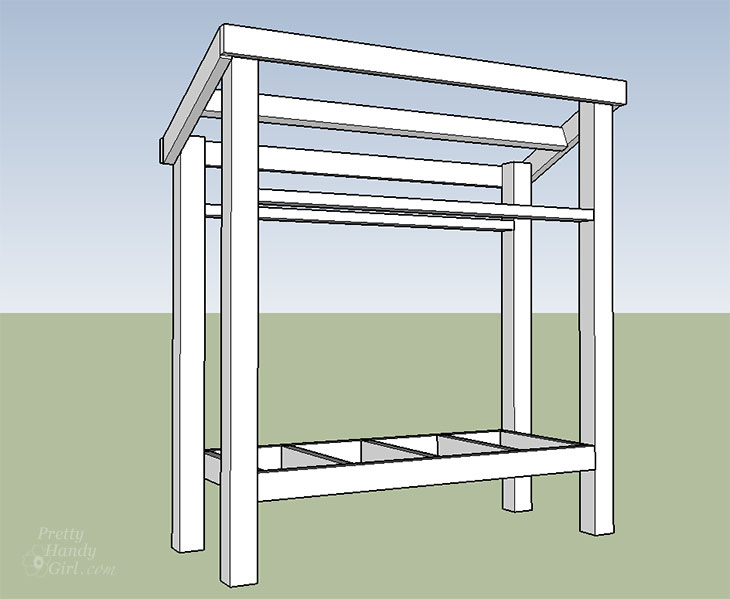
Your wood storage structure is now ready for the shelves and side cladding.
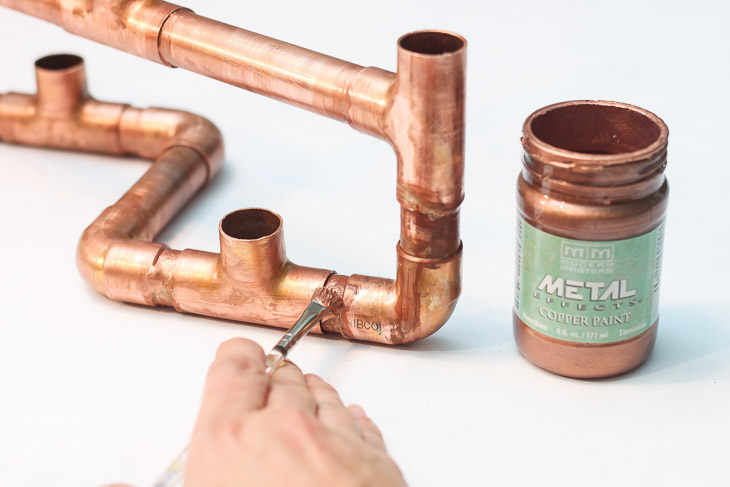
If you want to stain your wood storage shed, you might want to do that now. I left the shelves and side cladding raw wood to show off the beautiful rustic silver color. But, if you have new wood you can stain it as well. (I used two coats of Sherwin Williams SuperDeck Charwood color.)

Allow the stain to dry. Evenly space nine 5/8″ x 24″ boards on the top shelf supports. Secure with finish nails.
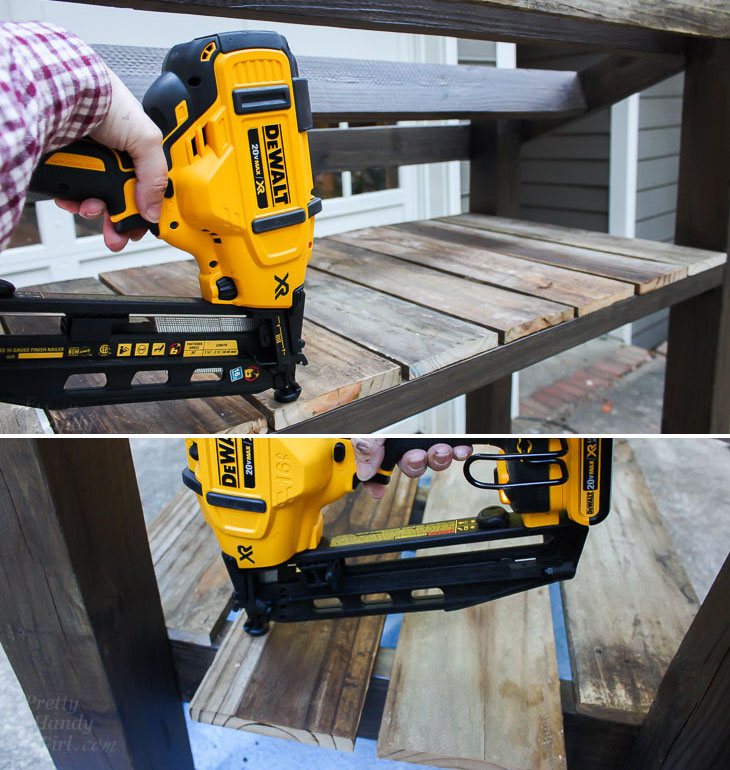
Center two 5/8″ x 59″ boards to the bottom shelf. Line up the two 5/8″ x 53″ boards against the front and back of the bottom shelf. Secure with finish nails.
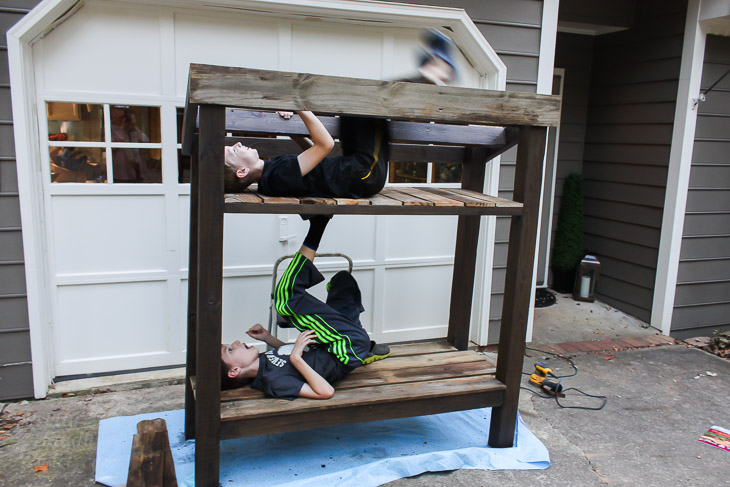
Enlist two rough and tumble boys to test the strength of your structure. (Good grief, how am I going to survive the next 10 years with these crazy boys?)
Secure seven 5/8″ x 60″ boards to the back of the shed. Use a 1″ scrap piece of wood to space them evenly. Secure with finish nails.
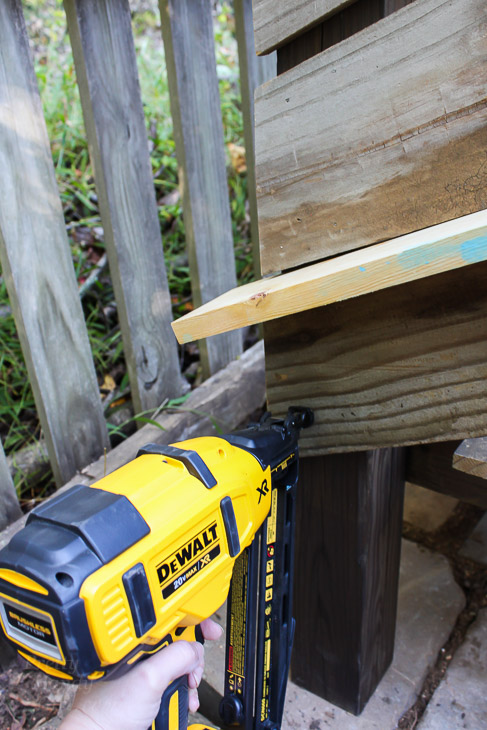
Cut one end of fourteen 5/8″ x 5″ boards at a 22.5˚ angle. Then line up and mark the other end against your structure. For a clean look, allow 5/8″ to overlap the back of the structure to hide the ends of the back cladding. (I suggest measuring and cutting your angled 5/8″ boards as you go. I have a 1/2″ variance in width along my sides.)
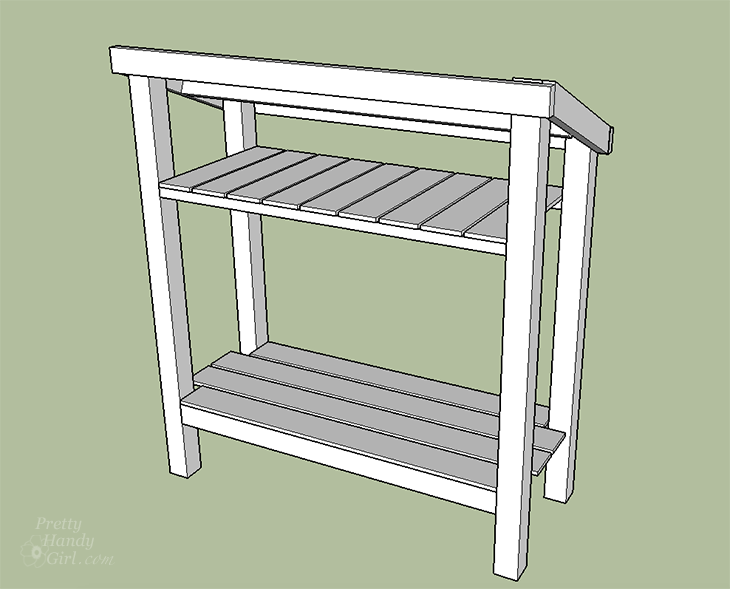
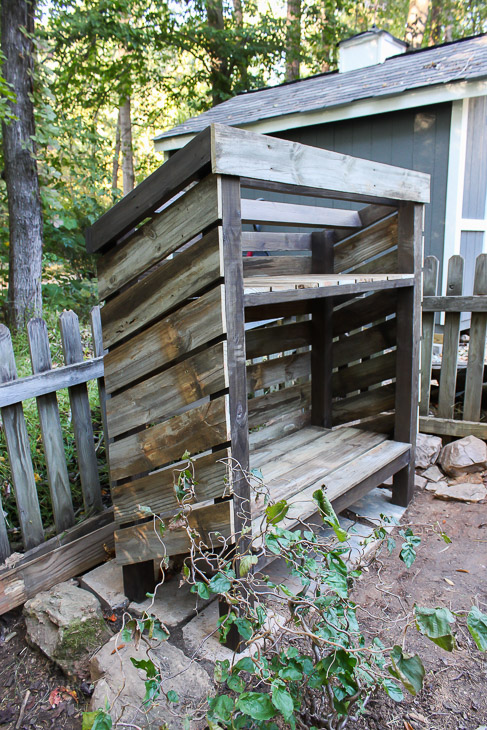
Your wood storage shed should look like this:
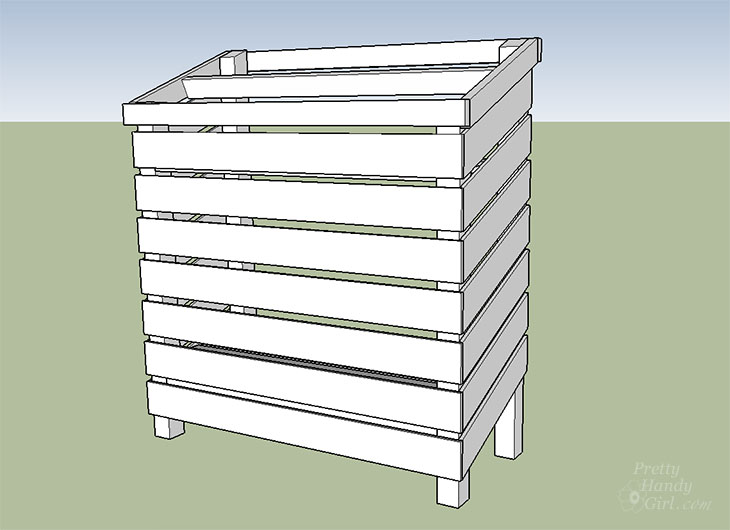
or this:
Installing the Roofing Sheet:
One of the easiest ways to roof a shed or small structure is to use corrugated roofing sheets. At 4′ x 6’7″, it’s easier to cover a larger area in just a few minutes. You can use metal or asphalt based corrugated sheets.
Here’s how to install the roofing sheets :
(I used asphalt sheets from Lowe’s for my shed. For more specific and detailed installation guidelines, check with the manufacturer of your roofing sheet.)
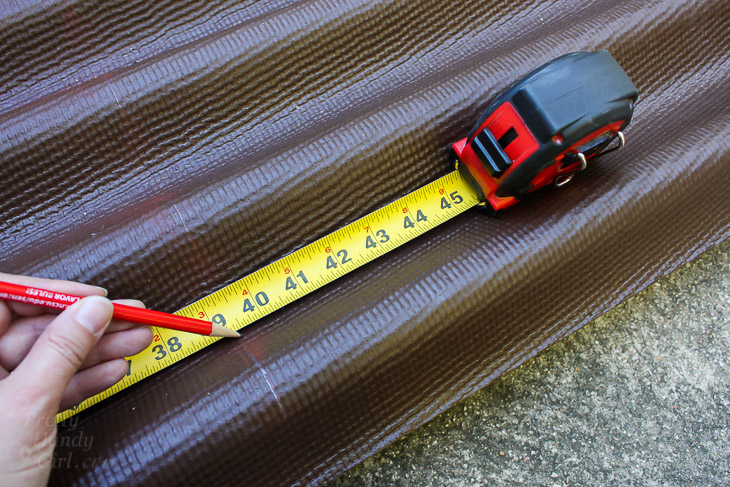
Measure the roof area on your shed. Add 2″ – 3″ to the width to allow for folding over the sides to secure to the shed sides. It works out that you’ll only need one sheet to roof this wood storage shed.
Measure your wood shed’s roof depth and add a few inches for overhang (if using asphalt roofing do not extend the sheet more than 2″ over a support or you could have some sagging over time.)
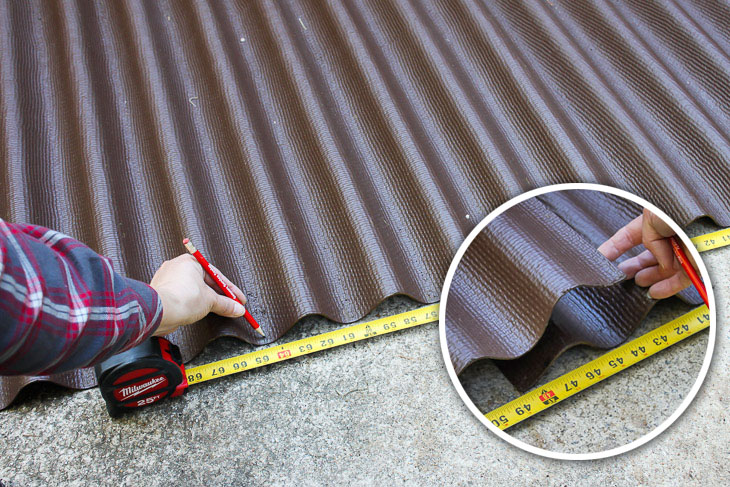
You can cut asphalt sheets with any saw or utility knife. Cut your sheet for the depth (front to back) measurement first. Next, overlap one sheet over the other (only overlap one peak.) Mark the width of the shed roof plus 2″. For these plans 65″ is the width that worked on the shed, but be sure to double check your shed roof.
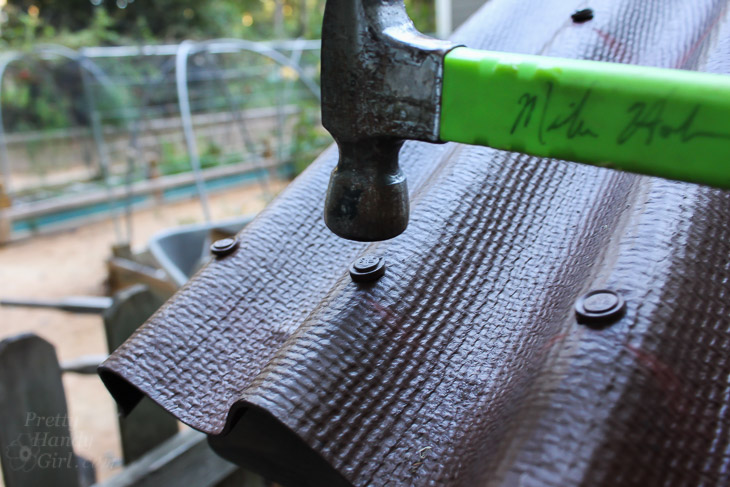
Slip a washer on each roofing nail. Hammer the nails into the sheets (keep the nail heads parallel with the sheet as shown below.)
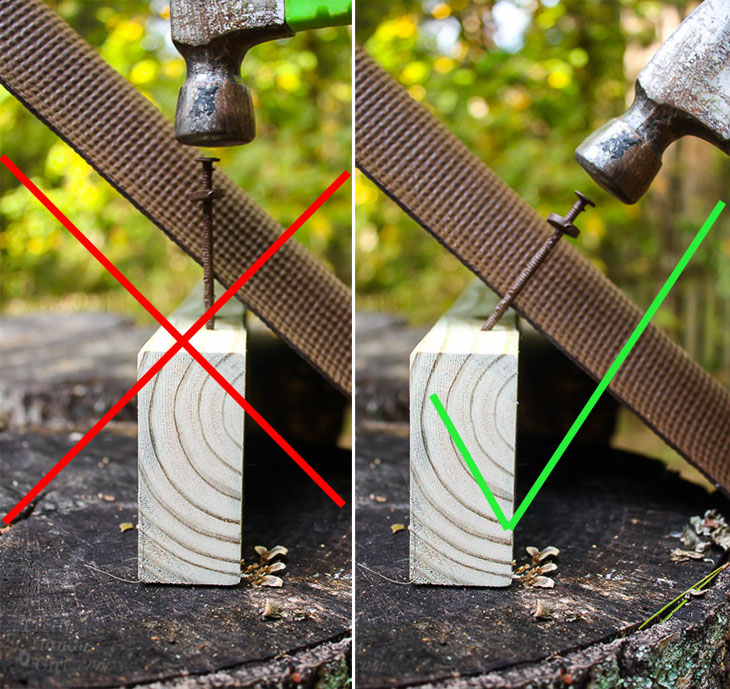
Hammer until the rubber washer covers the hole made by the nail.
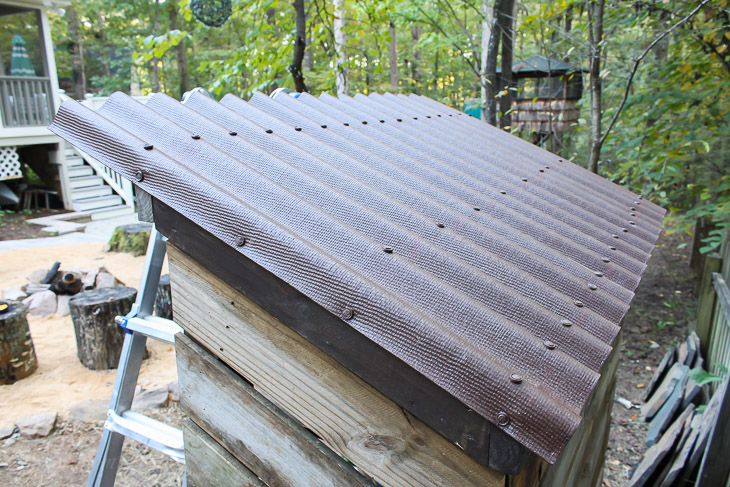
Nail the sides down to the wood shed roof framing.
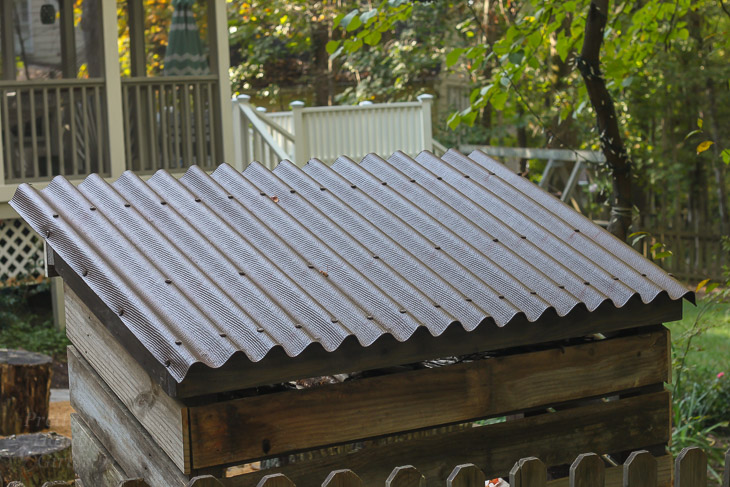
And call it a day! You’re done.
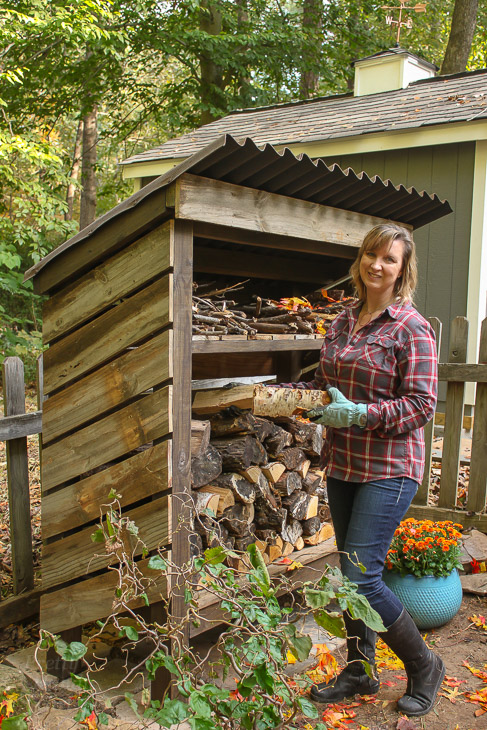
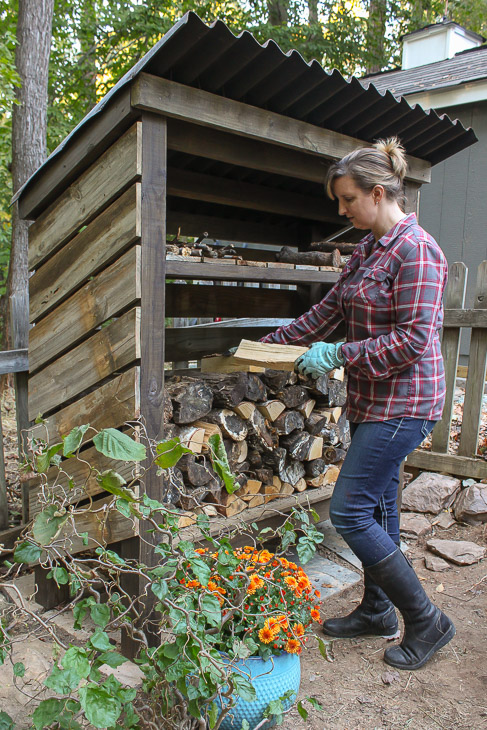
Go ahead and fill your wood storage shed with kindling and firewood.
Want to watch how I built this shed? Watch this video:
(Inserted You Tube video here when published.)
![]()


 ~
~