Holiday Home Tour 2016 | Pretty Handy Girl

Holiday Home Tour 2016 | Pretty Handy Girl

Welcome to the Holiday Tablescape Tour of 2016. I’ve partnered with some of the most talented DIY bloggers for a jam packed tablescape tour. You won’t want to miss a stop because there’s lots of decorating inspiration for all.

Holiday Tablescape Tour 2016

If you are coming over from I Am a Homemaker, welcome! Wasn’t Jillian’s table beautiful? I love the simple candy canes and pine branches at each place setting.

Tablescape Tour 2016

I hope you enjoyed my holiday home tour last week. Today I’d love to invite you into our dining room. I didn’t spend a lot of money on this tablescape. In fact, most of the decorations were created with a copper plumbing pipe, truth!

Holiday Home Tour 2016 | Pretty Handy Girl

This copper pipe centerpiece was made with—you guessed it—a copper pipe. You can learn how to make your own copper pipe centerpiece here.

Holiday Home Tour 2016 | Pretty Handy Girl

It doubles as a beautiful floral centerpiece, too!

DIY Copper Pipe Centerpiece | Pretty Handy Girl

For the napkin rings, you can cut small pieces of 3/4″ pipe and roll the end of napkins into the pipes. I might buy a larger copper pipe in the future to make bigger napkin rings.  Go ahead, make your own by following this video for cutting pipe by hand.

Holiday Home Tour 2016 | Pretty Handy Girl

For a touch of natural beauty, I tucked a few blooming camellias from our yard into the rings.

Holiday Home Tour 2016 | Pretty Handy Girl

I try not to buy greenery, but a few years ago I fell in love with seeded eucalyptus. Luckily my grocery store carries bunches to purchase.

Holiday Home Tour 2016 | Pretty Handy Girl

I’m excited for Christmas morning. We usually have family over and have a big Christmas brunch with lots of pancakes. Yum!

Holiday Home Tour 2016 | Pretty Handy Girl

Do you like to decorate your table for the holidays? You’ll want to check out the rest of the Holiday Tablescape Tour for more ideas!

Head on over to Cristina’s at Remodelando la Casa, you’ll love her tablescape!

Tablescape Tour 2016

Then visit the rest of the stops on the tablescape tour:

Decor Adventures
Her Toolbelt
I Am a Homemaker
Pretty Handy Girl
Remodelando la Casa
Sawdust 2 Stitches
Stacy Risenmay
That’s My Letter

Enjoy the rest of the tour!

PHGFancySign


Pin for later!

Find holiday table decor ideas and inspiration with this tablescape tour from Pretty Handy Girl | Holiday tablescape #prettyhandygirl #holidaytable #holidayhome

This DIY cell phone holder and charging station is a great last minute gift idea.

This DIY cell phone holder and charging station is a great last minute gift idea.

Hello Pretty Handy readers, it’s Jillian here from I Am a Homemaker  and I have a great last minute gift idea for that person on your list that has it all! Does anyone what to know how to build a DIY Cell Phone Holder and Charging Station?

Whether you see it as a blessing or a curse, we are pretty much tethered to our cell phones. They usually end up on our nightstands or kitchen counters at night. I don’t know about you but I use mine as an alarm clock (no worrying about forgetting to turn the clock back or the power going out and missing your wake up time.)  I thought it was time to make a designated spot for my phone that would double as a convenient way to charge it. I came up with this simple DIY cell phone holder and charging station.  Ready to learn how to make one of your own?

These directions will adequately hold an iPhone 6. You may need to adjust things slightly if you have a different phone.

(I’ve included affiliate links for your convenience. I earn a small percentage from a purchase using these links. There is no additional cost to you. You can read more about affiliate links here.)

Materials:

Instructions:

Step 1: Measure and mark a 6″ long and 3/4″ wide guide down the center of your one of your boards. This is the section you will remove from the wood to make a space for your phone.

This DIY cell phone holder and charging station is a great last minute gift idea.

Step 2: Set your router for a 3/4″ depth setting and use the 1/2″ router bit to remove the channel you outlined with your pencil.

This DIY cell phone holder and charging station is a great last minute gift idea.

Step 3: Use the 1/4″ bit for more control to clean up the edges of your channel.  Be sure to have your phone on hand to check the fit.

This DIY cell phone holder and charging station is a great last minute gift idea.

Step 4: Add glue to the top of the second piece of wood. Stack the routered piece on top and clamp them together. Allow to dry according to the wood glue instructions. (You can ignore the hole in my piece, I did things a little backwards but you can save some time by learning from my mistakes.)

This DIY cell phone holder and charging station is a great last minute gift idea.

Step 5: Once the glue has dried, drill a hole through both pieces starting in the center of the channel and coming straight out the bottom. Flip the piece over. Beginning at the hole you drilled and continuing to the back of the piece, use your 1/2″ router bit to cut a groove for the cord to rest in.

This DIY cell phone holder and charging station is a great last minute gift idea.

Step 6: This is totally optional, but you can go back and edge the top of your cell phone holder with a round over bit on your router to make a decorative edge.  It gives the piece a more decorative look.

This DIY cell phone holder and charging station is a great last minute gift idea.

Step 7: Now all you need is the perfect person to gift this to. Or you could always keep it for yourself. 😉

This DIY cell phone holder and charging station is a great last minute gift idea.

The phone can sit vertically or horizontally. When it is placed vertically, the charger will be completely hidden in the hole. When it is horizontal, the cord will need to be pulled up a bit and tucked behind the phone.

This DIY cell phone holder and charging station is a great last minute gift idea.

Want a few more last minute gift ideas? Check out these DIY gift ideas!

Jillian's Signature

-Read more of Jillian’s posts-


Pin for later!

Follow along with this easy tutorial on how to make a simple DIY cell phone holder and charging station. | DIY cell phone charger | Pretty Handy Girl #prettyhandygirl #DIY #chargingstation #cellphonecharger

Quick & Easy Peppermint Oreo Recipe : Great for last minute cookie exchanges or gifts


Want a quick and easy holiday recipe you can make with the kids? When you don’t have time to bake, but you still want to give a homemade holiday treat, try this recipe for Peppermint Oreos!

Quick & Easy Peppermint Oreos

Ingredients:

  • 1 Pkg. of Oreo cookies
  • 1 Pkg. of peppermint candies
  • 1 Pkg. of white chocolate chips

Instructions:

Place the peppermint candies in a double ziploc bags. Let the kids hammer them to smithereens! (I placed scrap wood under the peppermints to protect the countertop.)

While the kids are pounding away to their heart’s content. Melt white chocolate chips in a double boiler (or in the microwave. But, the double boiler will keep the chocolate from hardening as fast.)

Pry the hammers from your kid’s hands. Place the crushed peppermints into shallow bowls (one for each child.)

Roll the edge of the oreo cookies into the white chocolate.

Then roll them into the crushed peppermints.

Lay the cookies onto wax paper to cool.


After they cool, eat them, gift them or save them for a snowy day.

A bunch of oreos would fit nicely in one of these decorated gift bags made from a cloth napkin, don’t you think?

drawstring gift bags made from cloth napkins

Want more 15 Minute Gift Ideas?


Happy Holidays!


Pin for later!

Want a quick and easy holiday recipe you can make with the kids? When you don't have time to bake, but you still want to give a homemade holiday treat, try this recipe for Peppermint Oreos! | Pretty Handy Girl #prettyhandygirl #oreorecipe #holidayrecipe

How to Make a Vintage Rustic Sleigh Ride Sign | Pretty Handy Girl How cool! You can use this technique to make or transfer any sign graphic.

Holiday Home Tour 2016 | Pretty Handy Girl

I’m so happy to see you again this year! This is my annual holiday home tour and each year I can’t wait to invite you in to see the decorations. (These are my home tours from 2010, 2011, 2013, 2014, 2015.) This year I tried to keep it simple, but I did take two days to make a really fun vintage sign. I hope you’ll come on in and see it (and the rest of my holiday decorating efforts.)

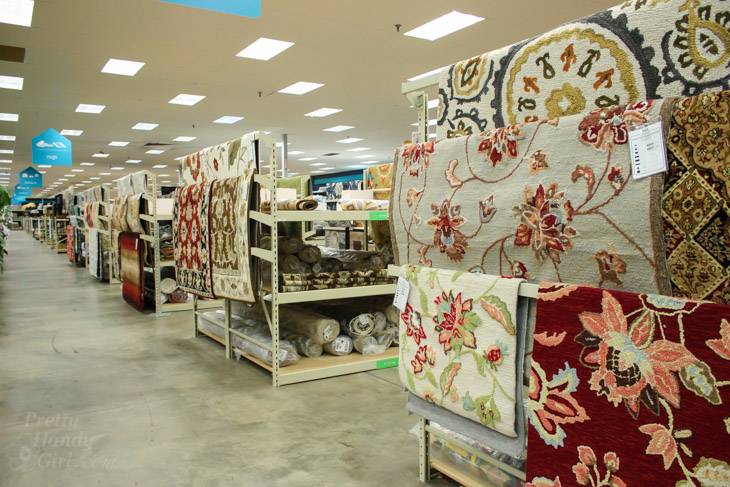
Before I start decorating, I like to choose a theme. This year I wanted to create a nature or woodland inspired theme. I pulled the storage bins out of the attic and assessed what I had to work with. Then, I made a list of some items I could use to fill out the room. Next stop was my local At Home store. This home tour has been sponsored by At Home. This year I’ve been thrilled to be an At Home brand ambassador. (You can see a photo tour of the At Home store in this post.

At Home Store Tour | Pretty Handy Girl

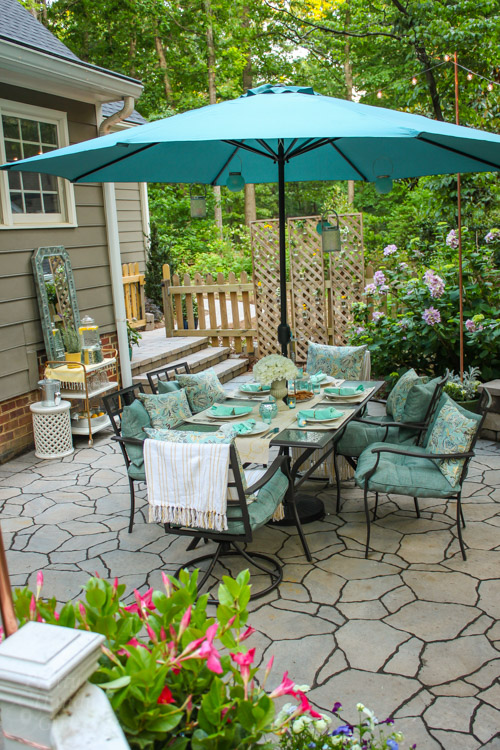
Or come take a tour of my patio decorated for a garden party using several At Home finds (feel free to stay a while if you need to shake off that winter chill by looking at summer photos.)

Outdoor Garden Patio Party Decorating Ideas | Pretty Handy Girl

Finally, you won’t want to miss this drab to fab screen porch makeover that I accomplished with help from At Home.

Installing the Most Beautiful Ceiling Fan | Haiku Copper Luxe Ceiling Fan | Pretty Handy Girl

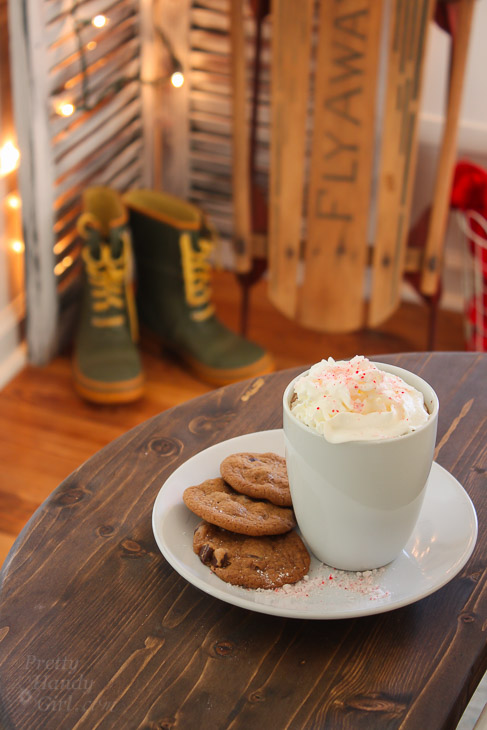
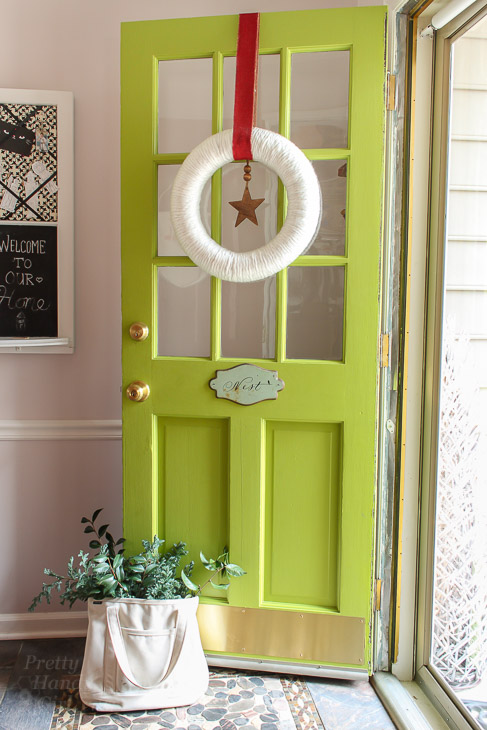
Have you warmed up yet? Well come on inside and get cozy. I made you some hot chocolate and salted caramel chocolate chip cookies for the tour.

hot-cocoa-side-table-boots-background

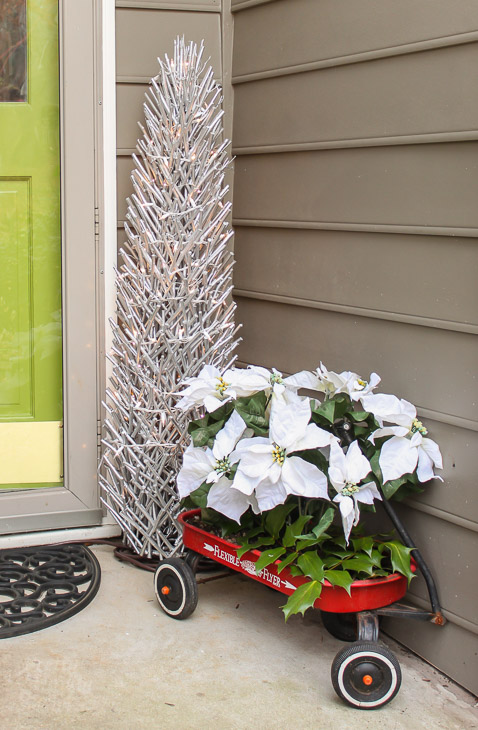
Did you notice the little silver twig tree? That was an At Home find, I couldn’t resist it. The little white lights make the tree glow at night. I also picked up some faux poinsettias from At Home and popped them in my 3 Step Little Red Wagon Planter.

Holiday Home Tour 2016 | Pretty Handy Girl

green-side-door

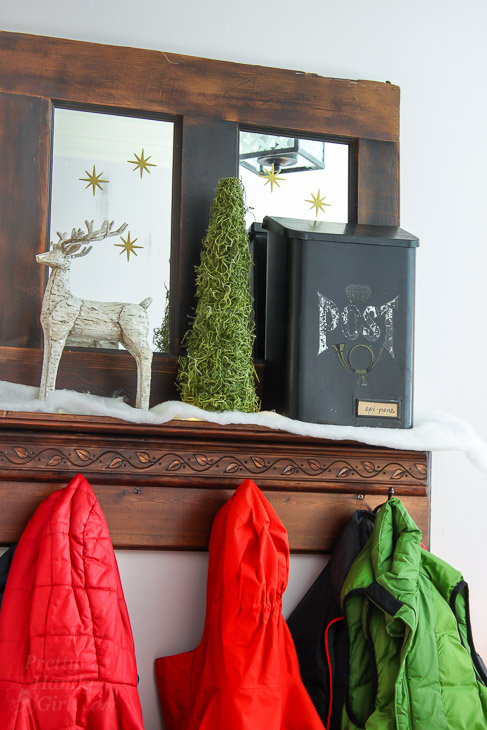
May I take your jacket? You can kick off your shoes if you want to get more comfortable. The shoe storage bench and coat rack were early DIY projects. This mudroom spot is my sanity saver because it holds our daily assortment of coats, backpacks, shoes and socks!

side-view-mudroom-bench-shoe-storage-coat-rack

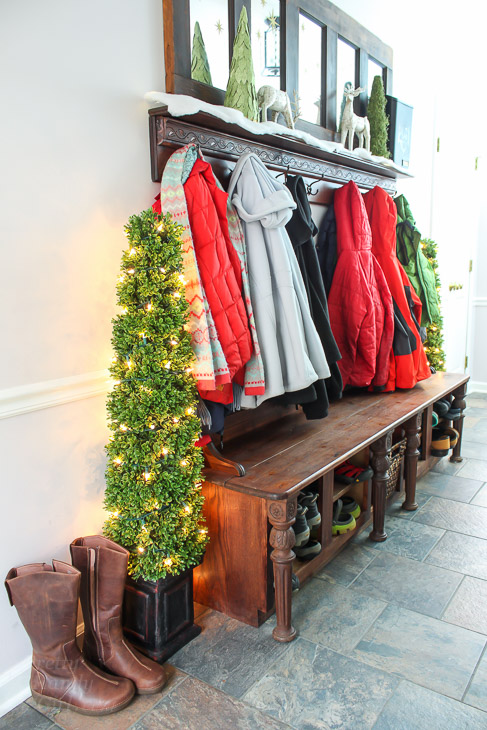
These topiaries from At Home have seen a lot of use. I bought the unlit versions to save money and added my own lights for the holidays. But, honestly the lit versions are only $10 more, so splurge if you buy some for your home.

mudroom-bench-full-view

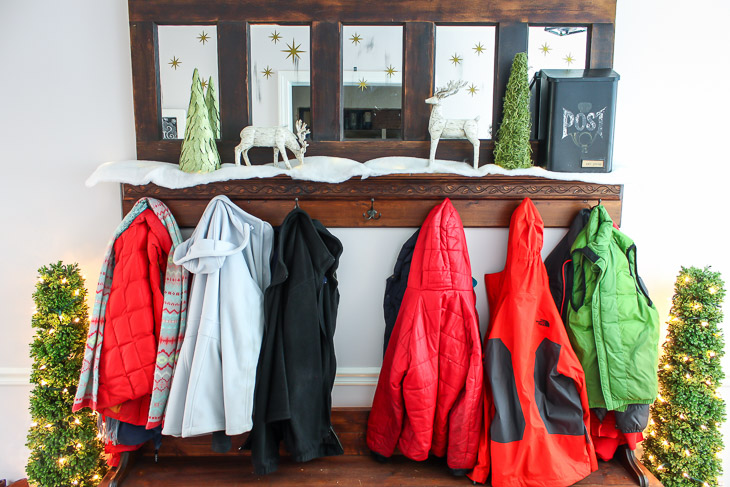
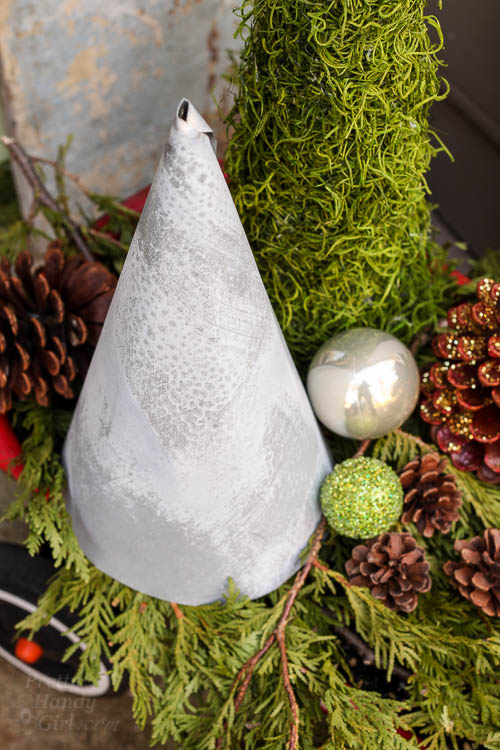
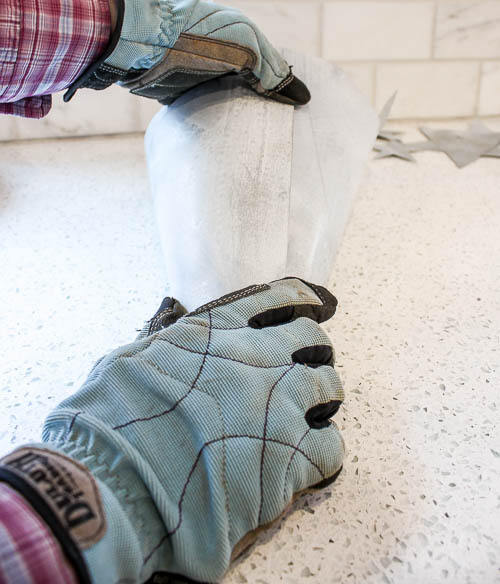
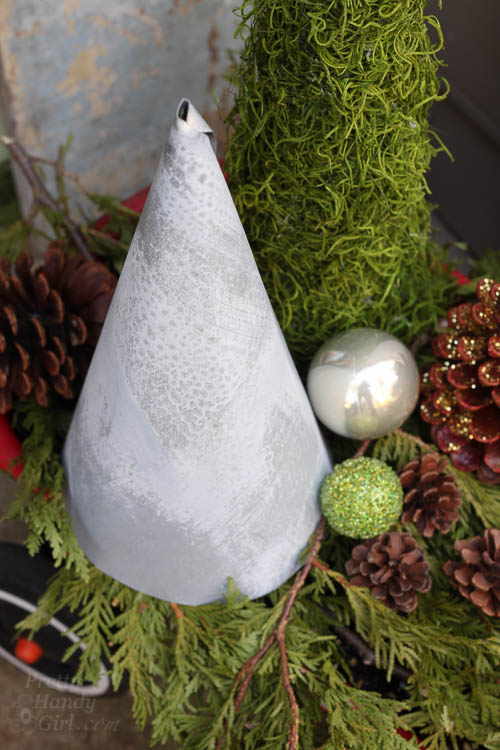
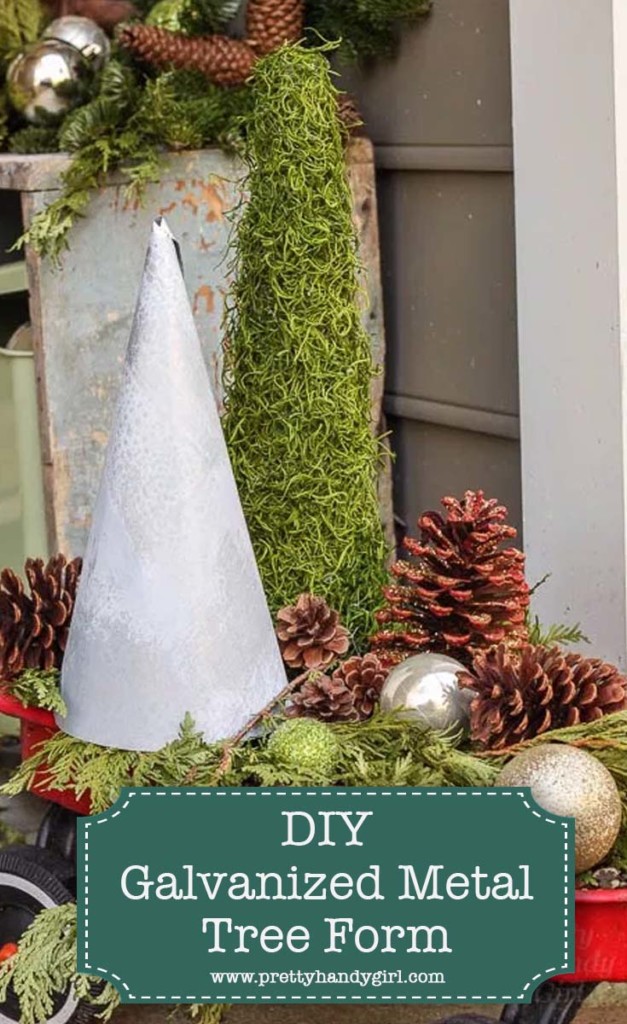
I decorated the shelf with some reindeer and two DIY cone trees (hot glue and moss or leaves). I also used some wall decal stars from my friend Leen the Graphics Queen (affiliate link.)

deer-mantle-view-faux-snow

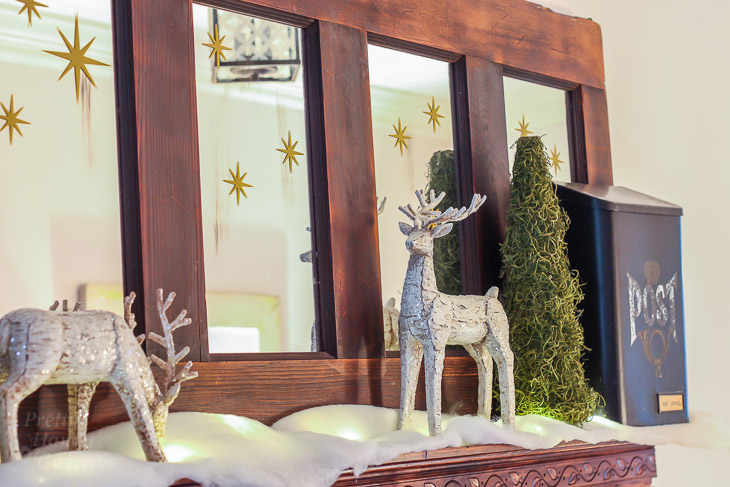
The “Post” box keeps all our epi-pens close at hand but not in sight. Anyone else have a collection of epi-pens? 😉

epi-pen-storage-in-post-box

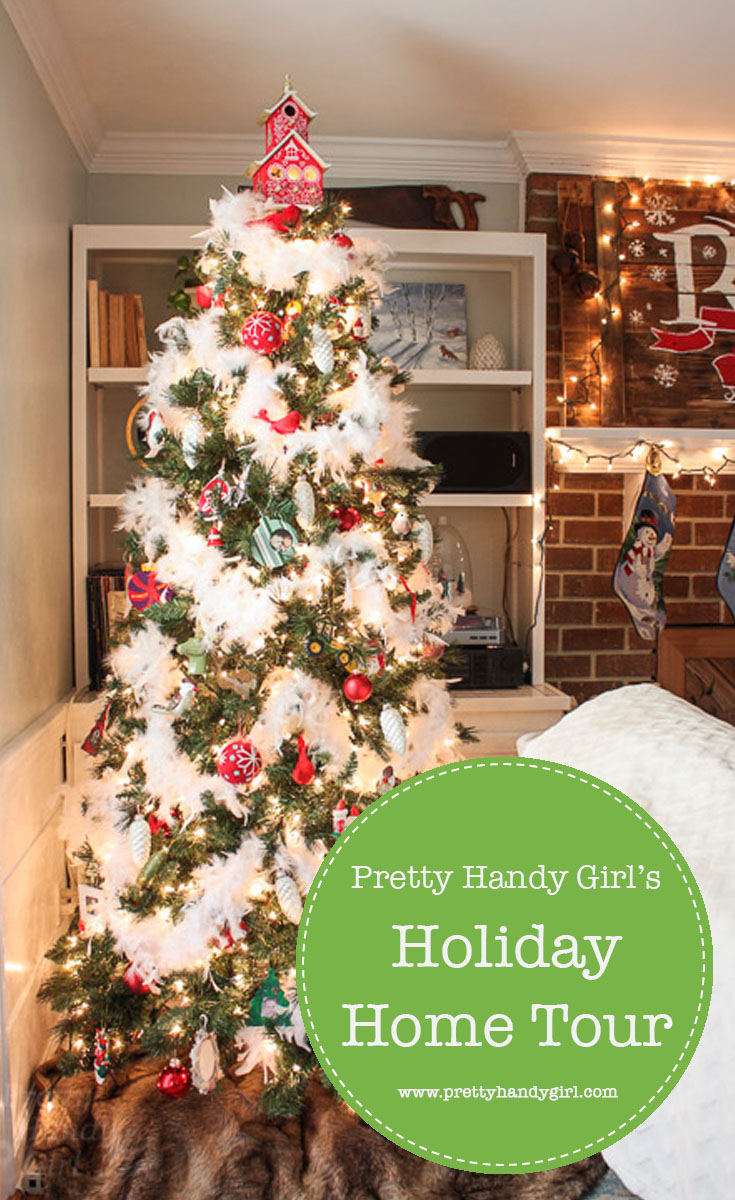
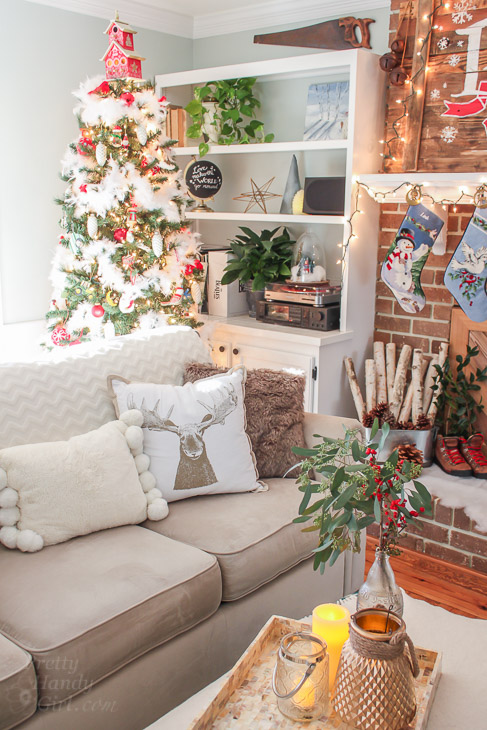
Come on in the living room and sit down. I just finished decorating the tree.

living-room-rustic-sleigh-ride-mantle-horizontal

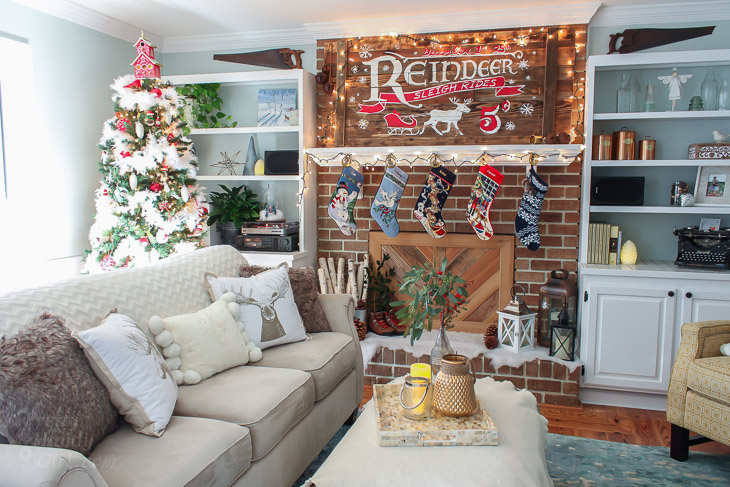
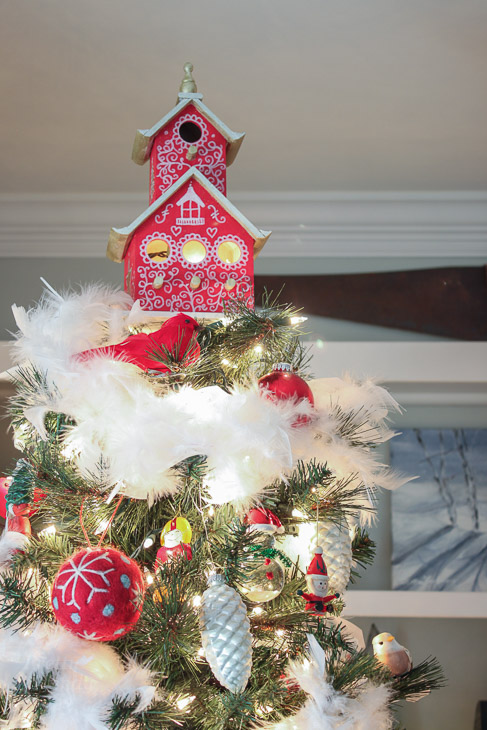
I brightened the tree with lots of feather boas and red ornaments. Plus, I added several of the kids’ ornaments they made in preschool. Those ornaments may not be pretty, but they are precious to us.

feather-boa-christmas-tree

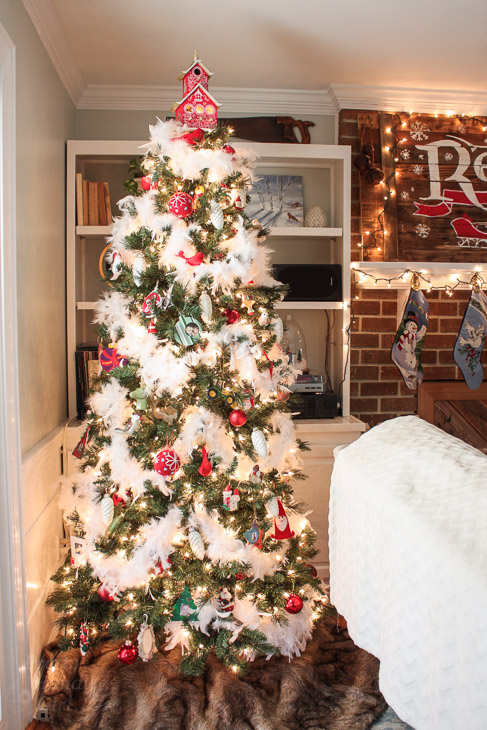
Want to make your own decorative bird house topper? It’s a fun little project that will satisfy your doodling desires.

birdhouse-tree-topper

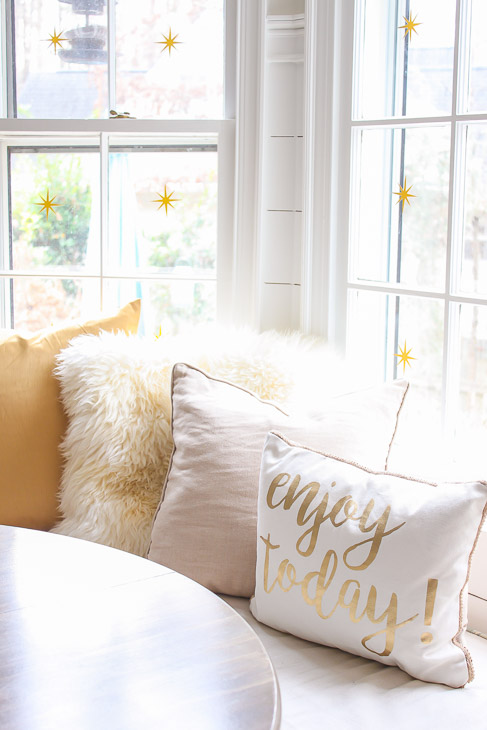
I have to share with you these beautiful pillows I bought at At Home!

moose-drawing-pillow

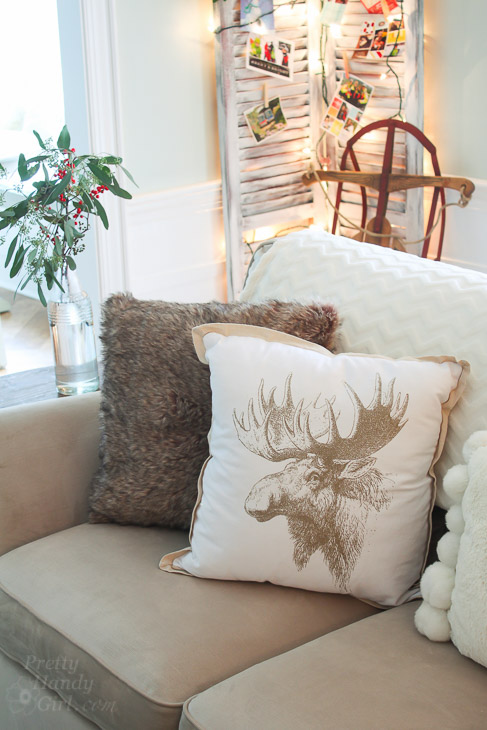
They look a lot like some higher end store pillows, but for much less. I especially like the faux fur pillows. They might stay on the couch year round.

living-room-sofa-tree-view

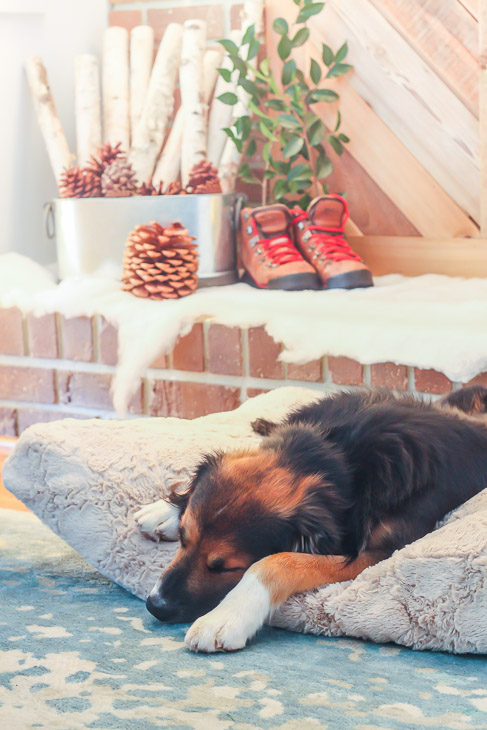
Speaking of pillows, I had to buy Bandit a cozy bed from At Home. They have the best prices and selection I’ve ever seen for dog bedding. Good dog, Bandit. It’s about time you fell asleep. This dog is non-stop energy most of the time.

sleeping-dog-athome-dog-bed
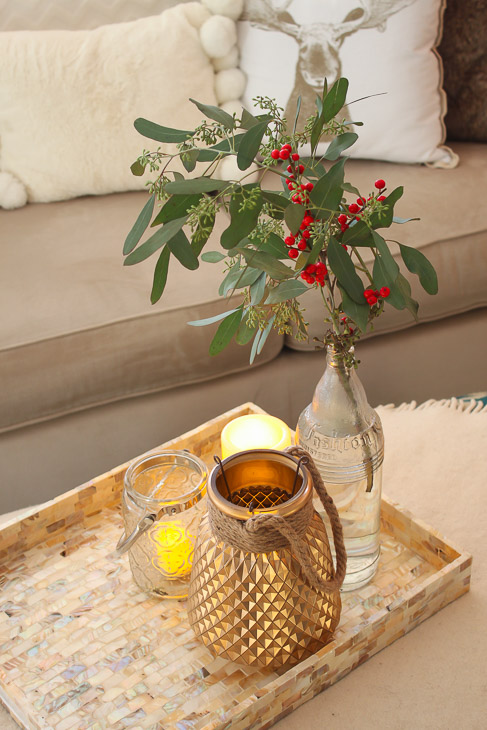
The other find I couldn’t resist at At Home was this pretty shell tray. They have an amazing assortment of trays in all colors, shapes and sizes.

seeded-eucalyptus-candles-at-home-tray
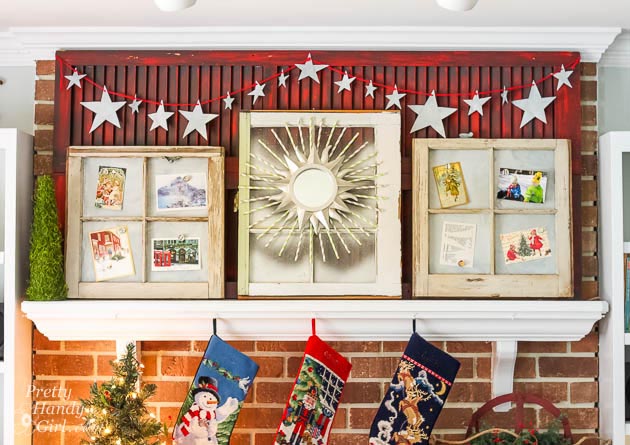
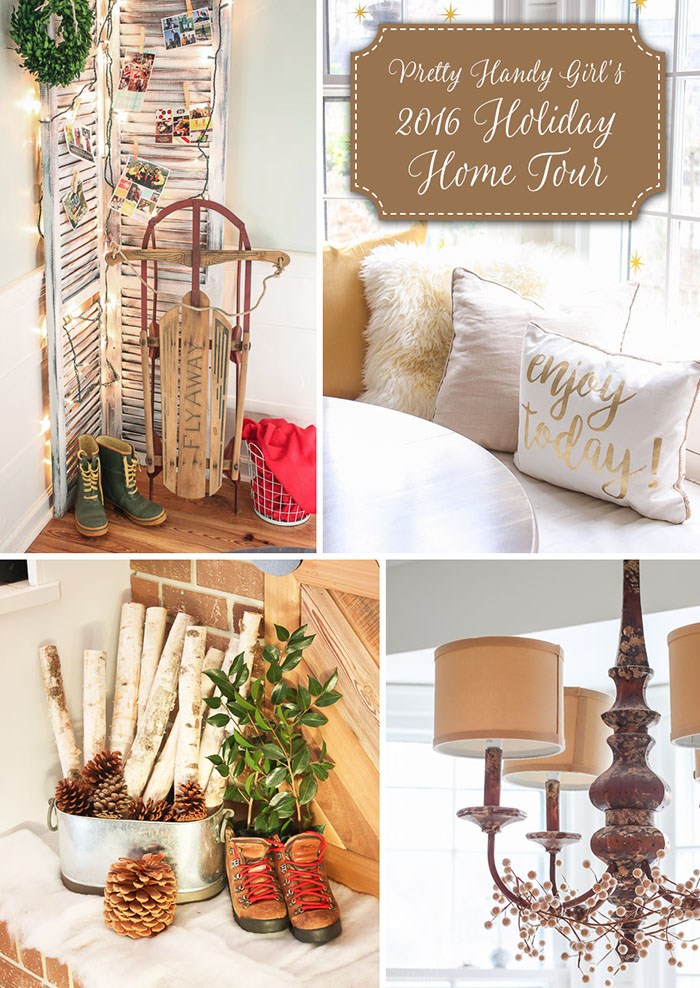
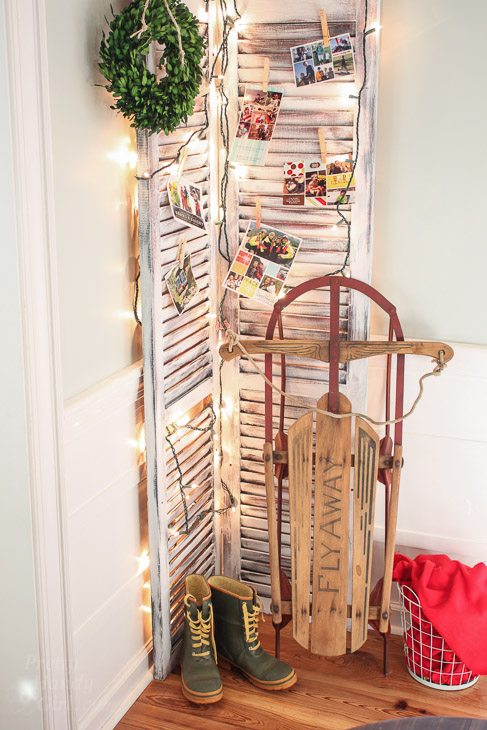
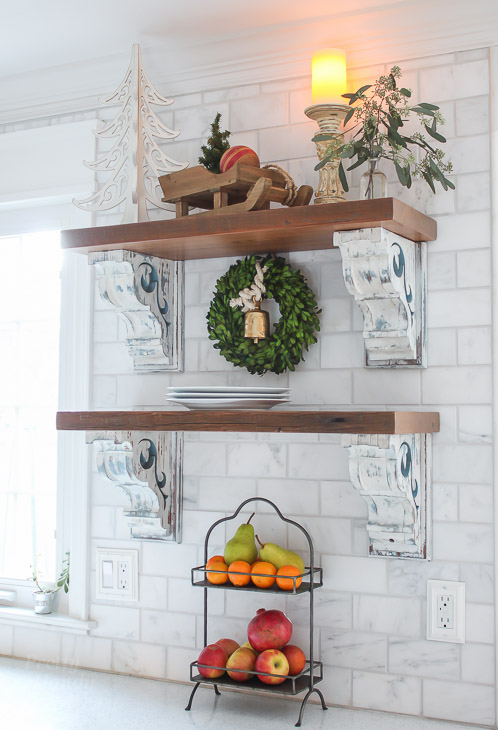
I love using this easy to make shutter screen to display our Christmas cards each year.

shutters-christmas-card-display-old-runner-sled

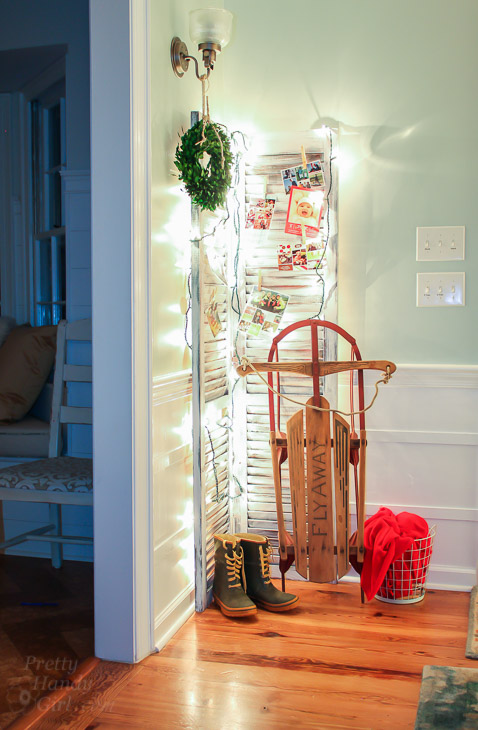
This year I added a strand of lights and the vintage sled.

shutters-display-christmas-cards

living-room-rustic-sleigh-ride-mantle-vertical

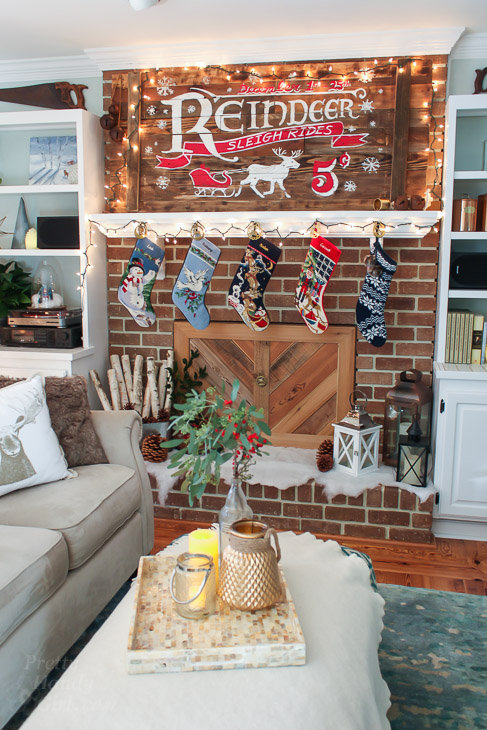
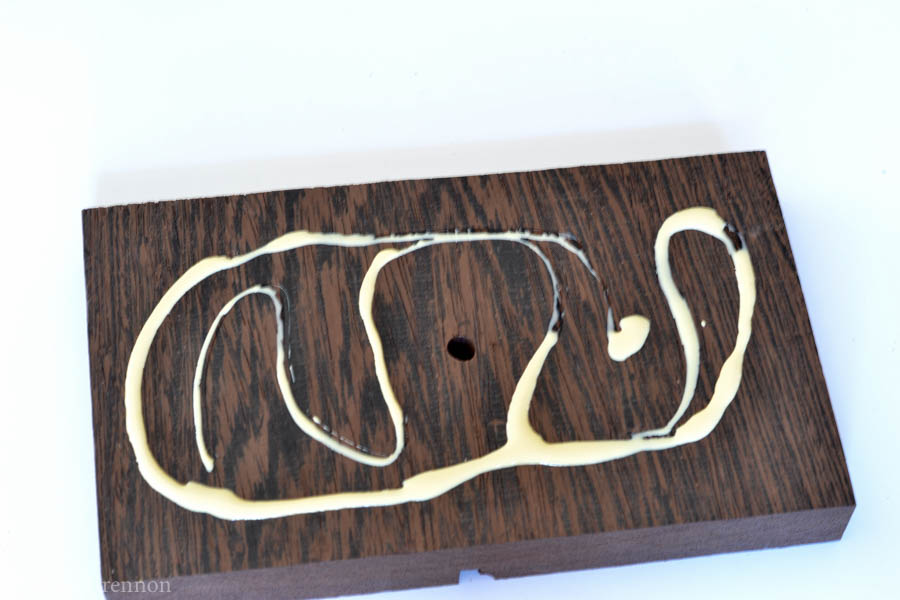
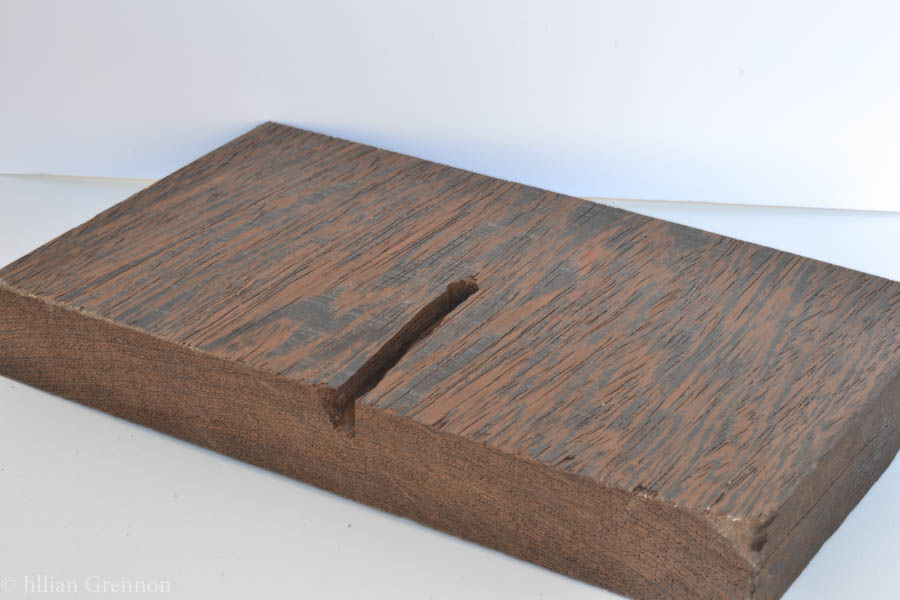
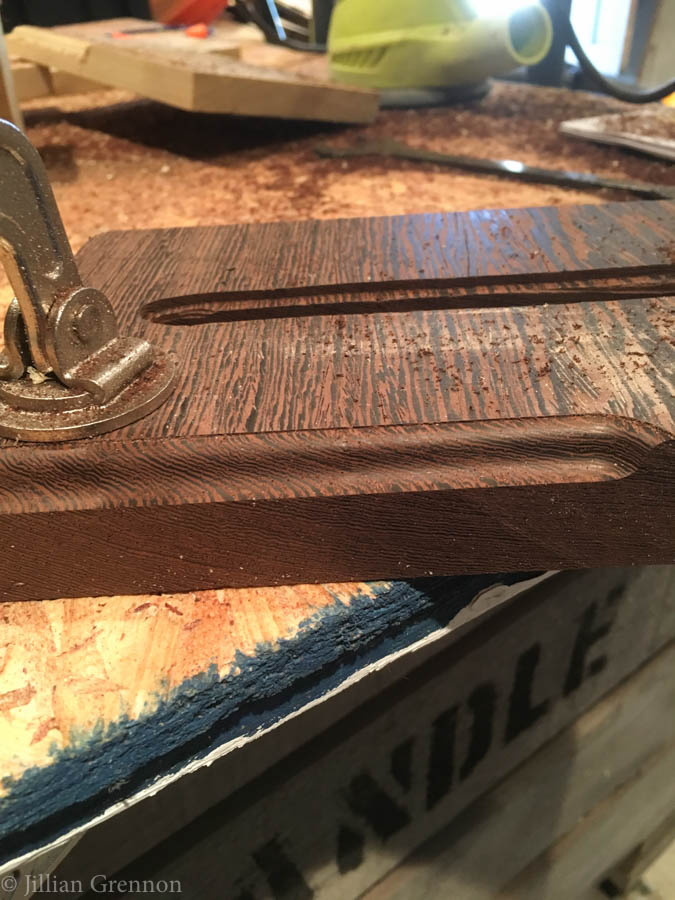
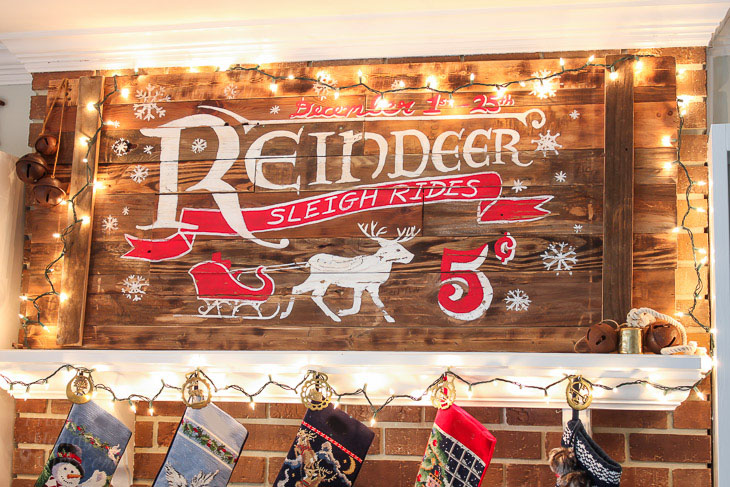
Did you spot my new vintage inspired sign?

reindeer-sleigh-rides-rustic-wood-sign

close-up-rusted-sleigh-bells
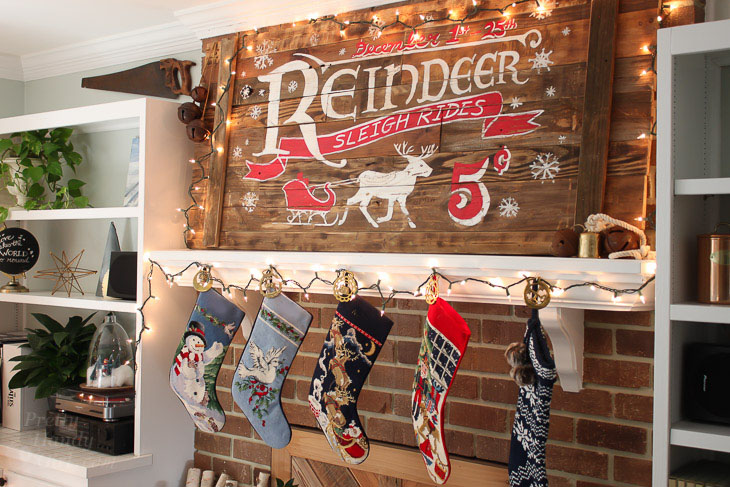
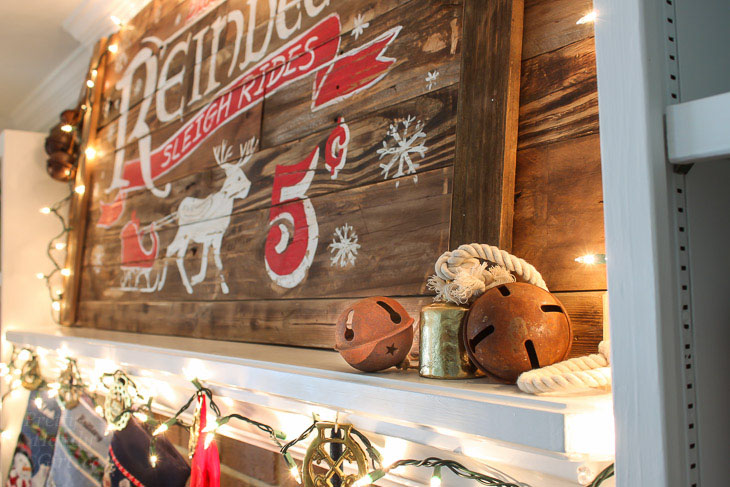
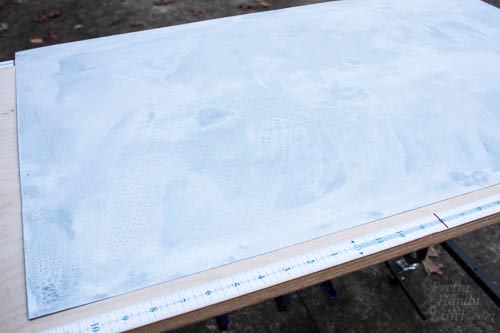
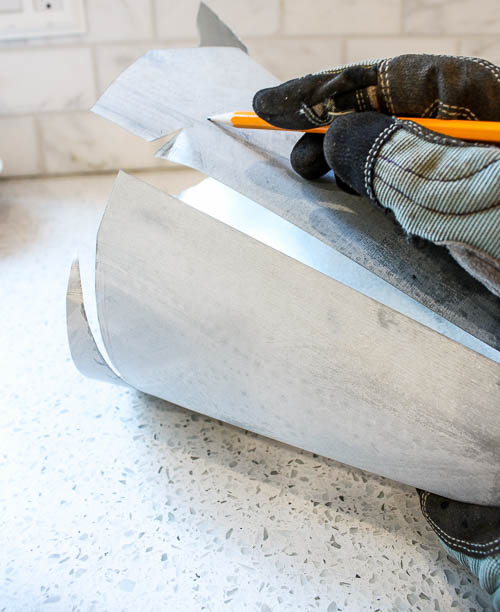
I made it this week using all scraps from my workshop. Here’s the tutorial to make your own Vintage Rustic Sleigh Ride Sign!

stockings-hung-rustic-wood-fireplace

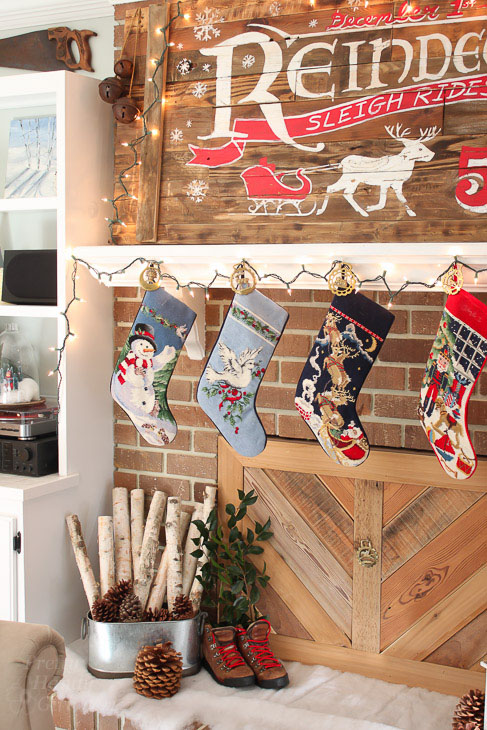
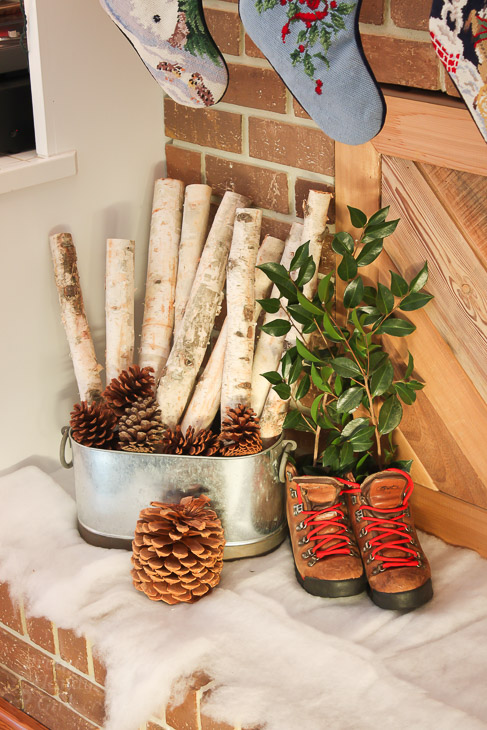
I know I’ve probably overstated this, but At Home has everything for your home decorating! For instance, birch logs can be purchased in the wedding section of At Home. (I’m not sure why they are in that section, but they are.) They were 6 feet tall, but I cut each log into three for display by the fireplace.

boots-birch-logs-by-fireplace

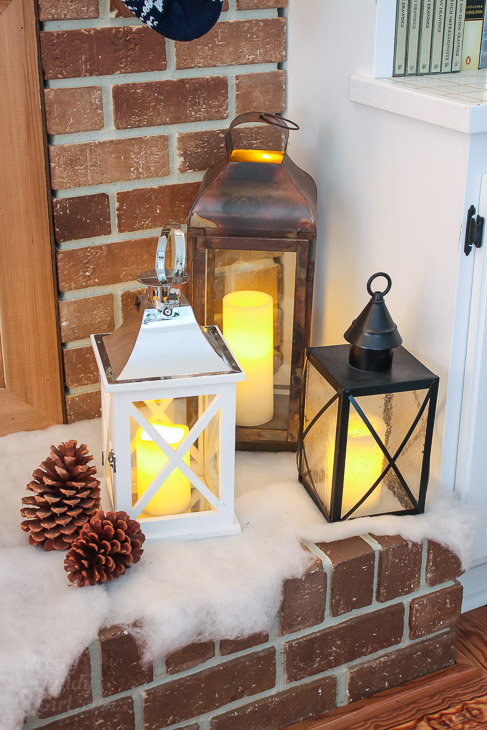
I bought the white lantern from At Home to round out my collection. You may not realize it, but that little black lantern was actually transformed from a $5 dated light fixture.

trio-lanterns-on-hearth

la-z-boy-cosmopolitan-wingback-chair-by-fireplace

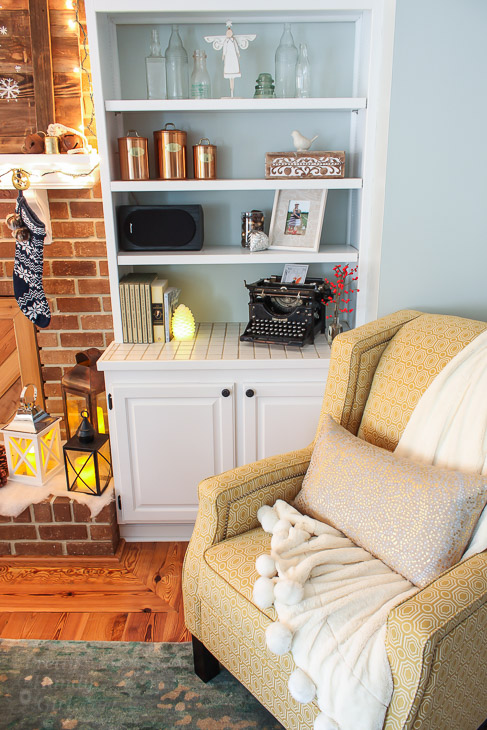
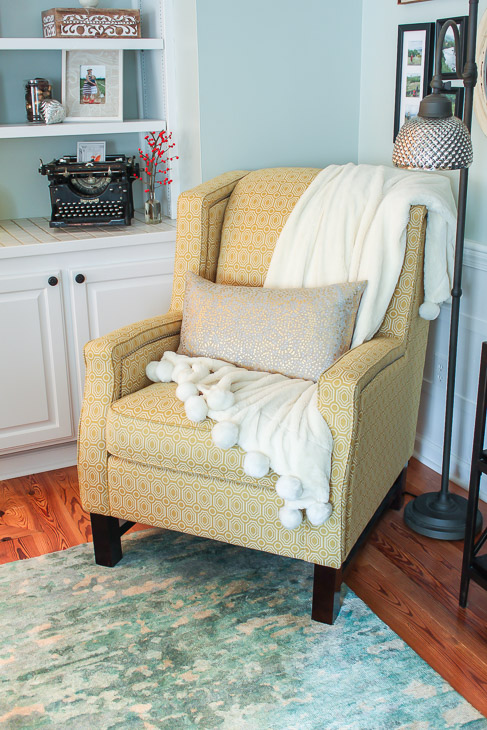
A note about that metallic dot pillow—yup, you guessed it—another At Home favorite find!

wingback-yellow-chair-metallic-lumbar-pillow-metallic

angel-bottles-holiday-decor

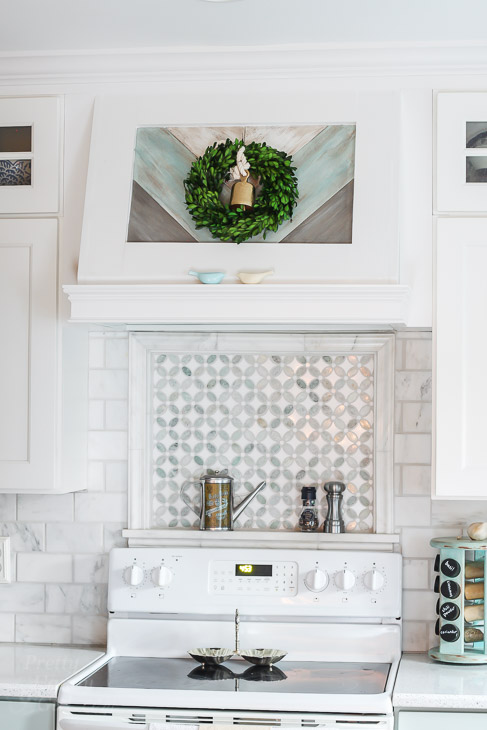
Let’s head into the kitchen.

open-wood-shelves-holiday-decor
open-wood-shelves-kitchen-holiday-decorated

bay-window-seating-gold-white-pillows

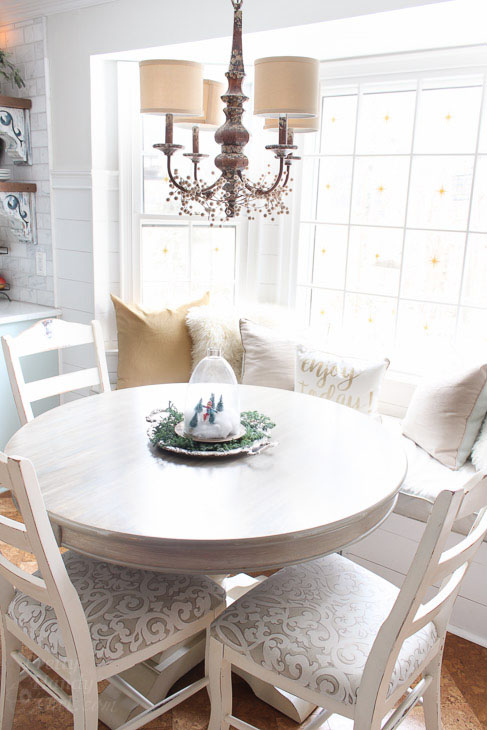
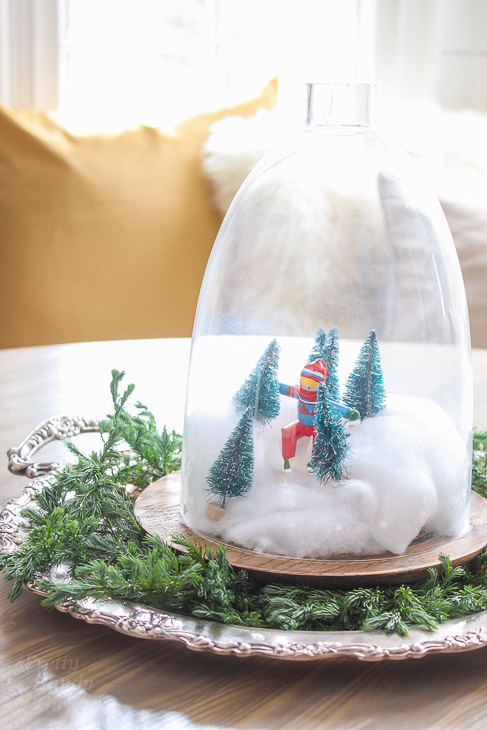
Every year, I like to make a little something I think the kids will enjoy. This year, I created a little snow scene in a cloche.

glass-skier-cloche-snow-globe

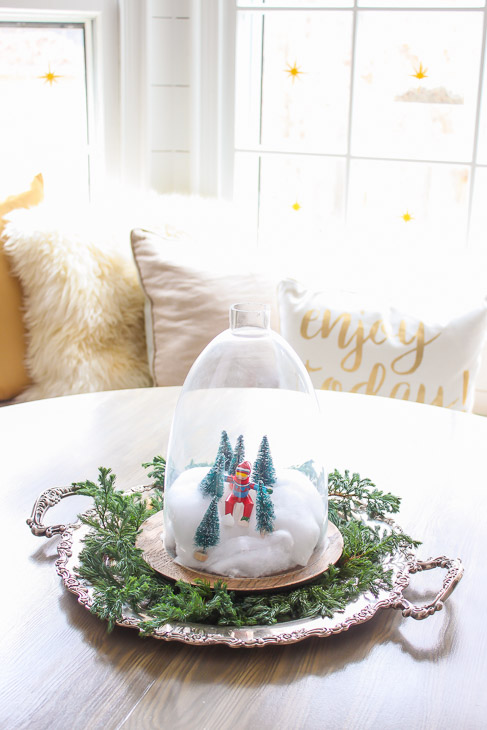
The cloche is actually the globe from a hanging light. I ditched the light and used the globe to make a fun little snow globe scene.

glass-skier-cloche-snow-globe-close-up

I used more wall decal stars from my friend Leen the Graphics Queen (affiliate link) to decorate the windows. These little stars add a festive feel in minutes.

gold-white-holiday-pillows

On the other side of the kitchen is a desk aka our family command center. The raised desk was a DIY project I built using more ReStore cast offs. And the hutch was built using an old table top. . . seriously!

kitchen-desk-hutch-holiday-decor

kitchen-desk-hutch-holiday-decor-closer

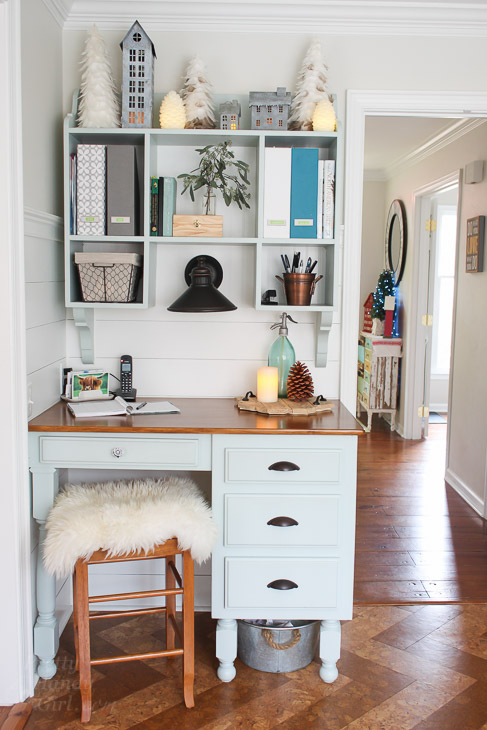
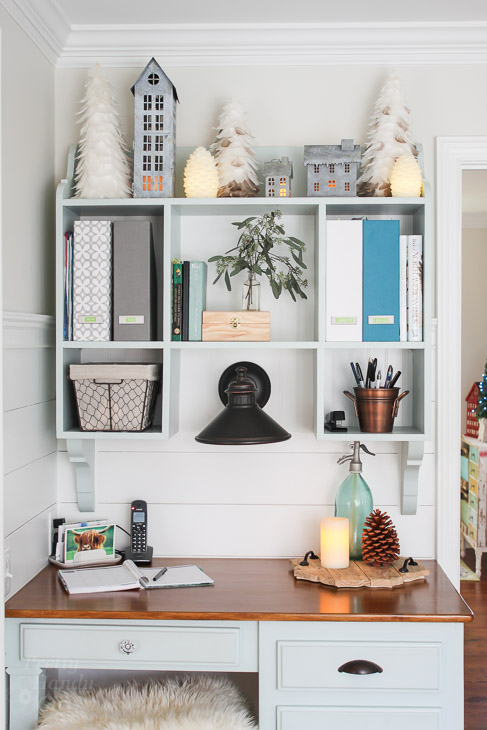
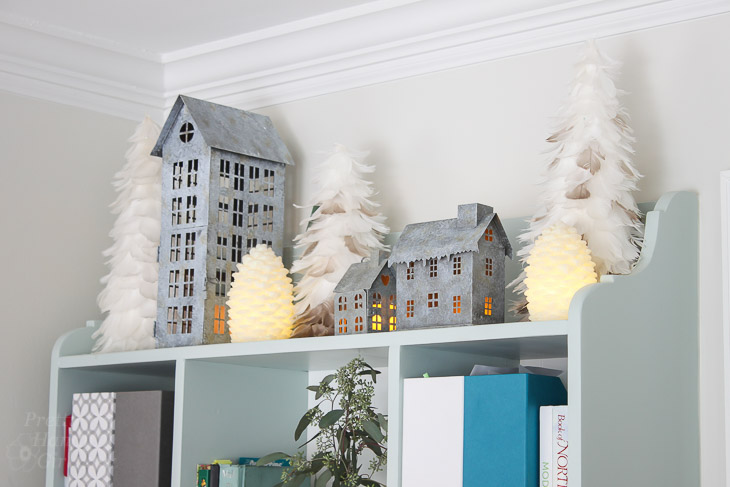
The little galvanized village scene was created using a variety of At Home accessories. The lighted pine cones came in a set of three and have a timer switch so they’ll shut off at night. That’s one less thing I have to turn off before bed.

galvanized-village-christmas-decor

small-boxwood-wreath-oven-range-hood

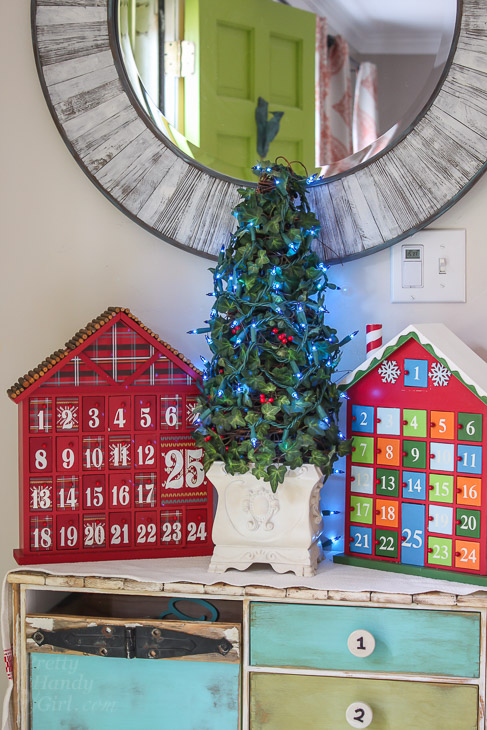
I usually let my boys decorate a small tree. This year they added blue lights to this little faux ivy tree. I actually like the soft blue glow at night. My boys. . . they love to go against the grain. 😉

advent-calendars-holly-tree

Thank you so much for coming over. I enjoyed your company.

double-wood-front-doors-storm-doors-lime-green

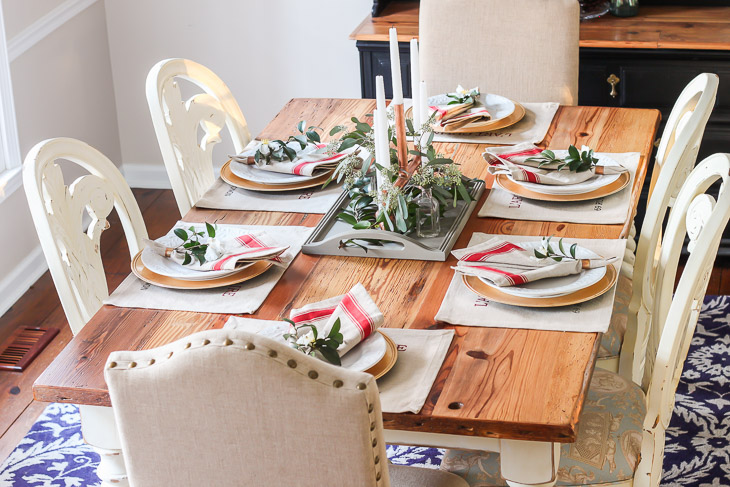
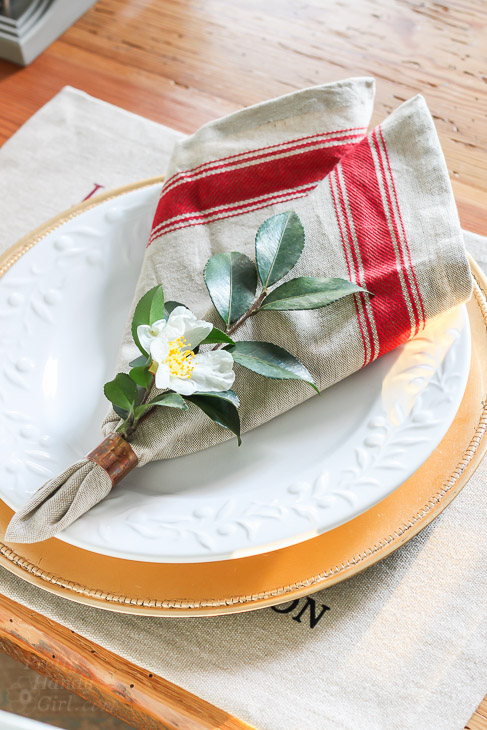
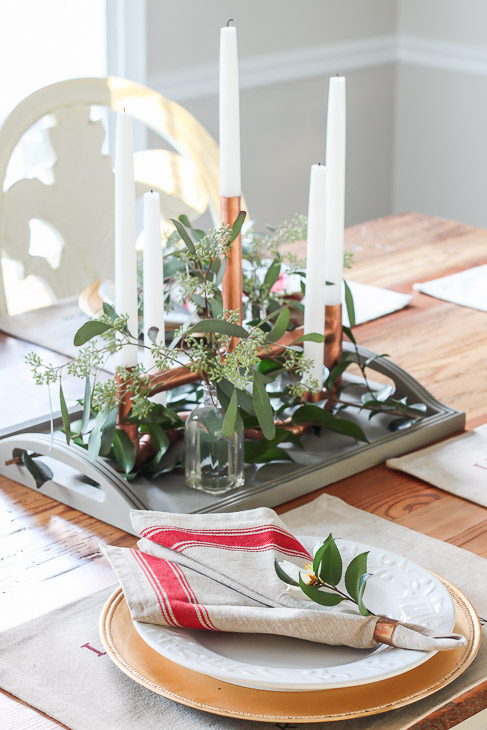
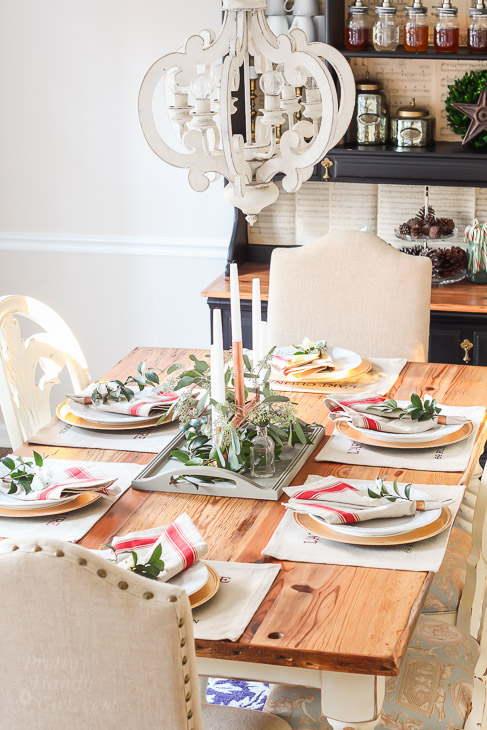
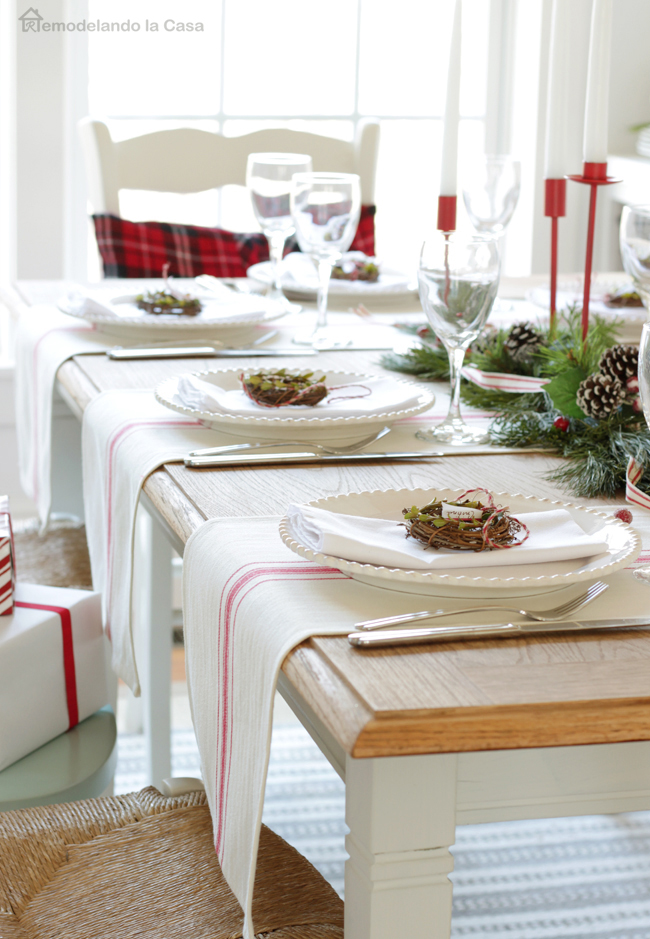
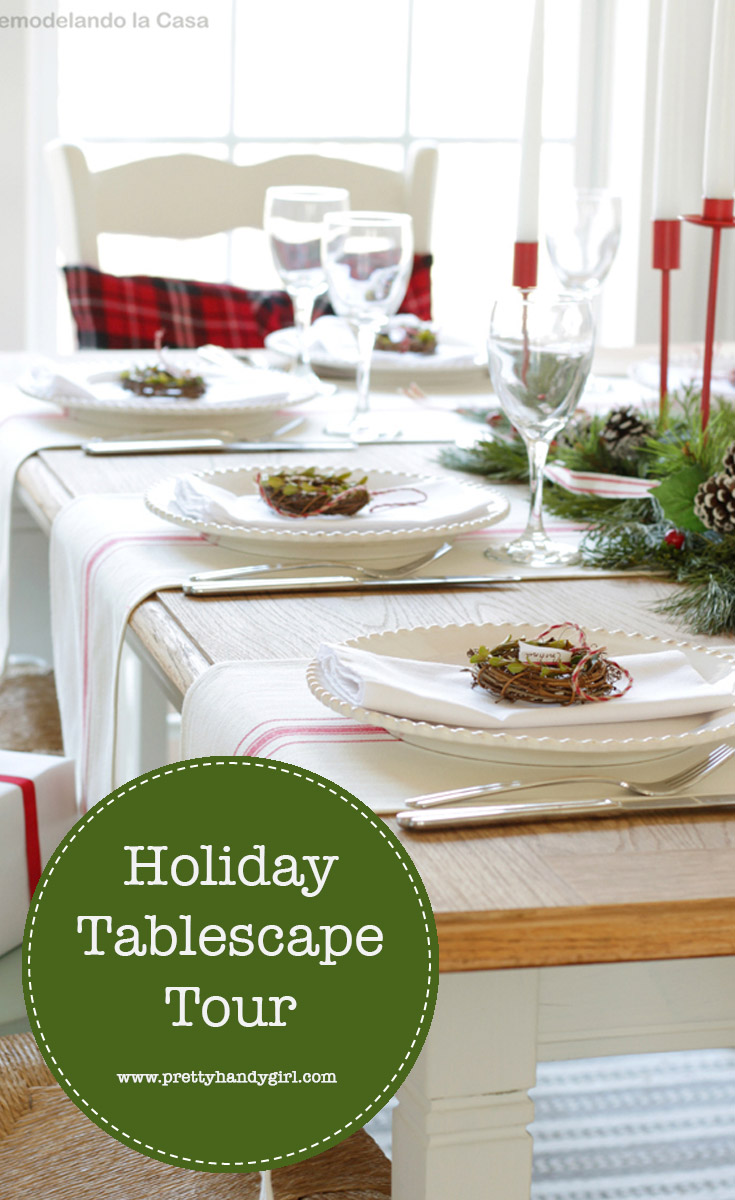
Stop by sometime next week. I’ll be sharing my frugal holiday tablescape with you.

PHGFancySign

Disclosure: This is a sponsored post for At Home. I was compensated for my time writing this post. At Home also provided me with a gift card to purchase items to use in this post. All ideas and words are my own. I was not told what to write.


Pin for later!

Check out Pretty Handy Girl's Holiday Home Tour for holiday home decor ideas and inspiration! | Holiday decor for the home #prettyhandygirl #holidayhome #holidaydecor

Galvanized Metal Tree Form | Pretty Handy Girl

Galvanized Metal Cone Tree | Pretty Handy Girl

Want to make a super cute and fast galvanized tree form? This little galvanized tree will fit in with some of your holiday vignettes, especially if you like the rustic look.

Rustic Metal Magnetic Window Frame | Pretty Handy Girl

Last year I had fun playing with DIY galvanized metal (otherwise known as aged quickly sheet metal). I made these cute galvanized magnetic windows. . .

Galvanized Metal Star Garland | Pretty Handy Girl

. . . and a galvanized star garland.

Galvanized Metal Star Garland | Pretty Handy Girl

After cutting out the star garland, I had some leftover galvanized metal. I decided to use it to make a galvanized tree form. Ready to learn how to make your own?

Materials:
(contains affiliate links)

Instructions:

Put on gloves when working with sheet metal. It’s a sharp material and can easily cut you.

Follow the instructions to age metal quickly in this tutorial. After the metal has aged and dried. Cut off a large corner from the sheet metal material.

Galvanized Metal Cone Tree | Pretty Handy Girl

Begin to manipulate the two corner edges rolling in toward each other.

Galvanized Metal Cone Tree | Pretty Handy Girl

Tightly roll the corner into a cone shape. Roll the metal tighter than you want the shape to appear.

Galvanized Metal Cone Tree | Pretty Handy Girl

Mark a straight line along the bottom edge of the cone shape to the height you want. Cut along the line with tin snips.

Galvanized Metal Cone Tree | Pretty Handy Girl

Set your galvanized tree form with a grouping of other tree forms or natural materials and enjoy!

Galvanized Metal Cone Tree | Pretty Handy Girl

Hope you have fun making a whole forest of galvanized trees. 😉

PHGFancySign


Pin for later!