DIY scalloped planter box centerpiece - free plans Hertoolbelt

Today on the Rockstar DIY stage is Amy, with the tutorial to make this perfectly rustic Scalloped Planter Box Centerpiece.

Rockstar DIY Series

Amy is the creative artist and builder behind Her Tool Belt! You may remember her amazing rustic chevron twin bed that crashed Pinterest (well, not really, but it should have.)

Well, the very talented Amy is in the wings right now and I just got word that she’s headed to the stage. So, without any further delay, here’s AMY!

page_break_2

Hi! I am Amy from Hertoolbelt and I’m so excited to be visiting with you today. A couple of years ago I dismantled an old barn at my parents farm, now I have a good supply of barn wood. I enjoy building projects with barn wood because of the unique weathered and rustic look of each piece. It works great for planter box centerpieces. I like to have a few planter boxes on hand for party decorations. I wanted to make this one have a more feminine feel, so I added scallops.

DIY scalloped planter box centerpiece - free plans Hertoolbelt

How to Build a Scalloped Planter Box Centerpiece

DIY scalloped planter box centerpiece - free plans Hertoolbelt

Materials

  • 2 – 1″ x 6″ x 6′ boards (or barn wood), actual 3/4″ x 5 1/2″
  • 1 1/2″ minimum length screws (I used 1 5/8″ deck screws)
  • wood glue
  • sand paper

You can modify these plans for whatever size of centerpiece you need. I designed the inside width to fit mason jars.

Cut List

  • 2 – 3/4″ x 5″ x 35″
  • 2 – 3/4″ x 5″ x 4 1/2″
  • 1 – 3/4″ x 4 1/2″ x 33 1/2″

Step 1

Cut the boards out according to the cut list above. Download and print the pattern for the scallop. When printing make sure your print settings are on 100%, not fit to page. Cut out the pattern and trace it on the 2 – 35″ boards.

DIY scalloped planter box centerpiece - free plans Hertoolbelt

Use a band saw, jig saw or scroll saw to cut out the scallop design (I used a band saw). Sand the cut edges as necessary.

On the end pieces, if you want a curve, use a paint can to trace a curve. Cut out the curve and sand if needed.

DIY scalloped planter box centerpiece - free plans Hertoolbelt

Step 2 Read more

Wall Art Pottery Barn Knock Off

Today we have Roxanne taking over the Rockstar DIY stage! Roxanne is the knock off queen. She will be showing us how to create these beautiful knock off Pottery Barn Blue Textile prints for much less. If Roxanne sees something from a high end store, she has the super power to create a knock off for 1/10th the price or less! She recently knocked off a $695 Restoration Hardware capiz chandelier for only $52!

You can do the math, but I know that’s a real steal.

Roxanne from The Honeycomb Home

Roxanne, is the talented DIYer behind The Honeycomb Home blog. She can frequently be found turning her cookie cutter home into a beautiful home on a budget. Please welcome the dynamic Roxanne to the stage!

Rockstar DIY Series

page_break_2

I was recently browsing my favorite website, Pottery Barn, and noticed this set of beautiful Framed Blue Textile Art. I loved the wooden frames and the blue fabrics, but not the price! They sell for $169 for one, or $334 for the pair! I realized this would be very easy to knock-off for a fraction of that price.

PB framed textile art

To re-create this look, I ordered fabric samples from Calico Corners. To make this work, you will need the larger sized samples. Average size samples are usually around 5.5″ squared. The larger versions at Calico are 27″ X 18″. I always prefer to order the larger size because its hard to get a good sense of how it will look in the room from the small size. Here is a picture of the small sample versus the large.

Fabric Sizes

I found two beautiful wood frames at Michael’s, which are normally priced $29.99, I scored them on sale for $10 each, it was a steal! I bought them in size 16″ X 20″, which is a little smaller than the Pottery Barn frames. Read more

DIY Rustic Wood Lanterns

Lanterns are the perfect way to add warmth into your decorating. Today on the Rockstar DIY stage is Katie, with the tutorial to create these beautiful DIY Rustic Wood Lanterns.

Rockstar DIY Series

You probably already know this Rockstar, because Katie is part of the Pretty Handy Girl rockin’ group. She is also the phenomenal DIY creator at Addicted 2 DIY. This girl doesn’t just build small lanterns, she also builds gigantic workshop garages from the ground up! She’s one bad ass DIYer.

katie-contributor-headshot

I hear the rat-a-tat-tat of the nail gun, so she must be ready to take the stage. Take it away Katie!

page_break_2

Rustic Wood Lanterns

Hey everyone!  It’s Katie again.  I’m back to show you how to make these simple, DIY rustic wood lanterns.  I love wood lanterns and have been wanting some for quite some time, but they can be pretty pricey.  With some square dowels, a little plywood, and some nails, I was able to create these gorgeous lanterns in no time at all.  I made mine from cedar boards that I ripped down into square sticks, but square dowels will work just fine.  The sizes of these are based on 10″ x 6″ hurricane vases I bought at Michaels, but these can be easily customized to fit whatever size vase you have, or no vase at all!

Rustic Wood Lanterns Materials:

  • 3 – 4′ long x 3/4″ square wood dowels (6 if you’re making two)
  • 1/4″ plywood or hobby board*
  • 1 1/4″ brad nails
  • 5/8″ brad nails
  • wood glue
  • wood sealer (I used Thompson’s WaterSeal Timber Oil in Natural)
  • hurricane vases (optional)
  • candles (optional)

*NOTE:  I used scrap 1/4″ plywood for the bottoms.  You can purchase small pieces of plywood or even 1/4″ hobby board at your local home improvement store.  It’s not absolutely necessary to use 1/4″ thickness.  If you happen to have 1/2″ or even 3/4″ plywood lying around, I’d definitely use that.  It makes this project even cheaper and everyone loves that!

Rustic Wood Lanterns Instructions:

Let’s get started assembling the lanterns.

For each lantern, cut 4 – 12″ sticks of wood and 8 – 6.5″ sticks.  Cut the base of the lantern into an 8″ square.

cut-wood-for-lanterns

Assemble the frame of the lanterns using wood glue and 1 1/4″ brad nails.

IMG_0756

Clamp the frame to hold the frame square while you shoot the nails into the wood.  Read more

A refinished wooden sideboard left with a natural stain – not painted! Learn how to refinish this sideboard.

Have you ever turned down a piece of furniture that looks ruined? Aha, today’s rocker is Emily and she has the superpower to make furniture look brand new again!  On the Rockstar DIY stage today is a performance you won’t forget. Emily will single-handedly take you through the steps of Refinishing a Mid-Century Sideboard.

Rockstar DIY Series

If you haven’t met Emily yet, she is truly a Rockstar! Emily lives in Rochester, NY and is ALWAYS working on an amazing home improvement project.

Emily-MerryPad

Emily can be found with a hammer, saw or drill in her hands at MerryPad. She has painstakingly renovated two homes. And, as if she wasn’t busy enough with home projects (and taking care of a baby and her step-daughter), she can also be found blogging at DIYNetwork’s Made + Remade. That girl is a machine!

Oh, I hear the sound of a sander, so put your hands together and give it up for Emily!

page_break_2

Hey guys! Super nice to meet you. If we haven’t already met, I figured there’s one thing you should know about me: I really like getting my hands dirty. Building furniture can be fun, and learning how to maintain my home has brought me a lot of pleasure, but if you see me and you notice my hands and arms are coated by stain? Well, you’ll know that I’ve been having a really good time (and I’ve probably run out of mineral spirits, again). Refinishing and restoring furniture–and cabinets, and floors, among other things–is one of my favorite DIY endeavors, always a fun learning experience, and always an opportunity to bring new life into an item that was once beautiful. I’ve had some lucky secondhand finds over the years, from bedside tables to chairs, but one of my favorite transformations was this Bassett Sideboard that I scored from a garage sale for $15.

How to refinish a vintage midcentury sideboard with scratches and water damage.

T’was one of my first refinishing projects, swoon.

If you’re tackling your first refinishing project (or just looking for tips), here are the products and tools I used for this makeover:

  • Detail palm sander and normal sandpaper to get into small crevices
  • Rags (general clean up cloths, and old rags or socks for applying the stain)
  • Tack cloths (the tack cloths are wonderful for cleaning all evidence of sanding dust before staining)
  • A paint brush and high-density foam roller (for application of the conditioner and polyurethane topcoat)
  • Pre-stain wood conditioner
  • Oil-based stain (for this piece I chose English Chestnut by Minwax)
  • Gloss polyurethane

An extraordinary amount of sanding went into eliminating the damage that had existed in the top surface. Scratches are relatively easy to cure, but you never know how bad the water damage is until you start sanding deep, as evidenced by this progress photo:

How to refinish furniture with scratches and water damage.

Elbow grease and a few more courses of low-grit sandpaper (80-120) helped to transform the surface of the sideboard into a raw wood state and eliminate the visible water rings. You might find that your water damage runs deeper – every case is different. Read more

Easy Fall Wreath Tutorial

24 Creative Fall Wreaths | Pretty Handy Girl

Hi Pretty Handy readers, it’s Colleen with Just Paint It. Although my focus is on painting now, I spent many years as a floral designer. With Fall right around the corner I thought you’d love to see this collection of 24 Creative Fall Wreaths.

Creative Fall Wreaths

Fall Floral Wreaths

Easy Fall Wreath Tutorial
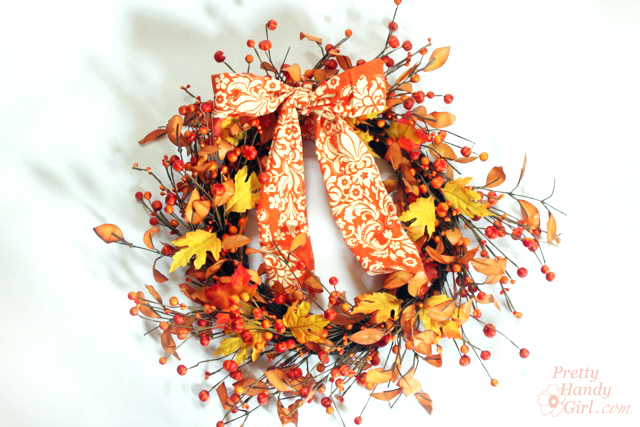
This wreath lives up to its name as the “Easiest Fall Wreath ever!


Fall Floral Wreaths

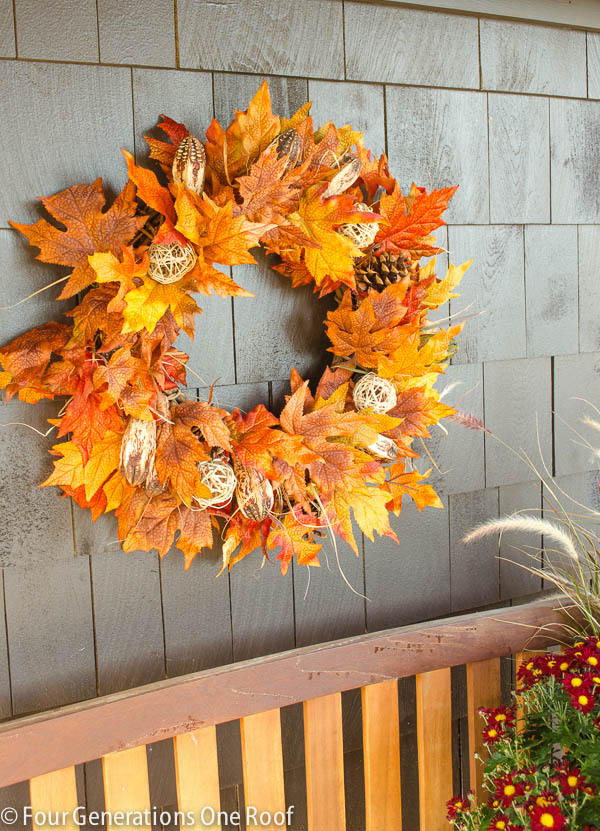
Jessica from Four Generations One Roof has a wonderful tutorial to make this full wreath laden with fall leaves and ornamentals.


Fall Floral Wreaths
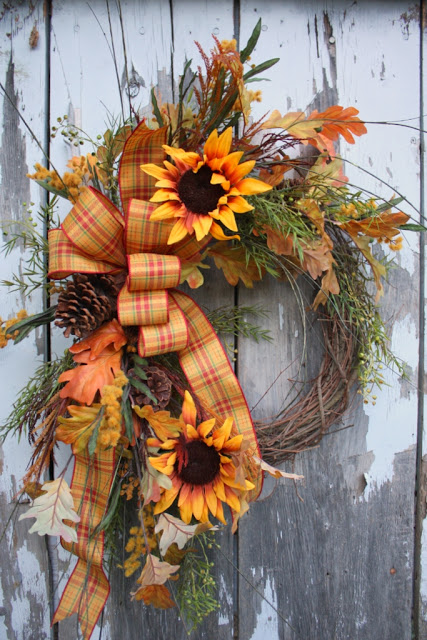
If you prefer leaving part of the grapevine base visible, Sweet Something Designs has some beautiful wreath ideas.


Fall Floral Wreath
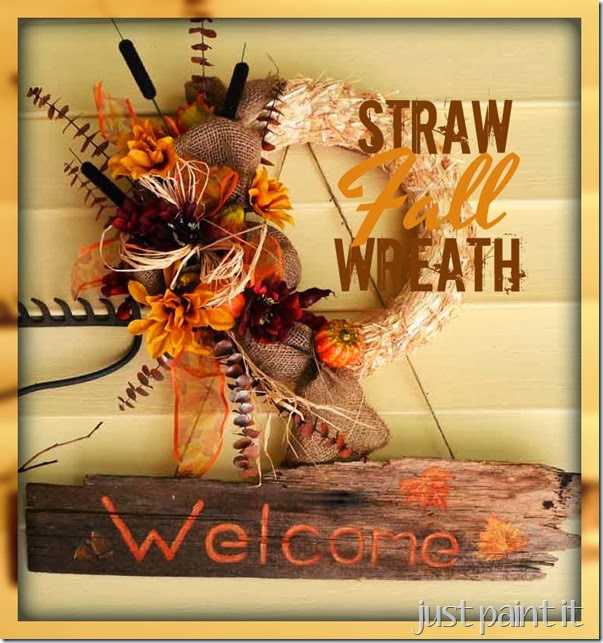
Straw wreaths make great bases like this festive but inexpensive wreath using items from the dollar store.


Fall Floral Wreaths
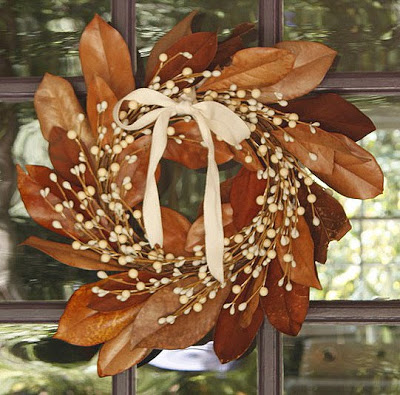
Make a welcoming statement without flowers! This gorgeous magnolia wreath uses a white bud wreath as a base and hot glued fallen magnolia leaves behind it.


Fall Floral Wreath
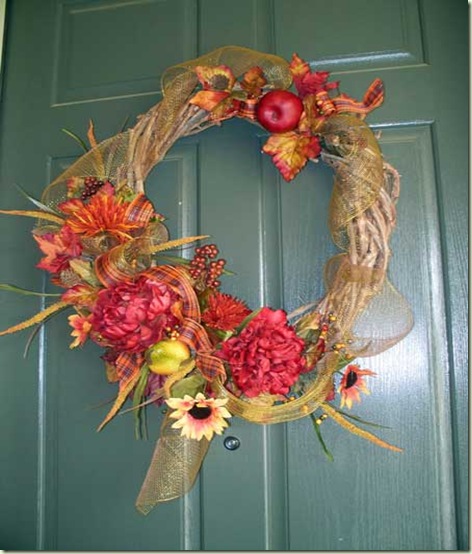
This lush wreath was created by Creative Green Living. She also shares tips to protect your door from getting scratched from the grapevine.


Fall Floral WreathsBrittany added some colorful preserved oak leaves to a cotton base to make a cheerful autumnal statement.


If you want to make your own design, follow these floral design basics – focal flowers, ornamentals, ribbons – in this tutorial by Just Paint It.


For a simple look for less than $10, you’ll love this branch wreath Karen made.

Fall Fruit Wreaths

Fall Fruit Wreath
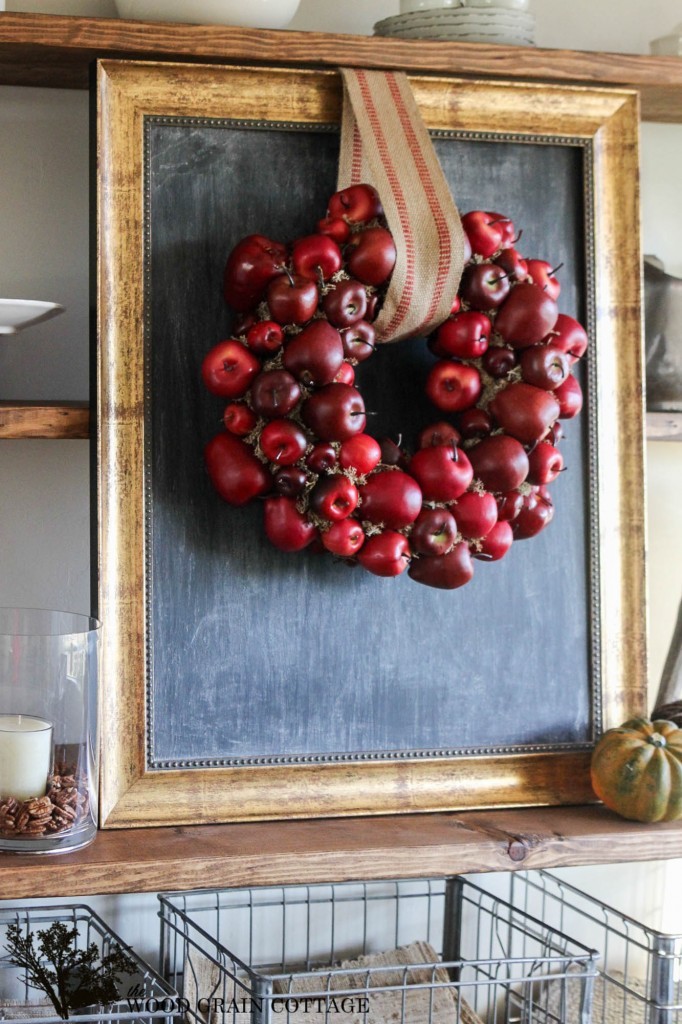
Many think of gourds and pumpkins for Fall but it’s also harvest season for many fruit. The Wood Grain Cottage created this delish faux red apple wreath, cleverly hung with burlap over a chalkboard.

Fall Fruit Wreath
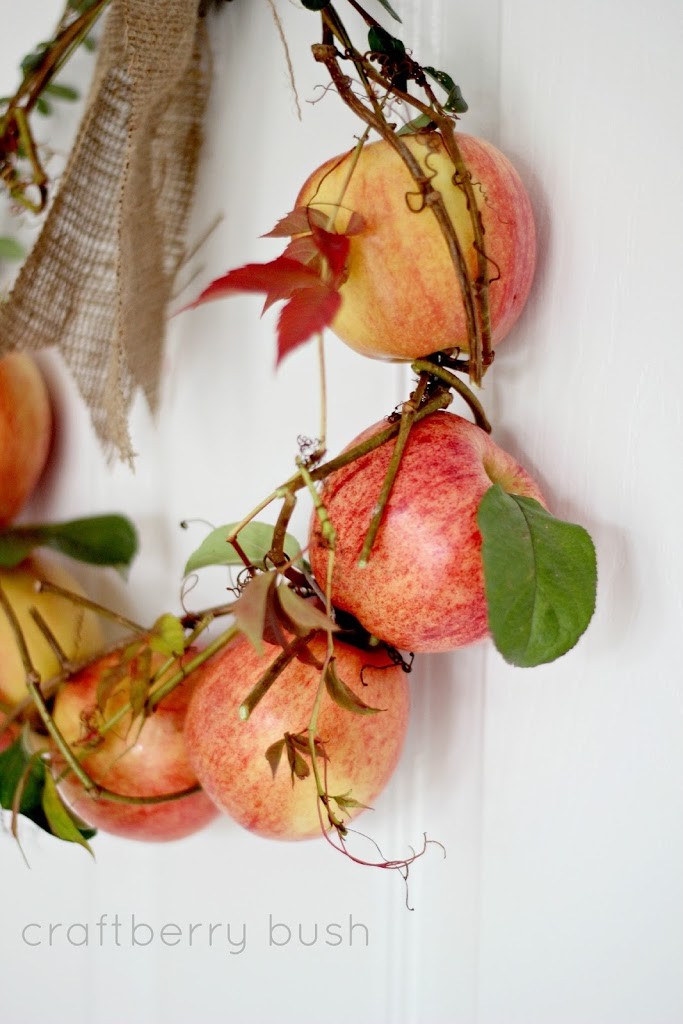
You can use fresh apples too, like this adorable wreath by Lucy at Craftberry Bush. Talk about sweet!


Fall Fruit Wreath
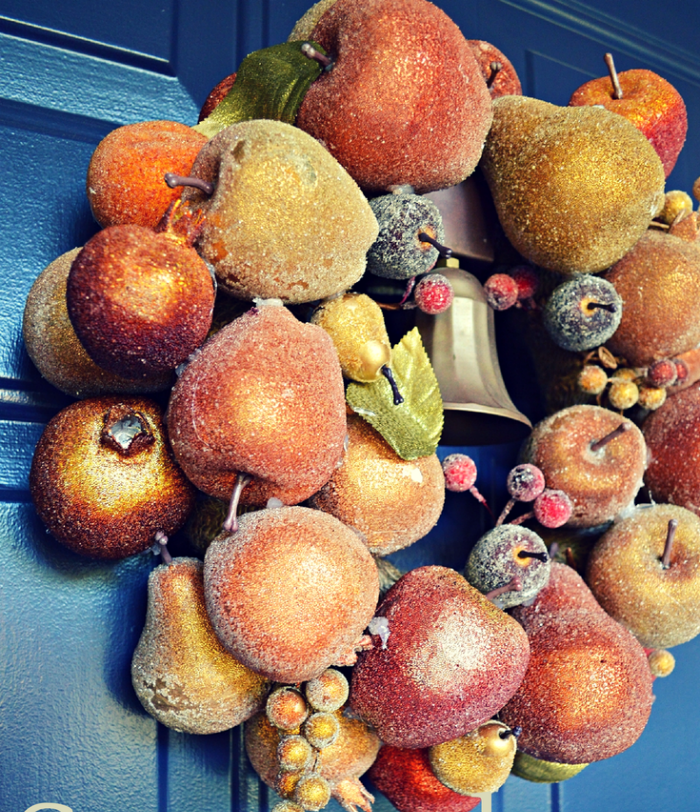
Don’t forget about “sugared” fruit. This bountiful wreath by Mad in Crafts could easily take you from Fall thru Christmas!


Sweater Wreaths

Fall Wreath
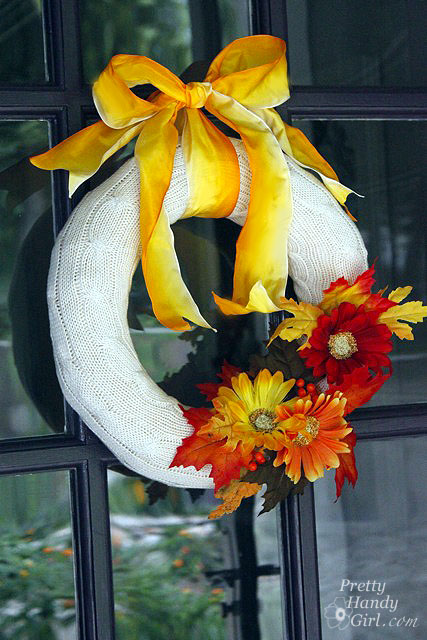
I’ve seen sweaters used on jars and vases but this cozy wreath was a first for me. It conveys a warm and festive welcome and is quite easy to make!

Fall Wreath
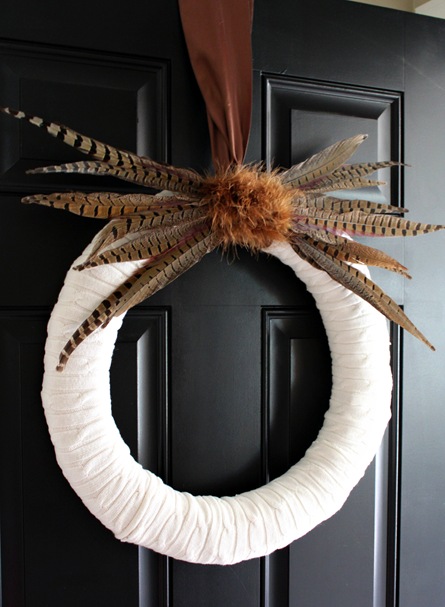
Just a Girl created another sweater wreath adorned with feathers. This wreath echoes the warmth of the season yet is simple in design.


 Fabric Wreaths

Fall Wreaths
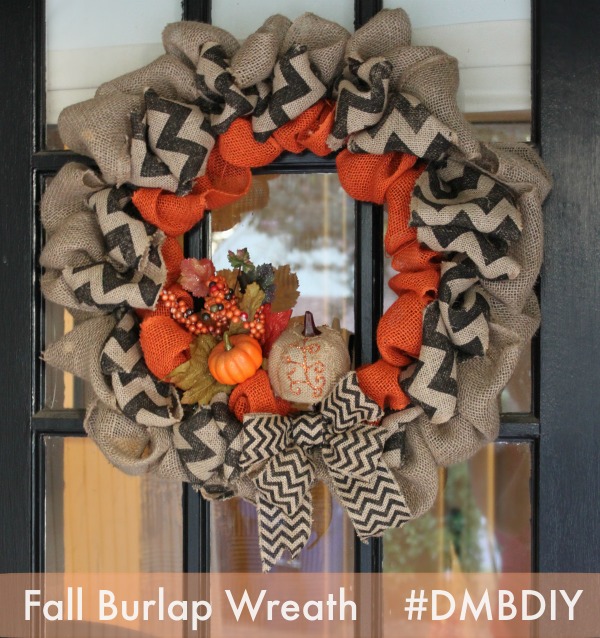
Patterned burlap makes a unique and stylish Fall wreath. City Moms Blog has a complete tutorial to create your own Fall Burlap Wreath.


Fall Wreath
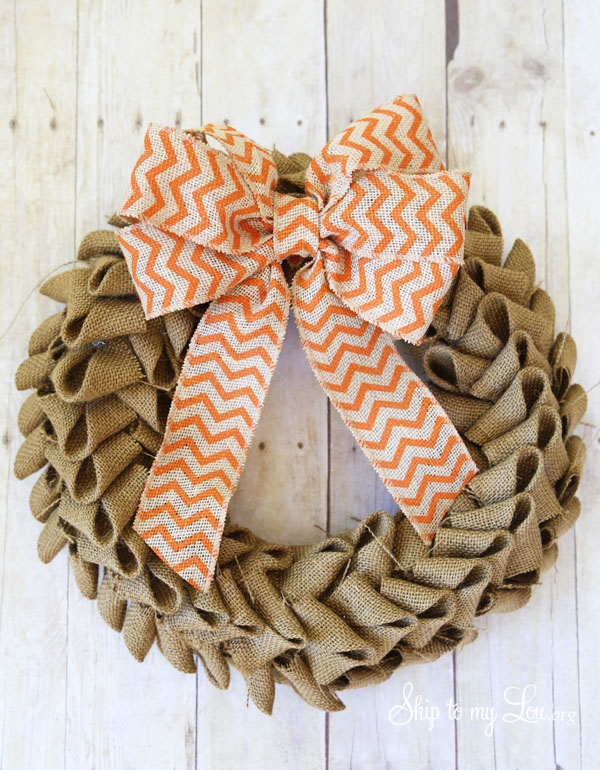
Skip To My Lou offers a different take on a burlap wreath, full of texture and dimension and pretty in its simplicity.


Fall Wreath
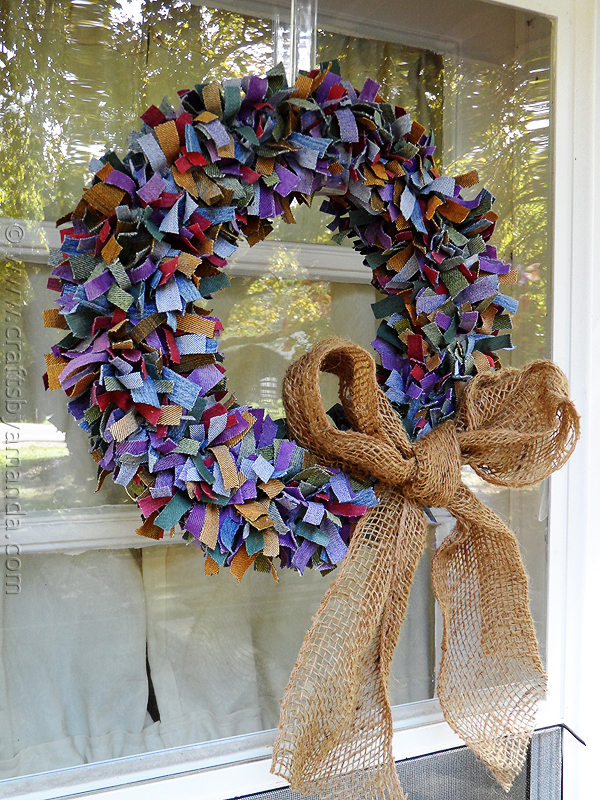
Who would think to use denim fabric for a wreath? Crafts by Amanda, that’s who. Playful and fun and a great way to upcycle jeans!


Neutral Color Fall Wreaths

Fall Wreath
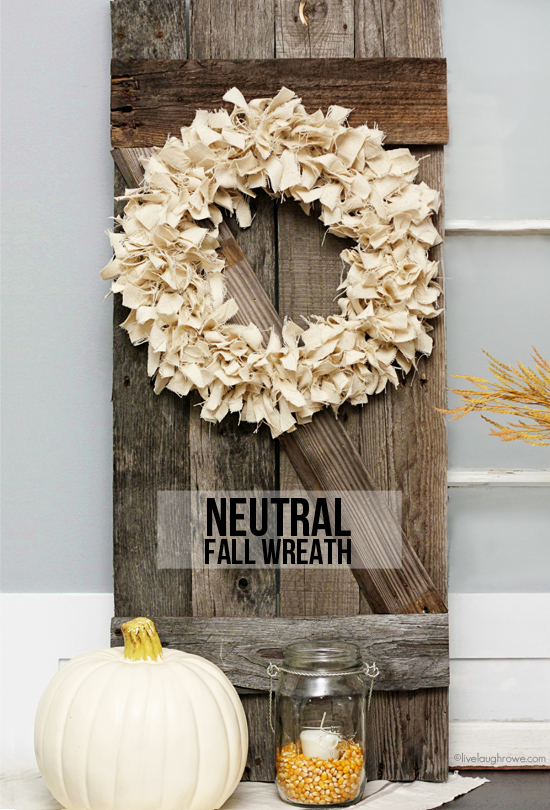
This rustic chic wreath was made with strips of painter’s cloth by Live Laugh Rowe. Displaying it on the barn wood completes the look.


Fall Wreath
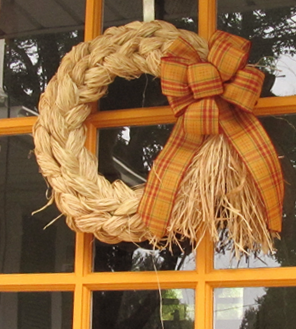
Vicki of The Creative Goddess braided a natural raffia wreath and offers an easy to follow video tutorial.


Fall Wreath
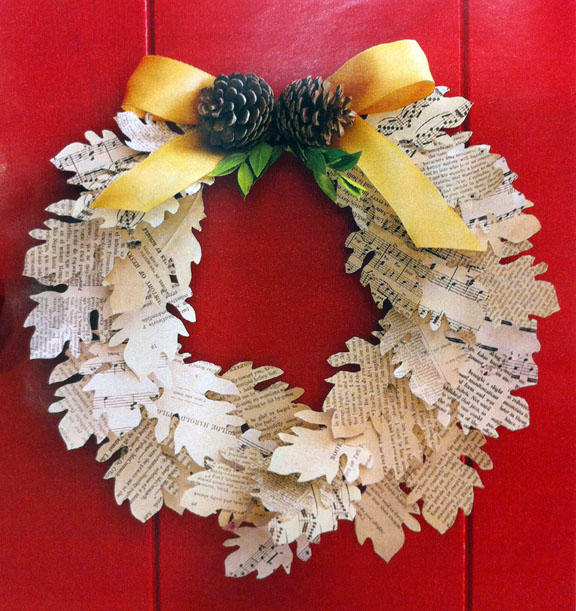
This oak leaf wreath made of book pages inspired an Autumn Garland.


Fall Wreath
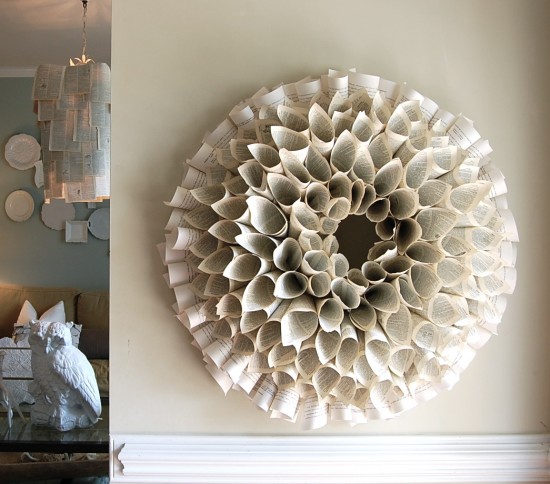
This book page wreath wasn’t made specifically for Fall by The Nester but it’s so spectacular, I had to include it.


Novelty Wreaths 

Finally, I’ve included these pieces to encourage you to think outside the . . . circle.

Fall Wreath
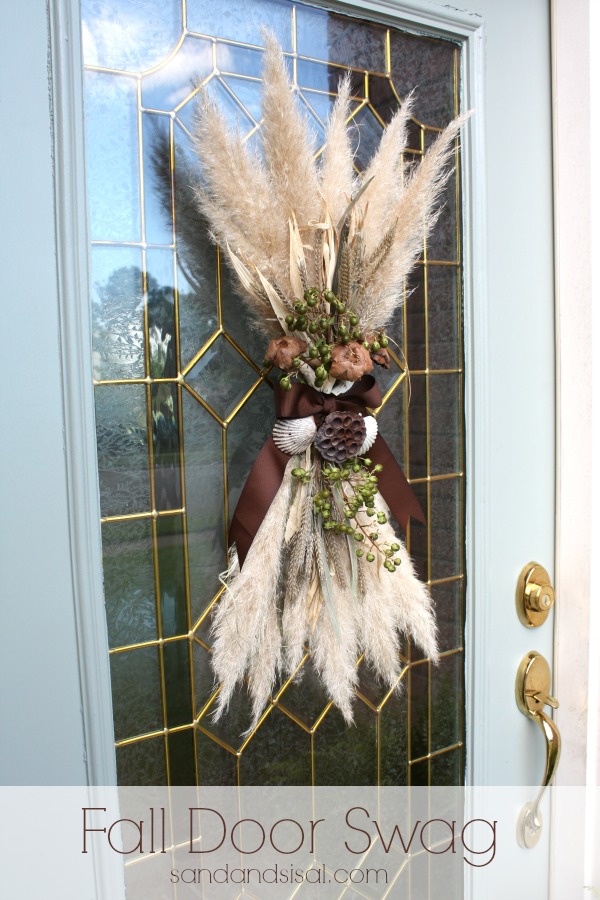
Kim of Sand and Sisal created a beautiful door swag for Fall that has a designer’s touch.


Fall WreathsA green acorn wreath? Why not! Little Things Bring Smiles blog is credited designing this unique wreath.


Fall Wreath
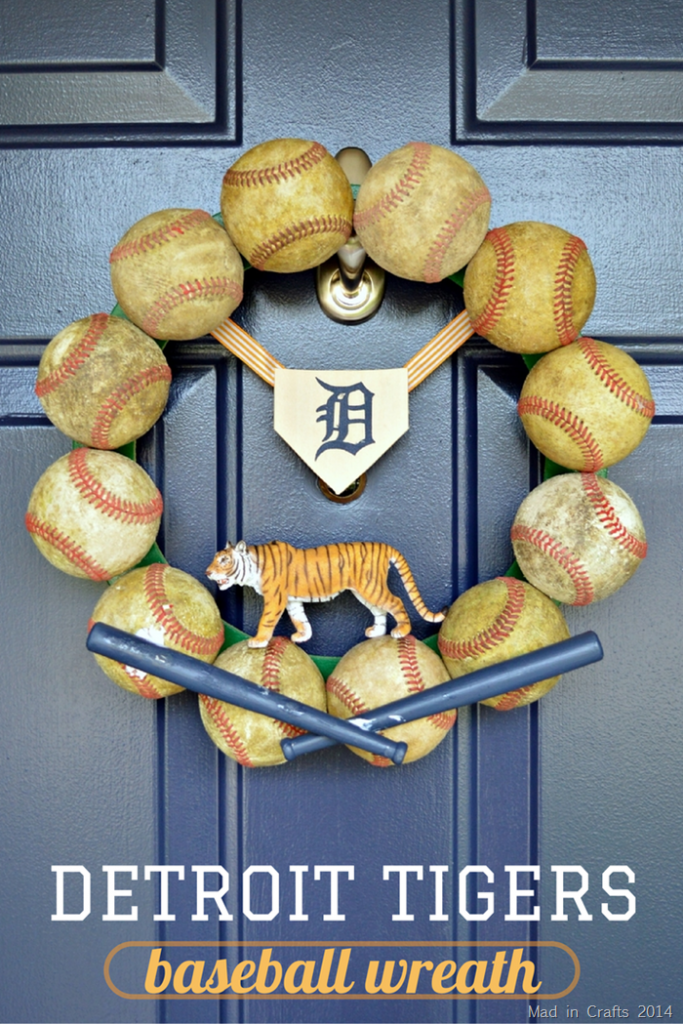
If your baseball team is lucky enough to be playing in October (World Series) Mad in Crafts shows you how to make a baseball wreath, sure to please. Go Team!


Fall Wreath
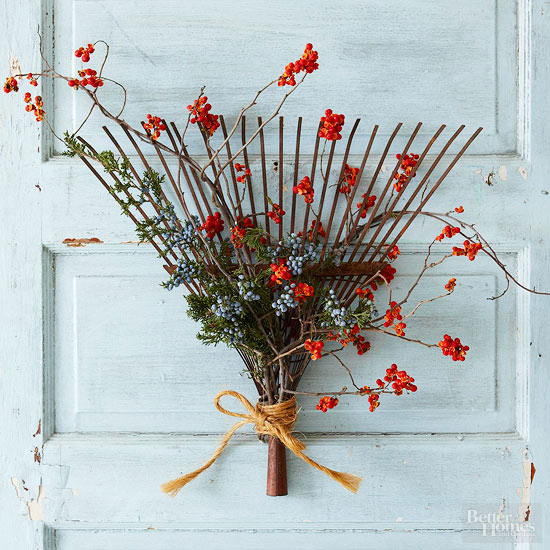
An old rake with stems of bittersweet from Better Homes and Gardens that isn’t a wreath at all, but looks right at home on any door.

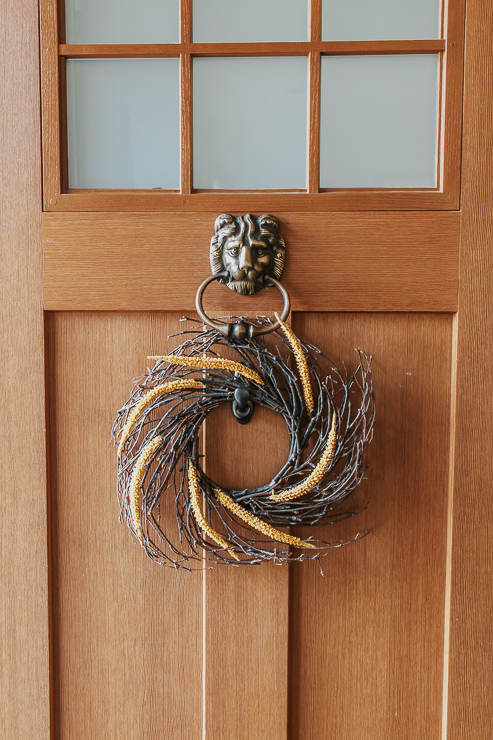
For a more modern look, you’ll love this simple wreath Karen made.

Whether you like vivid Fall colors or textural neutrals, a round wreath or old rake, I hope this collection has inspired you to create something fun this year.

Happy Fall y’all!

colleen_signature