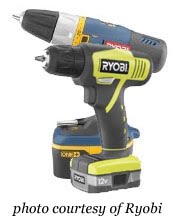
Recently I was asked what my favorite tool is. My Ryobi 12 volt Lithium Ion battery cordless drill was the first thing to pop into my head. Barely a week passes that I don’t reach for my drill to assist with a few loose screws (not that I personally have any of those.) For a homeowner or DIYer, this tool is indispensable. It allows you to drill holes, remove or drive screws and – well – just look like you know what you are doing.

I don’t just like this power tool, I love my cordless drill! Shhhh, don’t tell Pretty Handsome Guy, he might be offended. My drill is my right hand man, helping me breeze through projects with power and speed.

About 15 years ago my father-in-law asked what I wanted for Christmas, and I boldly told him that I wanted a cordless drill. He kind of chuckled and said, “Heh heh. Okay.” You see we didn’t own a house at that time, and I was still a young woman in my 20’s. But, I had big DIY dreams and I knew I wanted a power tool.

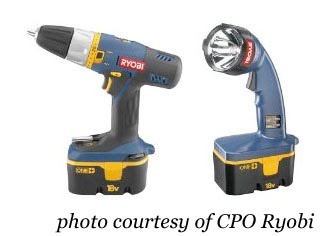
Christmas morning I opened a present to reveal a brand new 18 volt Ryobi Cordless Drill. It had loads of power, two torque settings and the whizzing whir that made me feel like I was one mean carpenter! Plus, it came with a flashlight attachment that would make any nighttime lurker look like a deer caught in the headlights.

I have owned two more Ryobi cordless drills since that Christmas present. The first one had to be replaced when the battery no longer held a charge (and buying a new battery cost almost as much as a new drill.) The second one met its demise when I accidentally drove a screw right up against a fence post and didn’t notice that the chuck was winding the opposite way until the collar was stuck wide open.

So, it was back to my super box home improvement store to shop for a new drill.

As I was checking out the drills and learning about the merits of the lithium ion batteries, I asked about the voltage difference since I had been using a 14.4 volt drill. The salesman at the “Big Orange” told me that I wouldn’t notice the difference between a 12 volt and a 14.4 volt. Pisshwah! I did notice a difference, especially when trying to drive screws into hardwoods! (My DIY abilities are sometimes underestimated by a few.) But, the salesman was correct, under normal daily use I don’t notice the difference.

Two things that I DO really love about this new Ryobi 12 volt Lithium Ion drill:  

1. Battery Life: Yes, yes, yes! What you have heard is true. The battery does last much longer. I’ve told you how much I use my drill, and I have only charged the battery on this drill three times since January 2010. That is 11 mos. of use including laying a sub-floor in our living room. The only downside to the lithium ion battery (but also could be considered an upside) is that the drill doesn’t slow or lose power until a few seconds before the battery is dead. Therefore there is very little warning that the battery is about to give up. At least this drill comes with a spare battery, so I always keep it charged.

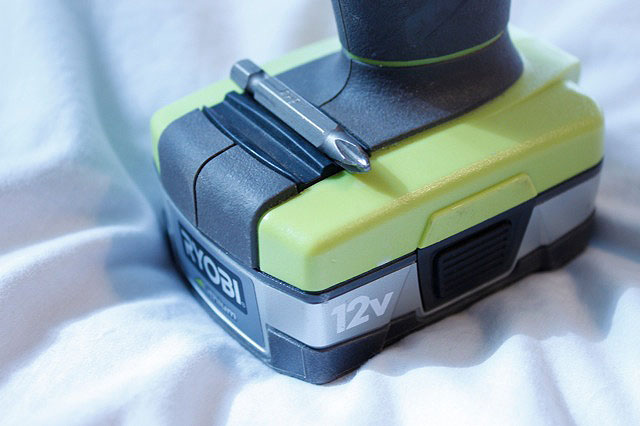
2. Size and weight: 3.5 lbs. of cordless drill made me feel like I had some serious power in my hands! That is how much the old 18 volt Ryobi weighed. When I held the new 12 volt Ryobi drill, I embraced the lightness of its lithe 1.8 lbs! I can really appreciate the difference when reaching overhead to use the drill. Plus, this new drill with its smaller size and smaller grip fits perfectly in my hand.

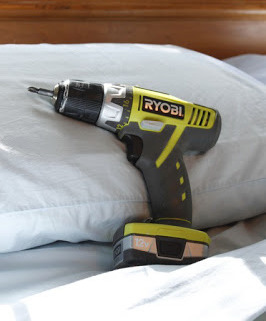
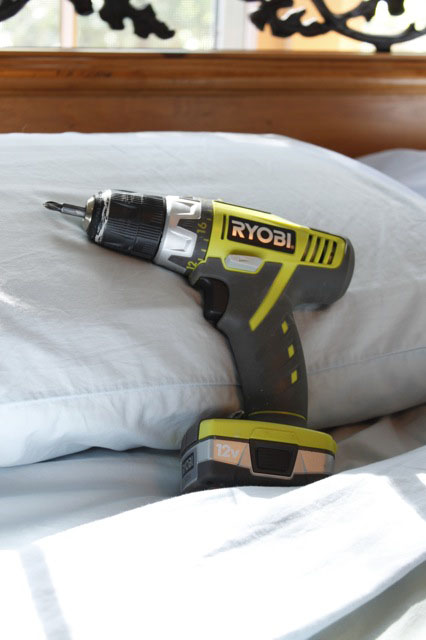
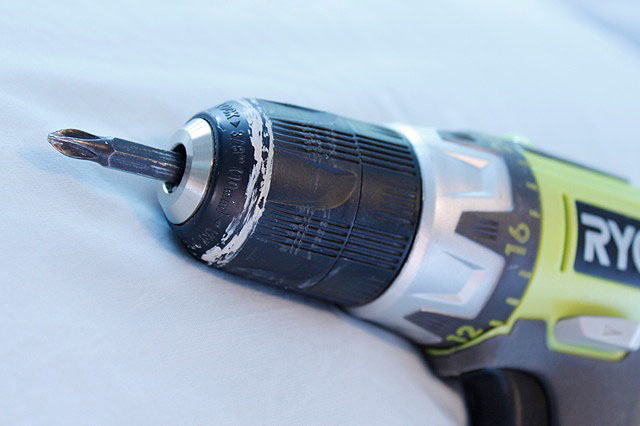
As you can see below, my drill shows signs of being loved used frequently. But, it still works like the day I lifted it out of the box.

Some other features about this little green mean machine: 

It comes with a charger, extra battery, a phillips and flat head bit. There is a magnetic bit shelf right above the battery. And a canvas storage case. But, my drill doesn’t get that much time stored away. It usually rests right here…

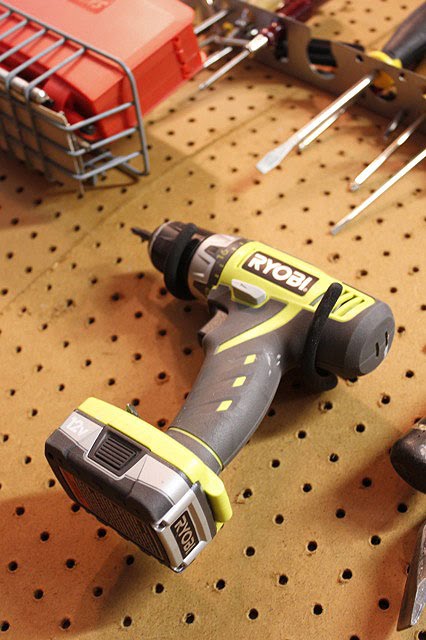
…ready to leap into action at a moments notice.

If you don’t own a cordless drill, I implore you to add this DIY essential to your holiday wishlist!

(I was not paid or compensated to write this post. This is my honest opinion and true feelings about my beloved cordless drill!)

I hate to break up the holiday glamour-fest, but it is time to put on my tool belt and share with you an important safety device. As some of you may remember, we had an oven fire this past September. We ended up replacing our oven and when the new one was delivered it came with an anti-tip device. All new free-standing and slide-in ovens should come with one. Be aware that most stores that deliver your stove WILL NOT install the anti-tip device when they deliver (shame on them!)

Oven.jpg

If you don’t know what an anti-tip device is, let me show you:

BracketParts.jpg

That’s it! Just a bracket and a few screws. But, that little device can prevent this:

TippingPics.jpg

The whole oven can and will tip very easily with very little weight on the open oven door. Stop reading RIGHT NOW and go open your oven door. Then press down to see if you can tip your oven!

If you can tip it, you can call the manufacturer of your oven and they should send you a device for free or just a shipping charge. To find an anti-tip device for your stove, contact the manufacturer.

Installation is super simple. The hardest part is pulling the stove out and cleaning all the goodies that have fallen beneath the stove for years. Apparently our stove doubles as a matchbox car garage!

CarGarage.jpg

Safety Alert: If you notice in the picture above, there is a metal box lying loose on the floor with black and grey wires entering it. This is the junction box where our wiring for the stove is hardwired into the house. The fact that this junction box is lying loose on the floor is dangerous! Should we (or the firemen) had pulled hard enough when removing the stove, the connections could have come loose and there would be 240 volts of live (or should I say life-ending) power exposed! Therefore we hired an electrician to wire an outlet into the wall before we installed our new stove.

One more safety tip, if your oven catches on fire (specifically the heating element is burning) you will need to stop the oven from receiving any power. Be sure to turn off the circuit at your circuit breaker! This probably would have saved me from having to call the fire department, I thought just turning the oven off would stop the element from continuing to ignite and burn, BUT NO IT DID NOT!

Anti-Tip Bracket for Your Oven Installation:

If your oven is hardwired, before installing the bracket be sure to shut off the power to the appliance. Even if you have an outlet, be extra safe and turn off the power to that outlet. Once you have removed all foreign objects from under the stove and cleaned the floor. Layout your template lining up the corner of the sheet to the corner of your cabinet and the wall.

LineUpTemplate.jpg

Drill through the crosshairs marking the location of the screws (remember to use a drill bit slightly smaller than your screws.)

DrillHoles.jpg
Remove your template, line up your bracket with the holes and drive the screws through the holes on the base of the bracket and then into the wall at the back of the bracket.
LineUPBracket.jpg
Once your bracket has been installed, grab a helper to help you guide your oven back behind the wall.
InstalledBracket.jpg

If you are having trouble lining up your stove with the bracket, you may need to remove the storage drawer and look underneath your oven. You also might need to adjust the feet on your oven up or down to give enough clearance for the whole foot to slide into the bracket. (You do this by screwing or unscrewing the feet.) Be sure to adjust the foot on the opposite side to level your oven.SlideFootUnder.jpg
And you are done, this installation is relatively easy as long as you don’t encounter things like electrical code violations (aka improperly hard-wired appliances.) Feel free to email me with any questions and I will try to assist you. Again, I have one extra anti-tip device for a GE stove if you would like it.

Now it is time to bake some cookies! YUM!

VotivesonShelf.jpg
Glass Jar Votive Holders

This has to be one of my favorite activities to do with the kids!

Start by saving jars for a month or more! Salsa, jelly, vegetable, and baby jars all work well. Soak the jars to remove the labels and scrub any excess glue off.

Materials:
Materials.jpg
  • Clean Jars
  • Mod Podge (or diluted School Glue)
  • Brushes
  • Jar of water to rest brushes in
  • Tissue Paper (I limited the palette to whites and blues)
  • Magazine cut outs, sheet music, stickers, or decorative hole punches
  • Plastic tablecloth or sheet to cover your work area

1. Tear your tissue paper, sheet music, or other paper into small strips and/or cut magazine pictures into small pieces.

TornPaper.jpg

2. Brush a coating of Mod Podge onto the outside of the jar.

1stCoatModPodge.jpg

3. Lay down your first layer of papers. (You be the creative genius here! You really can’t go wrong.)

AddTissueSnowFlake.jpg

4. Coat the top of your paper layer with more Mod Podge and continue until the jar has been covered. It is okay to and encouraged to overlap layers. (Again, you are the creative genius!)

2ndCoatModPodge.jpg

5. Finish your jar by brushing on a final coating of Mod Podge. Be sure everything has been coated.

DryingJars.jpg

6. Rest your votive holders on wax paper to dry. (Did you know that I never buy wax paper anymore? I use recycled cereal bags.) After an hour, flip your jars over to allow the other end to dry.

VotivesonCounter.jpg
Insert your tea lights or use flame-less candles and enjoy!


They are so adorable, that after the season has passed, I’ve been known to use these for pencil holders, for makeup brushes or impromptu vases for a bud or two. They also make a great gift from your child to an adoring Grandparent!  What do you think? Are they gift-worthy?

Sew Mini Gift Pouches from Napkins

AllPouches.jpg
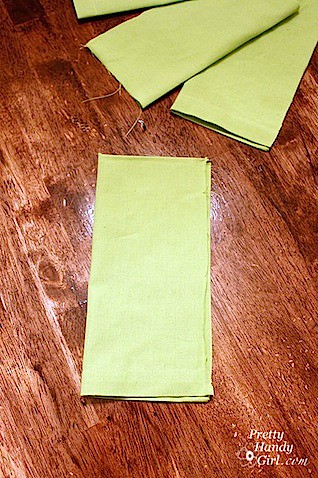
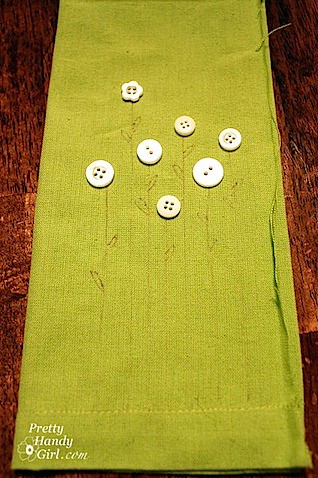
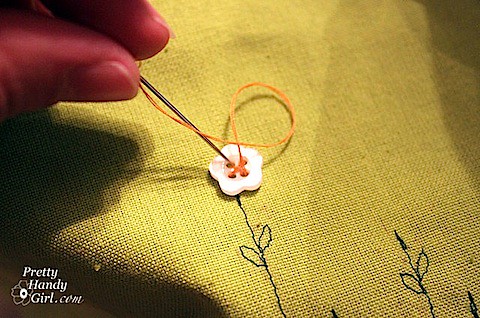
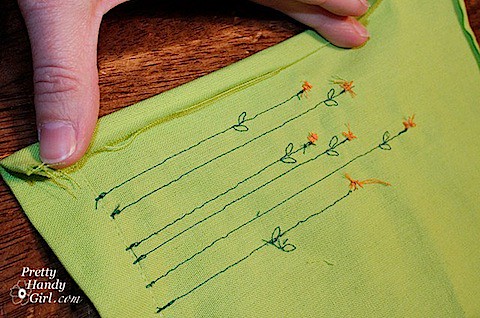
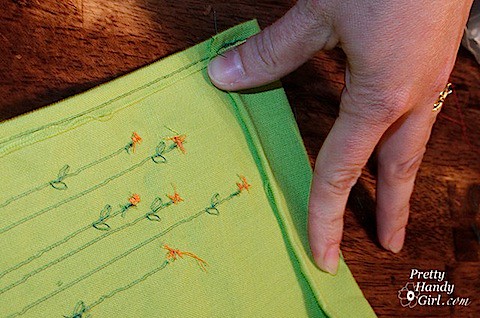
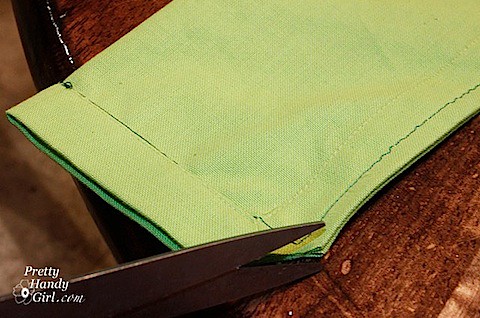
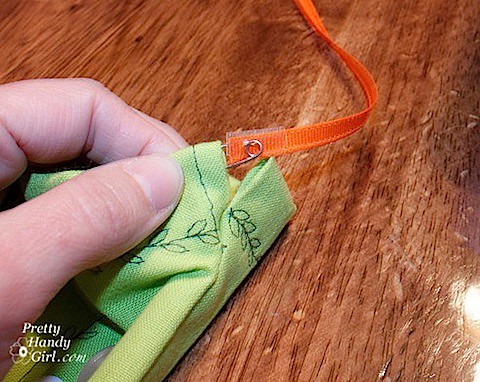
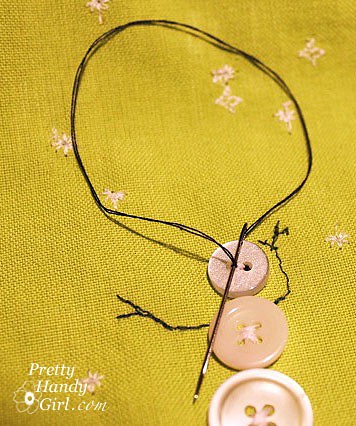
Oh the quandary of what to get my boy’s teachers, the sitter, and all those other important people in our lives. Usually I take the easy way out and buy gift cards. Well – okay – I’m still going to give the gift cards, but this year I wanted to present them in something a little nicer. Something handmade with love. Cute mini gift pouches!

These little handmade pouches are perfect for holding a gift card and some holiday treats. And then after the holiday season has ended, the recipient can use the pouch to protect and store valuables!

My pouches started like this:

DiscountNapkins.jpg

Discounted cloth napkins! 90 cents for each napkin. And here is how they became cute little mini gift pouches:

CutinQuarters.jpg

Open the napkin up and cut it into quarters.

FoldinHalf.jpg

Fold the napkin in half.

LayoutButtons.jpg

Allow 1/4 inch seam allowance on the open edge of your pouch, then layout your design and sketch with a disappearing marker where your stitch lines will appear.

SewStems.jpg

Sew along the lines you drew. (My machine has a few decorative stitches, but I could have done them by hand instead.)

SewOnButton.jpg

Then hand sew the buttons on where you want them.

HemPouch.jpg

Once your design has been completely stitched You will need to hem the raw edge on your napkin.

FoldOverDrawstring.jpg

Next, fold over the top of your pouch approximately 1/2″ to accommodate your ribbon drawstring.

DecorativeTopStitch.jpg

Stitch the ribbon drawstring pocket closed. If your sewing machine has decorative stitches you may choose to use one of them, but be sure to sew on the right side.

StitchLines.jpg

Fold your napkin back in half with the right sides together, and stitch along the bottom and open sides of your pouch. (I stitched this pouch a little higher on the bottom edge to make the flower stems end in the seam.) Be careful to stop stitching up the side before the drawstring opening.

CutCorners.jpg

Snip off the corners of your pouch.

TurnRightSideOut.jpg

Turn your pouch right side out.

FeedSafetyPin.jpg

Cut a length of ribbon long enough to thread through the top of your pouch and to tie a bow. Then attach a safety pin to one end of the ribbon. (I added some scotch tape so the pin wouldn’t fray the ribbon.)

PulledSafetyPin.jpg

Gently feed the ribbon through the bag using the safety pin to push its way through.

FlowerPouch.jpg

Add some goodies to your pouches and tie the ribbon to close it up.

AllPouches.jpg

For the Rudolf and tree bag, I simply cut out the shapes using felt and stitched around the edges.

SnowmanEyeballs.jpg

One more trick for you. The snowman’s eyes were added after I stitched the button on using white thread. Then I re-threaded my needle and sewed in and out a few times on each hole to give him little black eyes.

I will be the first to admit that I need to center my designs a little better, but for now I’m happy with them. And, hey, isn’t it the imperfections that make them look handmade?

https://3.bp.blogspot.com/_g5zUd7bijOw/TP5MiaPwgSI/AAAAAAAADLs/GU1XOSrD1_I/s1600/MoreXmasPouches.jpg

Update: I made a few more pouches last night, and altered my snowmen to a four hole button which gave me the option to add a mouth. I’m also perfecting my technique and getting better (not perfect) at centering the designs.


Pin for later!

DIY Christmas gift pouches made from napkins

CloseUpWreath.jpg
Sneak Peek at my Christmas Wreath

I am getting a lot of mileage out of my white base wreath I bought at Target several months ago. With it I’ve been able to make a Magnolia Leaf Wreath for the fall.

welcomewreath.jpg

I made a Feather Wreath for Thanksgiving.

SideViewWreath.jpg

Now it was time to give the wreath an injection of Christmas spirit. I removed the feathers, but left the green nuts on it. I had a green fabric leaf wreath that I made out of some floral filler stalks. All I did was twist 4 of the stalks into a circle shape and secure with a few pieces of floral wire.

2Wreaths.jpg

I set my white base wreath inside the green leaf circle.

TogetherasOne.jpg

To secure the two together, 1) I fed some of the base wreath twigs under the leaf wreath and 2) twisted them over to hug the green leaf wreath.

FoldUpSpring.jpg

That couldn’t be any easier! No glue, no mess.

I compared two different ribbons next to my wreath and ultimately chose the black and white one.

2Ribbons.jpg

Tied a pretty bow and stood back to admire.

BandWWreath.jpg

Hmmm, I like it, but it just wasn’t feeling Christmasy enough, so I quickly tucked some red floral sprigs with teeny bells on them into the wreath and gently curved them to match the shape of the wreath.

FinalWreath.jpg
Now that is more like it!
In less than 10 minutes I have my Christmas wreath! This base wreath has been the best $10 I’ve spent all year!

I’m going to try to use this wreath all year and will be sure to share the transformations with you.