A Mailbox that Can Take a Beating and Still Looks Great
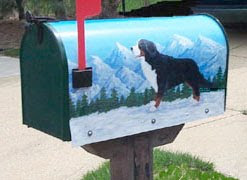
Several years ago I painted a mailbox for my stepmom (the wonderfully talented author, Diane Chamberlain). Her house was on a busy street and the mailboxes on this street were a prime target for mailbox baseball. I wanted to paint her mailbox as a surprise for her birthday, but the thought of spending hours painting the mailbox only to have it bashed did not appeal to me. Plus, this was supposed to be a surprise, and she might notice if her mailbox was gone for a few days (you think?!)
I came up with a solution that worked brilliantly! I painted the design onto automobile magnetic sign material (purchased from a sign shop for about $20). Wrapped it around her metal (won’t work on plastic mailboxes) mailbox and drilled the mounting screws through the magnetic material and the mailbox.
Believe it or not, that mailbox never took a hit by a bat (to my knowledge).
Here is how I did it:
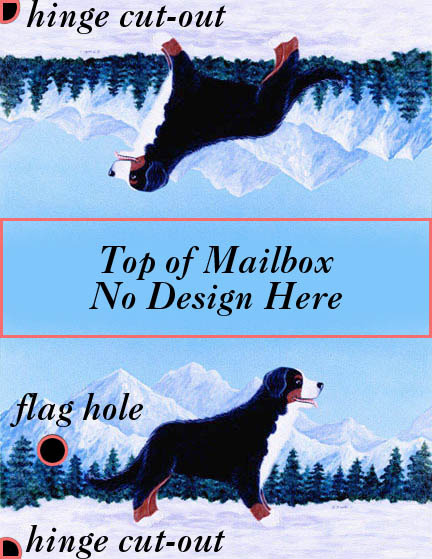
First I wrapped the magnetic around her mailbox and cut it down to size. Then I traced the locations that needed to be cut out (bottom door hinges and flag bracket). The magnetic material cuts very easily with an x-acto knife or utility knife.
Then I sanded the surface to get rid of the smooth glossy surface. Next, I added a coat of primer. After gathering my picture reference, I painted a portrait of her Bernese Mountain Dog on both sides using acrylic paint. Finally, I sealed the painting with 5 coats of exterior varnish or polyurethane.
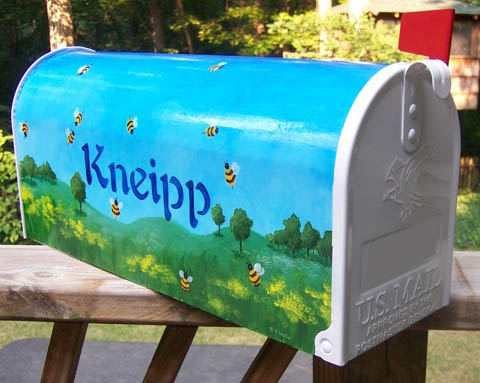
More recently my good friend’s plastic mailbox had a hole blown in it by a firework. For her birthday, I decided to buy her a new metal mailbox and paint another custom mailbox magnetic painting.
This time I painted a daytime scene on one side and a nighttime on the other.
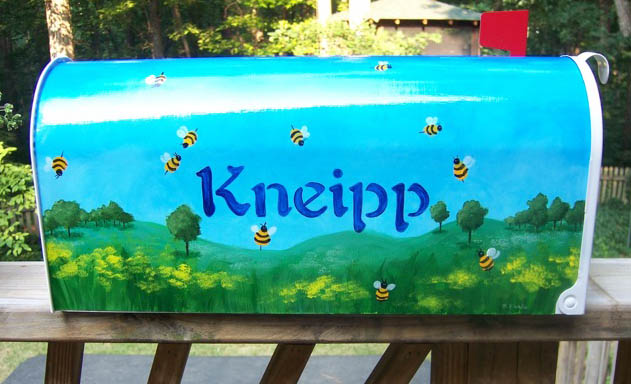
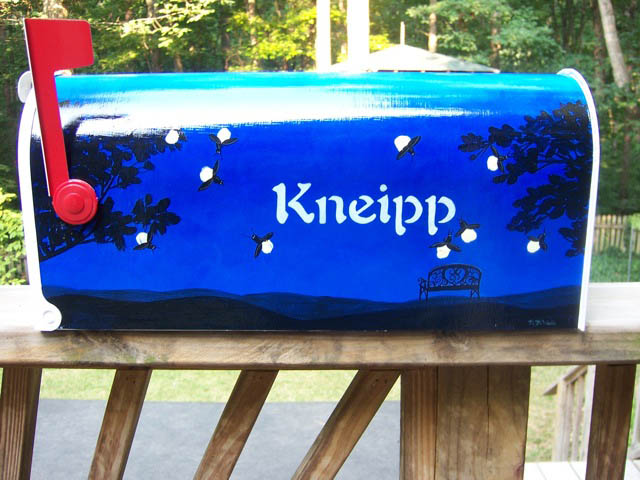
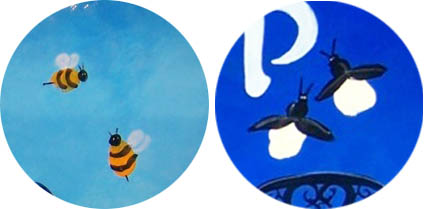
My boys helped me with the painting. I used their fingerprints to create bumblebees on the day side and fireflies on the night side.
A few weeks ago, my friend told me that the mailbox was hit by a baseball bat. I immediately asked how the painting was. Her husband proudly told me that the painting looked perfect. He was able to bang out the dent and put the mailbox back on the post. Although, he told me a secret. He said when installing the mailbox on the post, he used finish nails to attach it so that if someone tries to hit it again it will just pop right off.
The good news is that even if the mailbox is destroyed, you should be able to simply peel off the magnetic and attach it to a new mailbox. This would be helpful if you move one day and want to take your mailbox art with you.


Hi! Do you mind telling me what kind of polyurethane you use. Also how do you apply it without running? I just painted some owls with outdoor acrylic paint on my mailbox and I’m stuck on how to seal and protect. I sprayed some krylon gloss crystal clear spray but I don’t think it will give it the protection it needs. Thanks in advance!
I use Minwax Polycrylic. If you are working on a surface that can’t lay flat, you’ll have to use several thin coats.
Beautiful painting and great idea Brittany! Also good ideas about using vinyl…As a matter of fact, we sell lots of different vinyl mailbox designs that include your address number as well. 🙂 Our Sinkadoodles decals are weatherproof and should last for years. A page full of mailbox designs can be found here: http://www.sinkadoodles.com/mailbox/mailboxes.html
Great way to cheer up a mail box!!
Thanks for commenting on my arbor my son made for me! I sure love showing it off!
bee blessed
mary
For those of you who do not have Brittany's AMAZING painting talent, like me, the suggestion to use vinyl stickers may be a viable option. Walgreen's offers 11×17 photo cling's on which you could upload your own custom design or photo.
Use Brittany's diagram as a template to get accurate measurements and apply them to your design in a photo editing program. If you do not possess these skills, there are many "scrap-for-hire" digital scrapbook style design services available at reasonable cost.
You may need to use an epoxy to adhere the vinyl cling to the mailbox to ensure it stands up through wind, rain, hail, sleet and snow for your trusty mail carrier to reach. I would suggest only adhering around the edges though so as not to develop bubbles and to allow a few gaps for drainage.
Hmm, do I see a new division of your business brewing?? I wish I had a mailbox you could decorate.
Oh Brittany, this reminds me of how much I loved my mailbox with Bruin on it! (Not to mention how much I love YOU!)
Well, now that is another amazing talent you have! What a great idea! I think I would have to use vinyl stickers though, I am not anywhere near an artist like that!