How to Install a Ceiling Fan
I’ve installed probably a dozen ceiling fans in my life. Pretty Handsome Guy was remarking to me last night, “Wait, you mean you’ve never written a tutorial on how to install a ceiling fan on the blog?” It’s true, most of the installs were pre-blogging days. For this reason, I was truly excited when Casablanca contacted me and asked if I wanted one of their new ceiling fans. I knew it was a great opportunity to put together a tutorial for you so you could see that installing a ceiling fan is not a difficult DIY project! Plus, we had Casablanca fans in our previous house and they are well made and will last a long time. Therefore, I have no hesitation recommending Casablanca to you!
Okay, and I also wanted to change your mind about ceiling fans and design aesthetics. I know that some designers break out in hives when a client wants a ceiling fan. And who can blame them when the stereotypical ceiling fan looks like this:
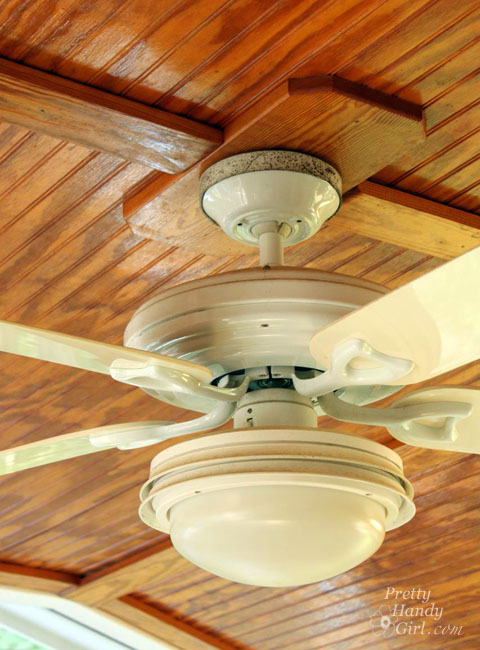
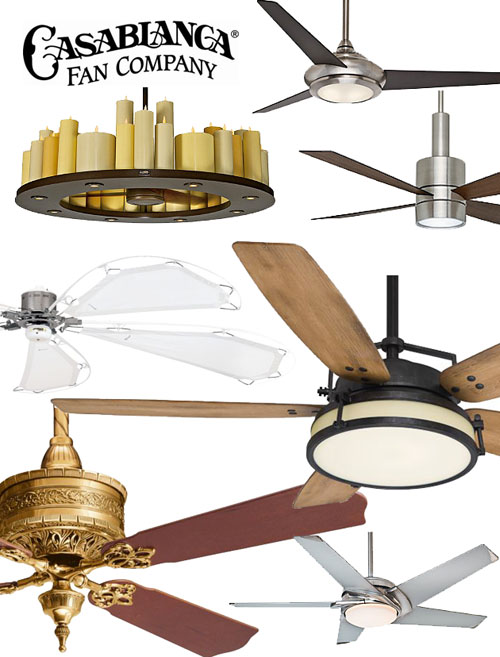
Oh yes, she’s a beauty. And she’s all mine, complete with moldy canopy and boobilicious globe. In all seriousness, that fan was U-G-L-Y. Plus, it was a bit too small for our porch. (You can figure out what size ceiling fan you need for your space in the FAQ section on the Casablanca site.) You can now understand why I was actually delighted to hang out on top of an 8 foot ladder in 95 degree heat to install a new ceiling fan. Yes, I was excited, especially because Casablanca has so many beautiful options for stylish fans. And I know, they have ceiling fans that will surely have the designers changing their tune.
Safety, Prep, and Hints Before You Install a Ceiling Fan:
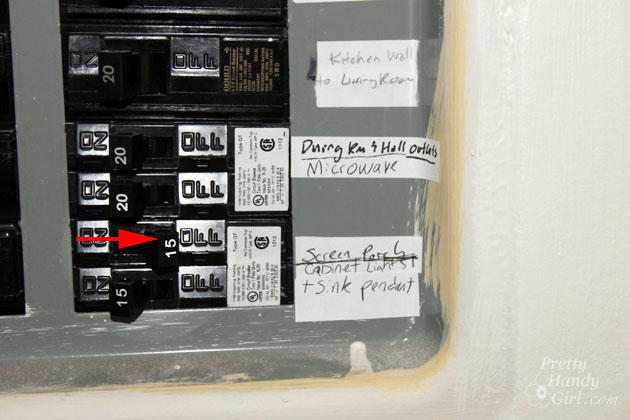
Before I give you the full tutorial for installing a ceiling fan, we need to talk about prep work and safety. First, do not attempt any electrical projects until you have turned off the power to the fixture you are working on. I like to turn on the fan and light (they are often on two different power lines) and then shut off the power. This gives me the visual assurance that the power is indeed off.
Next, if you are replacing a light fixture with a ceiling fan, you MUST make sure that the junction box is attached to a support. This means the box is screwed into a ceiling joist, brace, or the junction box is attached to a Ceiling Fan Brace. Do not attach a ceiling fan to a box that is not able to hold the weight of the fan (and all the vibration it will produce over the years.) If you don’t have proper bracing for your fan—have no fear—look into purchasing a Ceiling Fan Brace
that can be installed from inside the room (no need to crawl into the attic.)
Finally, you need to have a Sturdy A-Frame Step Ladder tall enough to reach 1-2 feet below the fan during installation. And having an assistant who can hand you the motor when it’s time to hang the fan is definitely a bonus.
One handy tip: You will most likely drop a screw during the installation. If you are working on a porch with slats, lay down a blanket under the ladder to catch them. This also helps aid in a quick clean up from dust and dropped dry wall debris.
Ready to get your cool on by installing a beautiful new ceiling fan? Let’s take a spin shall we:
Materials:
(I’ve included affiliate links for your convenience. I earn a small percentage from a purchase using these links. There is no additional cost to you. You can read more about affiliate links here.)
Instructions:
Turn off the power to your light fixture/fan.
Remove the existing fan and/or light fixture:
Check to make sure the fan AND light do not have power to them.
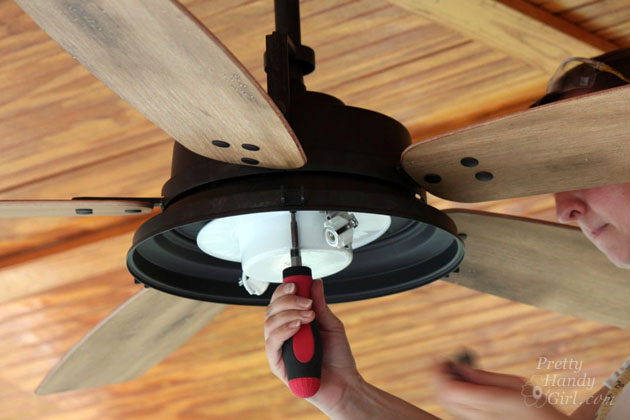
Begin by removing the existing light fixture or fan. All ceiling fans are different, but most require removing the light kit before you can get access to the fan blades and motor. Assess the fixture and look for screws to unscrew.
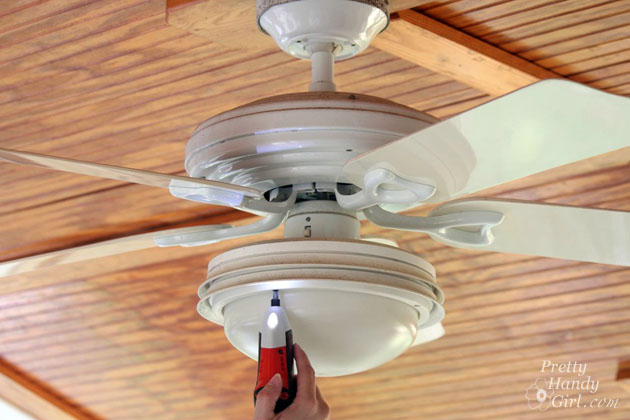
Remove the light bulbs and save them for another fixture.
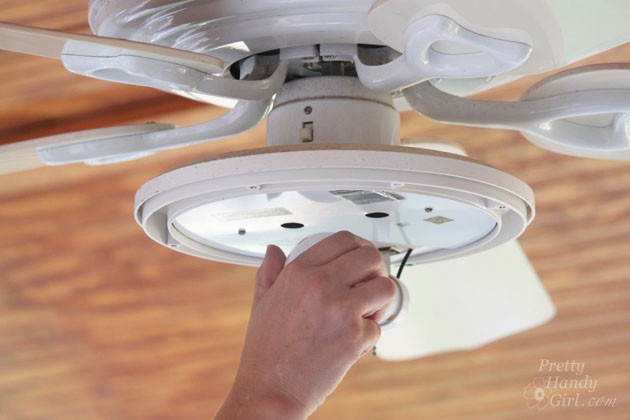
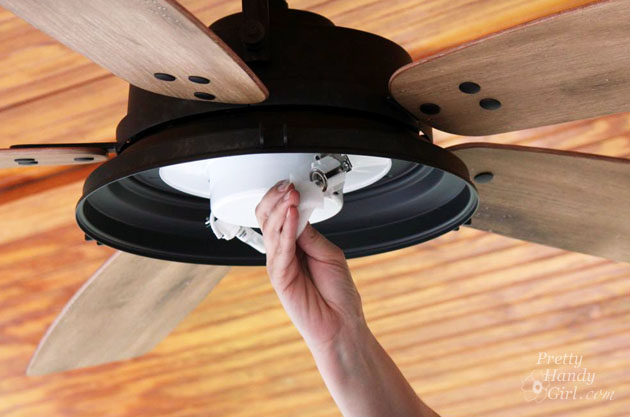
Keep removing screws until you can access the wiring. Disconnect the wiring from the light kit to the fan.

Remove the fan blades one at a time. It helps to remove blades opposite of one another to keep the fan semi-balanced.
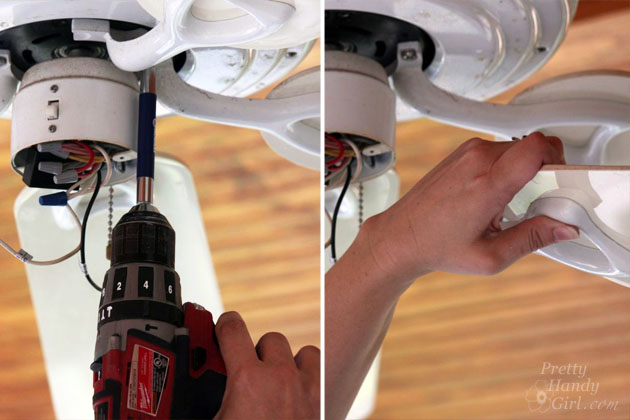
Disconnected the wiring from the fan to the ceiling. Remove the ceiling fan motor. (Sing a tune if you like.)

And finally, remove the mounting bracket.
Prepare the new fan for installation:
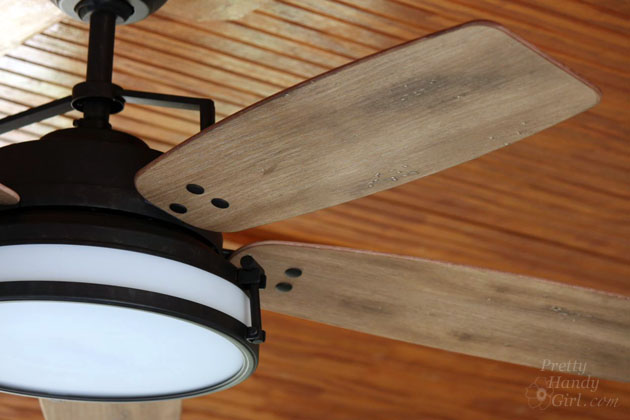
The fan I installed is the Casablanca 56″ Caneel Bay Aged Steel Ceiling Fan. The new fan is not only stylish, but also a full 6″ wider than the previous fan. This means better airflow on our screen porch.
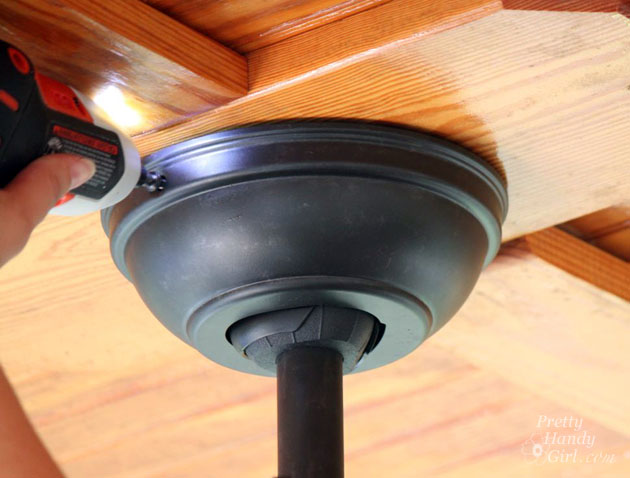
Before hanging the fan, the decorative arms need to be assembled. Screw the arms to the decorative cup:
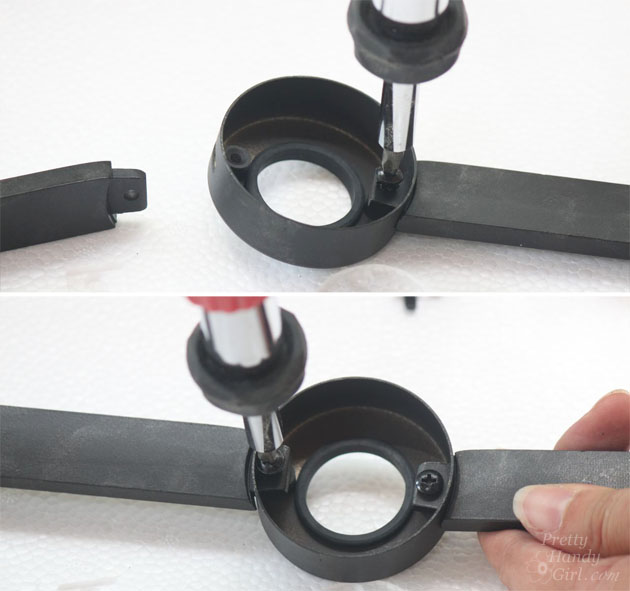
Attach the arms to the side of the fan motor. Hand tighten the decorative screws.
Insert the downrod through the decorative cup. Thread the wires through the top of the downrod. Loosen the set screw.
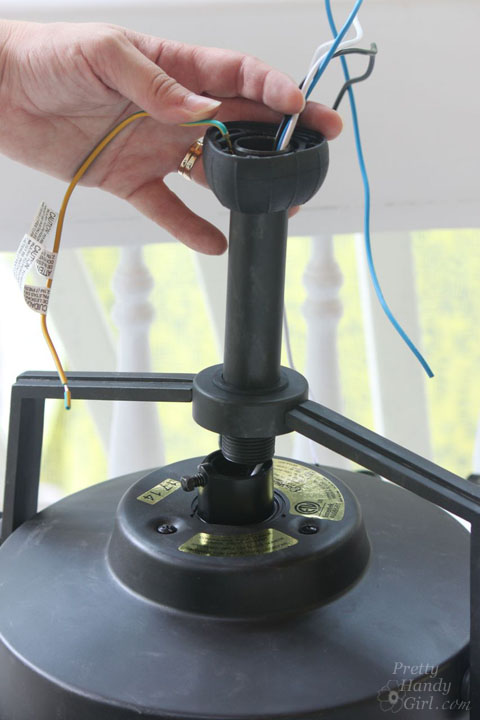
Turn the downrod into the top of the fan until it is tight. Tighten the set screw securely using pliers to insure a tight hold.

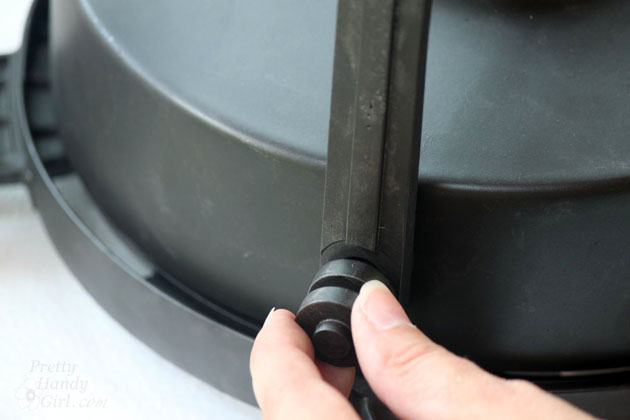
Slip the canopy over the downrod.
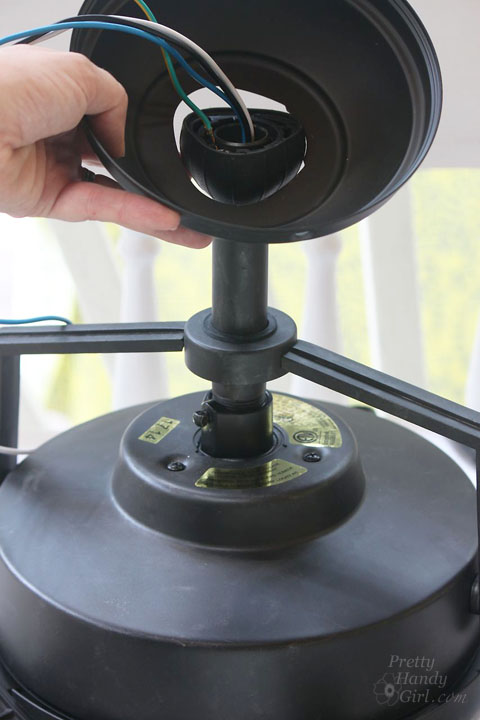
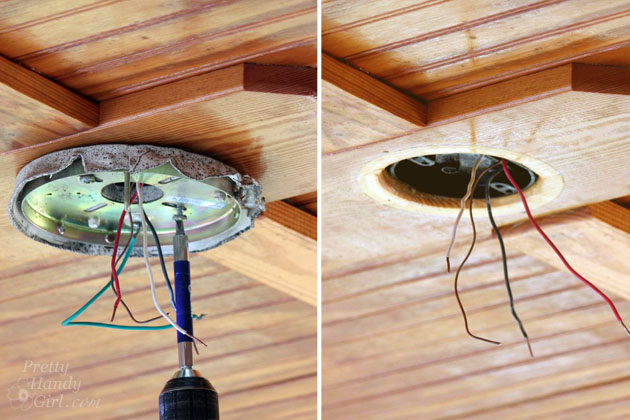
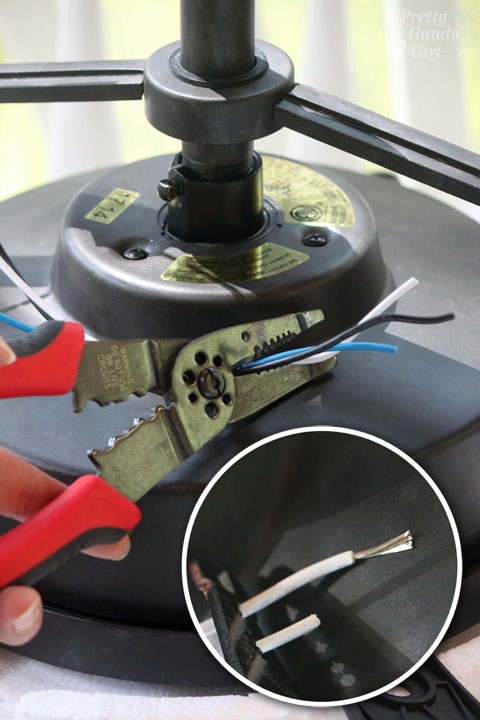
Trim the excess wires a little shorter (I like to leave 8-12″ more than I think I’ll need.) Strip approximately 3/4″ of the insulation off the ends of the wires.
Locate the hanging bracket and secure it to the stud that holds the junction box, or secure it to the junction box if it is bolted to a ceiling fan brace. Pull on the hanging bracket to make sure there is no movement and it feels secure.
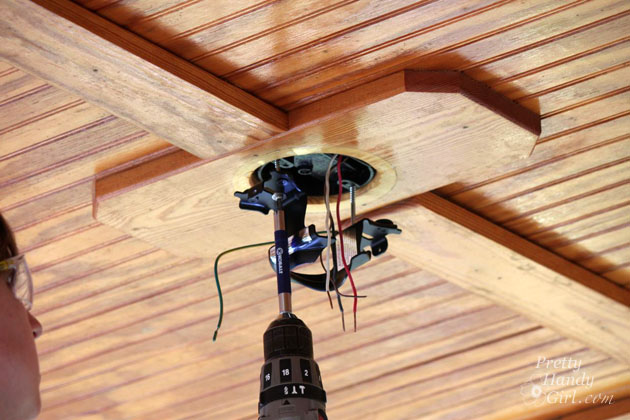
Bribe your assistant to hand you the ceiling fan motor. Gently slip the top of the downrod into the hanging bracket. Be careful not to pinch any of the wires.
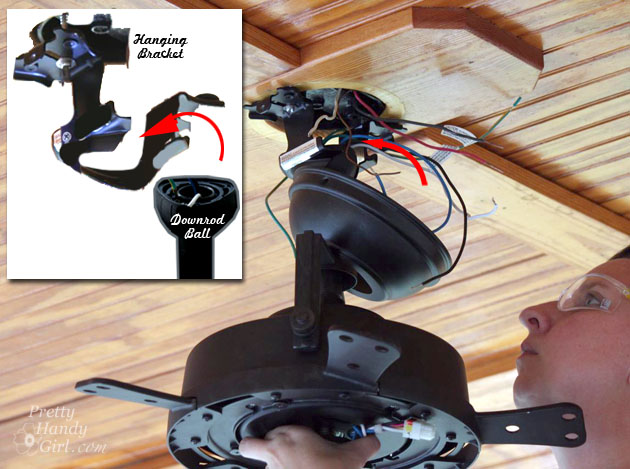
Now you can let your assistant go. The hanging bracket will hold the fan while you make your wiring connections.
Wiring a Ceiling Fan for Wall Switch Control (with 2 power wires – one for the fan and one for the light):
Most of the ceiling fans installed in the past used two switches if it had a light. This means there are two separate power wires that are in the junction box. Plus, one neutral wire and one ground. This is the standard installation for a ceiling fan that doesn’t have a remote and a receiver.
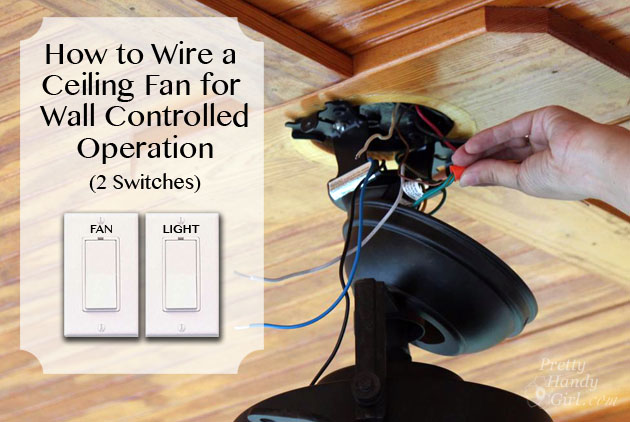
Always attach your ground wires first (copper, bare or green wires). You will want to attach the wires together with a wire nut and then wrap part of the bare wire around the ground screw attached to the mounting bracket. Or in the case of the Casablanca fan, attach the green and yellow striped wire (from the hanging bracket) to the green wire from the fan and the ground wire from your ceiling box.
Next, attach the white neutral wire from the ceiling box to the white wire from the fan.
Attach the black wire from the ceiling box to the black wire on your fan. And finally, attach the additional power wire (usually red, but can be black or striped) to the blue wire (this color may vary) from the fan.
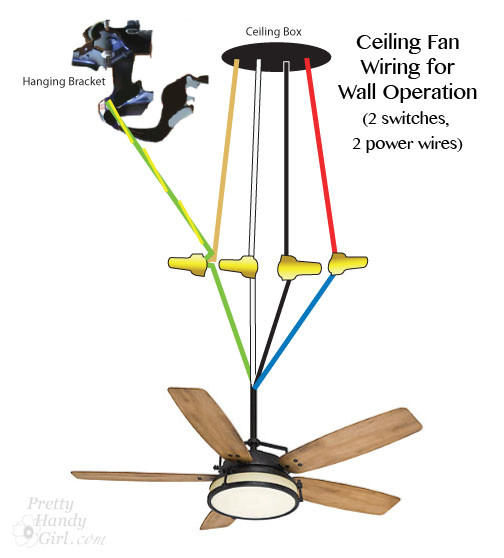
Gently tuck the wires into the ceiling junction box. It is good practice to put the white neutral wires on the opposite side of the box as the red and black power wires.
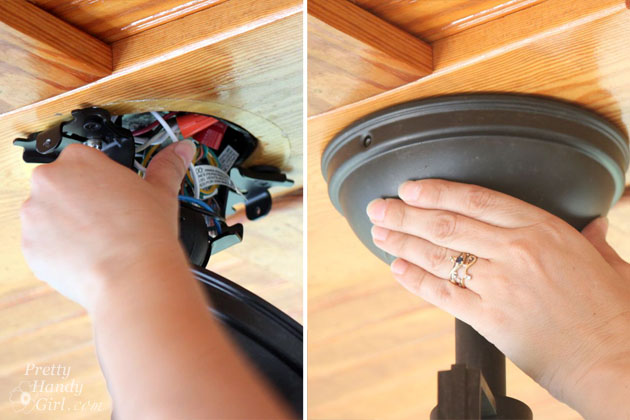
Cover the wires and mounting bracket with the canopy and screw it into place.
Wiring a Ceiling Fan for Remote Control Operation (using one power wire):
The Casablanca fan I installed has a remote control for the lights and fan speeds. The remote communicates to a receiver which independently controls the fan and lights. This gadget effectively eliminates the need for two separate power wires.

Wiring with the receiver is a little more work because you are creating more connections, but it’s just as easy to do. First, cap off your extra power wire (if you have one) and tuck it into the ceiling box. (For added safety, wrap electrical tape over the wire nut and wire.) Next, attach the ground wires together (copper, bare or green wires). Use a wire nut to attach the wires together, then wrap part of the bare wire around the ground screw attached to the mounting bracket. Or in the case of the Casablanca fan, attach the green and yellow striped wire (from the hanging bracket) to the green wire from the receiver and the ground wire from your ceiling box.
Next, attach the white neutral wire from the ceiling box to the white wire from the receiver.
Attach the black wire from the ceiling box to the black wire on your receiver.
Now make the connections from the receiver to the fan. Attach the white wires first, then the black and finally attach the two blue wires together with a wire nut.
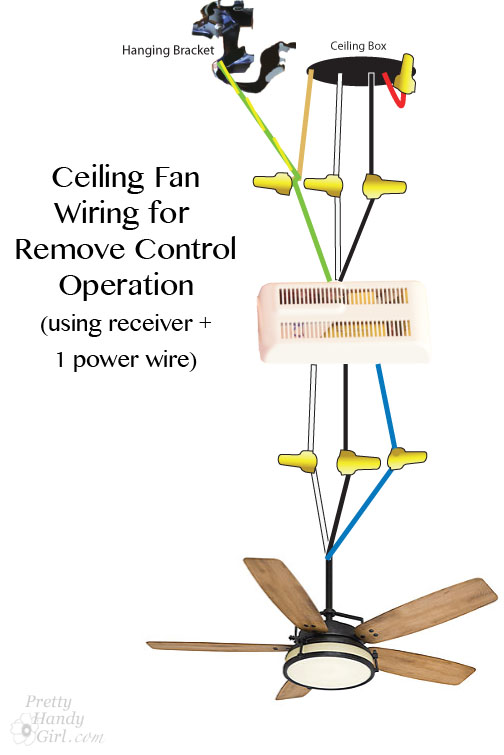
Carefully tuck the wires into the ceiling box. Then gently slide the receiver inbetween the hanging bracket and the ceiling box. You might need to play with the wires a little to get everything to fit neatly.
Raise the canopy over the hanging bracket and secure it with the screws provided.
Installing the Fan Blades and Light Kit:
Installing the fan blades on the Caneel Bay are a little tricky, but once you get one blade assembly screw and nut attached it moves quickly. Try to attach blades across from one another to keep the fan relatively balanced.

Lift the upper switch housing up onto the fan motor. Thread the wires through the center hole. Use the provided screws to attach the housing.
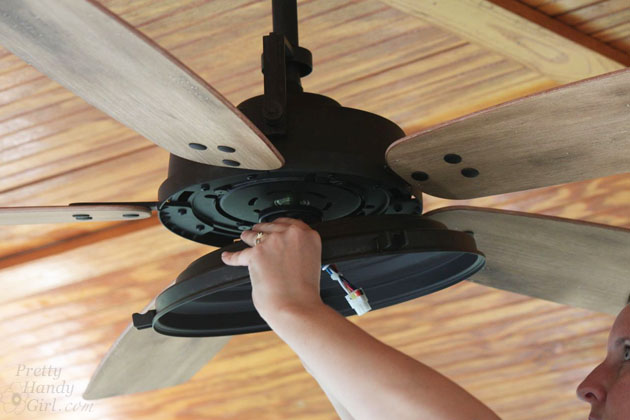
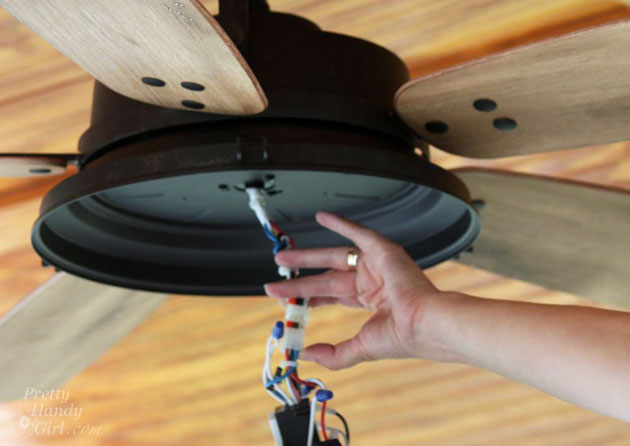
Connect the wires from the fan motor to the wires on the switch housing (light kit). Connecting them is super easy, just line up the colors and snap the wiring harness together and make sure it is secured.
Screw the light kit (switch housing) into the fan.
Add the provided halogen light bulbs. (Avoid touching halogen bulbs with your fingers because the salt and oils in your skin could cause the bulbs to wear out faster.)
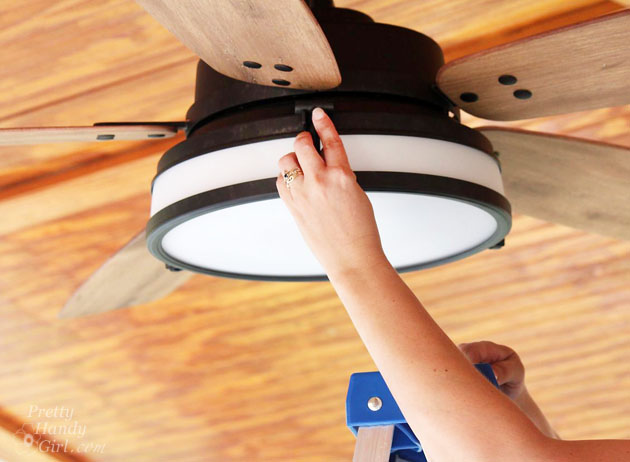
Attach the globe to the fan, making sure all the “hammers” on the globe ring are secured in the notches on the fan.
Turn the power on and make sure the light and fan works appropriately. If it fails to work, one of your wire connections may have come loose. Turn off the power and check your connections.

It’s time to appreciate the beauty of a new ceiling fan. And enjoy the efficiency of the wider blade span as it moves the air and cools you off. Excuse me now while I drink some ice cold lemonade and chill out.
Do you love the look of the Caneel Bay fan as much as I do? Or do you think you’d like a more modern look? I’ll be back next week to show you a few more changes I made on our screen porch.
![]()
Disclosure: This post is sponsored by Casablanca Fan Company. I was sent a complimentary fan and compensated for my time. All images, ideas and words are my own. I will always let you know the relationship I have with a brand via a disclosure. Also know that I am very particular about the brands I work with.
Hi Brittany,
I have bought a second hand ceiling fan with electrical codes (the connecting slots) on it: F A L N.
To connect it to the power and to a fanspeed switch: which cables have to be connected to which?
The switch has only two holes/wires, but how to connect switch and fan to the power?
I can send you an image, but do not see where to upload it…
Please send me a picture. I suspect you didn’t get all the parts with your fan. what you described is a wiring harness that connects to a mate. Email me at PrettyHandyGirl @ gmail.com
Could you address the issue of the “leash” that comes with some ceiling fans. It was an unexpected “surprise” that came with my new fan. Search of the interwebs reveals that these leashes are common on commercial, but not residential, installations. It’s awkward. Steel cable about 2′ long with a loop on the free end and the other end attached to the motor assembly. It is a Vaxcel “Corazon” fan. The instruction sheet is very poor. The fan comes wired for a two-switch installation but there is no explanation of the fourth wire, nor does the instruction sheet even acknowledge its presence. Similarly absent from the instructions is the presence of the leash and any mention of how to install it. I suspect that the legal department requires it and that maybe home installers just omit it.
Zeek, I’ve installed a few fans that have a “leash”. It’s more of a safety feature to prevent fans from falling. But, the cables on the fans I’ve installed are only about 8″ long. They tuck up into the housing easily. Maybe call the manufacturer?
Hey, Pretty Handy Girl! I used to subscribe to yer blog, but lost you after getting a new computer which had a different email address! Here’s my new one! Incidentally, I am trying to talk my husband into a ceiling fan at least in one area, so that was timely!
Best,
Linda, are you receiving my emails now? I think I added you to the newsletter list.
Great Blog & tutorial! Thanks! And totally LOVE the fan you were sent. I went on their website but did not see that particular one. Can you tell me the specific name of that ceiling fan? Thanks!!
Donna, here’s the link to the fan I installed: http://www.casablancafanco.com/Products/CeilingFans/56-AgedSteel-Transitional-CaneelBay-59113/
That fan is gorgeous! I know fans have such a bad rap, but we put one in our master bedroom and love it. We have plans later on down the road to put one in our living room and maybe another bedroom too. They are so much more energy efficient!
Thanks Ashley. I think those of us that live in warmer climates know that we just can’t live without ceiling fans. Glad there are some new and attractive designs!
oh wow, great job. I think this is the first fan installation article in I’ve seen with this much detail. Thanks for sharing.
Thanks Jim.
brittany thanks for the tut. i will use it if i win the ceiling fan…my goodness they have a lot of gorgeous ones, keep your fingers crossed for me xx
Chris, fingers crossed for you!!!
What if you want to install a fan where there’s no box/no wiring in the ceiling? We have switched outlets in most rooms and no overhead lights, but I’d like to install ceiling fans in a couple bedrooms. Attic above, full of insulation, but reasonably accessible.
Kat, we’ve had this situation in a few of our bedrooms. Your best course is to hire an electrican to wire a ceiling box for a ceiling fan. Be sure to state that it needs to hold a ceiling fan. The electrician will need to determine whether a new power line is needed or not. And make sure that if an existing circuit is used that it won’t be overloaded. You also need to use a reputable electrician who is licensed and versed on your local permits. It is possible that a permit needs to be filed to add an electrical line.
Great tutorial…so much better than the instructions that come in the box ….and color pix. Thanks so much! 🙂
Thanks Nancy. Glad my instructions seem clear ;-).