How to Make a Folding Guitar Stand
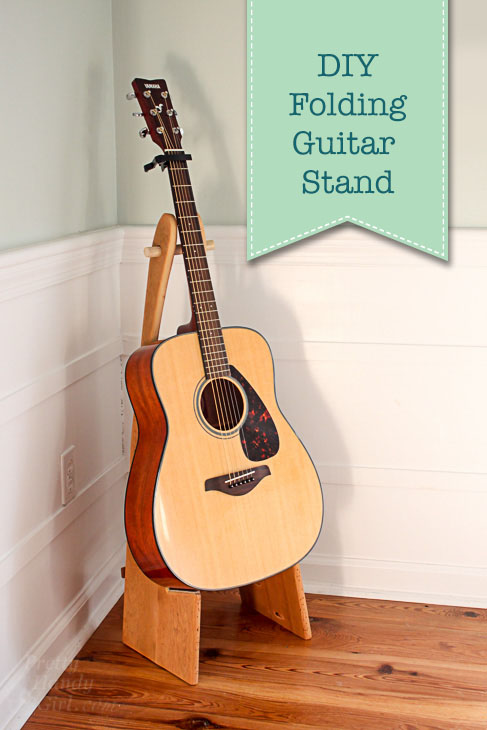
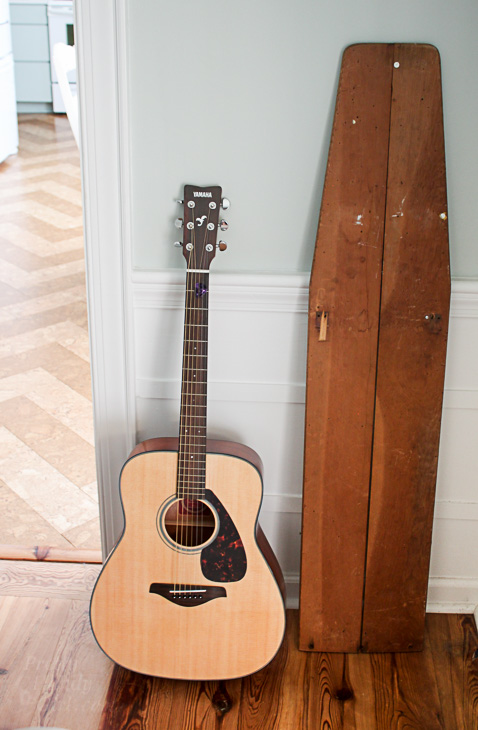
For my husband’s birthday I made him with a curvaceous DIY Folding Guitar Stand! He’s been playing guitar for a few years now and frequently leaves his guitar sitting out in the middle of the living room. I’m always worried the kids or dog will knock it over ;-(. Recently I saw The Crafted Workshop’s portable guitar stand and thought I could easily adapt the design into a curvy stand for my husband’s guitar. The stand was a fun challenge as I worked out the curves and How to Make a Folding Guitar Stand that would fold flat for travel. In my ever constant mission to use up scrap wood, I grabbed an old ironing board that was rescued on trash day in our neighborhood. It had a stained cover, but had beautiful aged wood beneath.
Don’t worry if you don’t have an old ironing board lying around, you can use store bought pine lumber instead. Let’s get busy making, shall we?
Materials:
(I’ve included affiliate links for your convenience. I earn a small percentage from a purchase using these links. There is no additional cost to you. You can read more about affiliate links here.)
- 2 – 1″ x 10″ x 36″ boards
- 1 – 3/4″ dowel rod cut to 6 inches
- 1 – 1″ x 1/4″ x 12″ piece of wood for the latch
- 3/4″ drill bit
- Drill or drill press
- 1/16″ drill bit
- 1/8″ drill bit
- 2 – 1″ wood screws
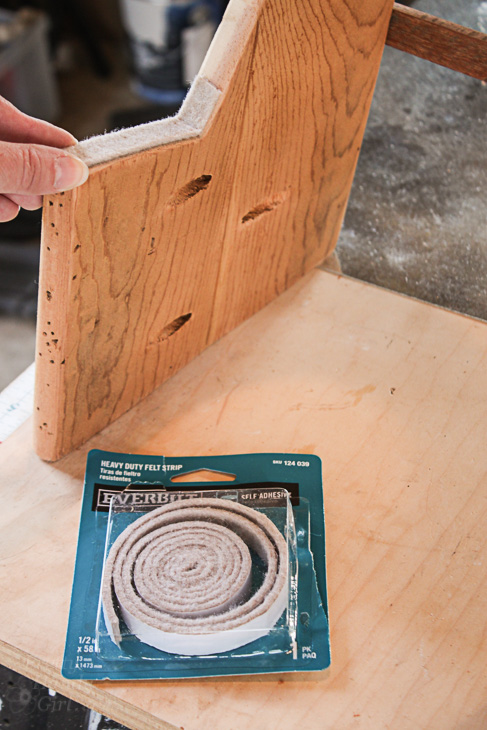
- 1/2″ Felt strip tape
- Jigsaw (or bandsaw)
- Pencil
- Tape measure
- Sander
- Sandpaper (150 grit and 220 grit)
- Philips bit or screwdriver
- Eye protection
- Hearing protection
Preparing the Lumber:
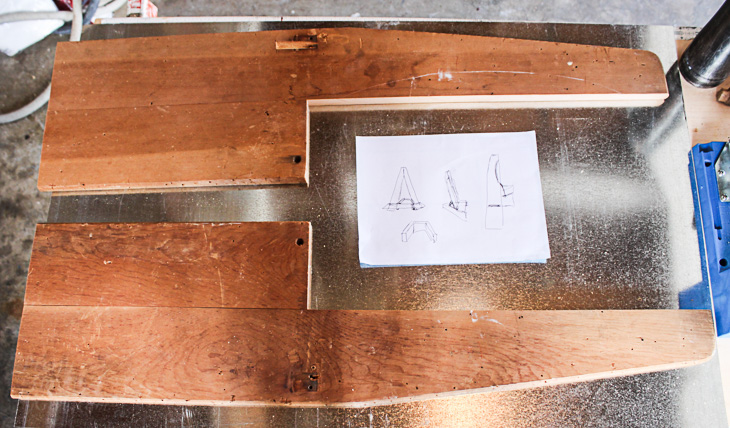
If you have scraps lying around, go ahead and join them together to get the appropriate width for this project (9 1/2″).
I was able to make the entire stand out of the ironing board lumber. After cutting your lumber, run one side of each board through a table saw to get a straight line.
Next, glue up the two boards and secure using pocket hole screws. (Unclear how to use pocket holes and a Kreg Jig? Check out my instructions for using a Kreg Jig.)
Now that you have your board, let’s build this DIY Folding Guitar Stand.
Instructions:
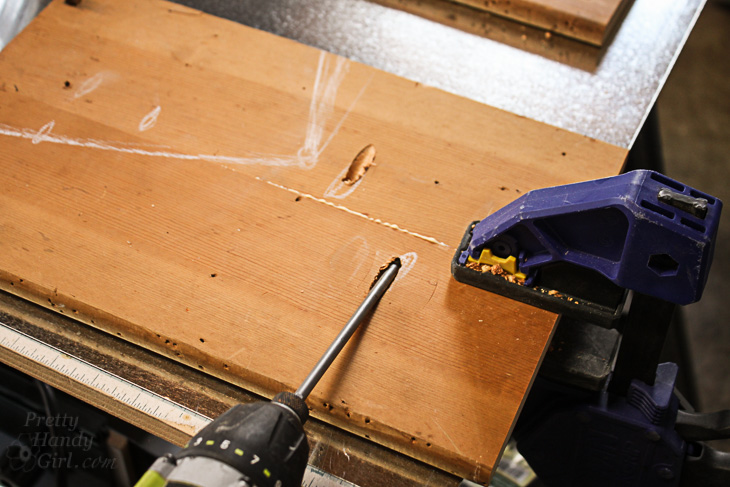
Download and print out this template (or draw your own based on your guitar.) Cut out the template and trace the two pieces onto your 1″ x 10″ boards.

Use a bandsaw or jigsaw to cut along the outline.
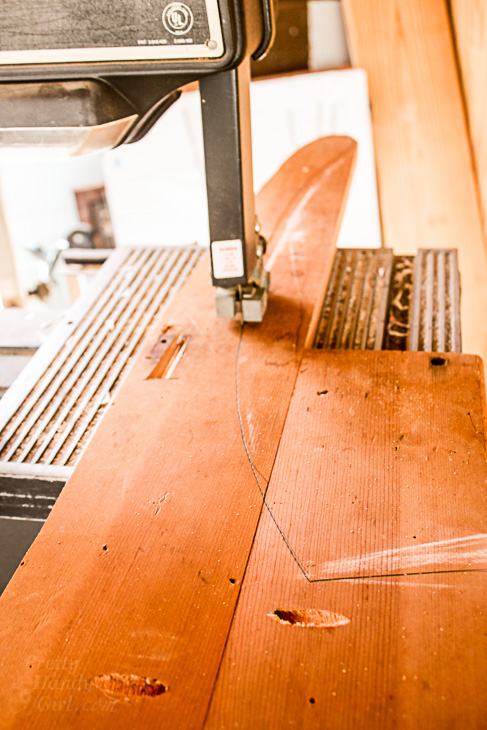
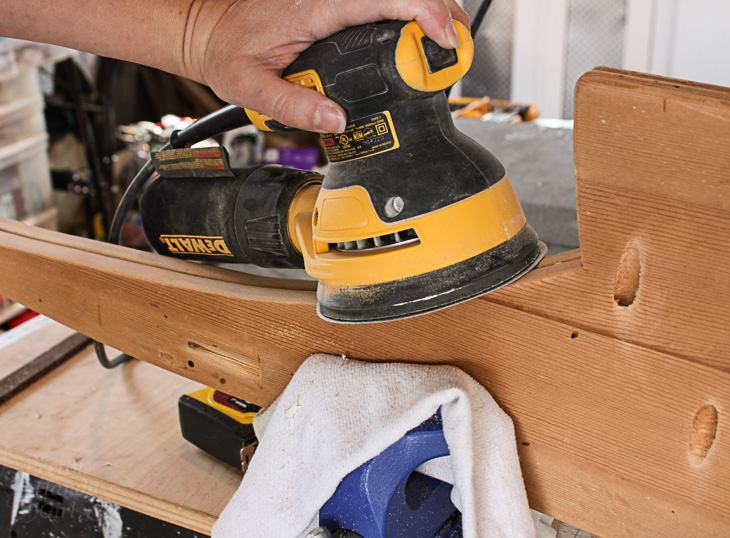
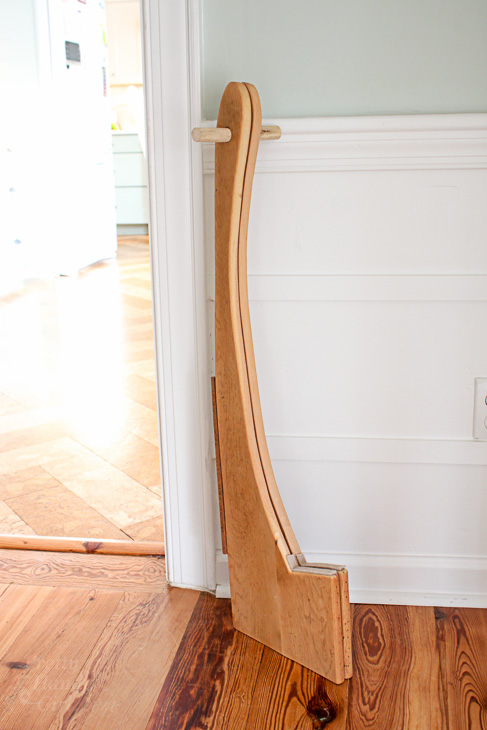
Cut the second side. Sandwich the two sides together and sand any spots that vary. Then separately sand each side to round over any sharp edges.
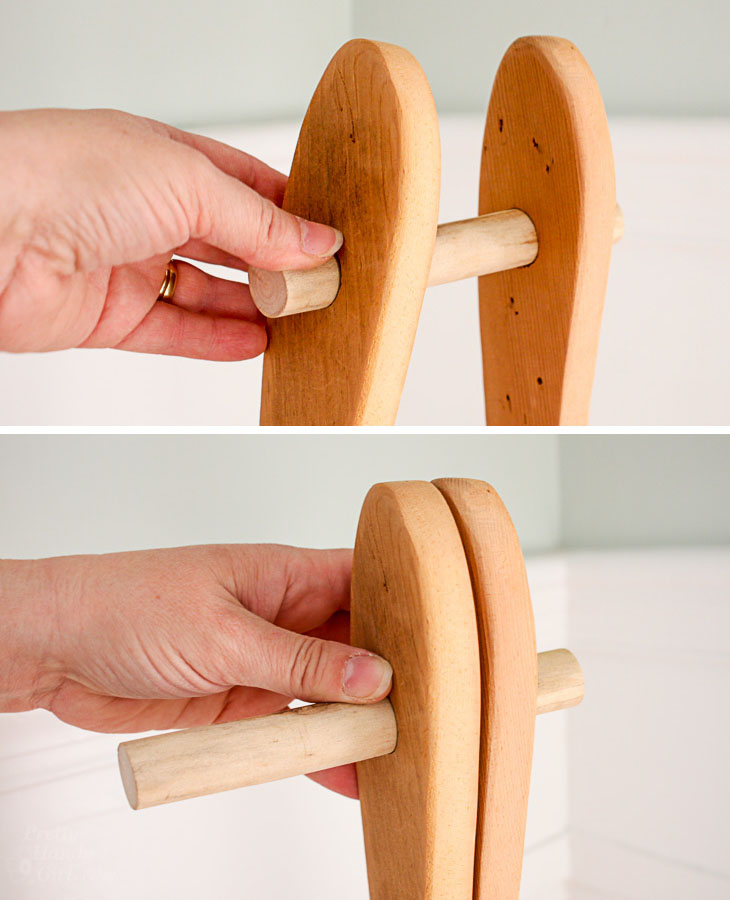
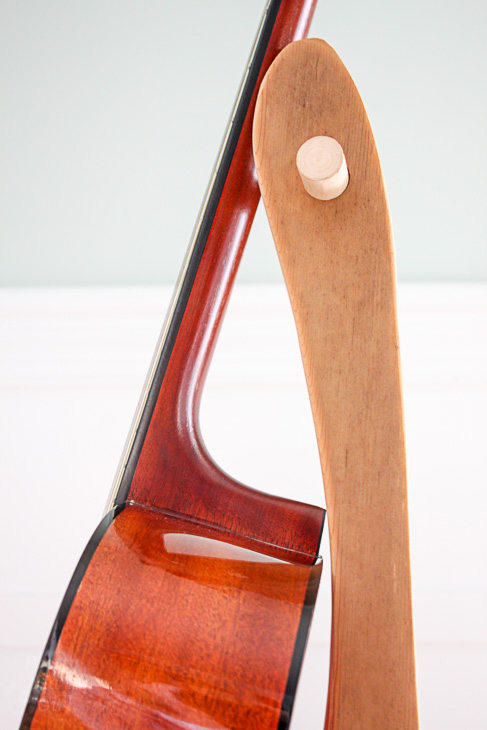
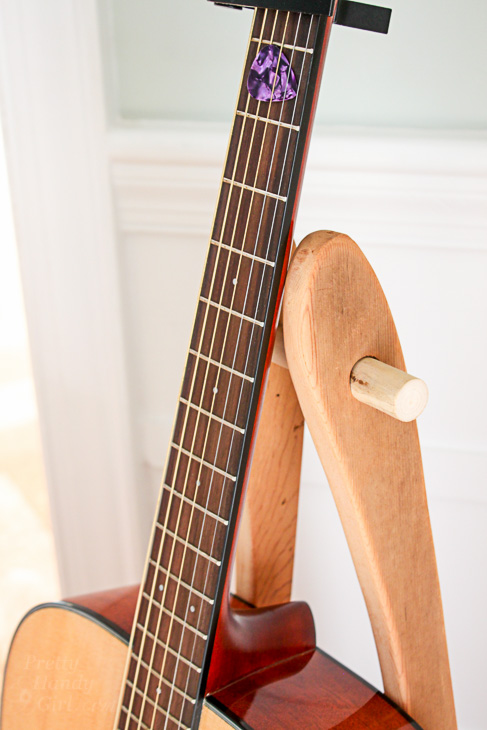
Use a drill and the 3/4″ spade bit to drill a hole through the top of the sides (3 inches down from the top edge.) Sand any splinters off.
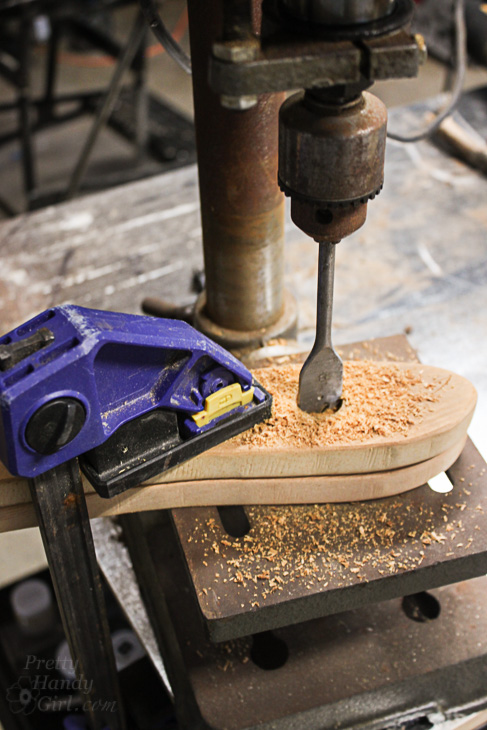
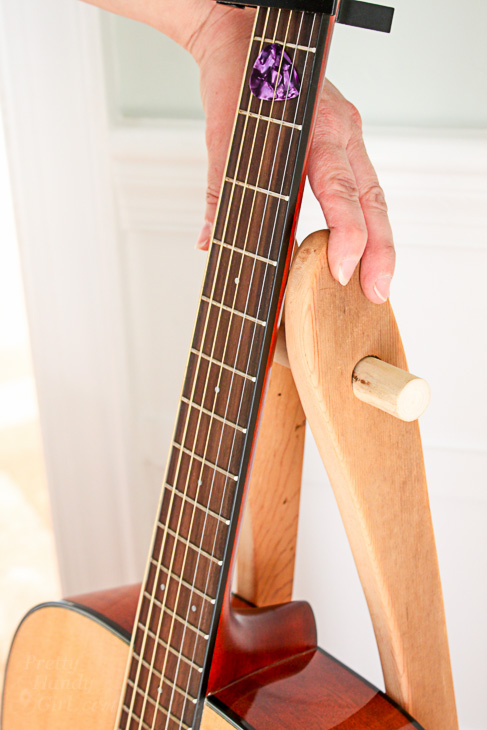
Feed the 3/4″ dowel rod through the holes. The fit should be snug, but you should still be able to press the two sides together to fold flat.
Cut a notch into one end of the 1″ x 1/4″ x 12″ piece. The notch should be slightly narrower than the head of your wood screw.
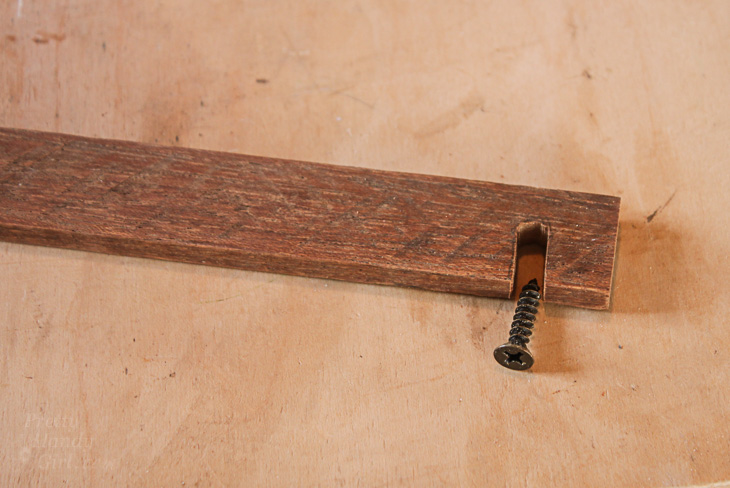
Drill a hole into the other end of the latch board. Feed one 1″ wood screw into the hole (make sure the screw can spin freely.)
Measure up 6 inches along the back side the stand. Pre-drill a hole using the 1/16″ bit. Secure the screw at this location using a screwdriver or philips head bit.
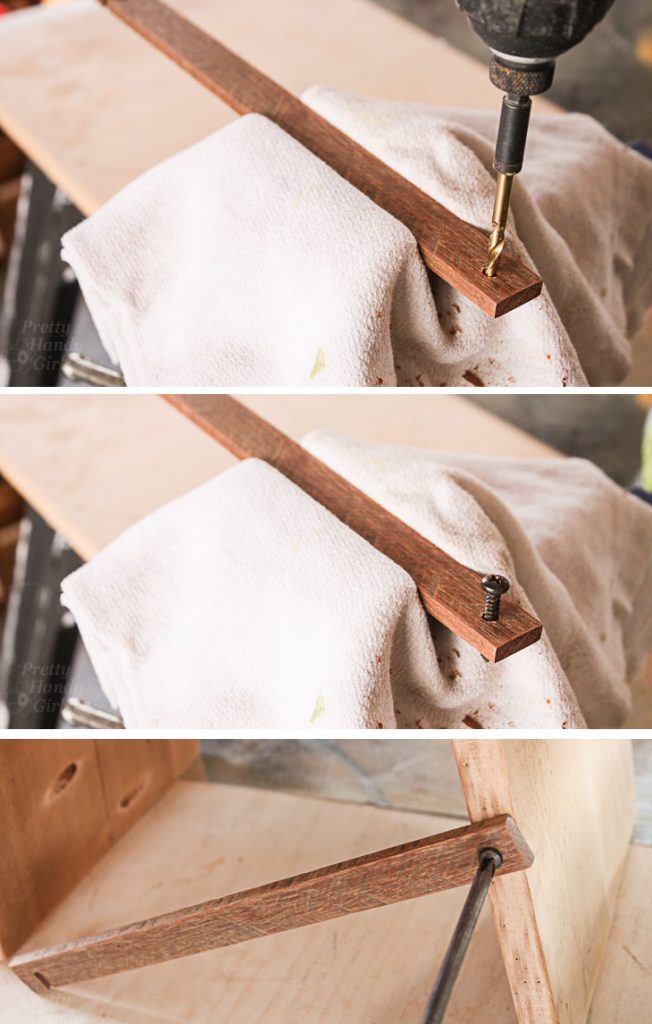
Measure up 6 inches on the other side.Hold the last screw inside the notch and pre-drill a hole in this location using the 1/16″ drill bit. Secure the screw using a screwdriver or philips head bit.
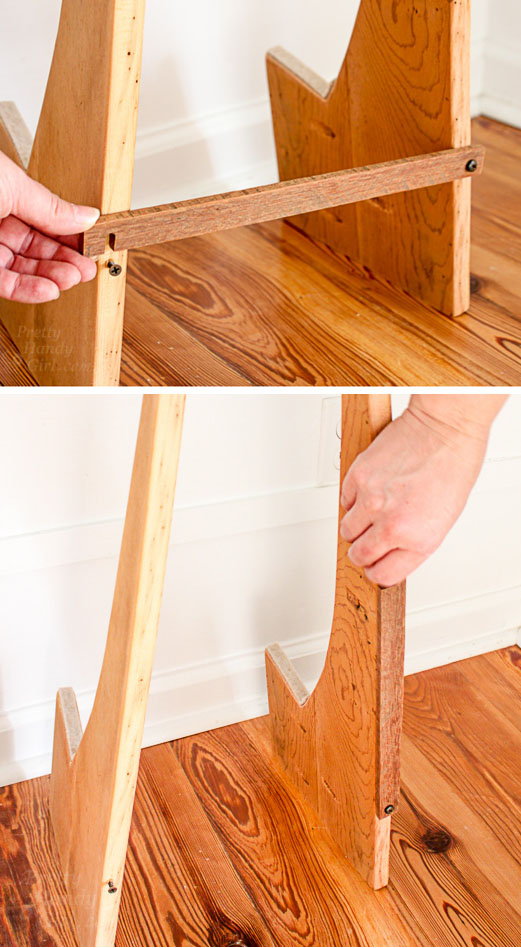
The latch should be easily lifted to fold the stand.
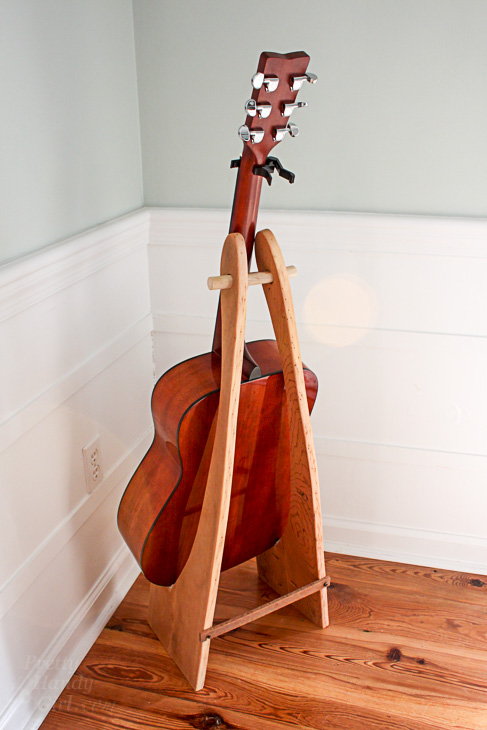
Add felt strip tape to the stand where the guitar rests.
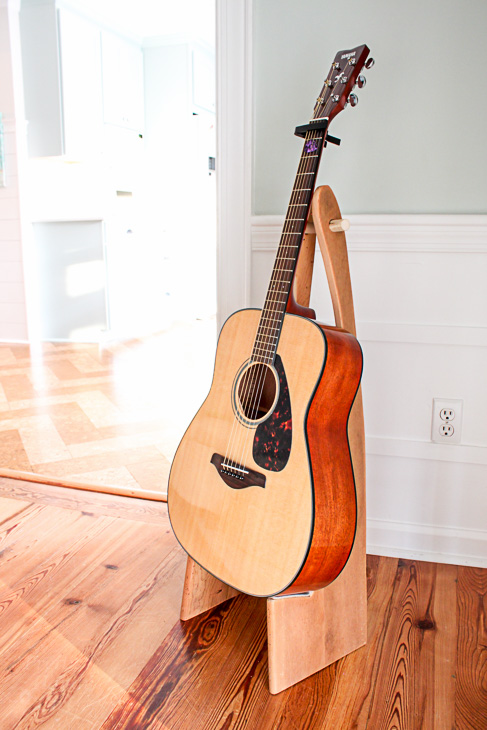
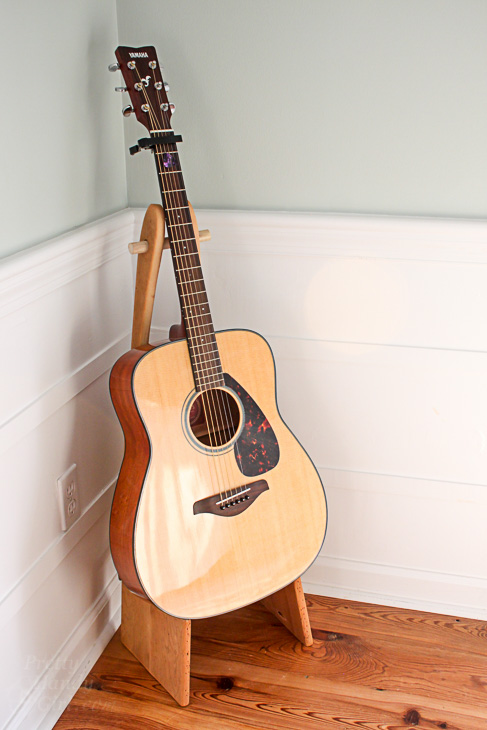
Set the guitar onto the stand and check for fit.
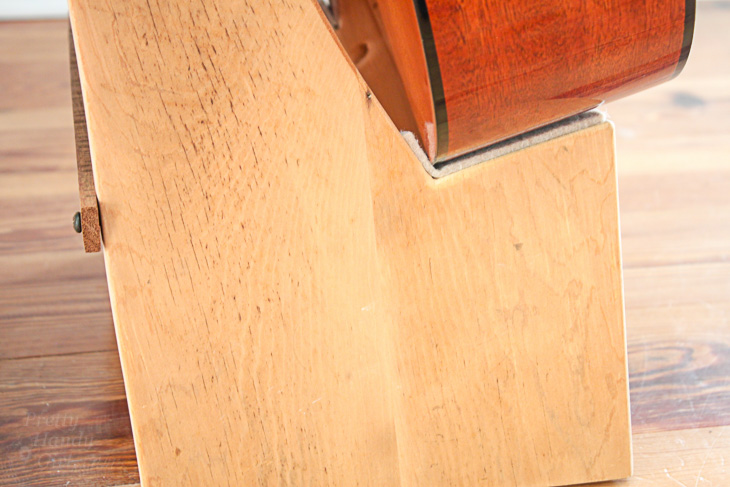
Check that the guitar only rests on the seat of the stand and the neck support. I had to make a few adjustments to the back of the stand where it was touching.
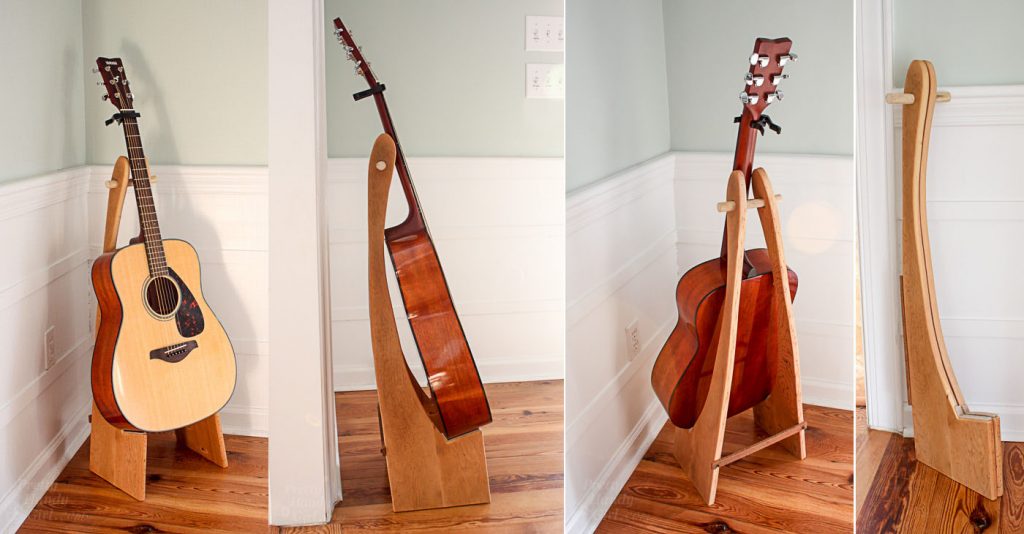
When you want to travel or put the stand away, it folds flat.
 Then it sets back up to hold your guitar.
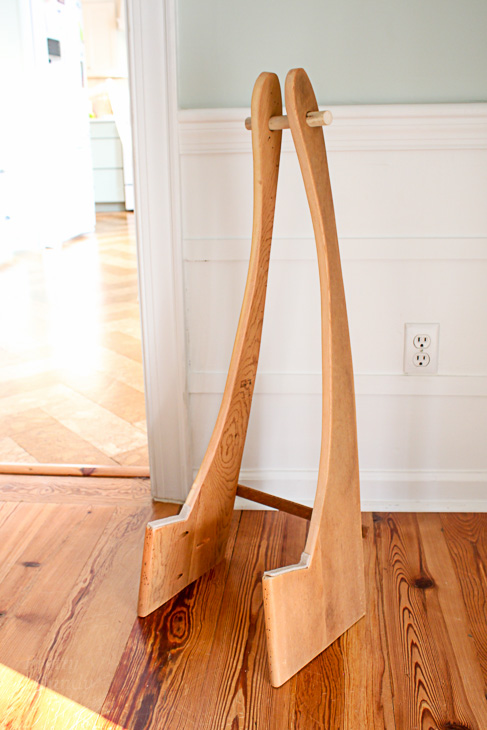
When unfolding the guitar stand. Adjust the sides onto the dowel rod until it lightly supports the guitar neck.
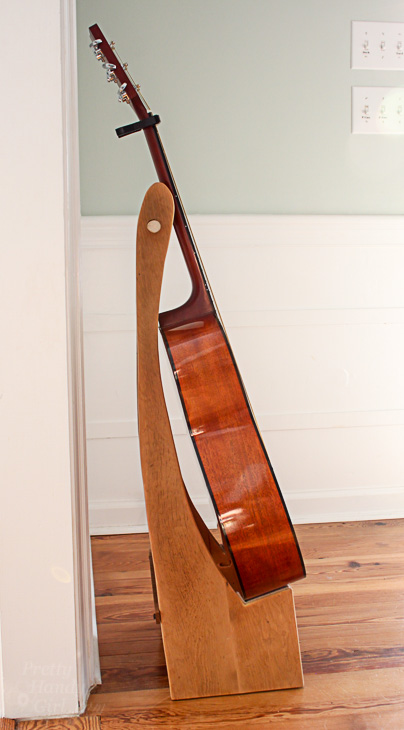
This wood guitar stand is super sleek. It’s also attractive anywhere you want to display your guitar.
Pretty Handsome Guy seems to really like his birthday present. I’ve noticed he’s been playing his guitar a lot more now that it sits out on display.
This is an easy DIY project. The only hardware is the two screws for the latch on the back. The rest is just two pieces of wood and a dowel rod and one strip of wood for the latch.
I assure you, this is a DIY project you can build!
Happy strumming!
![]()


That looks great. What is the name of the paint color on the top half of the walls? I was trying to find a page where you could see more of that room.
It’s in our living room and the color is Sea Salt: https://prettyhandygirl.com/paint-colors-home/
I am a Luther that has made quite a few string instruments and I like your simple stand better than many professionally aspiring business versions for a number of points.
It has more mass in the base to overcome any likelihood of the centre of gravity being compromised due to alack of low weight.. Its not ugly if the curves are executed without bumps; and it negates contact with the back of the instrument entirely bar the one point by the dowel, eliminating fussy contact inscribing to transfer the complex curve to the stand-guitar back contact area.Being a real pain of an individual, the only alteration I would make is to extend the footprint at the back base of the panels just as an extra insurance of stability when a fleeing hound followed by rampaging excited kids, so famous for their care in negotiating tight spaces carefully :/ (it really is the lowest form of witt isn’t it 🙂 just to make it so stable you could zap it with an 88 mm Reichs metale field gun, and though it would have a 4 inch hole right through it, it would most likely still be upright.
I know what your saying, kids are far more dangerous than a German field artillery piece, and I know your right, but its getting close and to my mind it would make your design the best of them all if well made with a slightly larger heel that extends its foot print back an inch or so on both sides also adding a touch more unsprung low COG weight, and that is well within reach of anyone prepared to take the necessary care and time to work with care and precision.
Thank you for sharing it with us.Me likey.
Hi! love the design! Do you have a template I can use? I’m just starting with woodwork and am a bit nervous
It’s linked right under the instructions
Thank you. I have been looking for the right plans for one I am building for my Son-in-law. He is a great musician and I am looking forward to seeing his reaction. I will post once I have completed my project. Thank you again for a wonderful Idea.
Nice work on this, Brittany! Hope to see you at the DEWALT event again this year and catch up!
Thanks Johnny. Sadly the event conflicts with plans we already had this summer ;-(.
Very creative! This looks way, way, way better that the one you can buy in music stores! Will definitely try this on my guitar and ukulele! 🙂
Wow love the creative style of this it truly does have some amazing features
wow. such a creative young lady. and the ability to put those wonderful ideas to work. I can get some ideas but have to rely on others to get into the mood to put them into reality.
your ability to supply us with directions we can understand is also quite a gift.]
thank you again
Wow, this is very nice. You truly do good work, and are very creative.