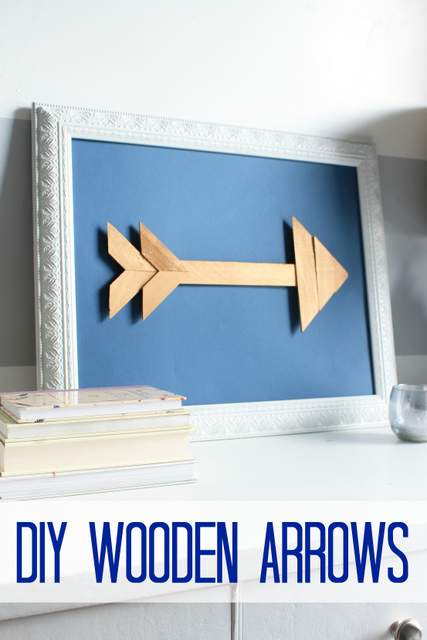
DIY Wooden Arrows
Although I don’t typically decorate for Valentine’s Day, this year I couldn’t resist a little craft project to celebrate the holiday. After all, it is about love and chocolate and who can resist love and chocolate? Instead of the usual craft creating something heart shaped, I decided to pay a little attention to Cupid and his arrows. I put together these easy DIY wooden arrows and now I’m going to show you how you can make one too!
This project is really easy, and totally customizable so you don’t have to be exact with your measurements. Feel free to be a little more free style. You can paint it {or not}, just about any color you’d like.
Materials
- Wooden Shims
- Wood Glue
- Miter Saw (or a hand saw and miter box)
- Pencil
- Ruler
- Spray paint, craft or wall paint or wood stain {optional if you will paint/stain it}
- Frame for framing {optional}
Instructions
1. First select some nice wood shims to use. Make a rough representation of what you’d like your arrow to look like.
This was a rough image of what I came up with. Two shims for the point and a few more for the tail. 
2. Start cutting your arrow and tail parts. You can cut the pieces like the arrow on the right or left, shown below. Either way you’ll need some pieces with a 45 degree angle. That’s where your miter saw comes in. See Brittany’s post about how to use a miter saw here. It’s one of the first power tools I learned to use and is very easy to handle and work with.
![]() 3. To cut the 45 degree angles, first set your saw at the 45 degree mark. Then cut one end of the wooden shim to 45 degrees.
3. To cut the 45 degree angles, first set your saw at the 45 degree mark. Then cut one end of the wooden shim to 45 degrees.

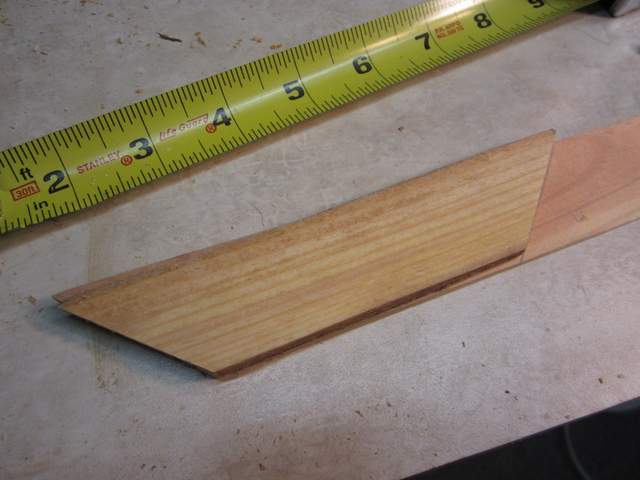
4. Using pencil, mark the length you want your point and tails to be. Cut one on your saw. To make a matching piece, use the first piece as a template. Cut and then flip the shim over and mark the opposite side. This way you don’t have to switch your saw.
For my arrow point, I cut it 6 inches at the widest part.
5. Then cut the smaller pieces for the tail. To get such small pieces safely into your saw, you can use a guide or other piece of wood to push the shim where you need it at the blade and clamp it down if needed. Be careful and don’t put your fingers anywhere near the blade!
6. To make the triangle shaped arrow head, use 3 pieces, increasing in size. Mark them and make your cuts. (You can see my mark with the pencil on the bottom one, whoops, flip it over to get the cut the right way!)
![]()
Here is what the arrow and tail end up looking like.
![]()
7. Use wood glue to secure your pieces together. Clamping them together isn’t necessary since they are lightweight, but you can rest a weight on top to hold the pieces together while drying.
8. Once dry, spray paint, paint or stain your arrow. No need to prime since it won’t get handled a lot. Craft or leftover wall paint works perfect for this sort of project too. Way to raid your craft supply stash right?
![]()
Display your arrows on a shelf, a table, or frame them to hang on the wall like I did. This is a project that is perfect for an empty frame you might have, and you don’t need glass for the front.
Simply put a piece of poster board in the frame and the backing. Tape the arrow in the middle. Easy peasy! A fun background can really change up the look art too. Maybe some wallpaper or fabric back there would be fun!

I really love this project! It was a great way to make use of all those wooden shims I have, and leftover paint, AND a leftover frame. The triple threat of DIY projects, if you will 🙂 Plus I can leave it up past Valentine’s Day and it will look cute on my wall. I might even make more.
![]()
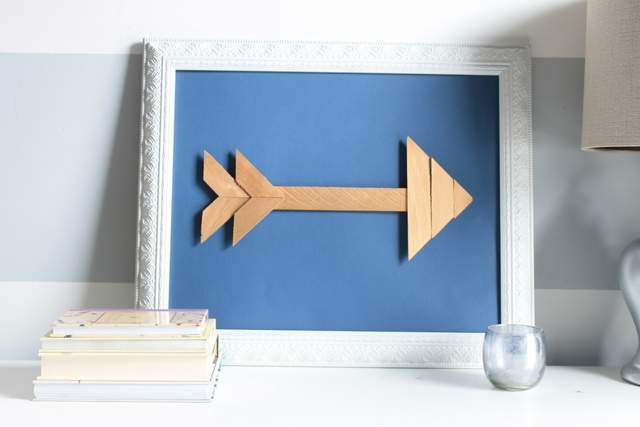
I think the gold painted arrow looks perfect against the blue in a white frame. Clearly all colors I’m addicted to these days!
Happy Love and Chocolate Day, or however you celebrate. Perhaps with a little DIY wooden arrow project for your walls?
Come visit me at Decor Adventures soon and find me on Facebook here!


Very cute! I can think of about a million uses for this.
Hi Colleen,
Glad you like them! I think I am going to make a bunch more myself 🙂
-Jessica