
DIY a GIANT Artist Canvas
Have you ever yearned to own a giant piece of artwork but the cost was prohibitive? Or you knew you could create some awesome abstract paintings, but buying large canvases would cost too much. Well, for those hesitant artists, I have this quick tutorial for building your own GIANT canvas!
Materials:
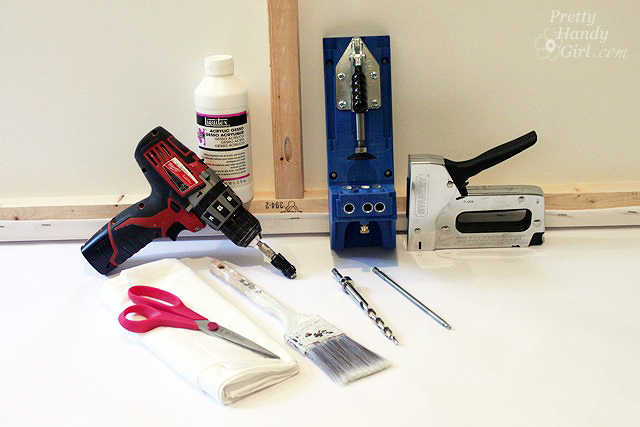
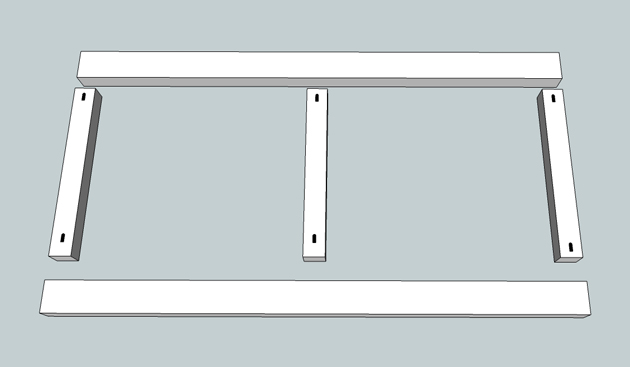
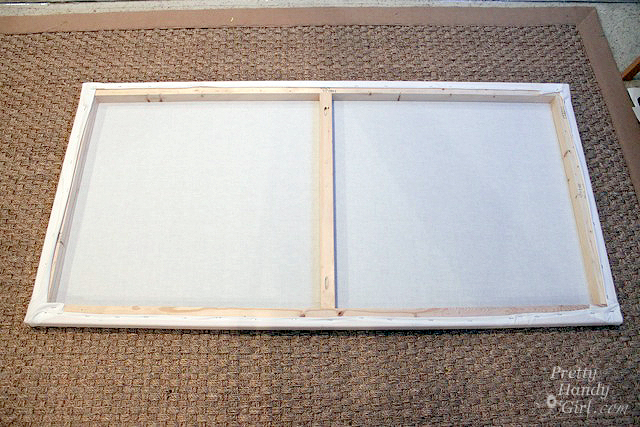
- 2×2″ boards for frame supports (two sides, top, bottom and center support)
- Kreg Jig and pocket hole screws
- Drill
- White fabric (canvas material would be best, but use what you have)
- Staple gun and staples
- Paint brush
- Gesso (if you don’t have gesso, primer would probably work fine)
Instructions:
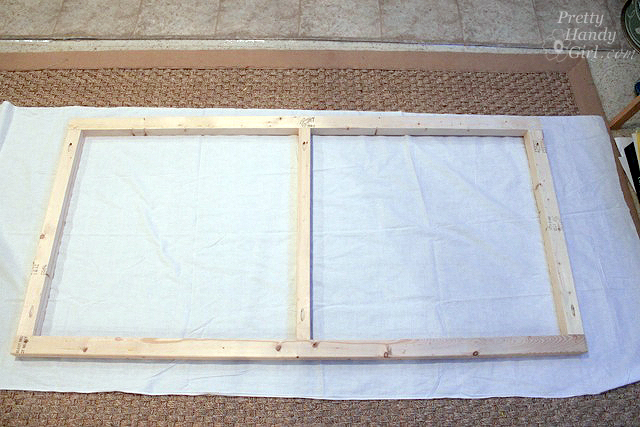
Cut your 2×2″ lumber down to size. Cut your top and bottom the full widths. Cut the two sides and the center support 3″ shorter to accommodate the height of the added top and bottom pieces. Note, if your canvas is portrait (instead of landscape), your support will be a center horizontal brace instead of vertical as shown.
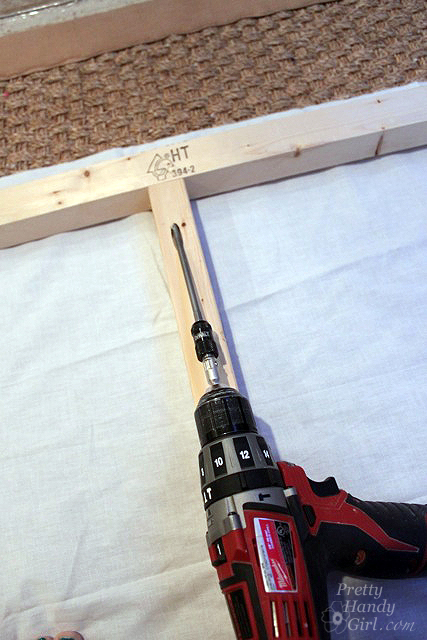
Use your kreg jig to drill pocket holes in the two ends of the sides and the support piece.
Use your drill and pocket hole screws to secure the pieces together.
Lay your fabric on a clean surface.
Wrap the sides up and secure with staples. If your fabric is thin, you may want to fold over the edges once or twice before stapling.
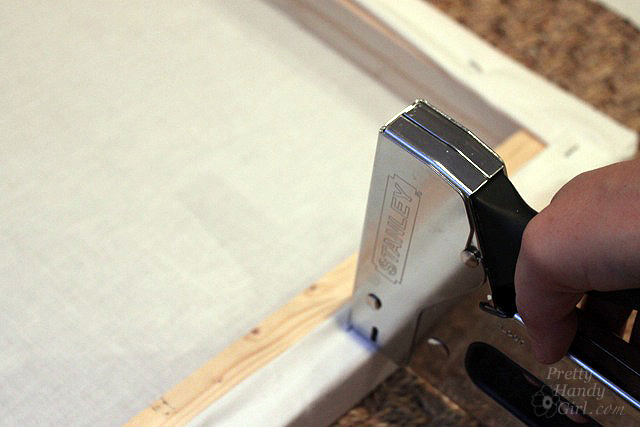
Continue stapling the top and bottom of the fabric until it is taut and completely stapled around the perimeter of your canvas frame.
Prime your canvas by painting gesso on the entire canvas. This will seal the holes in the fabric and prep it for painting.
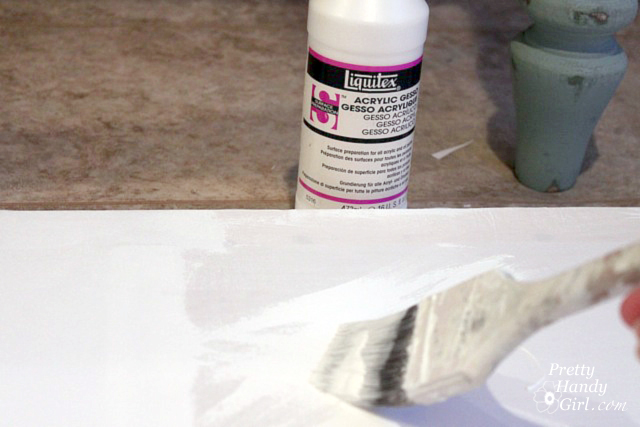
When the gesso is fully dried, you are ready to paint!
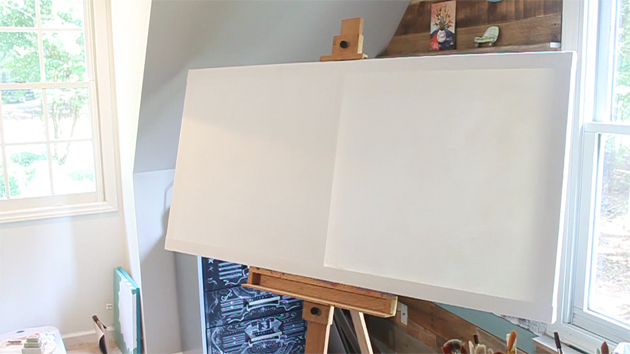
Stay tuned next week for a video tutorial on painting your own abstract ocean painting!

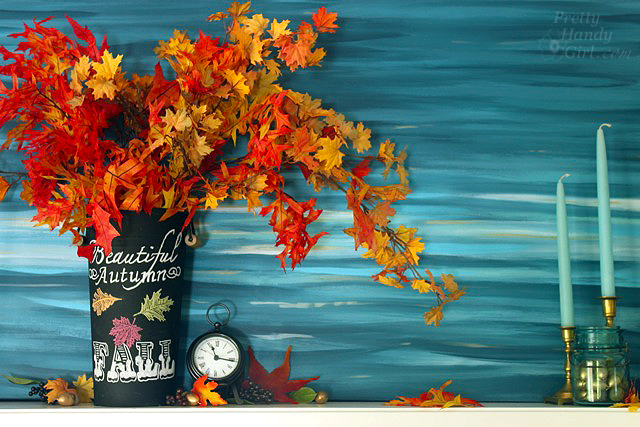
You may have noticed it on my Fall mantle.
Happy Fall Y’all!
 P.s. As if the planets were in alignment in the blogsphere, Kelly shared this great round up of 36 DIY art projects you can create on your new art canvas!


I’m thinking about making one of these as a Valentine’s day gift
Curious…do you need to go from side to side in drawing your canvas up to staple in order to bring the right amount of tension all the way around? Or did you simply work your way around the rectangle?
Susan,
Yes, I’m sorry I should have mentioned that in my tutorial. I usually staple North, South, East and West first, then work my way around on opposite sides as I go. Thanks for pointing that out.
In the future, you should cut a 45 degree angle into the wood that touches the back of the canvas so that only like half a millimeter is actually touching the fabric. The way you’ve done this, while totally fine for your purposes, will give you a visible line in your paint where the edge of the wood is all around the canvas. You can see it starting to show up on your painting even. The middle stretcher should also sit about half an inch back from the canvas.
Excellent tip Acacia! I will do that next time!