Rustic IKEA Hack Cabinet Transformation | Pretty Handy Girl

Rustic IKEA Hack Cabinet Transformation | Pretty Handy Girl

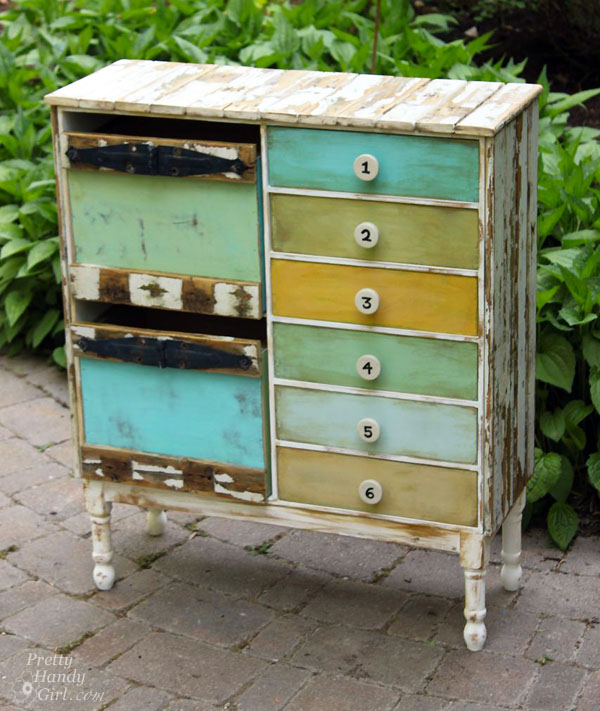
Rustic is not usually a word used to describe IKEA. IKEA is better know for their modern furniture, simple lines, meatballs and funny Swedish words. Today I’m going to change how you perceive IKEA furniture forever! Are you ready for this? Well, hang onto your hästes (Swedish for horses) because you’re going to see a transformation nothing short of amazing! You too can customize your plain jane furniture by adding legs and cladding the exterior with reclaimed picket fence wood.

This tale starts with a hunter green stained IKEA storage chest that I bought for our first apartment and stained myself (can you tell what decade it was? Hint: hunter green, honey pine, throw some burgundy in there and I’m sure you’ll be guessing no more.) It moved from room to room each time we settled into a new home. But, it never really fit in.

ikea chest in guest room

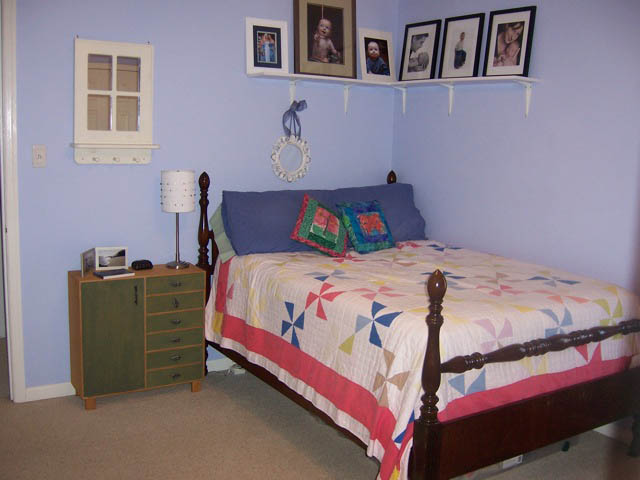
The cabinet was short and not very deep. Plus, it bore the mark of the popular 90’s hunter green. It was ugly. Why didn’t I get rid of it years ago? Maybe I was attached to it because it was the first piece of furniture I ever stained myself. And it brought back fond memories of calling the fire department because I smelled gas. Turns out you aren’t supposed to use an oil-based stain indoors, especially if you have a gas stove. Lesson learned.

Rustic IKEA Hack Cabinet Transformation | Pretty Handy Girl

Fast forward two decades and it’s still hanging around. The other day as I was lamented the fact that our foyer is too small to fit a cute dresser, I found myself looking at this sad little IKEA chest. I picked it up and put it in our foyer. The fit was perfect in the small space behind the front door! But, it was short and let’s not mention the hunter green again. Plus, it just wasn’t cute. And it doesn’t reflect my warm and weathered style. But, you know me, I wasn’t deterred.

I did some mental gymnastics and began to hatch a plan to create a marriage that would last longer than two decades.

Old picket fence pieces

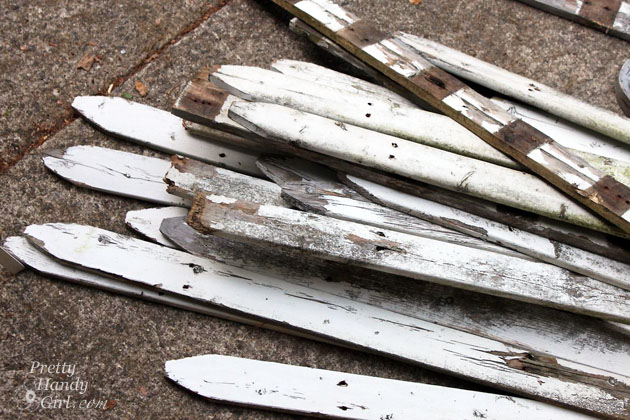
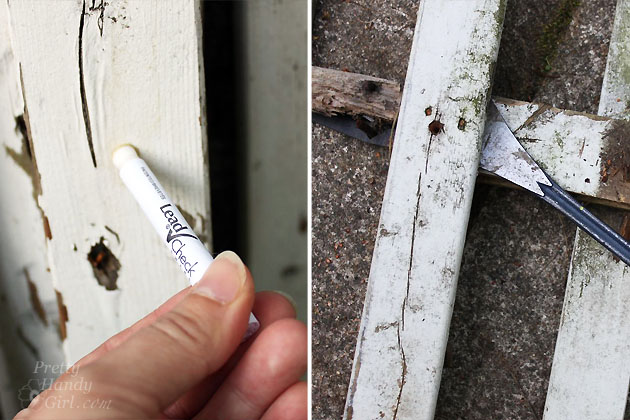
It began with some pieces of old picket fence that I found by a dumpster. They were perfectly chippy and rustic! Luckily the 3M Lead Check results were perfectly negative. I carefully took the fence apart and removed all the nails.

Lead check picket fence paint

Ready to see how I convinced the two polar opposites that they belonged together — rustic and modern — to create a match made in heaven? Let’s explore this couples’ counseling further:

Read more

I’ve been keeping a secret from y’all and I just can’t live with it anymore. I have a miracle stain remover recipe that has time and again proven to work on some of the most stubborn stains. Plus, find out why we don’t need dryer sheets anymore!

miracle stain remover

Miracle Stain Remover and a Healthier Alternative to Dryer Sheets

Recently, Pretty Handsome Guy came back from a business trip with a stained button-down shirt. It had wing sauce on it AND it had been allowed to settle for a few days AND he hadn’t pre-soaked it or used any stain remover. (Have I not taught him anything?! Sigh.) I thought for sure the shirt was a goner. But, I decided to put my miracle stain remover recipe to the test. Low and behold after 24 hours of soaking in the concoction, the stain was magically gone! No scrubbing, it was simply gone. Can I apply for a magic wand now?

I can’t lay claim to the recipe. I found it on our local “Mommy” message board back when I was a new mom. But, this recipe has worked on more stains than I can count.


I mixed up a batch today to try on one of my son’s shirts that got blueberry jelly on it. My mom tried to wash it to get the stain out, but it was still there after laundering. Normally once a stain goes through the dryer it is set in. But, that didn’t deter the me from trying my Miracle Stain Remover. Sit back and learn young Jedis (we watched Star Wars last week, so it is on my brain.)

Miracle Stain Remover…

Ingredients:

(I’ve included affiliate links for your convenience. I earn a small percentage from a purchase using these links. There is no additional cost to you. You can read more about affiliate links here.)

Fill your basin with warm water then add the Oxi-clean, Clorox 2, and powdered Dish Detergent. Give it a swirl and mix until the powders dissolve and bubbles form.

Place the stained garment into the mixture, being sure the stain is submerged. After two hours you can take a peek! My stain was gone.

For tougher stains, let it soak overnight. Remove the clothing to behold the miracle! Normally I will throw the garment into the wash, but you could simply rinse and dry it.

And, this formula is also safe for colors as well!

Laundry Detergent…

In the spirit of sharing, I also have this recipe for Making Your Own Laundry Detergent for only $1.25 per year! I mean, have you seen the price of laundry detergent lately?! 200 oz. for “gulp” $35! Whereas the recipe I made yielded 250 oz. for….are you ready for this…$0.61! This is a 97% saving on detergent by making your own.

And the best news is that it is safe for HE washers. You only need 1/4 cup per load. Click Here to Get the Recipe for Making Your Own Laundry Detergent for $1.25 per year!

Drying clothes…

And since I’m talking laundry today, this post wouldn’t be complete without mentioning my secret weapon for drying clothes.

I use two of them! They may look like medieval torture devices or rabid animals, but these little hedgehog dryer balls have completely kicked our fabric softener sheets to the curb! I haven’t used dryer sheets in over 9 years now! At first I was concerned about static (the bane of my hair’s existence), but then a friend told me that you can eliminate static by not letting your clothes over dry. Simply shut off the dryer when your clothes are about 95% dry. Don’t let the dryer run and run and run until the clothes are piping hot and there isn’t a spot of dampness on them. Instead, let the moisture sensor (if you have one) do its job and it should shut off right before the clothes are dry. The waistbands in jeans or sweatpants may feel slightly damp, but everything else feels dry. And most importantly, pull out fleece, polyester, or synthetic clothes about halfway through the cycle.

The dryer balls (you should use two) work together to punch, separate, fluff, and dry your clothes. They also help keep wrinkles to a minimum, but I’m not afraid of a few wrinkles (see my no iron solution to wrinkles post.) The Dryer Balls cost less than $10, but the cost savings of not using dryer sheets is definitely worth it. Plus, you don’t have to stress about the chemicals that are in dryer sheets. These little wonder balls (I can’t believe I just typed that) last for a long time, but it’s good to have three in case one hedgehog loses a nose (it can happen.) I have been using mine for over nine years. They start to get darker on the nubs from dye in your clothing, but it doesn’t transfer and it doesn’t hurt their effectiveness.

I hope you found these laundry tips helpful. Please share with a friend!
miracle stain remover