How to Install a Ceiling Fan | Pretty Handy Girl

How to Install a Ceiling Fan | Pretty Handy Girl

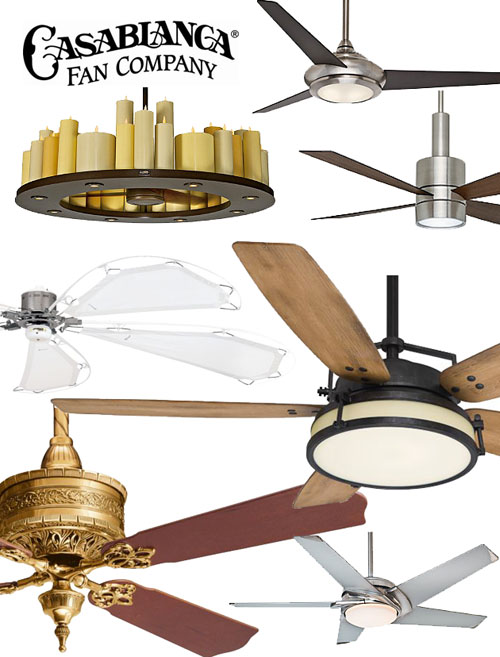
I’ve installed probably a dozen ceiling fans in my life. Pretty Handsome Guy was remarking to me last night, “Wait, you mean you’ve never written a tutorial on how to install a ceiling fan on the blog?” It’s true, most of the installs were pre-blogging days. For this reason, I was truly excited when Casablanca contacted me and asked if I wanted one of their new ceiling fans. I knew it was a great opportunity to put together a tutorial for you so you could see that installing a ceiling fan is not a difficult DIY project! Plus, we had Casablanca fans in our previous house and they are well made and will last a long time. Therefore, I have no hesitation recommending Casablanca to you!

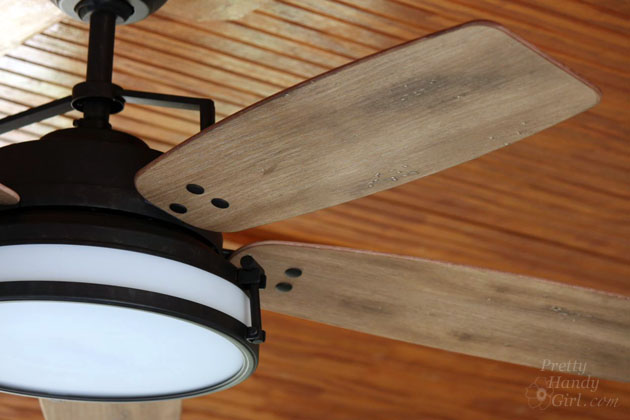
Okay, and I also wanted to change your mind about ceiling fans and design aesthetics. I know that some designers break out in hives when a client wants a ceiling fan. And who can blame them when the stereotypical ceiling fan looks like this:

How to Install a Ceiling Fan | Pretty Handy Girl

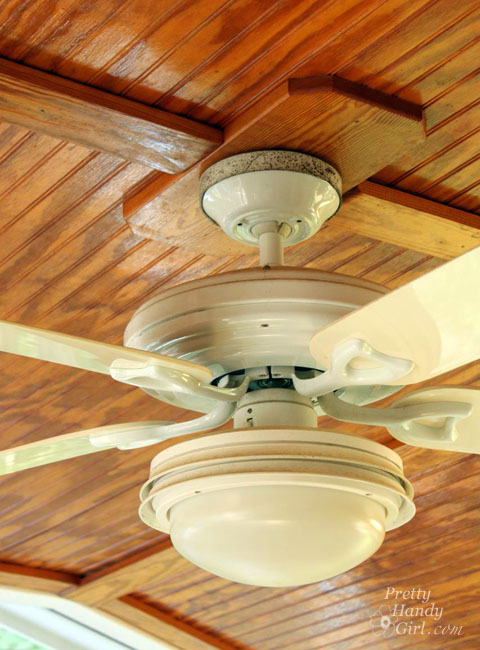
Oh yes, she’s a beauty. And she’s all mine, complete with moldy canopy and boobilicious globe. In all seriousness, that fan was U-G-L-Y. Plus, it was a bit too small for our porch. (You can figure out what size ceiling fan you need for your space in the FAQ section on the Casablanca site.) You can now understand why I was actually delighted to hang out on top of an 8 foot ladder in 95 degree heat to install a new ceiling fan. Yes, I was excited, especially because Casablanca has so many beautiful options for stylish fans. And I know, they have ceiling fans that will surely have the designers changing their tune.

Casablanca Fan Collection | Pretty Handy Girl

Safety, Prep, and Hints Before You Install a Ceiling Fan:

Before I give you the full tutorial for installing a ceiling fan, we need to talk about prep work and safety. First, do not attempt any electrical projects until you have turned off the power to the fixture you are working on. I like to turn on the fan and light (they are often on two different power lines) and then shut off the power. This gives me the visual assurance that the power is indeed off.

Next, if you are replacing a light fixture with a ceiling fan, you MUST make sure that the junction box is attached to a support. This means the box is screwed into a ceiling joist, brace, or the junction box is attached to a Ceiling Fan Brace. Do not attach a ceiling fan to a box that is not able to hold the weight of the fan (and all the vibration it will produce over the years.) If you don’t have proper bracing for your fan—have no fear—look into purchasing a Ceiling Fan Brace that can be installed from inside the room (no need to crawl into the attic.)

Finally, you need to have a Sturdy A-Frame Step Ladder tall enough to reach 1-2 feet below the fan during installation. And having an assistant who can hand you the motor when it’s time to hang the fan is definitely a bonus.

How to Install a Ceiling Fan | Pretty Handy Girl

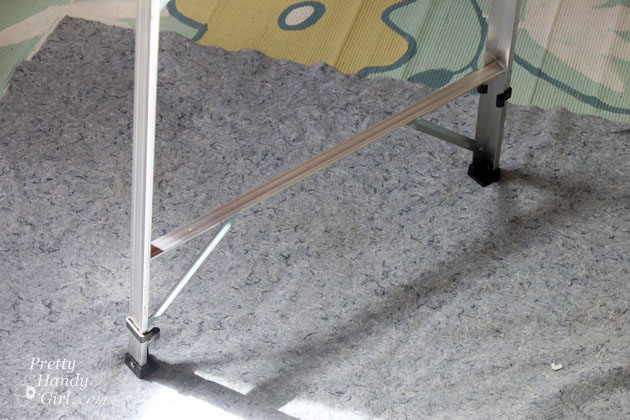
One handy tip: You will most likely drop a screw during the installation. If you are working on a porch with slats, lay down a blanket under the ladder to catch them. This also helps aid in a quick clean up from dust and dropped dry wall debris.

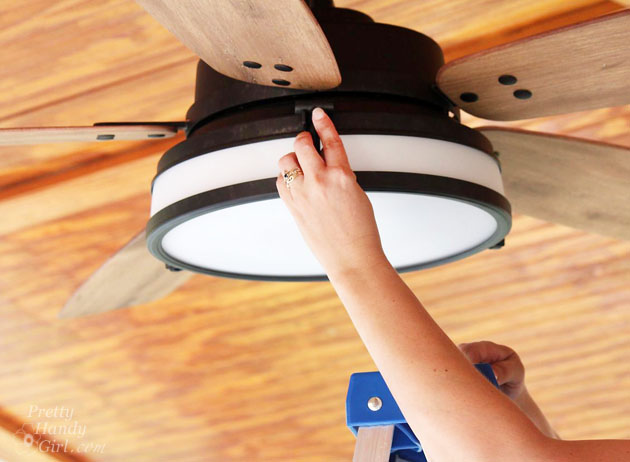
Ready to get your cool on by installing a beautiful new ceiling fan? Let’s take a spin shall we: Read more

DIY Industrial Charging Station

Have you ever been in need of an electrical outlet only to find that they’re hidden by furniture or in a hard to reach place?  How about that elusive time of day when you’re cell phone’s down to 1% and you have a handful of charging cables, but nothing to plug it into?  This seems to be a regular occurrence at The DIY Village, so we’ve finally solved these problems!  We created a DIY industrial USB charging station that has an accessible outlet; 2 usb ports capable of charging all of your devices; and even has a built-in accent light!  We think it would be the perfect addition to an office, your teenagers room, or even a college dorm room!  

DIY Industrial USB Charging Station Materials List:

(Contains some affiliate links)

DIY Industrial USB Charging Station Tool List

DIY Industrial USB Charging Station Instructions:

In order to make room for connectors and fittings that you’ll be using to build your Industrial Charging Station, you’ll need to remove (2) 1/2-inch and (1) 3/4-inch knockouts from the handy box.  (Set the handy box aside)

Handy-Box-Knockouts

The hardwired emergency light has screw-out plugs that give you installation options.

Emergency-Light-Base

Remove one of the side plugs from the light base and re-route the wiring through the opening. Read more

DIY Button Pendant Light | Pretty Handy Girl

DIY Button Pendant Light |Pretty Handy Girl

While I was house touring on Tybee Island and having  fun antique and salvage shopping in Savannah, I spied some bare lamp shade frame hanging lights. They immediately inspired me to design a DIY Button Pendant Light for over my bedside table in our master bedroom. Part of the desire was born out of the necessity to have more space on my bedside because the table actually doubles as my makeup vanity.

DIY Button Pendant Light | Pretty Handy Girl

Making a Button Pendant Light is an easy DIY project, but you’ll need some patience while threading the buttons. I’ll also show you how to wire a lamp socket and lamp plug! Ready to get started?

(I’ve included affiliate links for your convenience. I earn a small percentage from a purchase using these links. There is no additional cost to you. You can read more about affiliate links here.)

Materials:

DIY Button Pendant Light |Pretty Handy Girl

Optional:

Instructions: Read more

If you have been following my blog, you may remember this light fixture that I rescued bought at our local Habitat for Humanity ReStore. Read below for a Pottery Barn Inspired Lantern.

Originally I thought about using it as a light in our foyer, but that plan changed after I found myself drooling over these lanterns at Pottery Barn and Restoration Hardware. I love going into PB & RH, but rarely have the nerve to plunk down the money they want to steal
claim from my wallet.

Instead, I decided to transform my dated light fixture from the ReStore into a stylish lantern.

This is a relatively easy project that anyone can do! Yes, that means you.

Begin by removing the glass from the light fixture. (A note of caution: You should wear gloves. In other words, do as I say, not as I do!)

My light fixture had little metal prongs that easily bent to release the glass.

Next take apart your light fixture. Just start trying to unscrew parts. If they resist, grab your pliers.

I decided to save the wires, ceiling canopy and other wiring parts. Who knows, perhaps I will want to use it as our foyer light some day.

Okay, okay, also because I am a bit of a pack rat. I’m admitting one of my faults here: not being able to throw anything away. Don’t get me wrong, the producers of Hoarders are not knocking down my door, but I would prefer to Craig’s List, FreeCycle, reuse, or recycle anything I can’t use.

When all the parts were separated from the lamp, I needed to break the chain to the top of the light fixture. Here is an easy way to open up links in a chain that is not soldered together.

Place two screwdrivers inside the link you want to break. Lean one to the left and one to the right and apply pressure in opposite directions. The link should separate enough for you to remove the chain.

While the lantern is in pieces, you can rough up all the metal surfaces with sand paper. I actually did this to all the parts so I could paint them and potentially use them in the future. Wipe off the metal with a damp rag to remove any particles.

Now, you can re-assemble your light fixture (using only the parts you need to make your decorative lantern.)

I used brown Rustoleum spray primer. I like using a darker primer when my top coat color will be dark.

Be sure to rotate the parts and the lantern so you get all the sides coated with primer.

Now the most gratifying step, spray your lantern with your finished color. I coated the lantern with 3 light coats of a satin black spray paint to allow the lantern to look less new and more like old rustic iron.

And here is my new (old) Pottery Barn inspired lantern! $5 for the lantern + $6 for spray paint  = $11

What do you think of that, Mr. Pottery Barn merchandiser who wants to charge me $59 for the same size lantern?

Update: I received several emails and comments on this lantern and a few of you have been inspired to create your own! If you post it in your blog, I’d love to share your results.

Amanda at The Hand Me Down House, shows how she painted hers. She made the glass look like colored glass with Modge Podge and food coloring! Yes, you read that right. See her tutorial here.

If you’ve been following the Pretty Handy Girl blog, you will recognize this copper wall sconce from the reading nook post. It was a $5 find at the Habitat for Humanity ReStore!

The sconce was a wall mount, but plug in kind. The lamp was in excellent shape, but it needed a longer cord, I wanted to ditch the brown cord, and add a switch on the cord.

I have to tell you, re-wiring a lamp is one of the easiest electrical DIY projects to tackle. Especially on this sconce since it doesn’t have a long pole that the wires have to feed through. Hopefully, after reading this post, I can convince you to go ahead and fix that lamp. Or put a rolling switch on a light fixture you currently use.

Required Safety Tip: BEFORE WORKING ON ANY ELECTRICAL DEVICE, BE SURE IT IS UNPLUGGED OR YOU HAVE TURNED OFF THE POWER TO THE LIGHT FIXTURE OR OUTLET. 

Okay, now that we have that out of the way, don’t be scared, you can do this!

At this point, I actually looked inside the lamp. What the heck is that? Where are the threads?

Oh drat, someone broke a bulb and left the base screwed inside the fixture. I have never tried the “potato” solution, but this other method works great for me every time!

The Pretty Handy Girl’s Guide to Removing a Broken Light Bulb

1. Unplug your lamp :-).
2. You need two needle-nosed pliers to grip the metal base of the bulb at the 9 o’clock and 3 o’clock positions.

Gently twist the base to the left or counter-clockwise. Always remember: Lefty Loosie, Righty Tighty!

3. Keep twisting until your base is free.

Voila, it is fixed!

Now, time to remove that ugly brown wire and then add a switch to the cord.

Rewiring a Light Fixture

Tools needed:
New lamp cord
Utility Knife
Wire strippers/cutters

1. Unscrew the wire nuts. And untwist the wires.


2. Firmly pull the cord out of the hole. If you have a lamp with a long pole body, you will want to tape the new cord to the old so that the new cord is fished through the lamp as you are removing the older one.

3. Then feed the new wire back through the hole.

4. At this point (if you need to), you can trim your lamp cord to size using wire cutters. Then you will need to separate the cords slightly using your utility knife to cut gently on the center seam. Then strip off about 3/4″ of the white insulation using your wire strippers to expose your wires.

Wire strippers are pretty easy to use. Choose the hole that will just lightly cut the insulation, but not the wires inside. You can gently clamp down and watch as the insulation is scored. then you may need to rotate the cord 90 degrees and repeat. With the wire strippers firmly closed around the cord, pull the strippers toward the end of your cord. If the insulation is cut all the way through,it should slide right off.

5. Look carefully at your lamp cord. There should be two wires enclosed in the protective tubing. One side will either have writing on it or will have ridges that run the length of the cord. This “marked or identified” side is the neutral side. It will connect to the white wires in your lamp.

6. Twist the neutral side with the white wire in your light fixture. Twist the smooth unmarked side with the black (or hot) wire on your lamp.

* For some odd reason, my light fixture also had a bare wire (can also be green) or ground wire. I suspect that my fixture used to be a hard wired kind, but someone converted it to a plug in. If this happens to you, see my note at the end of this section.

7. Then twist wire nuts onto your wire connections being sure that you cannot see any exposed wires. If you do, cut your bare wires a little shorter and re-twist them together. Then for extra security try to fold the two wires so they are away from each other.

Hey, congratulations! You just rewired a light fixture!

If you want to install a switch on your cord, stay with me…If not, go treat yourself to a cappuccino! You deserve the reward.

* Note about bare or green wire: If you have a green or bare wire (ground) on your lamp, it is advisable to ground the wire by connecting it to something metal that is separate from the lamp. I chose to wrap the bare wire around the screws I used to mount it on the wall.

Installing a switch onto your lamp cord

Tools needed:
Switch
Instructions (if they came with the switch follow them instead of mine.)
Utility Knife

Wire strippers/cutters
Screwdriver

Required Safety Tip: BEFORE WORKING ON ANY ELECTRICAL DEVICE, BE SURE IT IS UNPLUGGED OR YOU HAVE TURNED OFF THE POWER TO THE LIGHT FIXTURE OR OUTLET. 


Sorry, just needed to remind you. No need to lose any readers due to electrocution.

1. Determine where you want your switch located on your cord.
2. Using your utility knife, cut a 1 1/2″ slit between the two cords at the location the switch will be.

3. Look carefully at the wires. You will be cutting the smooth or unmarked wire in the center of your split area. This is your hot wire.

4. Open your switch with your screwdriver. Be careful not to lose the screw or the nut on the reverse side.

5. Now lay your cord inside the switch as shown. If the cut side doesn’t fit neatly on the divided side of the switch, you can cut one of the wires a little shorter.

6. Place the cover back on the switch and screw it back on tightly. You will need to make sure the cover and back fit snuggly together with no gaps. It might help to squeeze the covers together firmly before inserting the screw. This is important, because there are little metal prongs that need to pierce into the wire insulation and touch the bare wire in order for the switch to work.

7. Go ahead and plug in your cord and test the lamp. Roll the switch, if it doesn’t work you will need to UNPLUG THE CORD and press the switch together firmer and/or tighten your screw.

DONE! You just installed a switch on your lamp cord.  Congrats to you!


For my sconce in the closet turned reading nook, I used cable tacks to secure the cord around the trim of the closet. Then snaked the cords as close to the trim and baseboards as possible. This keeps the cords out of the way and makes it look cleaner.

If you need more pictures or information on wiring a lamp or adding a switch. Check out Family Handyman’s website.

Geez, this has got to be one of the least visually appealing posts I’ve written yet. Are you still there, or are you asleep?

Well, if you stuck with me through this post, I have some eye candy for you.
A view from my flower bed this morning:
Lonely rose amongst the black-eyed susans
Abundant flowers in the flower bed, speaking of bed…
…Come sit with me on this bed turned bench and have some lemonade in the shade.