If the birds are out in your area, chances are they are looking for a place to nest. Try your hand at doodle-painting a cute little birdhouse to help them start a family. Who knows, they may be lurking in your yard like a depressed House Hunter’s couple who can’t get past the color on your neighbor’s birdhouse. Check out this cute Doodle-Painted Birdhouse.
Doodle-Painted Birdhouse
Have you lost your mind Brittany? This looks like a Christmas tutorial in May? No, I haven’t lost my mind and yes, this is May (for those of us who have lost track of the days. But, this is the perfect project for anyone who has a simple birdhouse that needs sprucing up for those discerning House Hunter birds.
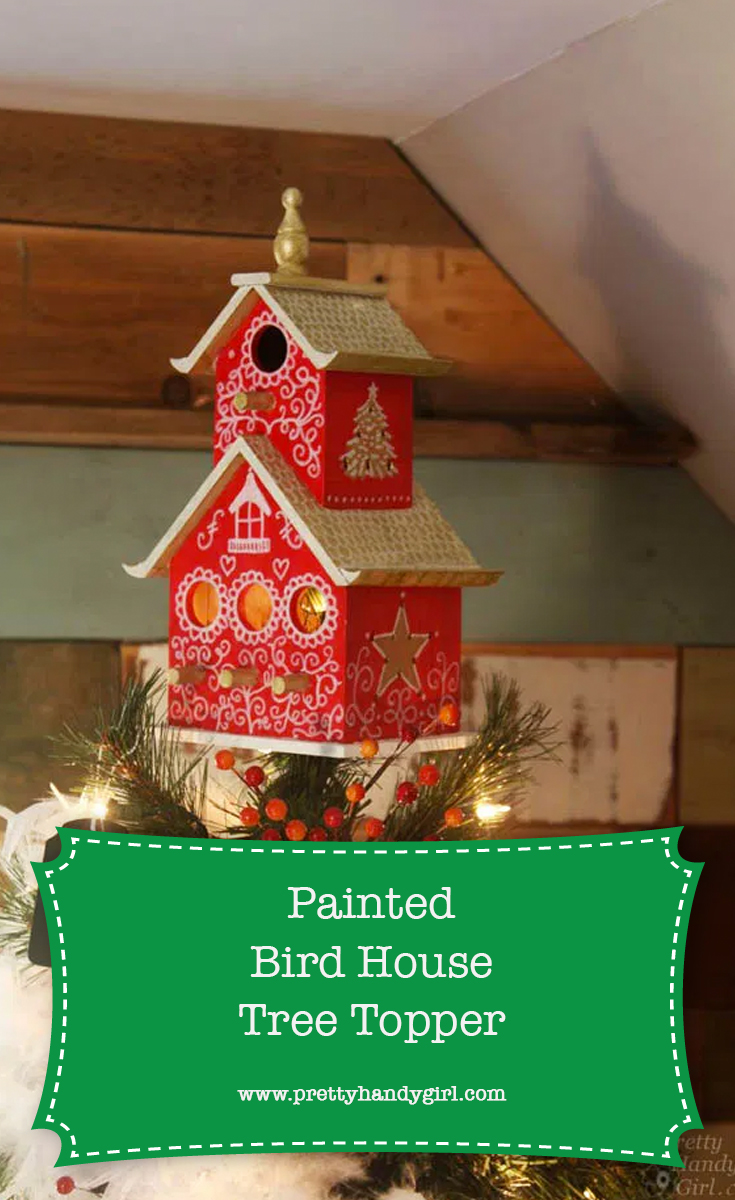
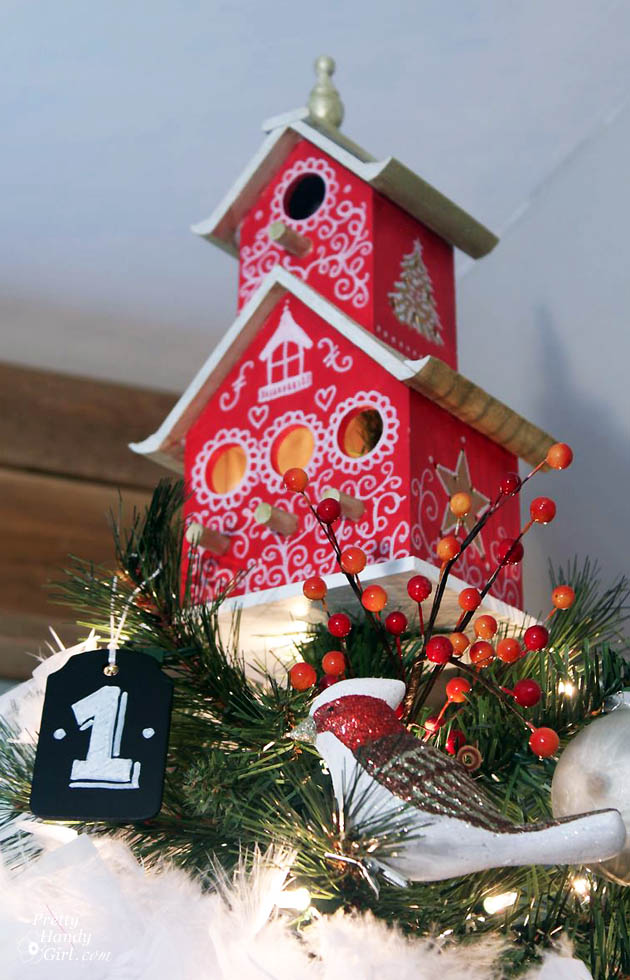
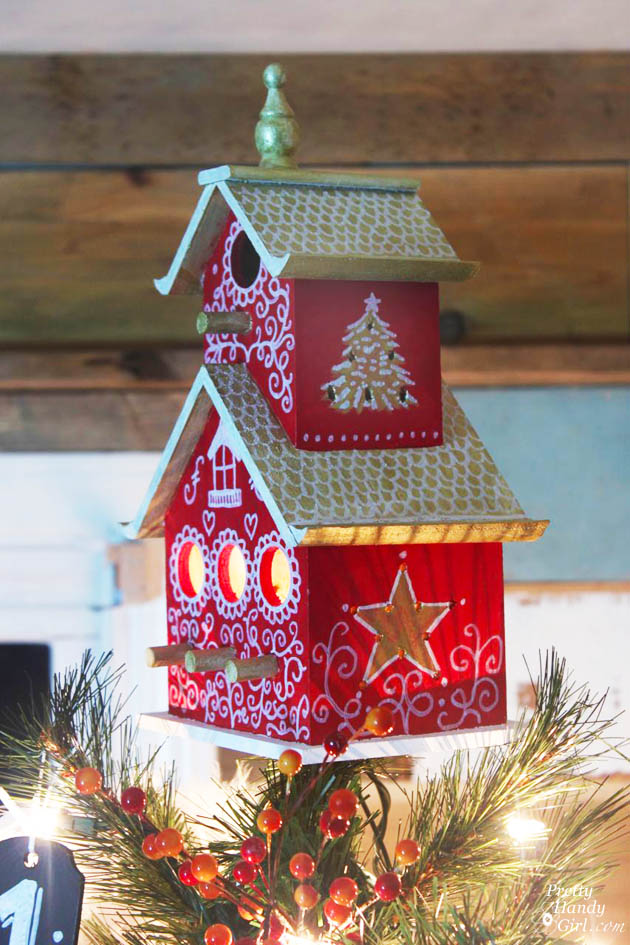
Although I created this little painted birdhouse to function as a tree topper, you can forgo drilling a hole in the bottom and add a hook to have a fully functional birdhouse for those bird watchers in your home.
This is a project you can do for fun or meditation. And kids can also get in the fun. All you need is some acrylic paint and a paint pen and you can have a blast making this Doodle-Painted Birdhouse for yourself or as a gift.
Materials:
(I’ve included affiliate links for your convenience. I earn a small percentage from a purchase using these links. There is no additional cost to you. You can read more about affiliate links here.)
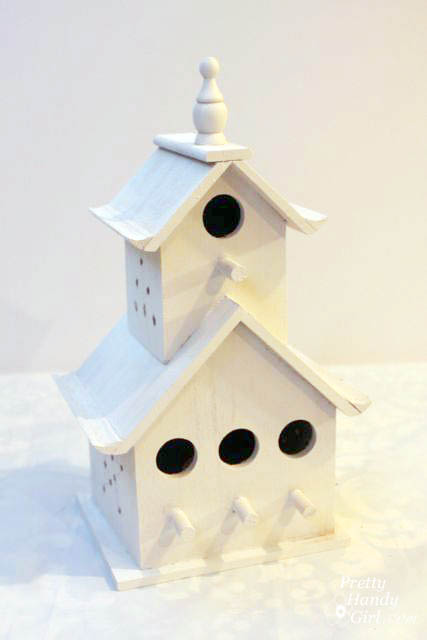
- Unpainted birdhouse
- Spray primer
- Pencil
- Drill
- 5/8 inch drill bit (for tree topper only)
- 1/8″ drill bit
- Plastic dropcloth (I used disposable tablecloths because they are cheap and smaller in size)
- Red craft paint
- Gold craft paint
- White paint pen
- Paintbrushes
Optional:
- Screw eye hook for hanging,
- Outdoor polyurethane sealant
Instructions:
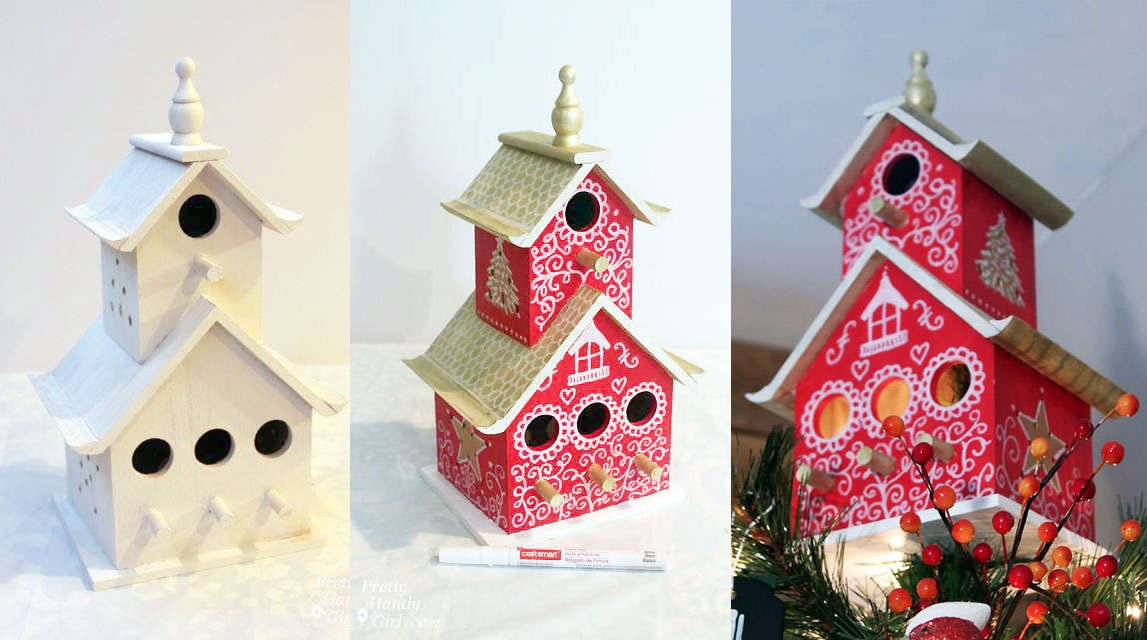
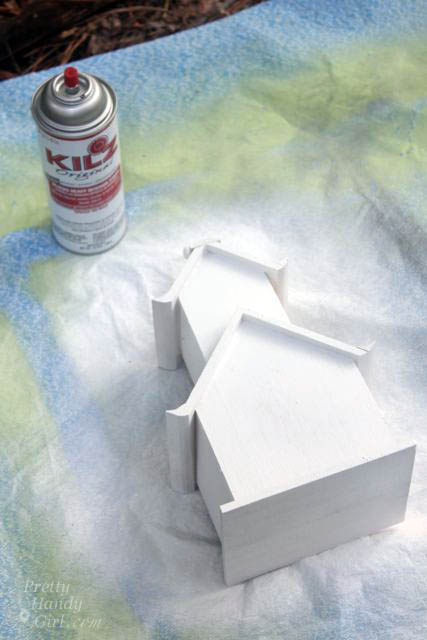
Spray prime the unfinished birdhouse and allow it to dry thoroughly.
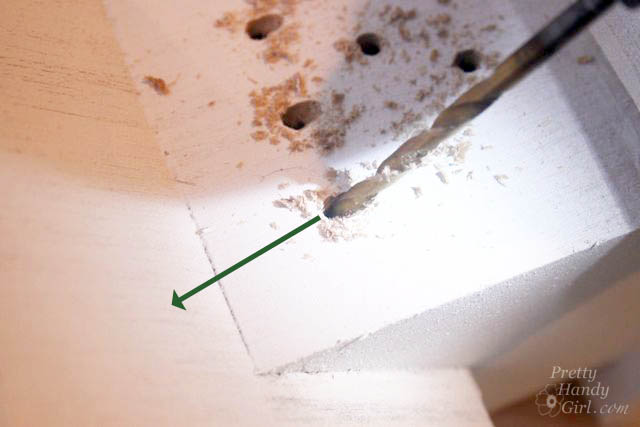
Sketch a star shape on the sides of the birdhouse. Mark the location where you wish to drill holes. (If you are using this for an outdoor birdhouse, it’s nice to have a little ventilation for the house. But, feel free to skip this step if you wish.)

If your birdhouse is a double-decker, you will probably want to drill holes through the sides at angle and down into the first floor roof. This will allow some of the light to come through the top story holes as well.
For Tree Topper Only:
Mark the center location on the bottom and drill a 5/8″ hole through the bottom of the birdhouse. (Skip this step if you want a functional birdhouse.)

Dump any wood shavings out of the birdhouse. Set up the birdhouse on the drop cloth for painting.
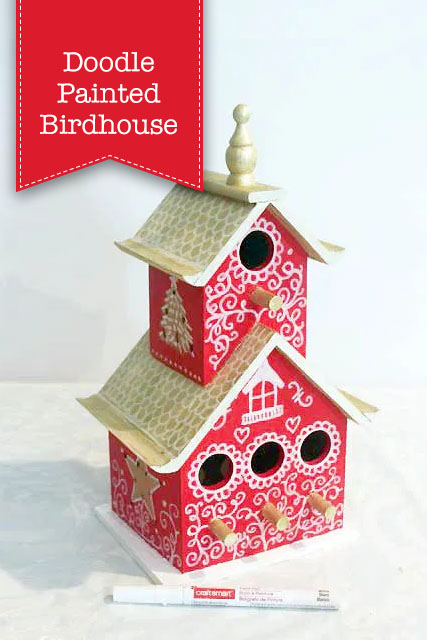
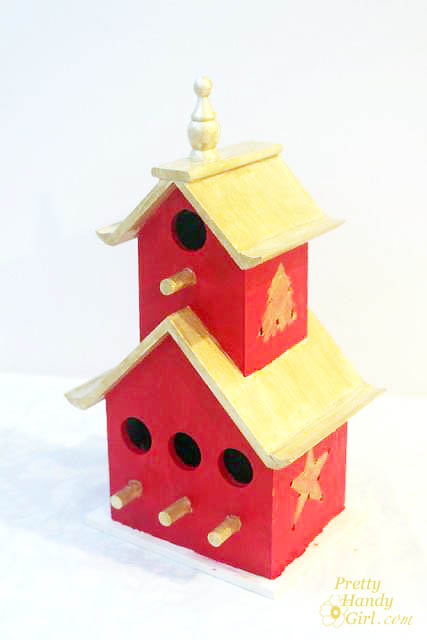
Paint the sides of the birdhouse red (or any color you like.)
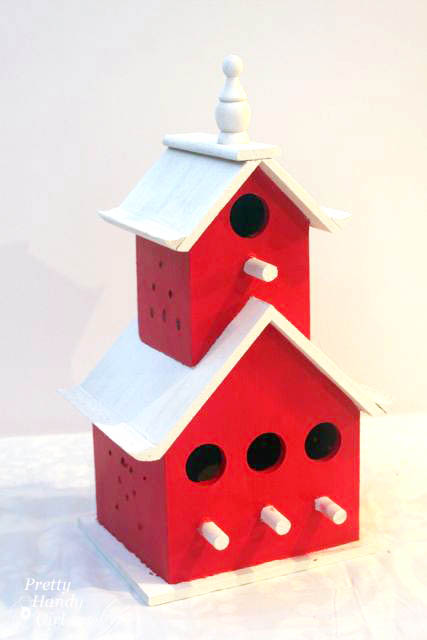
Paint the roof, steeple, and perches gold. Add a star and tree shape on the sides to accentuate the drilled hole patterns.
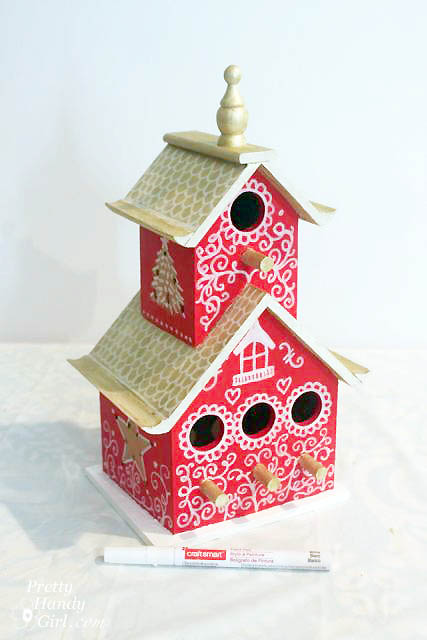
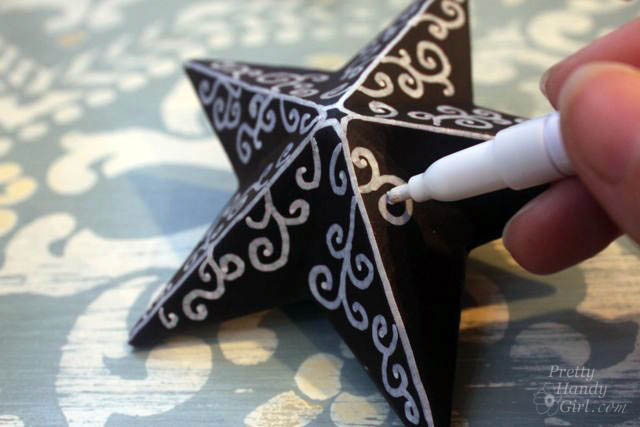
After the gold and red paint has dried completely, use the white paint pen to doodle-paint all over the birdhouse.
Afraid to Doodle-Paint?
Nonsense, there is no rhyme or reason to the doodling, just make lots of little curly q’s, c’s, and loops. You can start by outlining the window structures. Then embellish them. Regardless of your doodle-painting style, it’s important to have fun!
You can see how I used the same technique on the chalkboard ornaments on my Feathered Nest Christmas Tree and they came out really cute.
When the paint pen lines have dried, add a few coats of an outdoor sealant.
Birdhouse Tree Topper:
You can use it as a tree topper by feeding the top branch(es) into the hole on the bottom of the birdhouse.
Outdoor Birdhouse:
Add the screw eye hook and hang the birdhouse from a tree in your yard.

Décor Birdhouse:
If you simply want to display your birdhouse as décor, set a little battery-powered light inside the hole in the bottom and enjoy a homey birdhouse on a shelf.
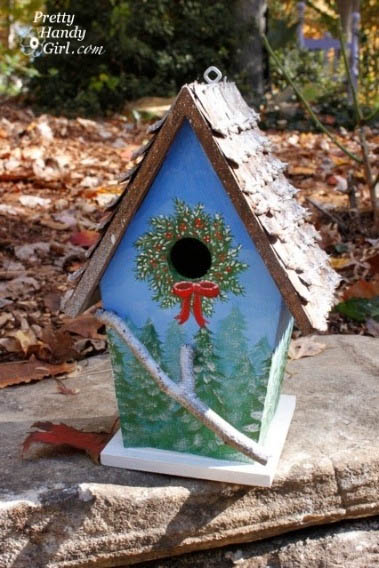
Want to decorate your birdhouse more? You can see how I created this little Christmas painted birdhouse and embellished the roof.
Doodle-painted birdhouses are adorable gifts and very frugal. Make it May is almost over, but stay tuned for one more project!

Pin for later!