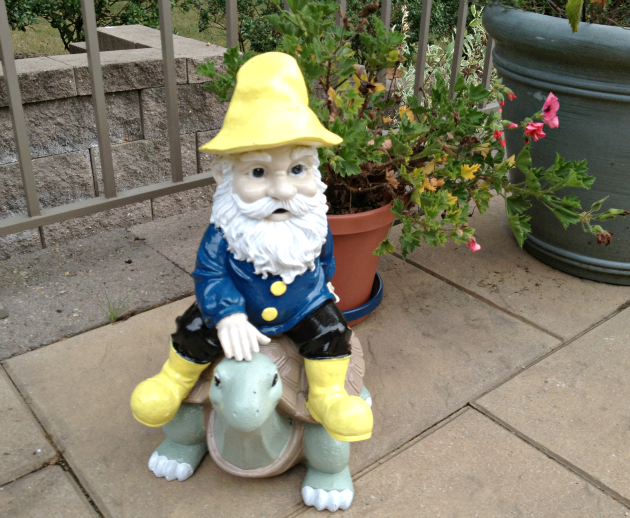
Garden Gnome-After Makeover

Garden Gnome-How to Fix

Garden gnomes are the cute little guardian angels that watch over our homes. And sometimes they get a bit neglected.

In our case the poor fella was beaten up a bit by string trimming and the sun.

So today I’m going to share how you can fix any small holes or cracks and repaint your gnome so that it looks like new. These tips will also work with other garden decor that you’d like to repair.

Here are the supplies you need

  • Hydraulic cement
  • Bucket
  • Margin trowel
  • Gloves
  • Great stuff
  • Old towel
  • Rust-Oleum Primer (spray)
  • Hobby paint brushes
  • Valspar paint samples
  • Rust-Oleum Clear Coat (spray)

This is a pretty fun project and the kids can participate, too.

Let’s get to it 🙂

Read more

Hey all, I’m super excited to share a sweet friend with you today. I met Kristi at Blissdom and she is one of the most unselfish women I’ve ever met. She blows me away when it comes to her blogging knowledge and business savvy . But, what I really wanted her to show you was her faux granite countertops! If you hate your countertops, you are going to want to see this!

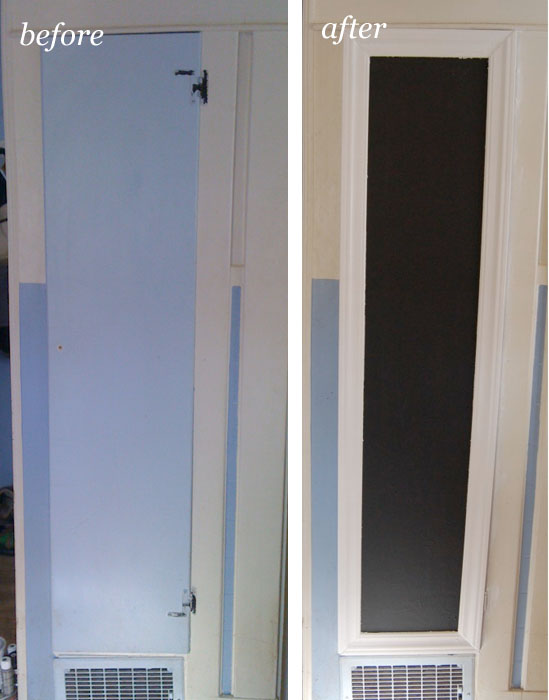
But, first a little more about Kristi’s blog. Kristi truly is creative, she blogs about crafts, home renovations, and oodles of other ideas! Check out this ingenious solution she came up with for hiding an access panel in her home:

She turned it into a cute framed chalkboard!

Be sure to hop over to her blog to get the full effect of Creative Kristi!

Now, please welcome Creative Kristi to Pretty Handy Girl:


Hey all! My name is Kristi & I blog at Creative Kristi. A little about me: I’ve been blogging for over 2 years & just love it-it’s my creative outlet. I’m married for 4 years to my wonderful husband, Military Man, who is in the Army National Guard. We have two beautiful kids- Little Man who is 3 & Miss E who is 8 months. We live in Maine & are SO READY for spring – how about you?

I’m so happy that Brittany asked me to share my counter-tops with you during her “Fall in Love with Your Home” series because doing this really did help me fall more in love with the home we have rather than always pine about what we didn’t have.

See, I had these ahem lovely baby blue countertops (with matching wall paint) when we moved in:

While I’m sure many of you are just so jealous of my very 1980’s kitchen, I was not so much a fan. But getting new countertops was not in the budget for a very long time. So I started researching alternative countertops. I loved concrete counters but when I priced it out it was still pretty expensive-even the DIY version. Then one day I stumbled upon someone who had painted their countertops to look like marble. I’m not a fan of marble but I thought surely the same concept could apply to granite counters. Nevermind that I am not an artist-I can’t even draw a person! I decided to just go for it. The materials listed online were very expensive paint and sealer-I figured I could try it with little bottles of acrylic craft paint and a glossy sealer (supplies listed below) I found at my local hardware store.

It took me one week and many bottles of acrylic paint but less than $30 later I had my ‘granite’ countertops!

It worked, looked amazing & two years later it still looks new! (You can read more about the transformation HERE.)

I even put together a video tutorial so that you can do your own if you’d like! You can watch it on YouTube HERE.

Here is a close up of the ‘granite’ I created.

I know that there are counter top paints now out on the market but I can pretty much guarantee they don’t come close to this level of ‘fooling’ people because they are usually only one or two colors, you need multiple colors & varying patterns in order to mimic mother nature. Besides I think acrylic paints, a gloss sealer & paper towels might just be cheaper! I still (2+ years later) get asked all the time when we got our new granite counters!

Supplies:

  • One U-G-L-Y laminate countertop (mine was blue)
  • A cleaner of some type and a rag (I used a 50/50 mixture of vinegar to water- as I do to clean most surfaces in my house)
  • 1 Quart of Kilz primer (or other stain blocking primer-you need something that will ‘block out’ the color underneath & also give your acrylic paint something to ‘stick to’)
  • Acrylic Paint in colors to match a print out of granite you like. (Just google granite countertops and find an online store that has close ups of the granite…find one you like, print the picture and head off to the craft store!)

I used FolkArt brand (made by Plaid) and the colors I used are: 938-Licorice, 425-Medium Grey, 2381-Battleship Grey (I did one section of my counter top in this and didn’t like it so used it very very sparingly after that), 450-Parchment, 602- Country Twill, and applied with an old toothbrush to just lightly mist the counter top: 660-Metallic Pure Gold.

  • An old toothbrush
  • paper towels
  • a piece of cardboard or something to squirt your paint onto.
  • Foam brushes (for clear coat application)
  • Some form of high gloss clear coat-non-yellowing (I used: Water-based Polycrylic Protective Finish in Clear Gloss-I only bought 1 QT. I believe but it will depend on how much counter space you are painting)

Thank you again Brittany for letting me share my favorite tutorial & if any of you try this please feel free to send me pictures-I would love to see them & feature them on my blog!

Have a happy day,

Thank you Kristi. Okay, so seriously, isn’t that an amazing transformation! I love that she was able to re-create the look of granite so successfully.

I know there may be some doubters amongst you that don’t believe that you can repaint laminate counters and have them last. Well, I can vouch for the fact that you can re-paint laminate countertops because ours has lasted over three years. You can see them in my guest bathroom vanity makeover where I painted over the harvest gold counters.

Those counters still look almost new. The only issue popping up is that there are hard water stains right behind the sink, but that would happen regardless of the counter surface. I hate hard water.

I hope you are enjoying the “Fall in Love with Your Home Series”.


I’ve been super busy this weekend finishing up some projects. I’m very excited and can’t wait to show you some of them.

However, because several of them are tutorials (which take a little longer to write up), I decided to share with you a guest bathroom makeover from our old house.

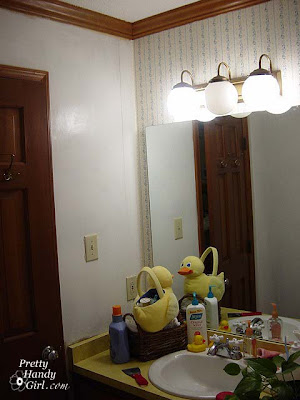
This poor bathroom had an identity crisis.

With its 1970’s light fixture, 
 
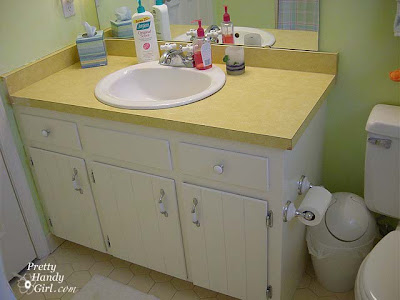
Harvest gold laminate counter top and dark wood vanity,
 
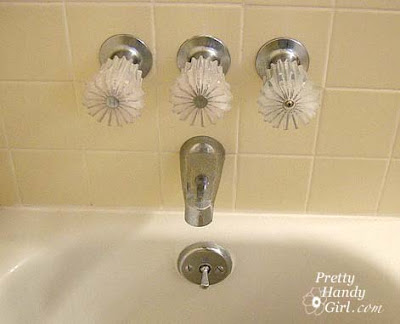
Sunburst shaped handles that hurt your hands to use them,


and Laura Ashley style wallpaper.

The first thing we did was strip the wallpaper in this room. If you have never stripped wallpaper, there are two types of wall paper stripping projects. The easy ones and the hard ones! Luckily we had an easy one.

Awww, doesn’t Pretty Handsome Guy look happy?!  

The walls had been primed before the wallpaper was attached (as opposed to gluing the wallpaper on top of the drywall (or sheetrock as some people call it.)
Forget the steamer, forget the chemicals, we used these tools:

  • Cheap, cheap, cheap pink fabric softener mixed 1:1 with water
  • Spray Bottle to pour your fabric softener mixture in
  • Paper Tiger or wall scoring tool
  • Wallpaper scraper – We really liked the Piranha shaver since it has a razor sharp blade
  • Or Wallpaper Trim Tool

You start by scoring the wall with the Paper Tiger or similar tool. The more holes the better, so put on some dancing music and get busy.

Then you spray the walls with your fabric softener mixture. Really saturate them! Wait 15 minutes, then spray them again. Now, use your scraper to start peeling. I truly hope your sheets come off in nice big sheets like ours did. If not, you may have to have your walls re-skimmed with spackle or joint compound.

Or, I hate to mention this, but you could paint over the wallpaper. We have two rooms in our current home that this was done in (we know for a fact that the wallpaper was glued to the drywall without priming first.) If you take this route, I want to let you in on two secrets:

  1. Use an eggshell or satin finish paint (it will not show the edges or imperfections as easily.)
  2. Take the time to make sure all the wallpaper seams are glued down and then spread some joint compound or spackle over the seams and sand it smooth. This will get rid of the tell-tale seam lines when you paint over wallpaper.

After you have removed all the wallpaper you need to wash your walls really well to remove the glue. We saturated the walls again with the fabric softener and then cleaned it off. Finally, we used TSP cleaner (available at any home improvement or hardware store) to get the walls perfectly cleaned.

Then I painted the walls a bright Nickelodeon slime green. I kid you not, but I didn’t take a picture of it in that state. My friends thought I had flown the cuckoo’s nest. But, I went back with a creamy lemon glaze and ragged it on top. The result was a beautiful lime sherbert color (perfect for a little boy or girl’s bathroom.)

Next, the light fixture had to go, and it went quickly!

 I replaced it with a four light chrome fixture.
Then, I had to paint over that ugly vanity cabinet:
 
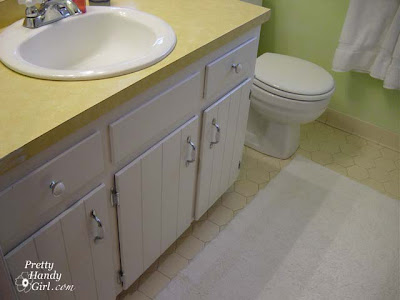
Now that is looking better! I added new chrome/porcelain pulls.

But, that harvest gold vanity would not stop shouting “groovy dude” whenever I saw it. So, it had to go too. Unfortunately, we were on a limited budget, so I had to get creative.

 
I fixed the chipped corner and seams with wood putty.
Then I sanded and primed the countertop with Zinser Oil based primer
(A necessity to get the  surface prepped with a super adhesion coat of primer)
so I could do this:
 
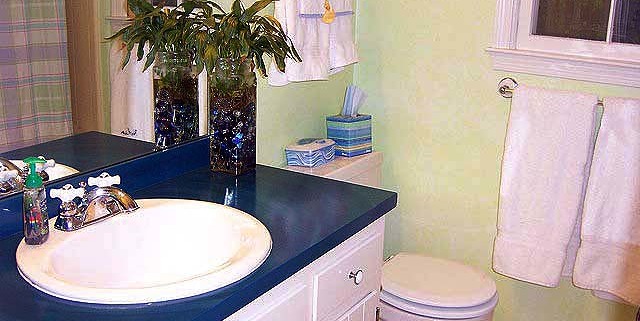
 Beautiful blue water reflections
I painted the vanity top and then added five coats of polyurethane to seal it. I recently had the opportunity to visit our old house and couldn’t wait to see how the vanity top held up over the years. It really held up better than I expected. There was some slight chipping where the back of the sink met the back splash. I should say that our neighborhood has very hard water and this is where the splashed water would hide and sit. So, for the cost of paint, we had a new vanity top that has held up to use for over three years so far.
 
So, are you ready to see the final reveal? Here it is:
Before: 
After: 
In case you are wondering what ever happened to those sunburst tub faucet handles:
Yes, that is me, installing new valve stems at 8.5 months of pregnant bloated-ness. 
That was also THE day I went into labor!
Anyone else have some crazy last minute pregnancy stories?


Today I’ll show you the painting technique I used on the chair I stripped yesterday.

Here is a list of suggested materials:
Tarp or drop cloth
Brush
Primer
Rubber gloves
Sandpaper (Fine & Medium grits)
Spray paint (optional handle adapter to prevent hand cramps and spray on your fingers)
Dust mask
White paint
Brown acrylic paint or craft paint
Rag
Polyurethane
Floor protectors (chair glides)

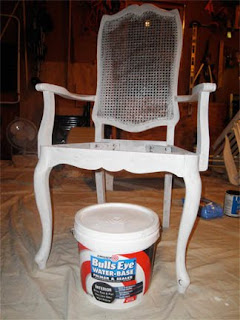
Because I stripped and sanded the chair down to bare wood, I needed to prime the wood so it would accept the paint. If you don’t prime bare wood, then the paint will be absorbed into the wood and won’t leave a clean all over finished look. The primer is also a base that makes the paint stick to it easier. Primer is very good at adhering to lots of surfaces, including your skin. So, be sure to wear gloves or you may look like a reverse dalmatian for a few days.

I’ve used many different primers. Sometimes I use a spray primer and sometimes a liquid primer. Did you know that primer comes in different colors? And it can be tinted? Be sure to ask the paint department next time you are drastically changing the color of a room. They might be able to tint your primer close to the color you are painting so it cuts down on the number of coats you have to use.

For this project I used Bulls Eye water based primer that you paint on. You do not need much, we only had a big bucket left over from painting some rooms in our home.

Primer dries quickly, so work fast. It isn’t necessary to make it look perfect, just get a thin coating on all the wood surfaces and be careful to wipe off any drips.

After the primer dries (I used my box fan to speed the process,) you should lightly sand the chair to remove any burrs or drips. This also gives the primer a little scuffing so that the paint has something to grip to. Don’t sand so much that you go through the primer coat.

At this point you will need to “tent” off an area where you will be working. Spray paint will get everywhere if you let it. The good news is that usually the particles will dry in the air, but they will coat everything in the vicinity and will need to be wiped off. If you can spray outside, it will be better for your lungs, but be sure your drop cloth extends at least 4 feet out in all directions from the piece you are spraying.

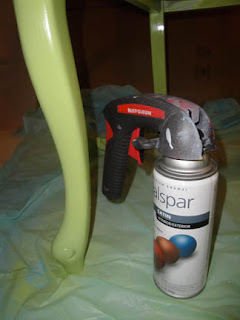
Now comes the fun part! Grab your paint can in the color you have painstakingly chosen. I used Valspar Pistachio Satin finish in a spray can. I used to use Rustoleum, but it seems that my local Lowe’s has eliminated most of the Rustoleum brand spray paints and replaced them with Valspar. My suspicions tell me that it might still be the same paint but branded for Lowe’s.

I use light coats of spray paint about 8-10 inches away from the surface. The trick with spray paint is to use several light coats instead of trying to cover all at once. This will insure an even finish. You also don’t want to end or stop on the piece you are spraying. I use a smooth consistent sweep across the chair and then release the trigger after my spray has left the chair. If you stop on the chair, you will either get a shiny spot or drips where the extra paint has collected. Here is a graphic to show you how to spray your paint:

I used three light coats to cover this chair. I did sand VERY lightly between coats (using a fine grit 200 grit or higher) to make sure there were no rough spots and to add something for the next coat to adhere to. I also wipe off the chair after sanding with a damp rag. Just be sure to take your time to work up to your final color. This is the point where you may stop and say that you like the final results of your painting job. If you stop now, be sure to finish your painting job off with two coats of polyurethane.
I choose to add some more interest to my chair.
Milk Painting – Adding Depth and Interest
 
After the green spray paint layer has completely dried, I took the fine grit sandpaper (200 or higher) and gently roughed up the surface. Then I wiped off the whole chair with a damp rag and let the chair dry.
For this step I used some left over white latex trim paint we had lying around. I used a semi-gloss finish because that is what we had, but you can use any white paint you have left over. I dipped the edge of my brush into the paint and then wiped most of it off on the can. Then I lightly ran the brush over the chair in the direction that the wood grain would go. The green paint should show through your strokes. Only go over the area once, unless you really ran out of paint on your brush. If you put too much on the chair, or have areas with too much (see the left edge of the picture on the right below),  you can take a wet rag or baby wipe to clean it off and try it again.

Once the whole chair has the milk paint technique, I let her dry. Once again, this may be the point where you stop painting. But, I really had more distressing in mind for this girl.

I wanted to let some of her age show through, so I grabbed some medium grit sandpaper (100 – 150 grit) and sanded some edges down to the bare wood. Think about any place on the chair that sticks out and might be rubbed and worn on an antique.

Unfortunately for me, the bare wood on my chair was a little too peachy colored next to the pistachio color paint, and I really liked the look of this leg that was sanded and had a darker brown area showing through. So, I decided to fake the darker brown wood look.

I wiped off the chair again with a damp rag and then ran up to grab some acrylic paint out of my art supplies. I chose the Raw Umber brown and squeezed a quarter size dollop onto my palette. Then I grabbed a clean rag and wrapped it around my finger. I dabbed my rag into the paint and made sure I didn’t have any globs on the cloth. Then I lightly ran the edge of my clothed finger over the edges of the chair where I had sanded.

Uh oh, don’t peek at the fabric on my chair! That is the next step we will go over tomorrow. Plus, it wasn’t a good idea to paint with the fabric on my chair. Too many opportunities to drip or rub paint onto the seat.
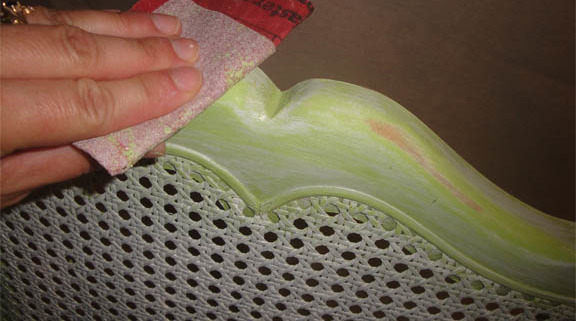
Once I was done adding the brown paint, I let the chair dry. Next I took my fine grit sandpaper and sanded the whole chair lightly being careful not to sand off any paint. Wiped the chair down and let it dry.
I really liked the aged beautiful look that my chair had achieved, so I was ready to seal her with 2 coats of polyurethane. I used a water based poly and lightly sanded between coats. At this point you are probably sick of the sanding, but I am a sucker for smooth finishes. I love to caress finished wood and feel the baby softness under my fingers. Plus, this is the chair that I will spend many hours sitting in and working.
After the poly has dried, I do add floor protective legs to my chair. It protects our wood floors from damage. I’m really into protecting our wood (as you can probably guess.) Furniture glides or floor protectors are super easy to add. They go on just like nailing a nail. Be sure you have your glide centered on the leg and that you aren’t nailing it into any metal. Then gently tap it into the leg of your chair.