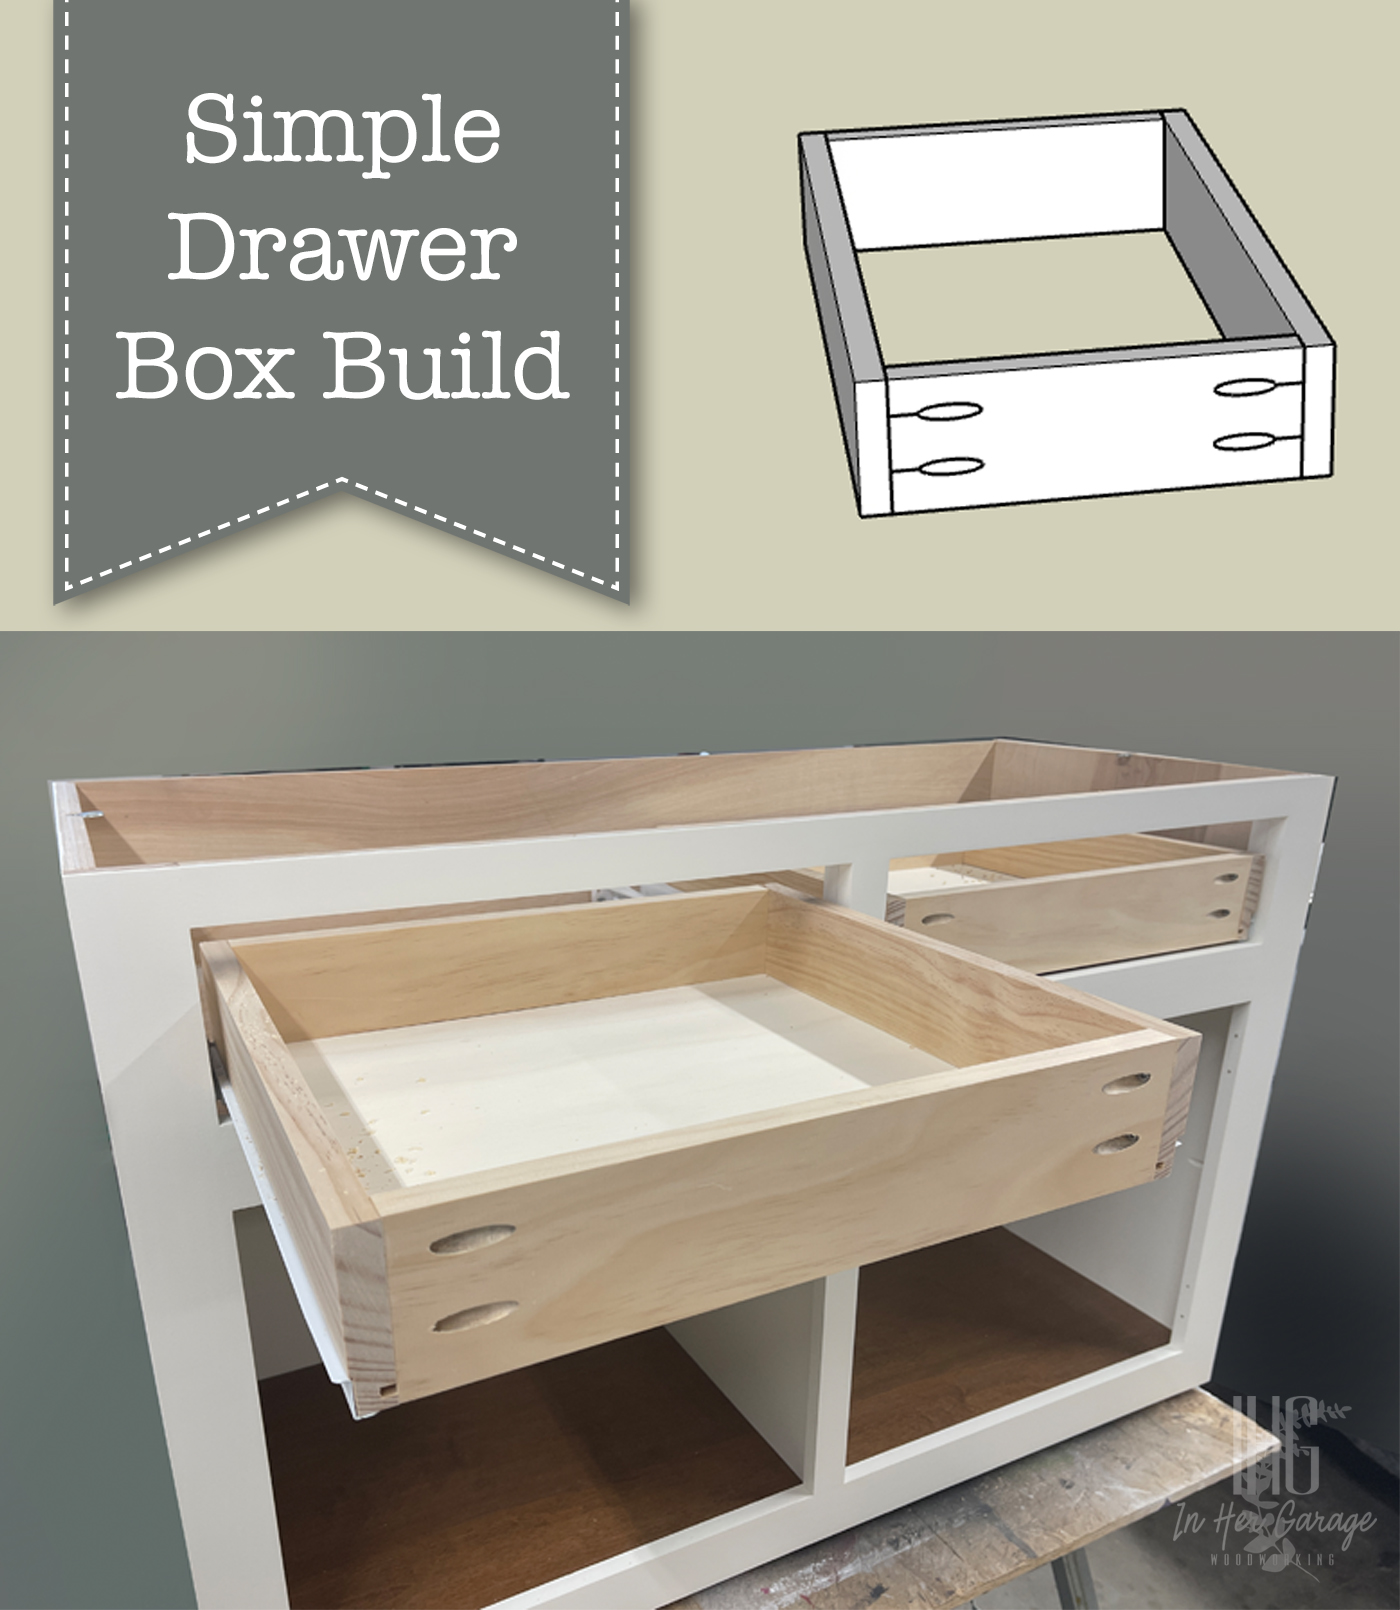
Learn the simplest and most accurate way to build drawer boxes with this easy tutorial.
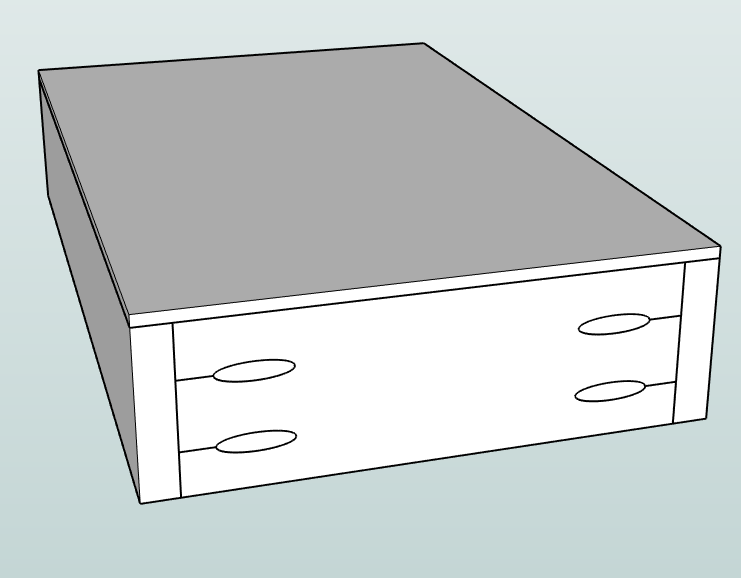
Drawer Box Build

Welcome back, this is Kristen from In Her Garage Woodworking here with another build plan for you.  When I first began my DIY woodworking journey over 5 years ago I was most intimidated by building drawers. I avoided them because I thought there were too many measurements and too much room for error. But, with a simple plan and a lot of practice, I now make drawers consistently and accurately.  These are the exact plans I use to this day to make drawer boxes for all of my commissioned furniture pieces because when you’re able to make something quickly and easily that is solid and looks great, why would you ever change it?

Materials

(I’ve included affiliate links for your convenience. I earn a small percentage from a purchase using these links. There is no additional cost to you. You can read more about affiliate links here.)

Tools

Instructions:

Your drawer can be any depth you wish, but before building the drawers, rip your 3/4″ material to the drawer height you desire (if you are using plywood or if your 3/4″ material is wider than your finished drawer.

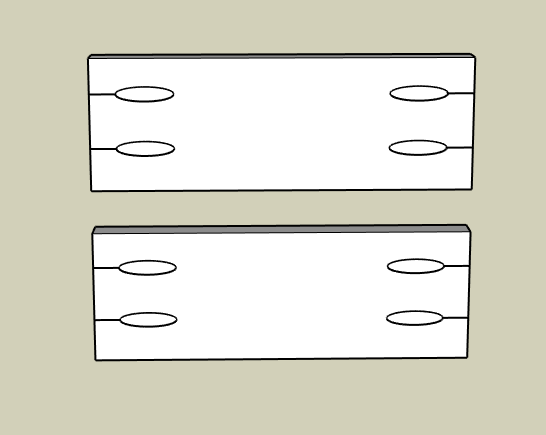
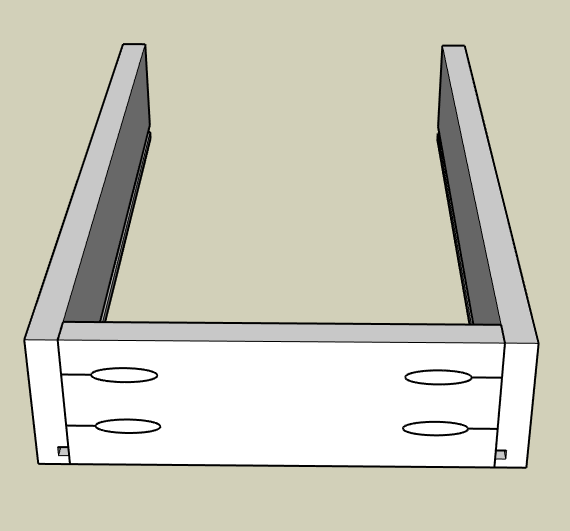
Step #1: Cut drawer box sides

Using your miter or circular saw, cut two identical 3/4” boards to the same length of the drawer slides you’ll be using.

Step #2: Cut drawer box front and back

Cut two pieces of the 3/4 inch material for the front and back of the drawer box.  If you’re using ¾” material to build the drawer box then the length of the front and back can be calculated as follows (see equation and picture below):

Width of drawer box – 1½” = width of front and back drawer box boards

Drawer Box Diagram

Step #3: Add groove for drawer bottom (optional)

Taking all four 3/4″ boards to the table saw cut a groove 1/4” from the bottom of all sides that is 1/4” deep. Run the 3/4 board through one time, then adjust the fence (or your saw) to cut another groove next to the first. (A standard saw blade is 1/8” wide so you will need to make two passes in each board to achieve a 1/4″ groove for the 1/4″ drawer bottom material.

Dry-fit the plywood to check for fit.


Step #4: Create pocket-holes

Using your Kreg jig make 2 pocket-holes at either end of the front and back boards on the opposite side as the plywood bottom groove if you chose to do this step. Be sure to avoid the groove.

Step #5: Assembly

If you DID NOT cut a groove to accept the plywood bottom, then you can assemble the drawer box using wood glue and 1 ¼” pocket screws.

Then, you will cut your bottom 1/4″ panel to the length and width of the drawer box and simply glue and nail it to the bottom of the drawer box

If you DID create a groove for the bottom panel assemble the front and both sides using wood glue and 1 ¼” pocket screws.

Next, cut the ¼” plywood to fit into the bottom of the drawer box groove dry fitting the back panel to check for fit.

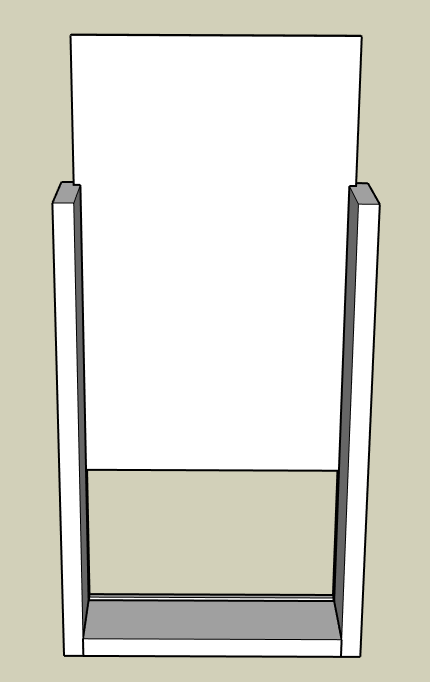
Once you have the correct size for the plywood bottom then slide it into the groove and attached the back piece of the drawer box using wood glue and 1 ¼” pocket screws.  There is no need to apply glue into the panel groove.  The plywood bottom will “float” in place.

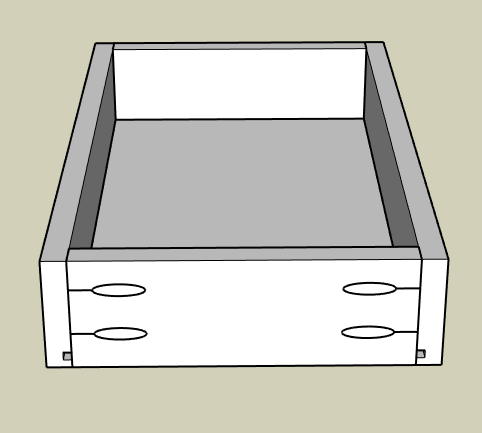
No need to worry about filling the pocket-holes because you will be applying a drawer face directly over them.

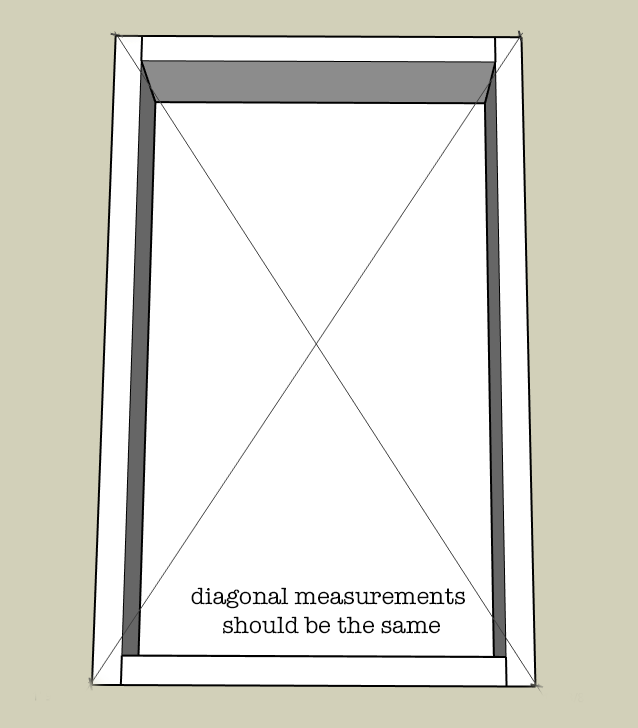
Be sure to check for square by measuring both diagonals of the drawer box.  If one measurement is longer simply squeeze the longer diagonal until both are the same.

Allow drawer box to dry.

That is the basic drawer box build that I use and it is strong and easy to put together. I hope this tutorial gives you the confidence to tackle that project you’ve been putting off.  Next, I will teach you my favorite method for installing drawers and how I troubleshoot drawer boxes that just aren’t quite the right fit!

Finishing Tips:

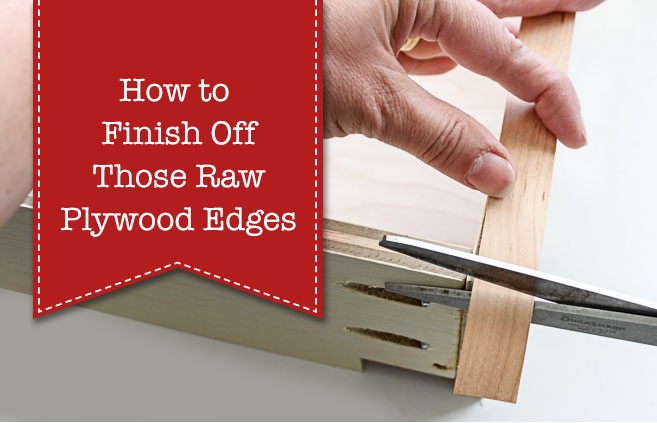
If you are making your drawer boxes out of plywood then check out Brittany’s Edge Banding Tutorial and learn how to cover that unsightly plywood edge.

Wondering how, or if, you should apply a protective finish to the drawer box? If I am working with solid wood for the drawer sides then I will give the material a quick finish sanding and that’s it. But, for plywood, I typically do one of two things, depending upon what I have on hand at that time.

  • Option 1: Apply 1 or 2 coats of sanding sealer to raise the grain of plywood and sand smooth. Sanding sealer is clear, easy to apply, and dries quickly. If I have the time and patience I may also apply a quick spray of clear, semi-gloss, water-based topcoat to give it a little shine but it isn’t necessary.
  • Option 2: Apply 2 to 3 coats of spray shellac to seal the plywood.  Spray shellac dries quickly and won’t leave any chemical smell behind. But be aware that it will give the plywood a slight amber tone which typically isn’t big deal.  Remember to lightly sand between coats.

Hi! I’m Kristen, from In Her Garage, and I am a self-taught woodworker and DIY fanatic from Minnesota where I live with my husband and our two daughters. Between being a wife, mom and, registered nurse, I try to make as much time for DIY as possible. My love for building came after our family built our current home in 2015. After we moved in, we needed furniture and instead of spending massive amounts of money to order the pieces we wanted I decided that I would build them myself. I started with a buffet table plan from the fabulous Ana-white and quickly set out to remodel my entire home office.

Since then I have started a side business building furniture for the people in my community. I love hearing my clients talk about the pieces they wish they had whether it be a rustic buffet table, a one drawer side table, or a toy box, and then making it a reality for them. While starting my small business it made perfect sense that I would document my building journey so I simultaneously launched the In Her Garage blog and I love sharing my plans, tips, and tricks.

Making something beautiful with your own two hands through a little preparation and determination is an amazing feeling and I hope to bring inspiration and know-how to those looking to tackle a big or small project.

I am so glad that you found me here and please feel free to connect with me on PinterestInstagram, and Facebook to see what I am working on right now. And check out the brand new In Her Garage Etsy shop for other plans or to have a furniture item made especially for you!

How to Hire Great Contractors! Plus: Free Printable Questions You Need to AskHow to Hire Great Contractors and Questions You Need to Ask

Hiring a great contractor can be a tough task. The actual experience can be so paralyzing that some people ultimately give up on their dreams of a renovated space. I have a good friend who felt completely overwhelmed by the challenge of hiring a contractor to renovate her master bathroom. With media stories of people getting ripped off by bad contractors, I could understand her trepidation. Today I want to give you some tips on How to Hire Great Contractors. Plus, you can download the printable with the Questions You Need to Ask both the contractor and their references.

Recently I’ve been vetting contractors to work on the Saving Etta project. I know first hand how difficult and scary it is to hire a stranger to work inside your home. When you factor in the amount of money you will be paying this person, it’s enough to lose sleep over the decision. Let me break down the steps to hiring a reputable contractor so you can finally have that renovation or addition you’ve always dreamed of.

How to Find a Contractors:

I am of the belief that you should start with recommendations from people you know or at least people in your circle (neighbors, social groups, or friends.)  I love using Nextdoor.com to look for referrals for contractors. (Especially if there are multiple neighbors who used the same contractor and were all pleased with the work.) Another reason I like finding contractors through neighbors is because I know the contractor is familiar with renovations on homes that were built around the same time frame as our house. This is important, especially if you have an old home.

If you can’t get any recommendations from neighbors, ask your friends who just had a renovation completed.

If you’re still striking out, go visit a local kitchen and bath showroom and ask if they have any contractor recommendations. Oftentimes, the designer can tell you who they work with.

As a last resort, search for contractors on Google, Facebook, Yelp, Angie’s List, Craig’s List, or the Yellow Pages. It may be daunting to find contractors through this route, but hopefully the rest of this article will help weed out the dishonest and disqualified contractors.

How to Use the Web to Look for Reviews:

After acquiring a list of names, I like to perform some online sleuthing. Search for the company name in the Better Business Bureau database and read all the complaints. If they’ve had one or two, you don’t need to completely eliminate that business. But, if the contractor has numerous complaints, it’s probably best to remove them from the list of contractors to consider.

Next, perform a google search for the business name (be sure to include the city and state they are located in) and or the business owner to see what pops up.

Contacting Contractors:

When you call the contractors you have selected, be upfront and honest about your project, the time frame, and your budget. Oftentimes good contractors may not be able to take your job right away or may charge more than you can afford.

Ask for References:

Get at least three recent references. (Ask for references within the last 3-6 mos. And ask for recommendations from clients that had similar projects to your’s.)

Questions to Ask Contractor’s References:

This is probably the most valuable resource for you. Many people will call a reference and simple ask “were you happy with XYZ contractor?” But, you can get a lot more information about the contractor if you know the right questions to ask.

    1. Were you happy with the job the contractor did? Was the work performed to your standards?
    2. Did the contractor hire any tradespeople to help complete the job?
      • If so, what was the quality of the tradesperson’s work?
    3. Did you have to manage the tradespeople or did the contractor oversee their work?
    4. Were there any errors or mistakes that happened during the process?
      • If so, how did he or she handle them?
    5. What was the condition of your home (or job site) after the work was complete?
      • Was it cleaned up or was anything left behind?
    6. Anything you wish the contractor had done better?
    7. Was the contractor upfront with any cost changes?
    8. How accurate was the contractor’s timeframe?
    9. Did he/she show up on time or let you know of any delays?
    10. How were the inspections? Did he/she pass the inspections easily or were there any issues?
      • If there were issues, how were they handled?
    11. Did the contractor need to pull a permit and if so what for?
    12. Have you needed him/her to come back and fix or finish anything?
      • If so, how timely was that accomplished?
    13. Was the contractor open to your design preferences?
    14. Anything you want to add or any suggestions you have for me moving forward with this contractor?

Feel free to download this printable questionnaire to use when contacting references. (For personal use only.)

Update on Backyard Landscaping | Pretty Handy Girl

What to Get from the Contractor BEFORE Work Begins:

Always get quote before you hire a contractor (this can be a ballpark quote, but be sure to ask the contractor to alert you if they need to go over the quoted amount.)

If the contractor is a general contractor, electrician, plumber or a tradesperson that requires licensure, ask for their license number. Call the licensing board to verify that their license is up to date and the information matches their records.

Ask for a general liability insurance certificate (have your name and address included in the certificate holder’s field)

Ask for their workman’s comp insurance if they have anyone working for them. And call the insurance company to verify that the policy is still active. 

Ask for a lien waiver release. This will protect you should the contractor fail to pay his or her subcontractors. If you don’t have a lien waiver and the subcontractors are not paid, a lien can be placed on your house until they receive payment.

Have a contract signed by yourself and the contractor that details the work you are expecting them to accomplish and the amount they quoted.

Red Flags to Look Out For:

  • Was the contractor forthcoming with the above information?
  • Ask the contractor if you need a permit. If they say no, be sure to ask more than one person if a permit is needed. And maybe even call your city permit office to verify that information.
  • Regarding the quotes, you will undoubtedly receive a range of quotes for your project. Be very wary if one contractor’s quote is significantly lower than the others. There is truth in the old adage, you get what you pay for.

During the project, occasionally ask your contractor if you are still on target and within budget. It’s better for everyone involved to keep the lines of communication open. Always allow 15 – 20% over the budget for surprises or incidentals. You never know what you might find in your walls when they are opened up.

Never Pay in Full:

If I have one important takeaway from this article, it’s to never pay in full until the job is completed to your satisfaction. Never fall victim to the claim, “I have to pay my guys.” If the job isn’t 100% complete, retain at least 10-15% of the total until the work is done. Once the contractor has all your money, you’ve lost all your bargaining chips.

More Information about Hiring Great Contractors (Video Chat):

A few weeks ago, I hosted a Facebook Live to talk more about how to hire great contractors and avoid getting burned. Here’s the Facebook Live video:

Good luck and remember, you can do this!

Now that you are one step closer to getting started with your project, you need to read this article: Are you Sure You’re Ready to Take on a Home Renovation?

Are You Sure You're Ready to Take on a Home Renovation? | Pretty Handy Girl

If you are thinking about renovating your kitchen, I have some great tips for Surviving without a Kitchen during Renovation:

how to move a shed

You might remember the ugly Frankenshed behind the Millie’s Remodel house. It’s finally time to try to move this ugly monster. Whether we’re successful or not, I’ll share the Easiest & Cheapest Way to Move a Shed!

Millie’s Remodel: The Easiest & Cheapest Way to Move a Shed

A long long time ago (back before we had children), Pretty Handsome Guy and I were making a move from Philadephia to Charlottesville, VA. We packed our rented UHaul full to the brim and were ready to start the new adventure.

We were backing the truck out when we heard a loud scraping sound and suddenly the truck was stuck. The front wheels were still in the driveway, but the back of the truck had bottomed out on the crowned pavement (turns out a road really isn’t flat from side to side.) We were blocking traffic and didn’t know what to do. I tried calling UHaul but they said it was operator error and we needed to call a large truck tow company.

As I was searching around for someone to help, our neighbor took one look at the situation and ran to the back of the driveway. He came back and created a lever with some blocks and a 4×4 post. Then he put one end under the bumper and proceeded to perch on the other end of the 4×4 bouncing up and down. He told Pretty Handsome Guy to give the truck a little gas. Although my neighbor couldn’t have weighed more than 125 lbs., the lever gave us enough lift to get us unstuck.

Here we are about twenty years later, and I still remember that 4×4 lever trick! But, I have a few more tricks up my sleeve, because although you might be able to lift a shed with a 4×4 and some blocks, how do you move it from one side of your yard to the other?

The Easiest & Cheapest Way to Move a Shed:

Today, in the Millie’s Remodel updates we will attempt to move the Frankenshed.

This eyesore sits directly outside the back bedroom and I can’t even express how ugly it is with poor construction and ugly siding. Then there’s the piece of plexiglass screwed over the window opening.

ugly shed in backyard

But, the worst thing about this shed is the siding that is cracked, and the caulk used to fill the seams. Now you can understand why I don’t have high hopes for moving this monster in one piece. I kept the dumpster over the weekend because I think there’s a very good chance this shed will fall apart the minute we try to move it. If that happens, I’ll cut it apart in pieces and top off the dumpster.

But, hey, you’re no idiot. I’m sure you are thinking, “Brittany, if you title this post How to Move a Shed, that means you probably were successful. ”

Well, you’ll just have to see if you’re right and watch the video:

Materials:

  • 2 – 2″ x 4″ x 16′ (or as long as you can transport)
  • 3 – 4″ x 4″ x 10′
  • 6-8 Cinderblocks (depending on the size of your shed, you need least 6 to set the shed)
  • 4 – 3″ PVC pipes (at least as long as the length of your floor joists)
  • Drainage Gravel
  • Carjack
  • Level

Tips on Moving a Shed:

  1. Empty the shed (less weight is better)
  2. Have a helper or two
  3. Use longer lumber for better leverage
  4. Measure and determine the final resting location
  5. Make sure the final location is clear of obstacles (especially low branches)
  6. Pick a path and clear any obstacles
  7. Use 2x4s to act as tracks
  8. Use large PVC pipes to act as rollers
  9. PVC pipes roll best when perpendicular to the floor joists
  10. Elevate the shed on blocks off the ground (to prevent rot) unless you have a concrete pad

How to Move a Shed:

Set a block near the shed and slip the end of a 4×4 under the shed while resting on the block If you can’t get the 4×4 underneath, raise the shed up with a car jack, then slip the 4×4 underneath.

Lift the shed and slide 2x4s under the shed in the direction you want to roll the shed.

Set one PVC pipe under the shed in the middle of the shed. Release the 4×4 slowly. If the shed doesn’t tip toward you, you can add a little weight to the front to help it tip.

Lay two more PVC pipes on top of the 2x4s under the shed perpendicular to the 2×4’s and to the floor joists. Then slip one more PVC pipe in toward the front.

Remove the blocks and the 4×4 (but keep it nearby). Push your shed and let the PVC pipes roll underneath. As soon as one PVC pipe pops out the back, bring it to the front and roll onto it.

To turn the shed, put the 4×4 inside the door frame against one corner. Press against the other end of the 4×4 outside the door frame to pivot the shed. (You can see how this is done in the video.) Adjust your 2×4 tracks and place the PVC pipes perpendicular to the floor joists, then push the shed.

Perpendicular or Parallel to the Joists, why does it matter?

When the PVC pipes are placed perpendicular to the joists, the floor framing touches the pipes in multiple spots (as shown below.) This allows the shed to roll very easily.

The pipes can roll when parallel to the joists, but it’s much harder because the framing is not resting on the pipes at as many points, and the PVC may bow in between the blocking. You can certainly use the pipes parallel to the joists for pushing the shed out into an open area where you can then set the pipes perpendicular to the joists.

A Makeover for Frankenshed:

To clean up the look of the shed, my assistant Brett built a new door. Then he added trim and used the old bathroom window for a new window. Once my painter painted the trim and siding to match the house, it was unrecognizable.

I can’t believe this is the same shed, can you?

before and after shed makeover

The old patchy privacy fence between the neighbor’s property was removed (it practically fell down when we removed the patched section).

Brett installed a new PVC privacy fence to match the one in the front of the property.

PVC privacy fence

Now that the exterior has a beautiful front and backyard, it’s time to start focusing on finishing the interior. Stay tuned for more Millie’s Remodel updates!

A special thank you to the Millie’s Remodel Sponsors:

The Millie’s Remodel project sponsors have donated materials for the Millie’s Remodel project. As you know I am very particular about the brands I work with and recommend. As a general contractor, I choose the products used on my projects wisely to make sure they last a lifetime. Therefore, I have no reservations putting my name behind each and every one of these sponsors.

millies remodel sponsors logos

Get a load of this transformation! See Millie’s Remodel and her exterior front reveal. Plus, I’m sharing tips to help you keep your home protected from termites when landscaping.

Millie’s Remodel Update: Exterior Front Reveal

This update of the Millie’s Remodel project is sponsored by Corteva, the makers of Sentricon. I’m grateful to have Sentricon on board as a Millie’s Remodel sponsor!

Although I still have a lot to catch you up on inside the Millie’s Remodel house, the exterior siding, brick, and front door has been painted. I chose a pretty bright blue for the front door. It’s Loyal Blue from Sherwin Williams.

I built the shutters using leftover tongue and groove planks from the porch overhangs. I promise to share a tutorial for you in the near future.

And I added a modern address plaque beside the door. Also, a DIY I’ll share a tutorial for later.

Although the shutters have been hung and the house numbers look amazing, I feel like something is missing. The house feels a bit naked from the waist down if you catch my drift. It needs some landscaping!

Unfortunately, I’m a little over budget on all the renovations at Millie’s Remodel, so I need to save some money on the landscaping. I decided to plant a few bushes out front and call it done.

Budget Landscaping for a Mid-Century Modern House:

With my budget being under $200, I was able to put in some foundation plantings and one feature plant to give Millie a more finished look outside.

I planted three Fatsio Japonica bushes (the wider bushes with bigger leaves).

Between the Japonicas, I planted two Golden Ticket privet bushes. They should fill in a little over time, but for now, they certainly help ground the house.

For the feature item, I chose a pretty yellow Amber Gold arborvitae for the small bed between the front door and the driveway. I like the color and the tall skinny look of this tree. When full-grown it may be up to 5′ wide and 10′ tall. But, hopefully, it won’t reach full width and can stay a little narrower. I’ll have to keep an eye on it and trim the sides if it starts to get too big.

Luckily, I had a pile of wood chips in the backyard where I had to take out a large rotted tree that was hanging over the house. I was able to use the chips as fresh mulch around the plantings.

Although it’s hard to tell, in the above photo, I kept a barrier of bare earth (and no wood chips) against the foundation of the house. Why? Let me take a moment to talk about how to landscape while keeping your house protected from termites.

Landscaping While Keeping Your Home Termite Free:

I know we live in an area that is overpopulated with termites, so I’m very careful about protecting my homes from conditions that could lead to a termite infestation. Most plants need moisture to stay alive, but unfortunately, termites love wet mushy wood because it’s easier to chew and more tempting! For that reason, it’s important to pay attention to moisture around your home’s foundation. All the tips below will help you reduce the likelihood that termites will find your home tasty.

  • When spreading mulch around plantings, keep it away from the house. Leave at least a one-foot perimeter along the foundation clear of mulch and other organic matter
  • Plant bushes so as to maintain a three-foot clearance from your home (be sure to look at the mature height and width information on new plantings)
  • Never pile firewood, lumber, mulch, soil, or other “termite-friendly” matter against your house
  • Don’t use wood timbers or lumber to create garden beds against your house
  • Install gutters and use downspouts to move water away from the foundation
  • Always make sure your land is graded with a slope away from your house
  • Keep gutters clear of debris to prevent them from overflowing.
  • Contract with a good termite treatment company (you can read how I chose Sentricon in this post.)
  • Keep up with scheduled inspections with your termite company.

My local termite company that installed the Sentricon system came back two weeks ago to check on the system to see if there was any termite activity and inspect the bait stations to see if they needed to be replaced. My technician was able to find most of the bait stations from the map he created during installation.

But, if the stations were buried, he could use the detector to find them.

You can learn more about the Sentricon system and how it’s installed by watching my previous video:

We saw some minor evidence that they had found the stations. This is good because it means they are feeding off the bait stations and taking it back to the colony.

Unfortunately, the memory card in my camera was corrupt, or I’d show you the bait station after almost a year. Luckily, Sarah has an excellent photo of her Sentricon bait station after being in the ground for almost a year.

A Look Back at Millie’s Front Exterior Transformation:

Together, I think the landscaping (although only 6 plants and some mulch) and painting made a big difference. We should look back to when I first bought the house. Remember how she looked? The greenery you see was all weeds!

Then, after painting, she looks great, but still needs some architectural pizzazz.

Finally, the shutters and painted front door made a big difference, but she was a tad naked around her base.

Now she has some beautiful modern greenery out front.

Did I do okay on my minimal budget?

Disclosure: This is a sponsored post for Corteva, the makers of Sentricon. I was provided complimentary termite protection for a year and was compensated for my time and efforts to promote Sentricon. I was not told what to write. All opinions are my own. I am particular about the brands I represent and will always let you know when you are reading a sponsored post.

Today we’re prepping to tile in the kitchen and bathrooms. Having seen firsthand how much damage water can cause to a home, I want to show you this tutorial for How to Waterproof Floors!

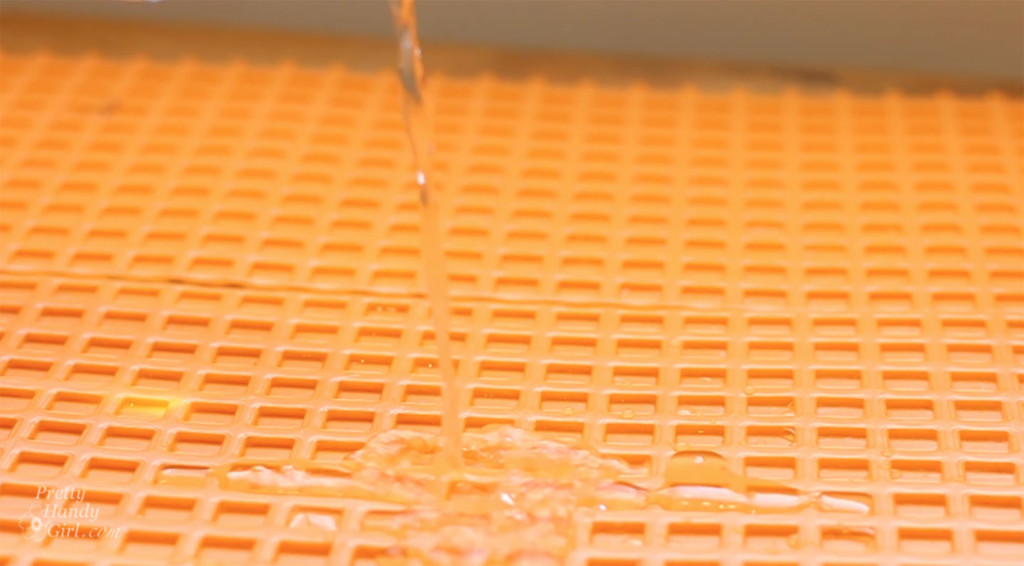
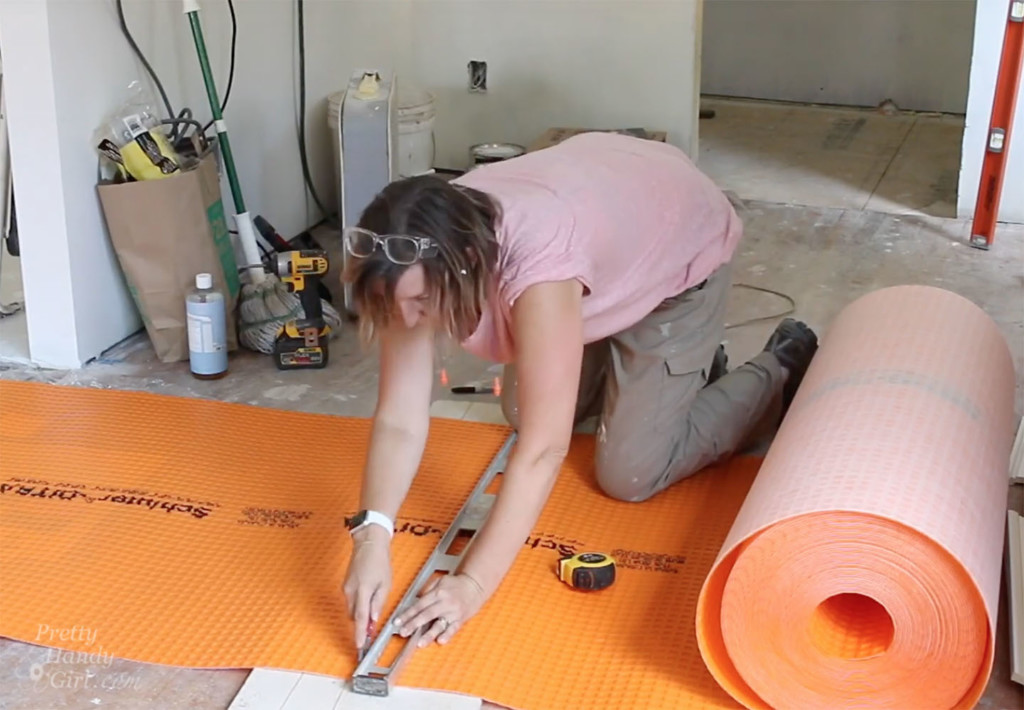
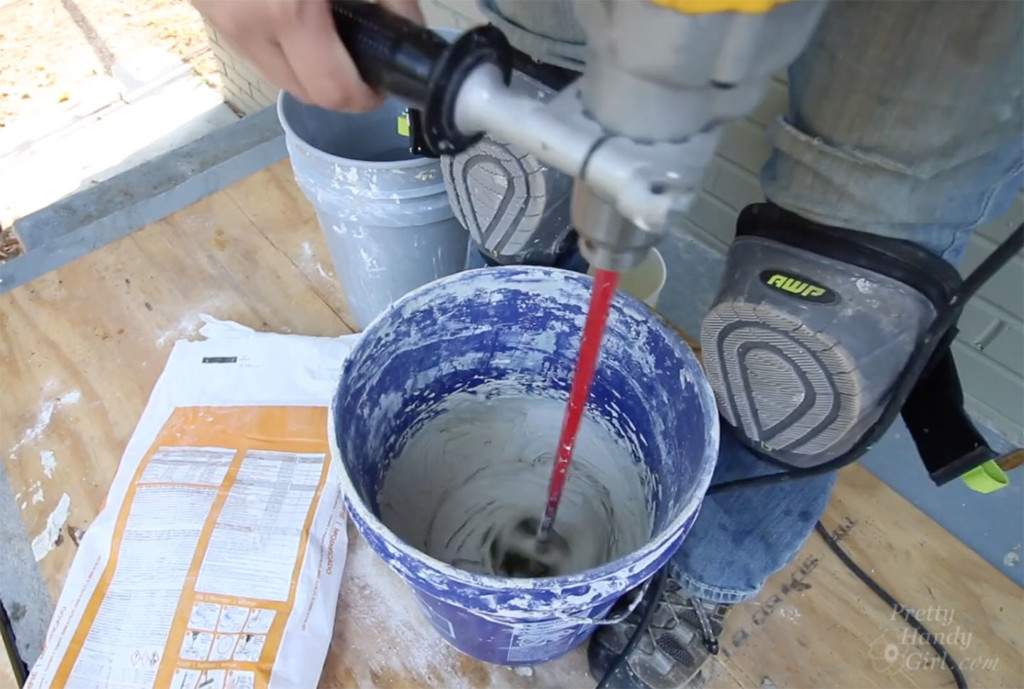
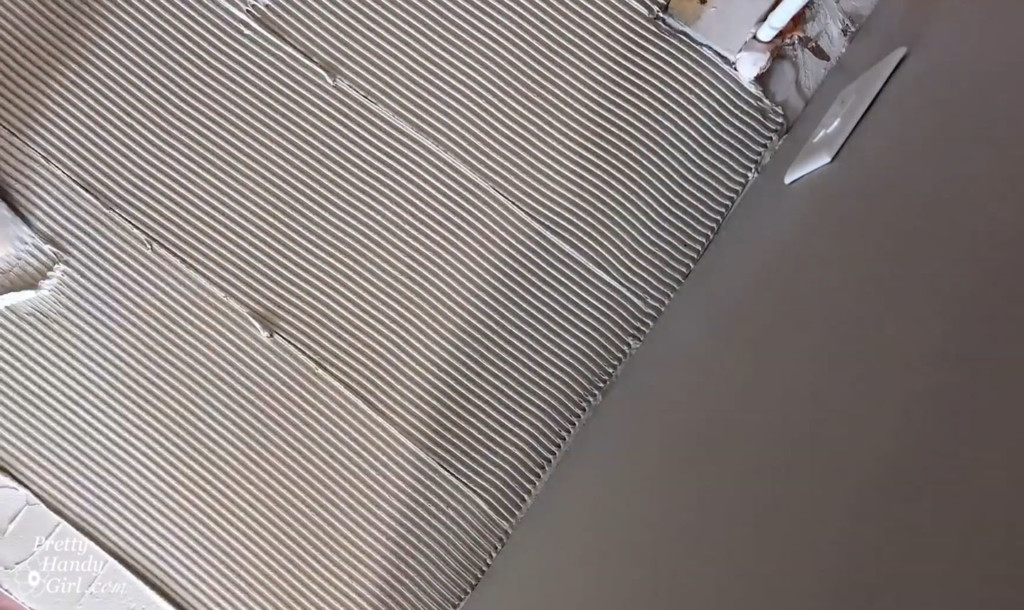
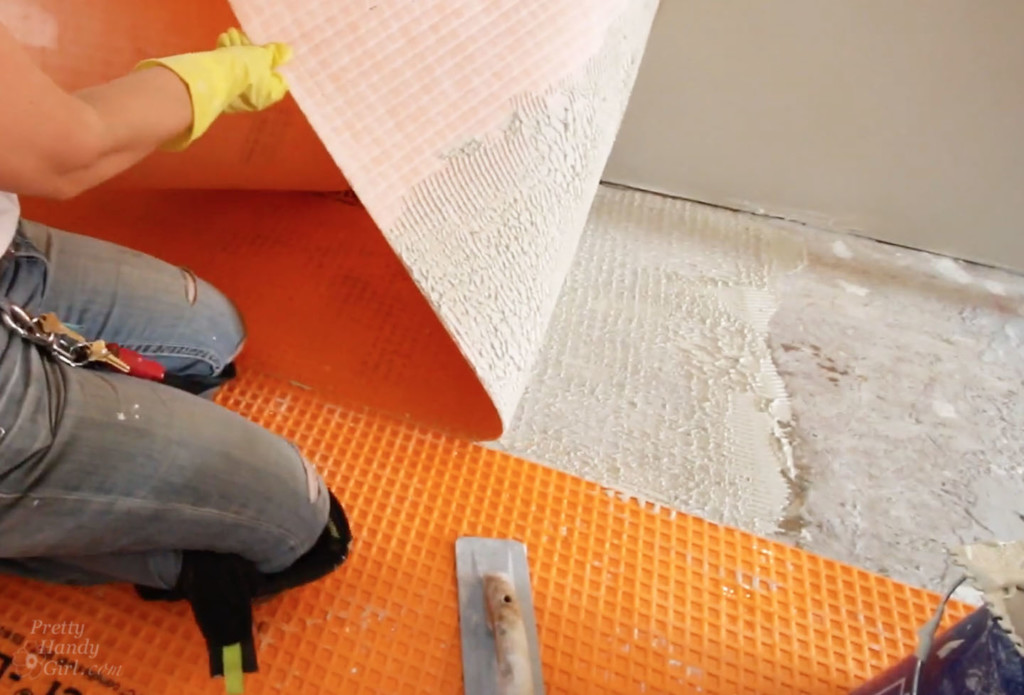
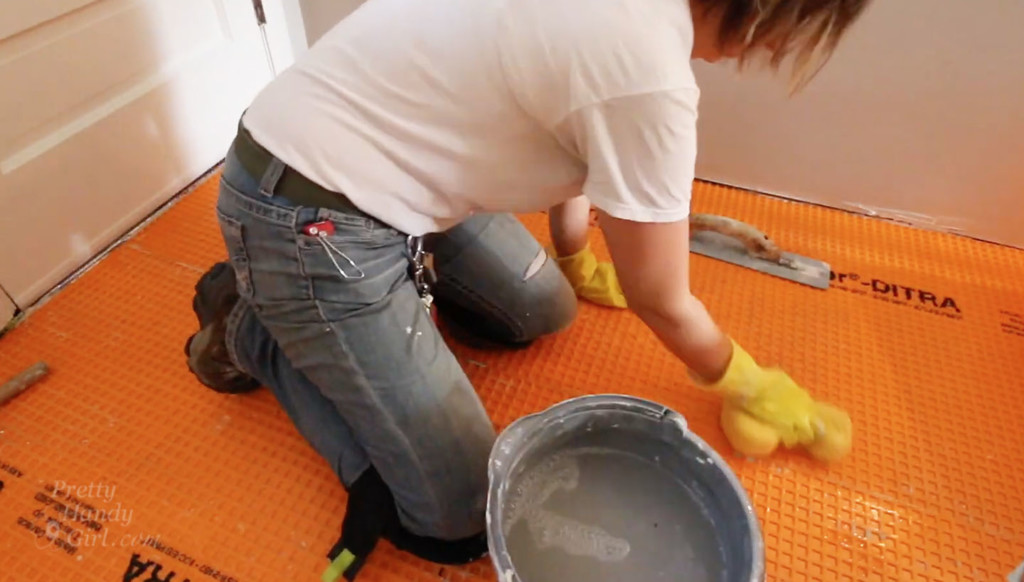
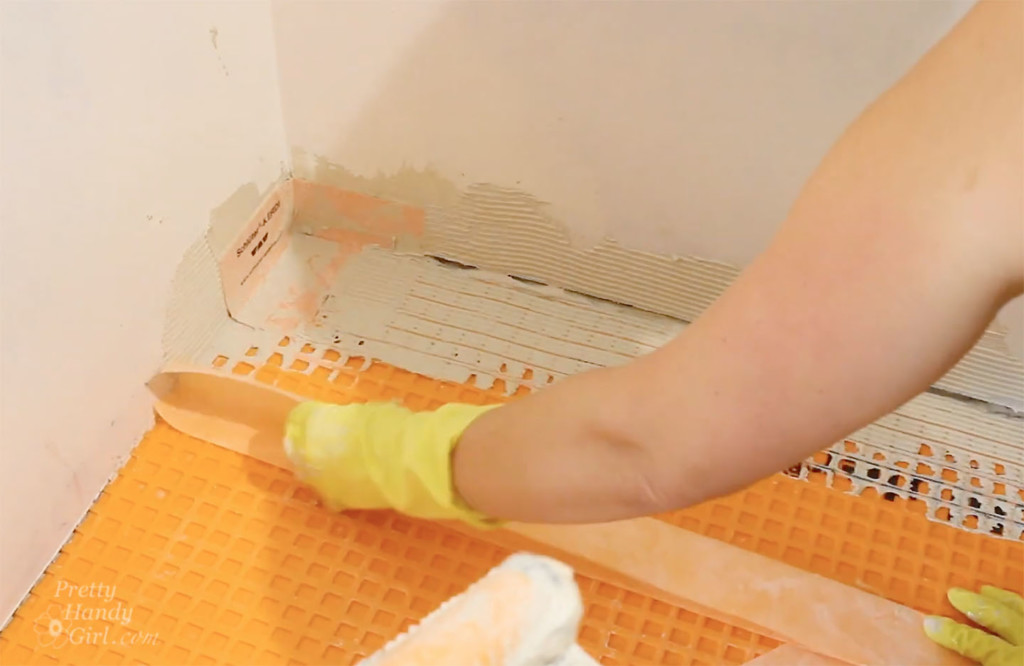
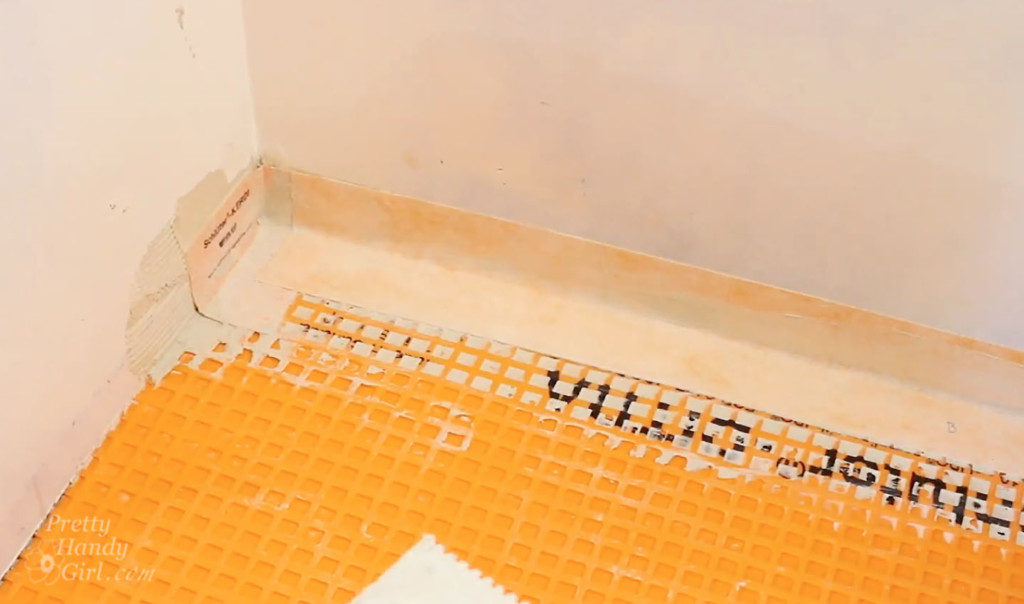
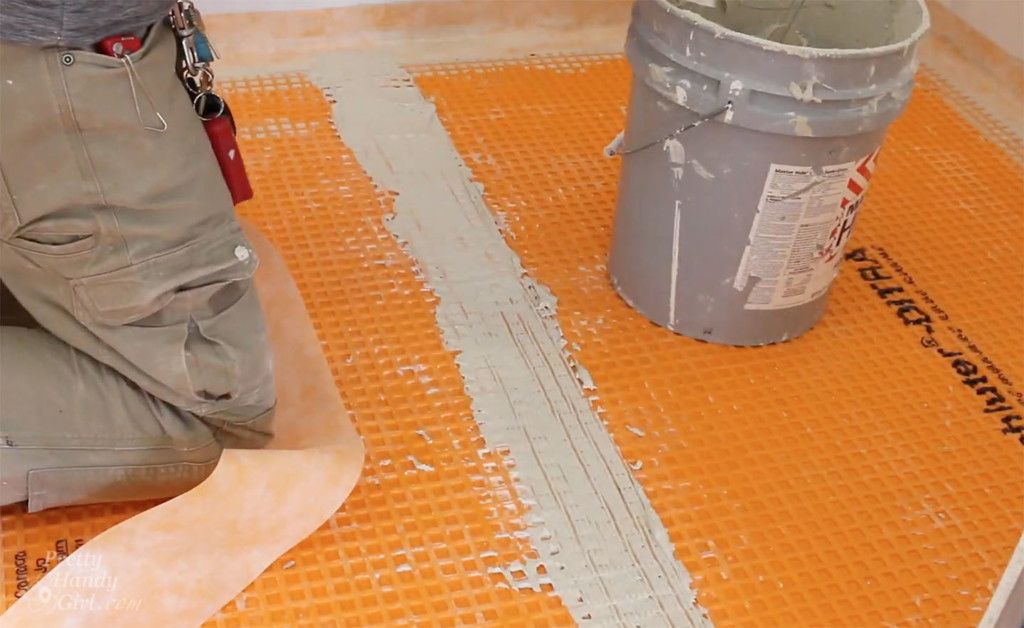
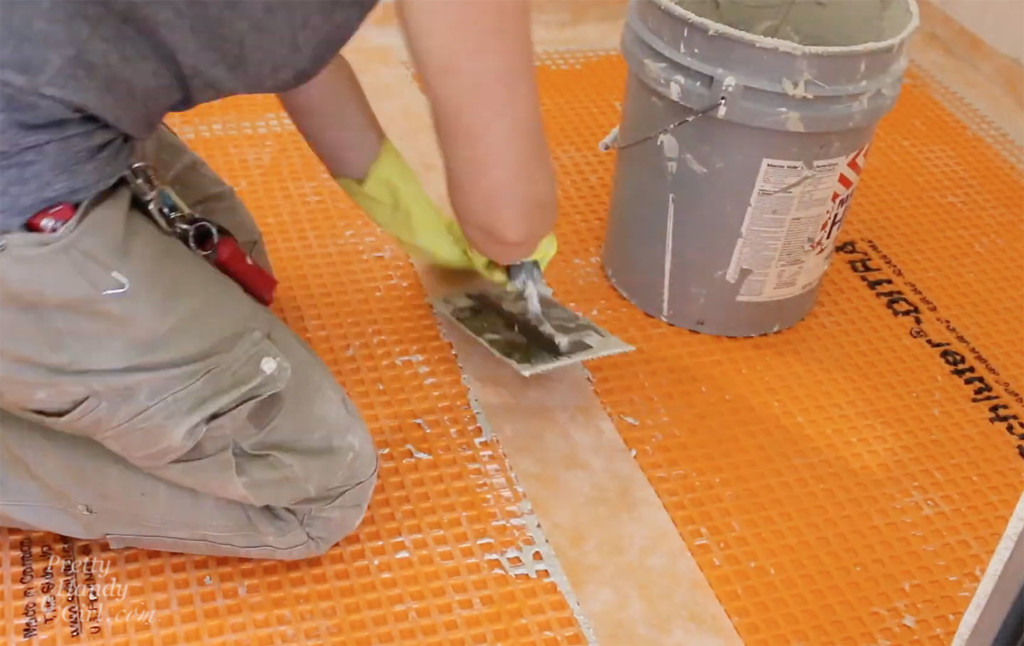
Waterproofing Floors in Any Room

Renovations are finally moving forward at Millie’s Remodel. This is the point where I feel like we already hit rock bottom and now we’re finally on the rebound. You might remember we used a self-leveling concrete in the kitchen last week. Now it’s time to waterproof the floors to prevent damage from ever happening again!

Last year I took two Schluter classes and learned about waterproofing, uncoupling membranes, and tips and tricks to keep your tile job looking flawless for a lifetime. What I learned over the four days blew my mind. I learned why and how shower systems fail. But, most importantly, I learned how to properly prepare surfaces for tile using waterproofing membranes. Today we’ll just be talking about waterproofing a floor, but I’ll have another tutorial for you soon so you can learn how to waterproof walls too.

Materials:

(I’ve included affiliate links for your convenience. I earn a small percentage from a purchase using these links. There is no additional cost to you. You can read more about affiliate links here.)

Why should you waterproof a floor?

Before we get started, I want you to fully understand how waterproofing a room can actually save you money and save you from the headache of having a leak in your home.

If you have a kitchen or a bathroom, chances are you’re going to have a leak in your lifetime (or your home’s lifetime) if it hasn’t already happened. One of the best things you can do is to install waterproofing materials so water can never damage your floors or floor framing again. I believe so strongly in the Schluter products, that all the properties I’m working on (including my own) will have Ditra installed on the floor before tiling.

By using the Schluter Ditra uncoupling and waterproof membrane in conjunction with Kerdi band around the perimeter of the room, I can waterproof the entire floor. Which means I don’t have to worry about rot or mold happening. Any little leaks will sit on top of this membrane until I see it because the water will rise instead of seeping into your floor or walls.

Ready to get started? Let me show you how to waterproof any room in your house!

For your convenience, I made a video to help show how to install Schluter waterproofing products and how to fully waterproof a room!

Instructions:

  1. Cut open your roll of Ditra and roll it out onto a scrap piece of wood or something you can cut on.
  2. Measure the room you want to waterproof and transfer the dimensions onto your Ditra membrane. Use a straight edge and a sharp utility knife to cut the Ditra. You might need to make a few passes with the knife to cut completely through the Ditra membrane.
  3. Test fit the Ditra in your room. Cut out a hole for your floor vents by pressing your knife through the membrane where the vent is and remove the material up to the edges of the duct. Cut the rest of the pieces to fill the room. Do not overlap the Ditra material.
  4. Now it’s time to mix the thinset. When using Schluter Ditra it’s highly recommended to use the Schluter All Set. This mortar is specifically manufactured to cure against the waterproof membrane. Read the instructions on the packaging and mix your thinset as directed.
  5. Use a wet sponge and clean water to clean and wet the subfloor. Spread the thinset onto the floor using the Schluter Ditra trowel. Make sure you have good coverage on the floor.
    Then use the notched trowel to comb through the thinset at a 45° angle.
  6. Lay the Ditra membrane on top of the thinset and use a smooth float to press the membrane into the thinset. In the beginning, you should roll back a corner of the Ditra to make sure you have full coverage onto the backing of the membrane. Place the Ditra back down and use the float again to make sure the membrane is pressed into the thinset.
  7. Use a wet sponge to clean out any mortar that has squeezed out the seams or edges.
  8. Once all the Ditra has been installed into the subfloor, you’re ready to seal the perimeter and seams. Grab a Kerdi corner piece for each corner of the room. Using the Kerdi trowel, apply thinset mortar to the inside corner of the room. Use the notched side to comb through the thinset. Place the Kerdi corner into the thinset and use the flat side of the trowel to embed and scrape along the Kerdi.
  9. Now you’re ready to install the Kerdi Band on the straight sections of wall. Be sure to cut your Kerdi band so it overlaps the corner pieces by at least 2 inches. I like to pre-fold my Kerdi Band by creasing it in the middle so it’s easier to install in the corners. Apply the Kerdi Band to the wall and floor using the same technique as the corner.
  10. Clean up any excess mortar leaving a smooth surface for tile installation.
  11. Now it’s time to complete the waterproofing of the room by sealing the seams between the Ditra sheets. Cut your Kerdi Band so it overlaps any perimeter band by at least two inches. Apply the thinset over the seam, use the notched trowel to create ridges in the thinset.
    Then embed the Kerdi band into the mortar and run the flat side of the trowel over the band to smooth the thinset and embed the band.
  12. Clean up any excess and allow the thinset to cure before tiling.

Once the thinset has cured you can tile your room and rest easy knowing this room is waterproofed and there’s no way the subfloor will rot from a sneaky little leak. Or a big leak if you have kids that like to splash out of the bathtub. I know this risk all too well from my own boys.

I hope you found this tutorial helpful and you’ll consider using Schluter waterproofing materials before you renovate your next “water” room.

Disclosure: I was provided with some Schluter materials for this project. I was not told what to write. All opinions are my own. I am particular about the brands I represent and will always let you know when you are reading a post with complementary products or a sponsored post.