Easy Fix for a Screen Door Hydraulic Closer | Pretty Handy Girl

Easy Fix for a Screen Door Hydraulic Closer | Pretty Handy Girl

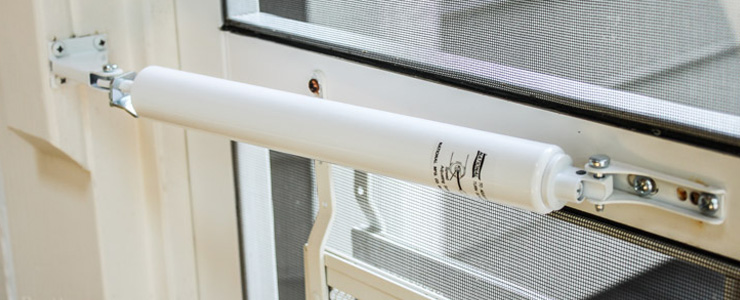
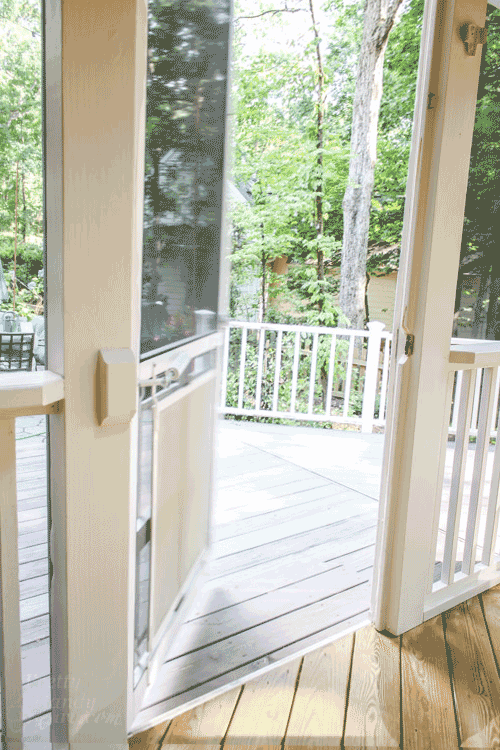
How annoying is it to have your ankle bitten by a screen or storm door that closes too fast? Not only is it annoying, but it can really hurt! Why put up with a screen door hydraulic closer that no longer works well when you can fix or replace it in a few minutes.

Today I’ve partnered with National Hardware to show you an Easy Fix for a Screen/Storm Door Closer and save the skin on your heels.

How to Replace a Screen Door Hydraulic Closer | Pretty Handy Girl
Materials:

(I’ve included affiliate links for your convenience. I earn a small percentage from a purchase using these links. There is no additional cost to you. You can read more about affiliate links here.)
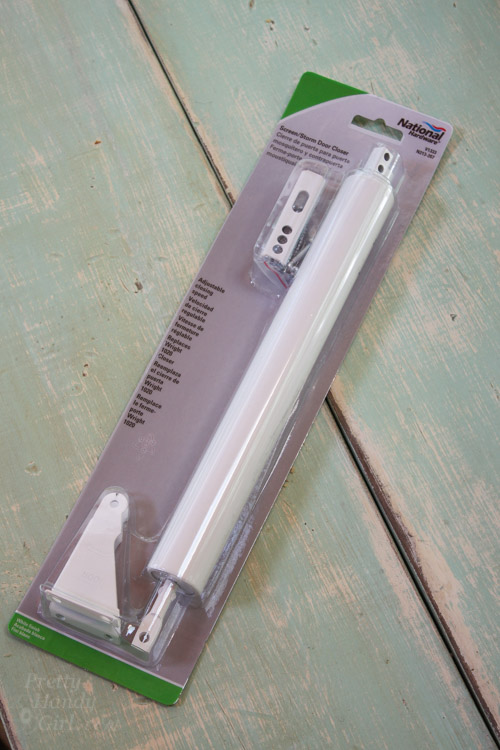
Instructions:

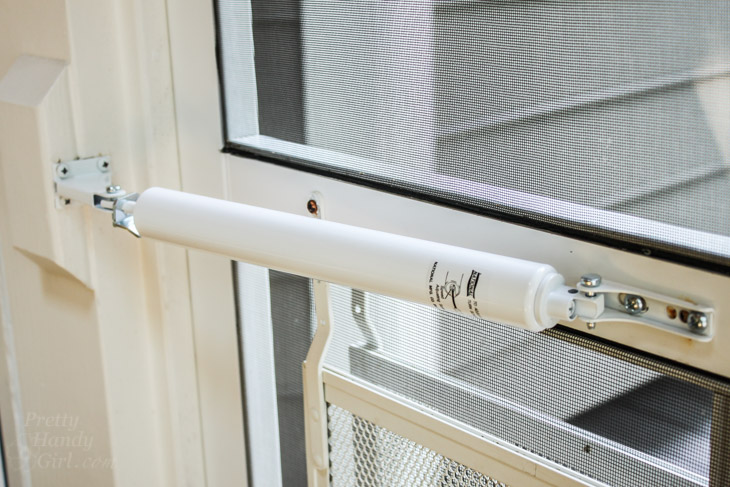
It is possible that your screen/storm door closer just needs to have the tension adjusted. Locate the tension adjustment screw on the end of the door closer. Turn the screw clockwise to tighten and make the door close slower. Turn the screw counter-clockwise to loosen and make the door close faster.

How to Replace a Screen Door Hydraulic Closer | Pretty Handy Girl

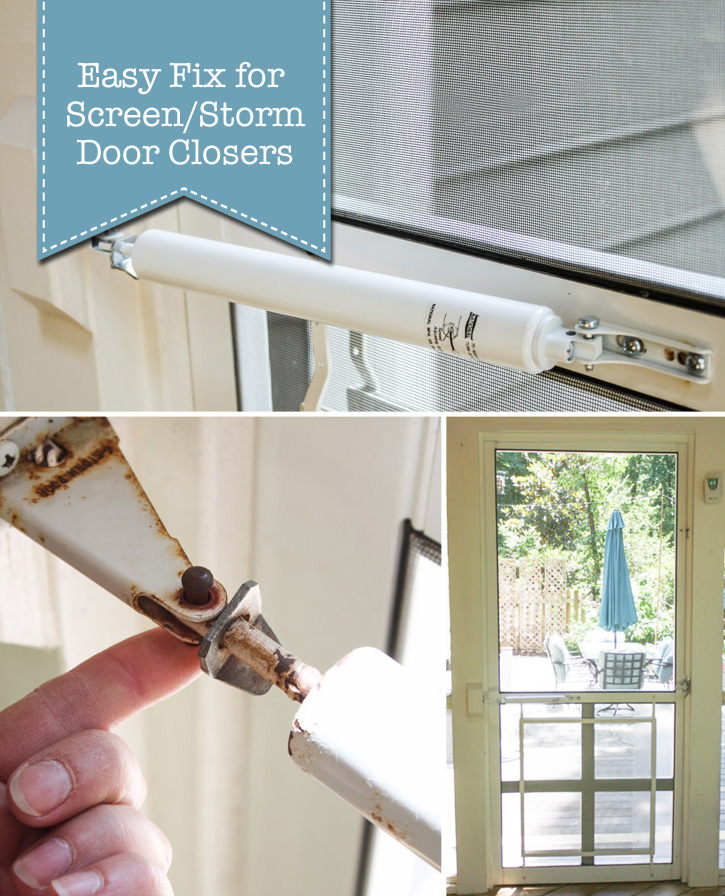
If the door closer continues to not operate smoothly (or the door closer is unsightly), you may need to replace it.

Close the door completely. Press up to remove the pin from the bracket and release the door closer barrel. If the pin is under too much tension, open the door an inch and slide the open clip against the barrel and try again.

How to Replace a Screen Door Hydraulic Closer | Pretty Handy Girl

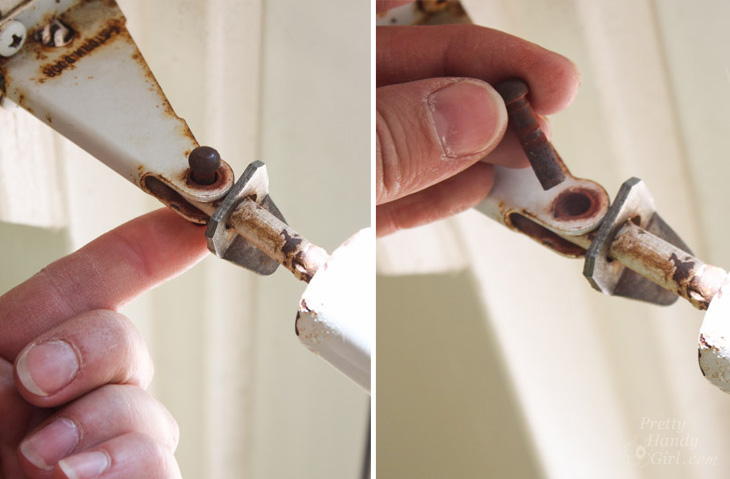
Remove the pin from the door side bracket. The barrel can now be completely removed.

How to Replace a Screen Door Hydraulic Closer | Pretty Handy Girl
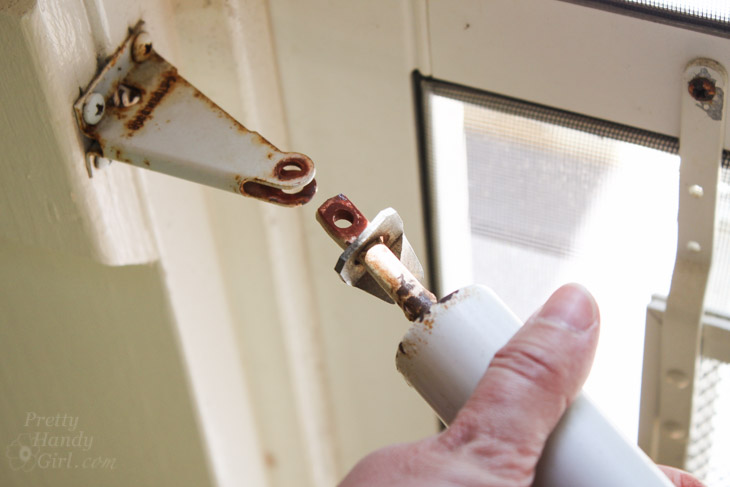
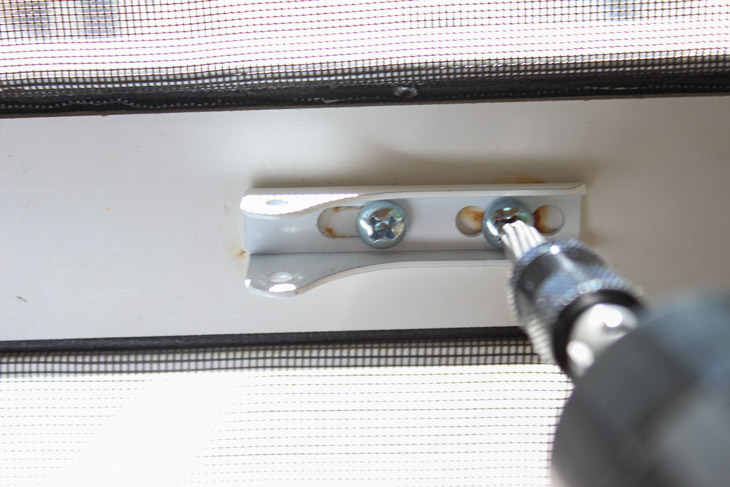
Loosen the screws from the bracket on the screen door to remove the bracket.

How to Replace a Screen Door Hydraulic Closer | Pretty Handy Girl
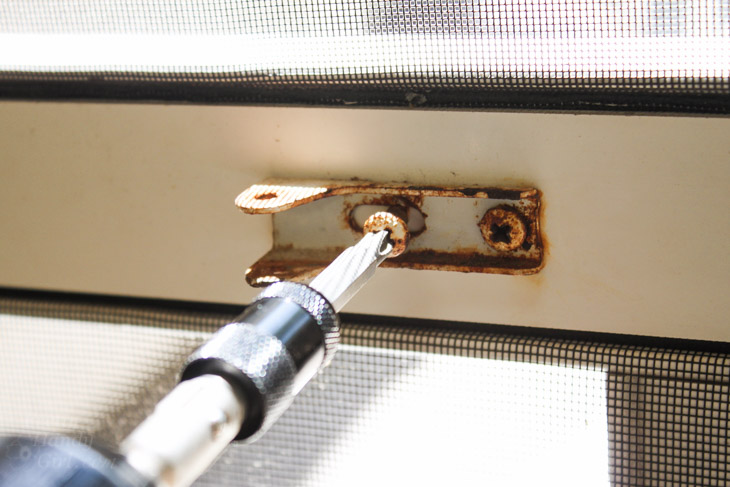
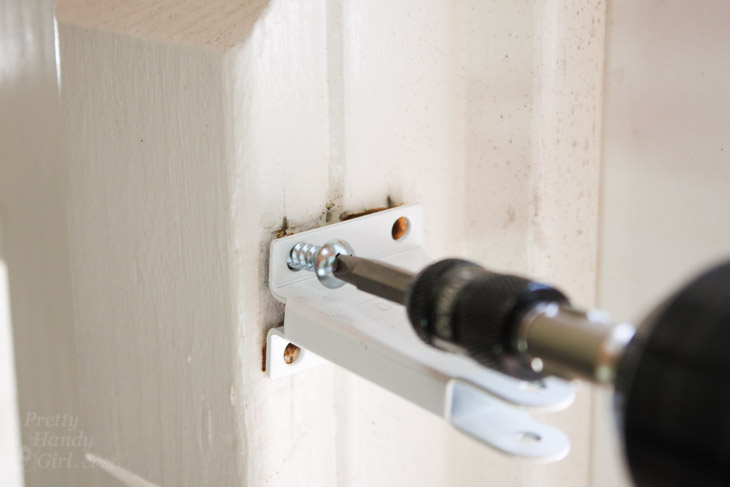
Loosen the screws from the door jamb bracket and remove.

How to Replace a Screen Door Hydraulic Closer | Pretty Handy Girl

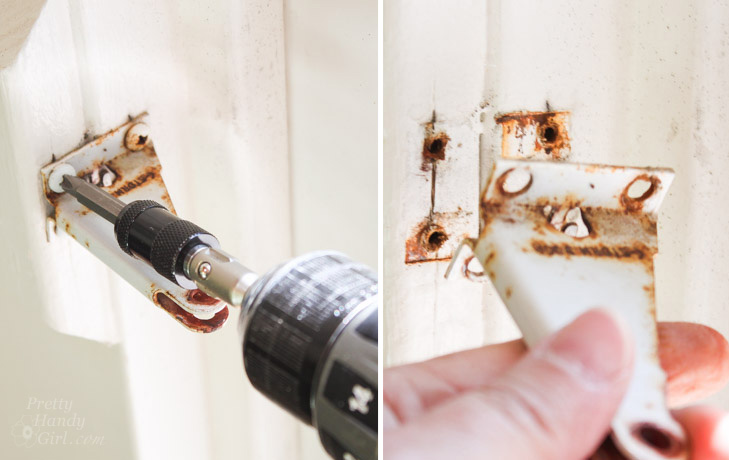
Attach the new bracket to the door jamb with provided screws.

How to Replace a Screen Door Hydraulic Closer | Pretty Handy Girl

Slide hold open clip up against the closer barrel.

How to Replace a Screen Door Hydraulic Closer | Pretty Handy Girl
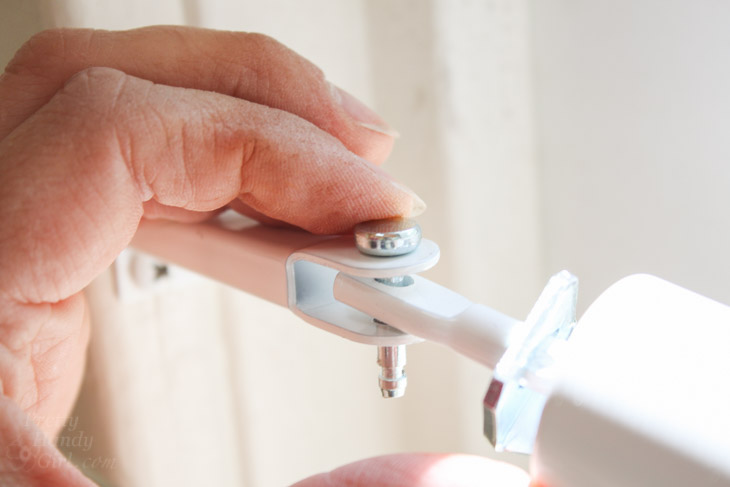
Insert the pin into the closer barrel and the jamb bracket.

How to Replace a Screen Door Hydraulic Closer | Pretty Handy Girl
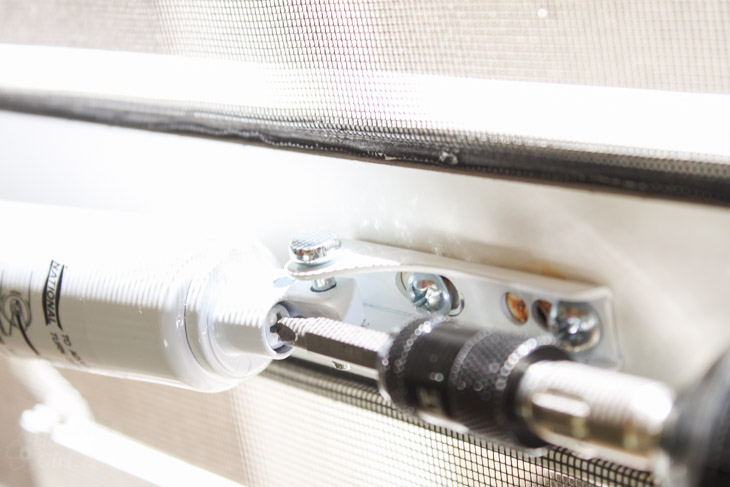
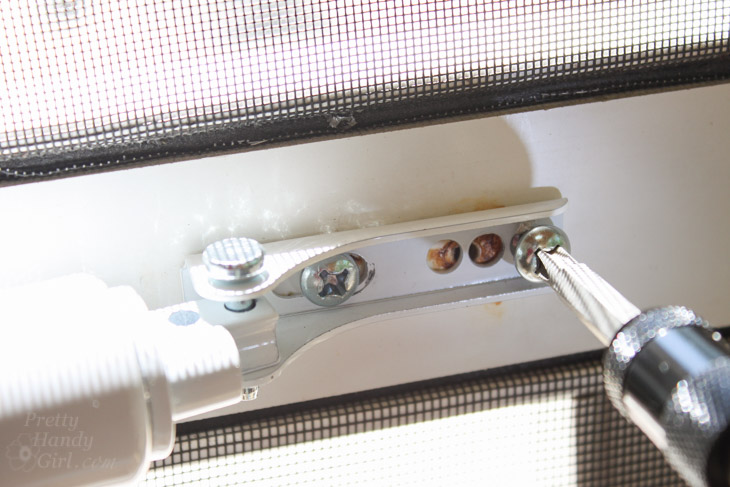
Install new bracket onto screen door. Keep screws slightly loose.

How to Replace a Screen Door Hydraulic Closer | Pretty Handy Girl

Slip the other pin into the barrel and the bracket.

How to Replace a Screen Door Hydraulic Closer | Pretty Handy Girl

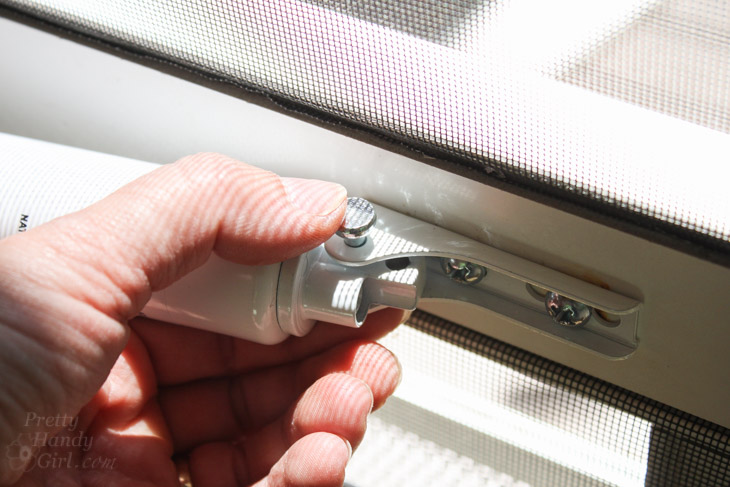
Slide the bracket away from the barrel until there is no slack. Tighten screws on the bracket.

How to Replace a Screen Door Hydraulic Closer | Pretty Handy Girl
Your new screen door closer is installed. Time to test the door.

How to Replace a Screen Door Hydraulic Closer | Pretty Handy Girl

Make any adjustments necessary to the tension screw.

How to Replace a Screen Door Hydraulic Closer | Pretty Handy Girl

That was an easy fix, wasn’t it?! Now, what else can you improve around your home. Check out all my Home & Auto Maintenance tutorials.

How to Replace a Screen Door Hydraulic Closer | Pretty Handy Girl

Be sure to check out all the Drill has to help your home look and function beautifully.

PHGFancySign

Disclosure: This is a sponsored post for National Hardware. I was provided complimentary hardware and was compensated for my time and efforts to promote National Hardware. I was not told what to write. All opinions are my own. I am particular about the brands I represent and will always let you know when you are reading a sponsored post.

How to Fix Small Areas of Wood Rot | Pretty Handy Girl

How to Fix Small Areas of Wood Rot | Pretty Handy Girl

Wood rot is as inevitable as a rain storm after you wash your car. Any home that is built with wood is susceptible to rot. Newer constructed homes using cement based siding and PVC trim don’t have to worry about it. But for the rest of us, there will always be wood rot in our future (if not present.) The best way to protect your home against wood rot is to keep all joints caulked and painted. Look out for areas where water accumulates.

Our window sill was just one such spot that collected dripping condensation from the aluminum storm windows (don’t get me started on those cheap pieces of $#@+. One day I will have them replaced.)

How to Fix Small Areas of Wood Rot | Pretty Handy Girl

Over time the water seeped below the surface and rotted this corner of our window sill.  Fixing wood rot in small areas is a snap using Bondo. For larger areas, you’ll have to replace the wood.

How to Fix Small Areas of Wood Rot | Pretty Handy Girl

For today, I’ll show you How to Easily Fix Small Areas of Wood Rot.

Materials:
(contains affiliate links)

How to Fix Small Areas of Wood Rot | Pretty Handy Girl

Instructions:

Begin by digging out as much of the rotted wood as you can. Anything remaining must be solid wood.

How to Fix Small Areas of Wood Rot | Pretty Handy Girl

Sand the edges of the void left in the wood. Read more

How to Install Cabinet Door Knobs and Drawer Pulls Perfectly the First Time | Pretty Handy Girl

I know when you buy a new vanity or just have new cabinets installed it’s hard to get up the guts to drill through the pristine doors and drawers to install new knobs on then. I get it, really I do. You are worried you’ll drill in the wrong spot. Or you might mess up the finish if your drill bit slips. Well, you’re in luck! Today I have the goof proof tutorial for How to Install Knobs on New Cabinet Doors and Drawers!

Materials:
(contains affiliate links)

How to Install Cabinet Knobs Perfect the First Time | Pretty Handy Girl

Instructions:

Take one last look at the pristine cabinet doors and drawers. Now, grab the tape measure and let’s get busy!

How to Install Cabinet Knobs Perfect the First Time | Pretty Handy Girl

Mark the location for your new knob or pull. For knobs, you want to center the knob equidistant between the top and sides of the cabinet door. If you have a decorative frame, the knob can line up with the miter joint. For drawer pulls, center the knob left to right and top to bottom. Read more

STOP! You Don't Have to Gut Your Dated Bathroom | Pretty Handy Girl
I’ve been working for the past few months on a friend’s home here in the beautiful capital city of North Carolina. Her home had a great floor plan, but needed some TLC and some updating. Luckily she and her husband had just finished renovating the master bedroom. They were about to gut the kids’ bathroom and give it a similar renovation when I stopped her. She was in disbelief when I told her I could renovate that bathroom for a fraction of the cost of a full renovation. And, buyers would hardly be able to tell the difference.

You Don't Have to Gut Your Dated Bathroom | Pretty Handy Girl

This is a small bathroom, but fully functional and the tile was actually in good shape.

You Don't Have to Gut Your Dated Bathroom | Pretty Handy Girl

Do you doubt my claims? Ready to see the after photos? Read more

The Best Glue for Every Fix | Pretty Handy Girl

The Best Glue for Every Fix | Pretty Handy Girl

Over the years I’ve used a multitude of glues and learned the best glues for each application. Here is a list of The Best Glues for Every Fix. Most of the links in this article are affiliate links to help you find the exact glues I use.

To get a good secure glue fix, you have to use the appropriate glue for the job.

Hot Glue:

I know many people love hot glue because it’s a good resource for crafting. Hot glue is best used for fabric and textured crafts. But, that’s it.

Hot_Glue_end

Rubber Cement:

For a permanent paper to paper connection, use two coats of rubber cement.

DIY Book with Storage Inside | Pretty Handy Girl

Spray Adhesive: Read more