Pros and Cons of 4 Types of Picture Hangers

Pros and Cons of 4 Types of Picture Hangers

Hello! It’s Jessica, from Decor Adventures and I’m back this month with some very handy tips to help hang items up on the wall. Do you ever wonder which picture hanger to use? Did you know there are several ways you can hang things up? From curtains to art and mirrors to lightweight decorations — there are many options for hanging (and sometimes you don’t even have to put a hole in your walls.)

I live in a 115 year old house that has both plaster and drywall, and I’ve experimented with many types of ways to hang items on the walls. Today I’ve compiled The Pros and Cons of 4 Picture Hangers.

1. Picture Hooks and Nails:

This is probably the most common way to hang up items. Simply mark where your item will go and hammer in your nail and hanger. Brittany shows you how to hang up items when putting together a gallery wall here.

insert-nails-into-hanger

Pros:

Hooks and nails come in many lengths so they can work well in most walls and are easy to use. They are also affordable and go into a wall quickly. All you need is a hammer.

Cons:

Hooks and nails don’t always work in every wall type and can rust. They can’t be used in plaster walls. When hanging heavier art, you need to find a stud to nail into. Read more

Notched Hanging Brackets

Hang Wall Decor Straight

Have you ever had the frustrating experience of hanging something on the wall only to notice afterward that it wasn’t straight? Yah, this happens to me all the time. So – let’s talk about how easy it is to Hang Wall Decor Straight Every Time.

Recently my wife wanted to hang a cork/dry erase board in our laundry room so that we can keep track of the kid’s activities. When tackling small projects like this one I always think, “How can I make this easier than it looks?”.

Well, fortunately my memory isn’t shot yet. I remembered that I received a pen laser level for my birthday and it would be perfect for getting the cork/dry erase board straight and level. If you’re going to hang a heavy mirror, tons of pictures, or several pieces of wall art I highly suggest getting something like this level because you’ll save precious time, countless re-hangings and eliminate the agony most of us experience during this process.

The Bosch pen laser level I have costs $35 on Amazon but any similar product will suffice.

Here are the additional supplies you need for this 20 minute project: Read more

how_to_securly_hang_a_keybox

One of the souvenirs I brought back from our London trip was this adorable little carved bird key box.

key_box_open

The colors, the wood and the artistic way it was carved spoke to me and told me that I had to have it in my kitchen! Despite the lack of space in our suitcases, I was able to cram socks and underwear inside to make room for it.

bird_key_box

When we got home I found the perfect spot to hang my little key box. Although the box had hangers attached, I knew the daily pulling and key snatching would eventually prove too much for the dinky hooks. So, I simply removed the hangers with a screwdriver.

dinky_hangers

Materials to hang a keybox: Read more

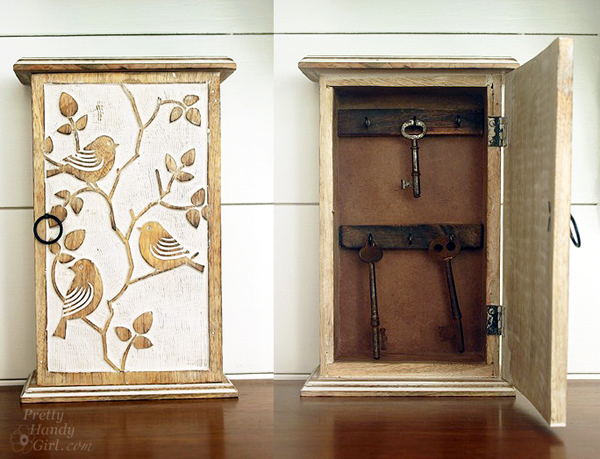
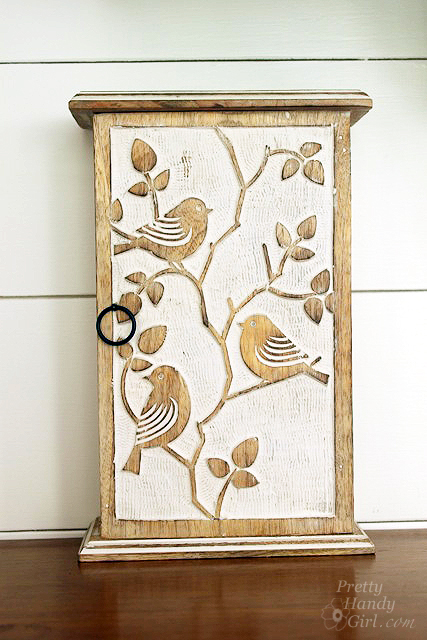
Hey all, I’m safely at Blissdom now and meeting many other inspiring bloggers. Unfortunately, there is one blogger who, sadly, I won’t be meeting. Jessica from Decor Adventures. She is as sweet as can be and a real kindred spirit when it comes to DIY projects. Instead she’s staying home to kick DIY butt in her basement, but agreed to take some time to meet you all in my absence. Take it away Jessica!
Jessica

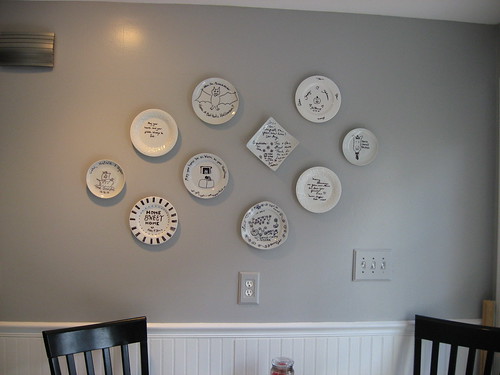
Hello Pretty Handy readers! I’m Jessica from Decor Adventures, a professional by day and project addict by night, decorating my new 111 year old house. Today I want to share with you how to hang plates on a wall.  It’s so simple, with no visible hardware, you’ll be hanging them up in no time.

When we had a housewarming party last fall, we made our guests participate in a fun little activity while helping to decorate all at the same time. I got some inexpensive plates at the thrift stores and asked our guests to freestyle it!  We had them decorate plates to hang in our house with their well wishes for our first place.
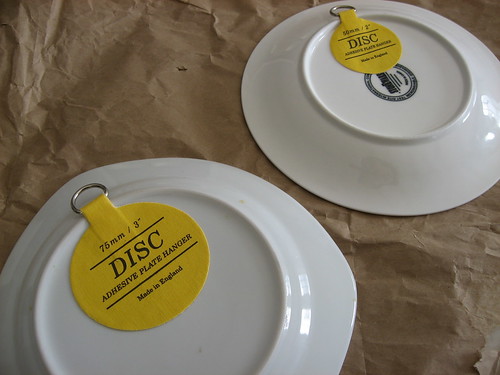
Kitchen

First the secret is 
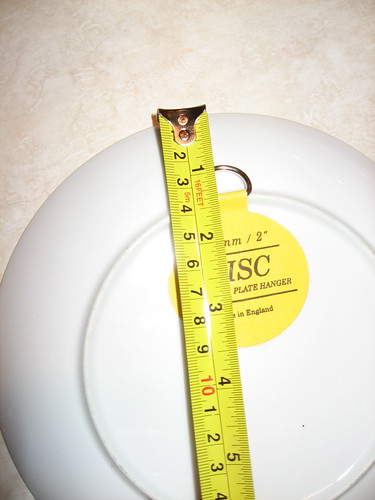
Dischangers. They are easy to order online, ship super quick and come in different sizes to hold various weight.

To use them, moisten the disc and secure it to the back of your plate then let it dry overnight. Make sure you wait, even if you want them up right away. You don’t want any plates crashing to the ground because the glue is wet!

Plates

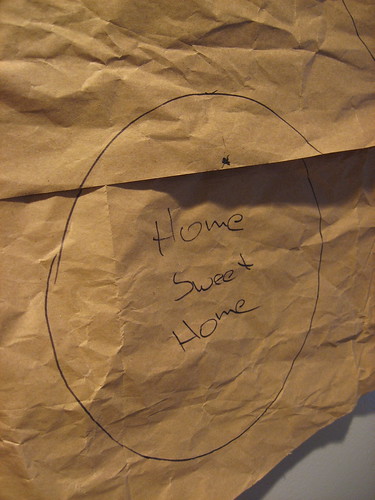
To make my arrangement I used a technique I saw online where you make a grid of your art on a piece of paper, hang it on the wall, nail in the holes, hang up your art, pull the paper away and presto! Art on the wall. This actually can be done with different wall arrangements, plates, art or photos, etc.

To get started I pulled out a piece of packing paper that came in box from an item I ordered. I was that thick butcher paper. I laid it out on the counter space which was just about as big as my wall area.

Then I arranged the plates on the paper how I wanted them to look on the wall. This way I could move them around without having to hammer a new hole in the wall.

Plates

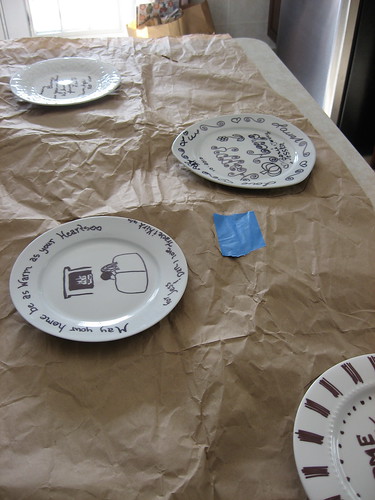
Then I traced each plate onto the paper with a sharpie, making sure it didn’t bleed onto the counter underneath. You can write on the plates or art which piece it is. This will help to see what you’ve got going where.

IMG_8563

Then I removed the paper from under the plates and hung it up on the wall with painter’s tape. Now you’ll see the placement of your art/plates.

IMG_8561

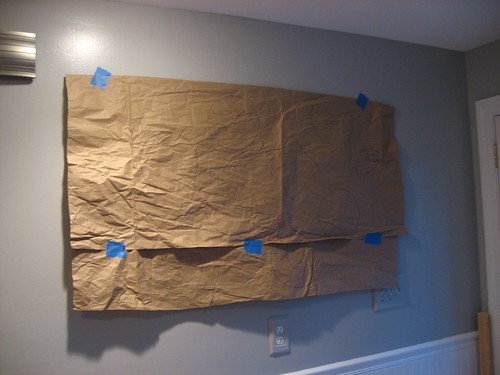
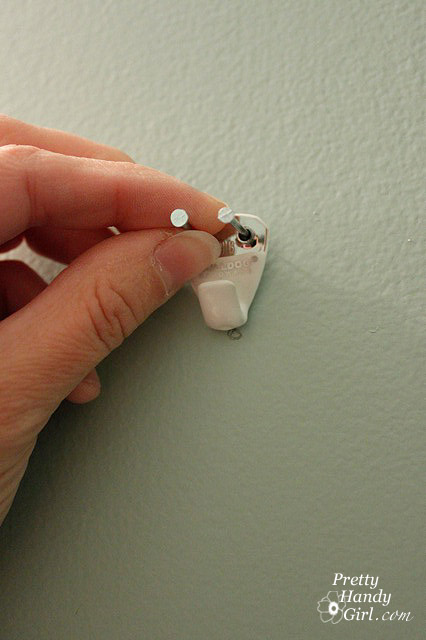
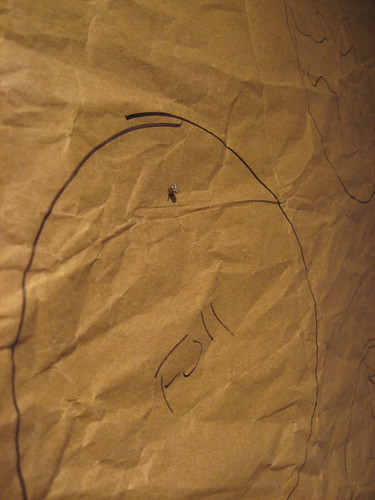
After that, measure where each nail hole goes,

IMG_8562

mark that spot on your “plate” on the wall,

IMG_8563

and hammer one in!

IMG_8565

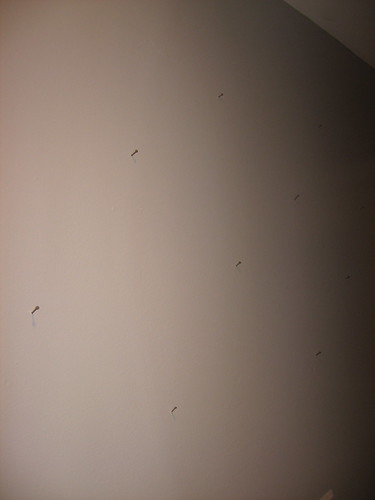
Once you carefully remove the paper, you’ll have your nails all ready to go.

IMG_8566

Lastly, simply hang up your art and you’re done.

IMG_8570

Plates

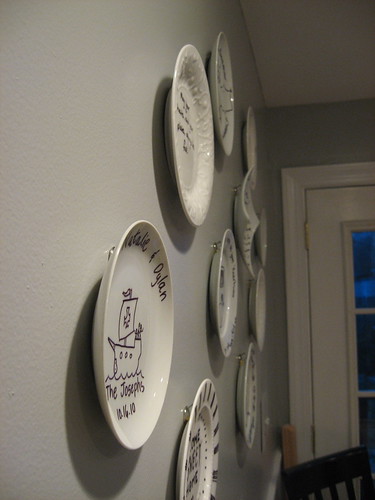
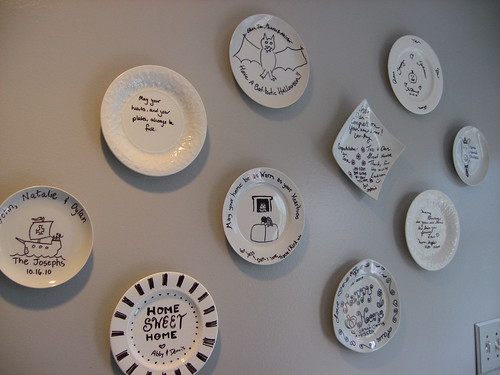
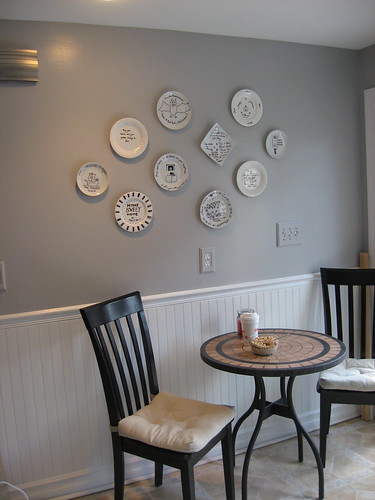
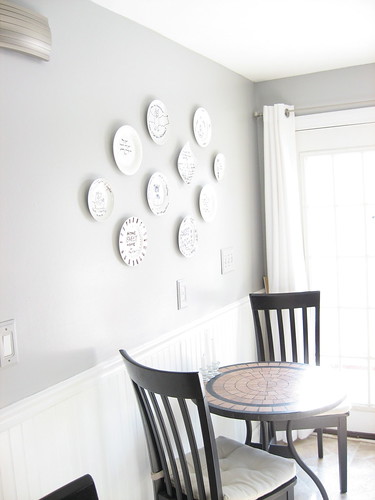
This is the little bistro corner in our kitchen. So when our friends come over they get to see their handiwork.


Kitchen

IMG_8812

Hoped you learned something today with my plate art. Do you have a technique for hanging things up on the wall? Any tips you want to share?

Thanks again to Pretty Handy Girl for letting me visit!

Please give Jessica a round of applause. Wasn’t that a great tip for hanging plates? I think I’ll be using this technique to hang our family photo wall soon!

You should hop over to her blog where she and her husband are doing some crazy renovations to their home.