
Today’s tip is a DIY laundry detergent recipe that is gentle on your washer (HE and regular), but most importantly it will save you money!

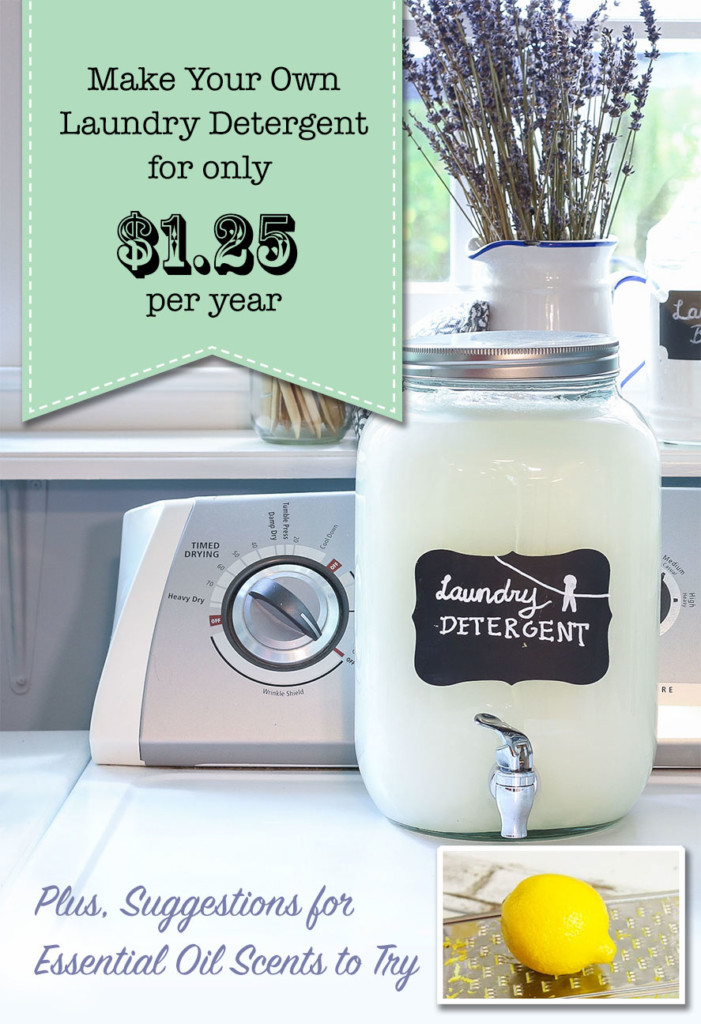
If you’ve ever looked at the cost of store-bought detergents, you may have choked at the cost. I have a wonderful detergent recipe to make your own own homemade laundry detergent for only $1.25 per year!
And the detergent is low suds and low residue which will keep your washer and clothes cleaner.
How to Make DIY Laundry Detergent
If you think this homemade liquid laundry detergent couldn’t possibly work on dirty clothes, think again. I can tell you that in addition to our regular clothing, I’ve been using this recipe for 9 years on my boys’ clothes, on my own work clothes, and my husband’s karate clothing. And it really works.
Whatever stains don’t come out in the wash are no match for my DIY Miracle Stain Remover.
The great thing about this laundry detergent is the basic ingredients are simple, gentle on sensitive skin, and can be purchased at your grocery store. Just look on the high or low shelves in the laundry detergent aisle.
If you can’t find them in the laundry aisle, it’s always a good idea to look at your local hardware or home improvement store.
To make the homemade detergent, you only need about 15 minutes and then let the liquid detergent sit overnight. The next morning, you stir, add more cold water, and you are done!
Do you think that’s too much time to devote to making your own laundry soap? What if I told you that this batch lasts our family of four (did I mention two of them are young boys) six months or more.
Click Here to Download the Printable Version of the Recipe
Laundry Detergent for $1.25 a Year
Several of you asked me to make a video showing how I make my own detergent. For your convenience you can watch the video, then scroll down to read the directions to make your own laundry soap.
Ingredients:
(I’ve included affiliate links for your convenience. I earn a small percentage from a purchase using these links. There is no additional cost to you. You can read more about affiliate links here.)
Please note, you can purchase these items cheaper at your local grocery store or hardware store. The links are here to help you see what the box looks like or to order if you can’t get to the store.
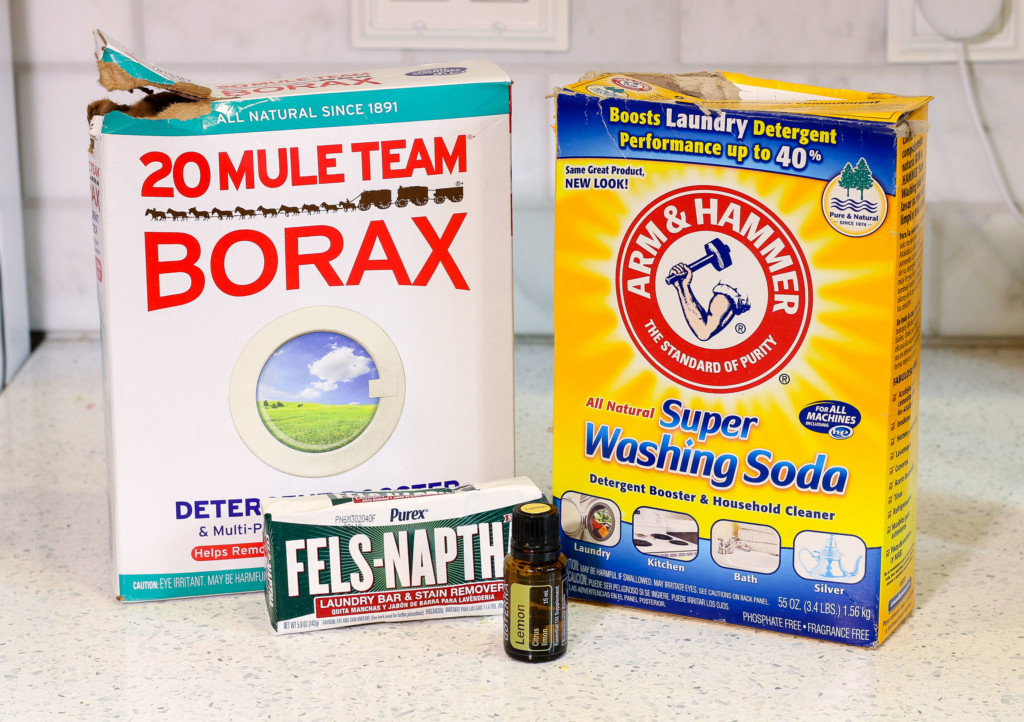
- 1/4 bar of Fels Naptha soap
- 1/4 cup Arm and Hammer Washing Soda (not baking soda)
- 2 Tablespoons Borax powder
Optional: Essential Oil for Scent (see below for scent ideas)
Instructions:
- The first step is to cut your Fels Naptha Bar in quarters. Grate one quarter of the Fels Naptha Bar using a fine cheese grater.
- Boil 1 cup of water. Pour grated Fel Naptha into pan of boiling water. Stir continuously until the soap has dissolved. Meanwhile, pour 2 1/2 quarts (10 cups) of water into a large container or bucket. Pour dissolved Fels Naptha into the bucket of water. Stir.
- Add 1/4 cup Super Washing Soda and 2 TBSP Borax to the bucket.
- Add 2 1/2 quarts more water and stir.
- Cover the mixture and let is sit overnight out of reach of pets or children. Uncover the bucket and stir the gelatinous mix.
- Add 5 Quarts (20 cups) of water to the bucket. Stir.
- Add 15-30 drops of your favorite essential oils.
Some essential oil scents you may like:
Citrus scents: the added scent of lemon, lime, orange, bergamot, or grapefruit is a favorite!
Herbs scents: peppermint, spearmint, rosemary, basil
Other scents to try: Eucalyptus, chamomile, cypress, lemongrass
Want to fight mold & mildew? Use Tea Tree Oil (Melaleuca)
Blends to try:
- basil & lemon
- lavendar & lemon
- orange, bergamot, and lemon
- chamomile, lavender, and orange
- lemon & tea tree
Miracle Stain Remover Recipe:
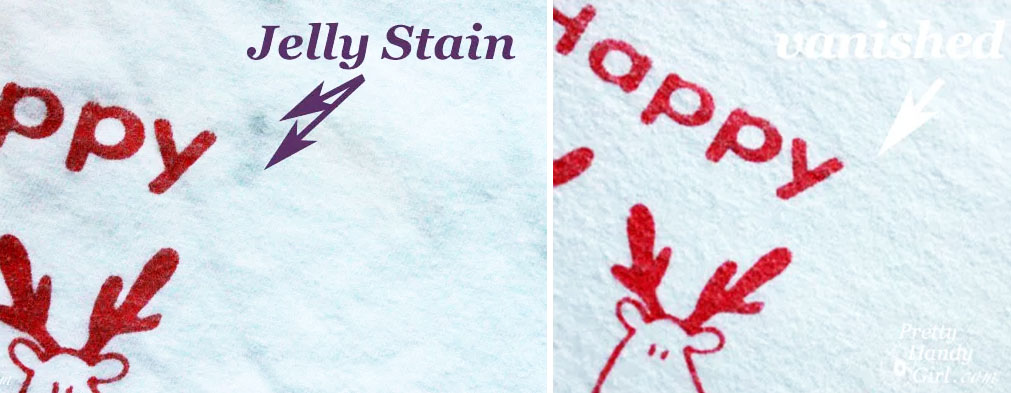
If your clothing gets stained, try soaking in this miracle stain remover a day or two before laundering. You’ll be amazed how the stain lifts out effortlessly. It’s a great way to get even the toughest stains out.
How did I figure out my cost per year?
I had to do a little guestimating to figure out my cost. In the nine years I’ve been making this recipe, I’m only on my second box of Borax and Arm & Hammer Washing Soda.
Each batch of this homemade laundry soap consists of at least 4o cups. If you use the required 1/4 cup per load (do not use more, as more detergent won’t get your clothing cleaner) you can easily get 160 loads of laundry from each batch.
All this to say, I came up with a very conservative estimate that I pay $1.25 for laundry detergent per year, much less than commercial detergents.
The next time you have a load of laundry to wash, give this diy laundry soap a try. You may never buy commercial laundry detergent again!
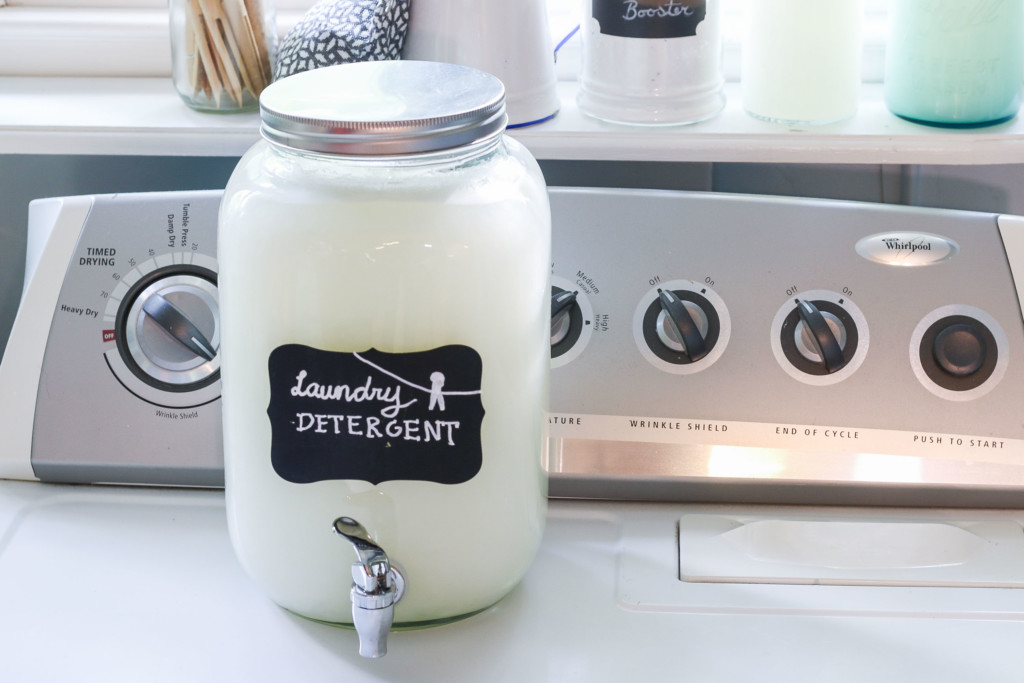
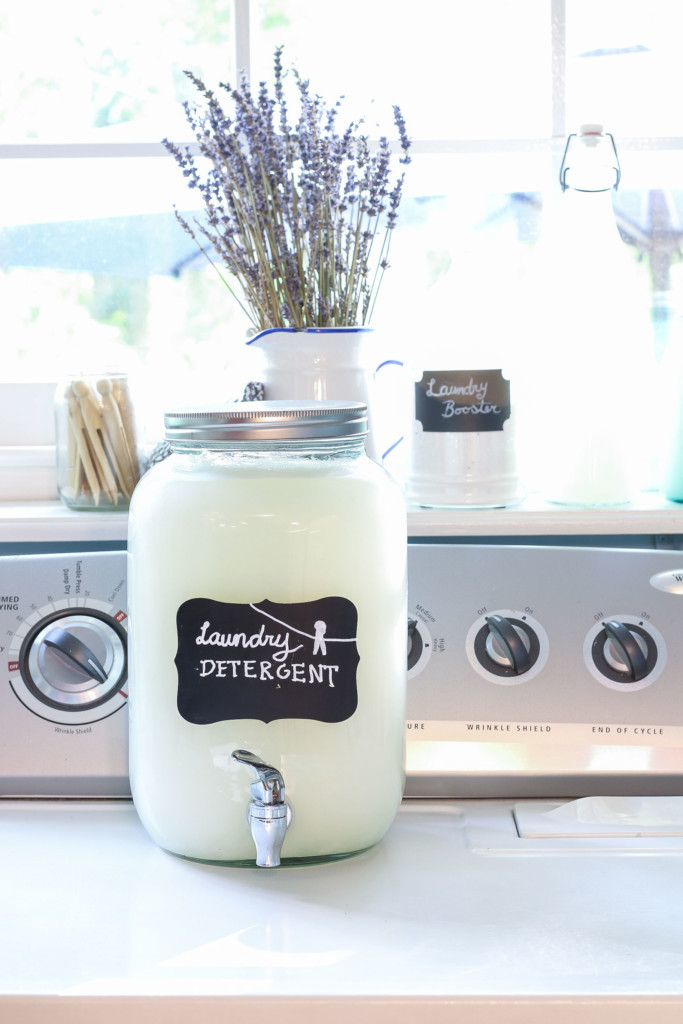
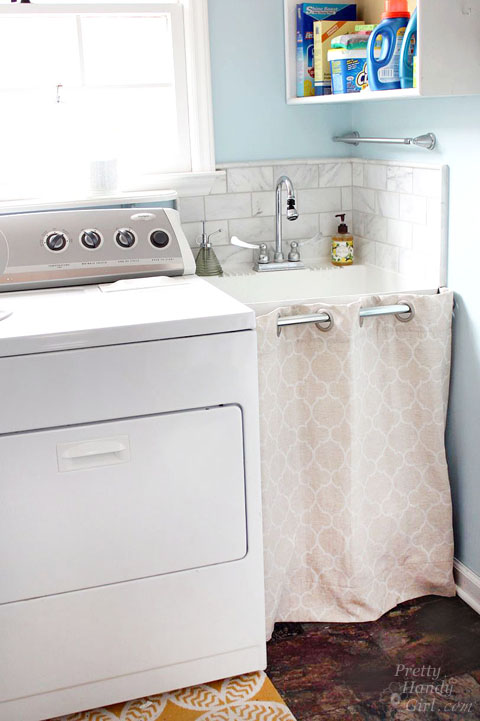
Storing Your Laundry Detergent:
The first time I started making this recipe, I used my empty laundry detergent plastic container. But, it was often too small for the batch size. Next, I used an empty 2.5 Gallon bucket water jug.
But, several years ago I bought a big glass drink dispenser and a smaller bottle with a flip top stopper. The smaller bottle is filled and used for dispensing detergent into the 1/4 cup measuring cup and then added to the washer.
The large drink dispenser holds all the excess detergent. This is a prettier solution to storing all the detergent and looks better on your laundry room shelf.

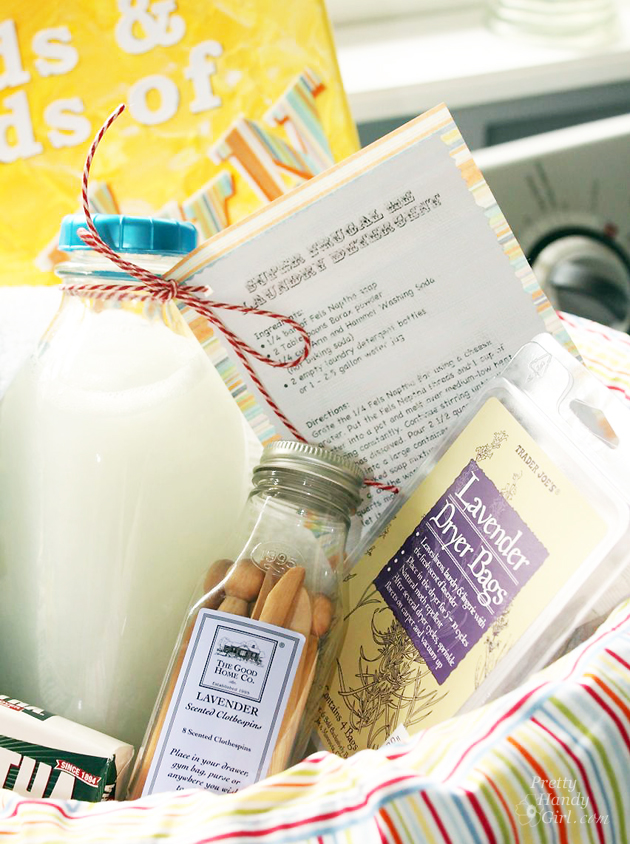
Gift Idea:
Once you try this DIY laundry detergent, I know you’ll love it. And then you’ll want to share this recipe with everyone you know!
It does not contain any harsh chemicals and takes just a little bit of time to make. I like to share the recipe with a small sample amount in a laundry themed basket.
If you want more uses for that big box of Borax, check out my 2 Ingredient Ant Killer!

Pin this page for later!


