Do you have a door that sticks or doesn’t close properly? You are not alone. Many factors can contribute to this problem. Let’s learn how fixing common door problems can be easy.
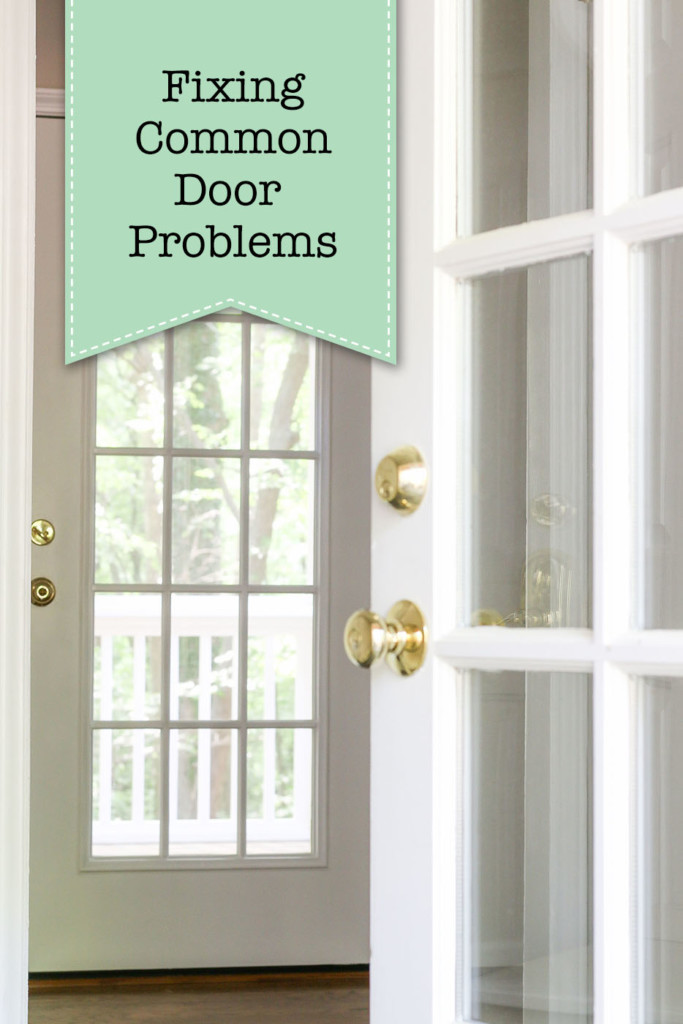
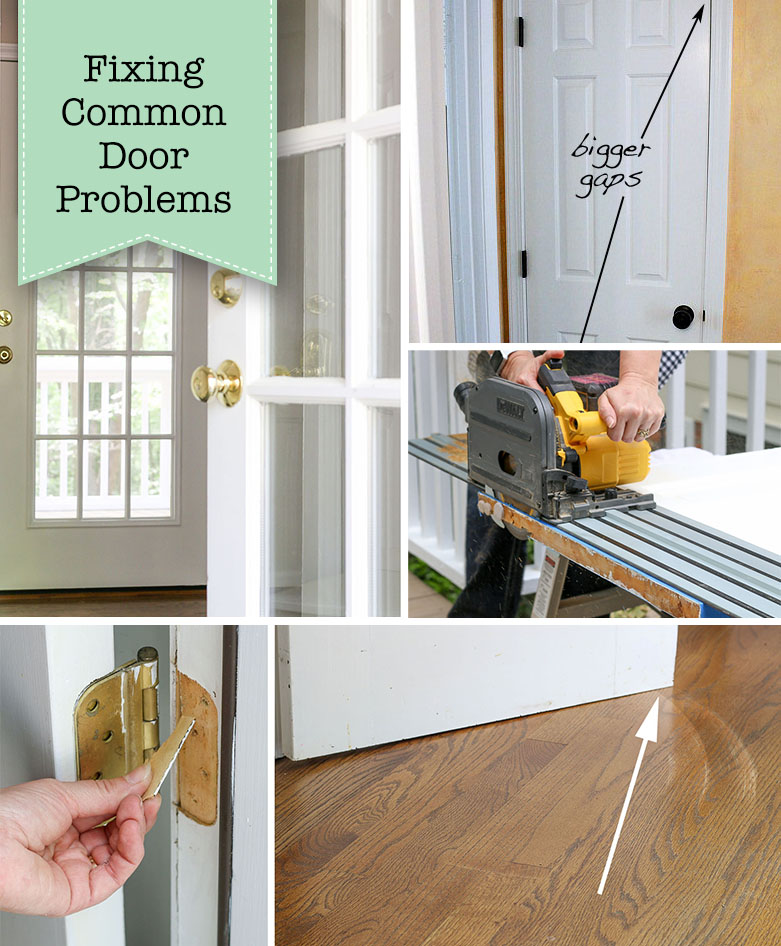
Fixing Common Door Problems
Do you have a door that sticks or doesn’t close properly? Or maybe your door rubs, squeaks, or is drafty. Regardless of the problem, I’m going to show you how to fix your most common door problems! But first, a big thank you to Schlage, the 100-year-old leading door hardware company, for sponsoring this article.
If you have common door problems, you are not alone. Many factors can contribute to them: house movement, humidity, dry air, improper installation, slamming doors, or kids swinging on them (true story). Without being able to control many of these factors, it’s important to know how to fix your door problems – as your door is often a main focal point of the room and/or entryway.
(I’ve included affiliate links for your convenience. I earn a small percentage from a purchase using these links. There is no additional cost to you. You can read more about affiliate links here.)
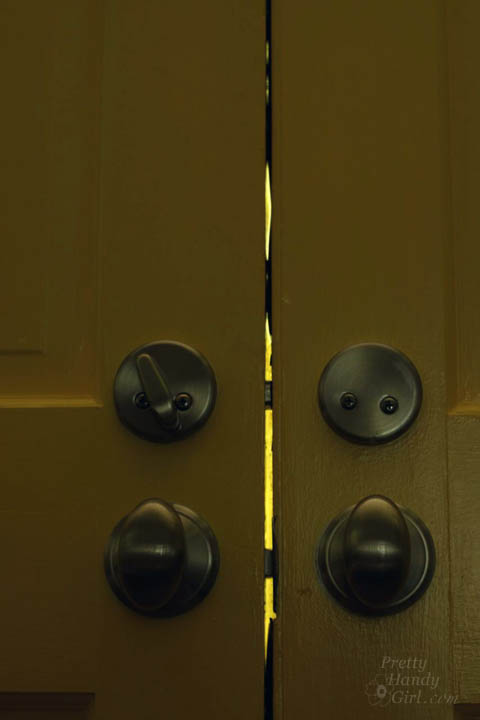
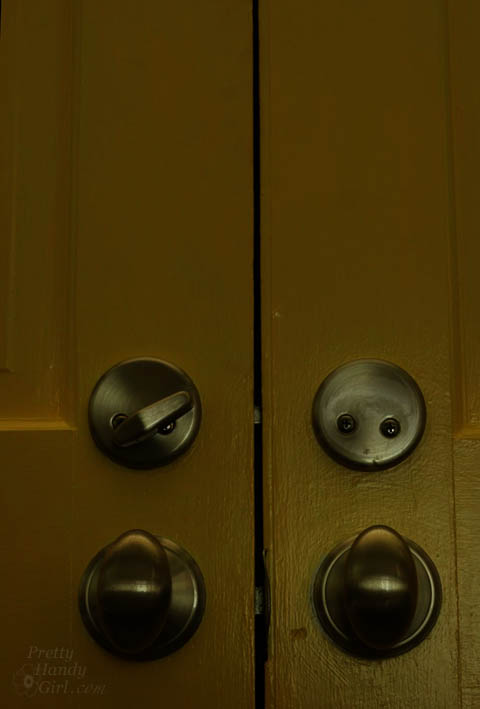
Door Not Latching:
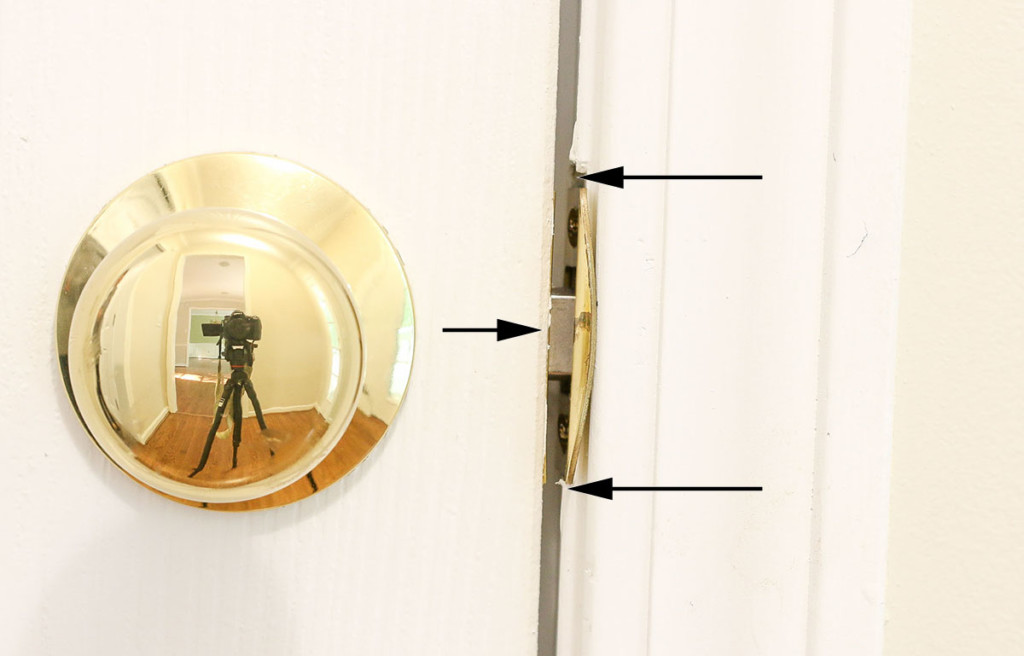
A door that doesn’t latch properly is usually a simple fix. Lean down until you are at eye-level with your doorknob. Look at the gap between the door and the door frame. Is the latch centered on the strike plate?
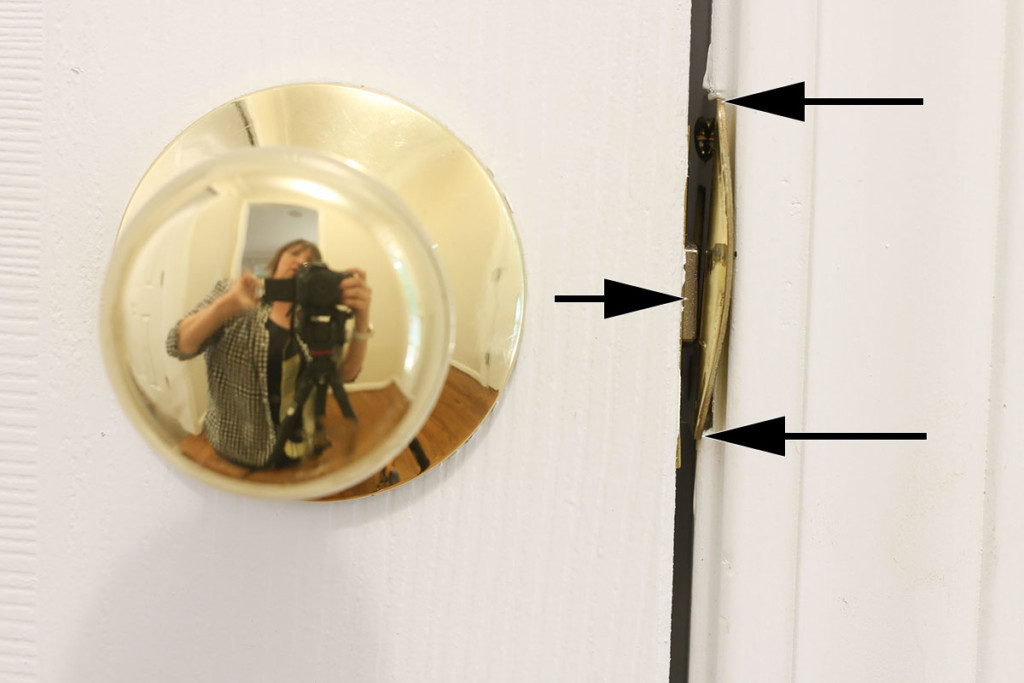
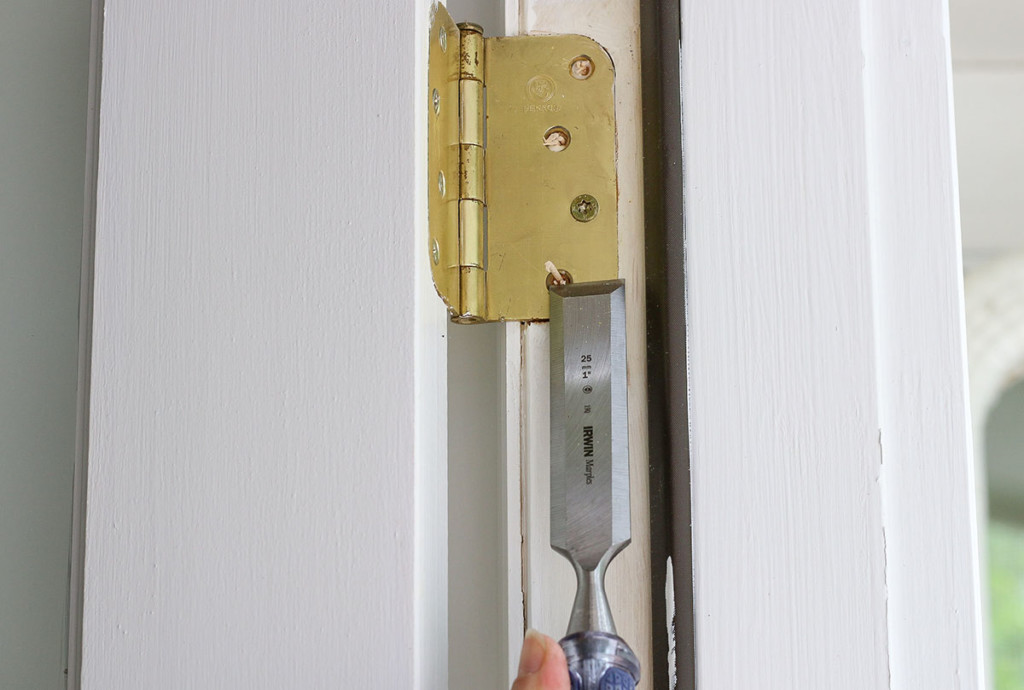
If not, that’s why your door doesn’t latch. Here’s how to fix it. Determine the center of the latch. Remove the strike plate and move it to center on the latch. Mark the new location of the strike plate. Chisel the door frame as needed.
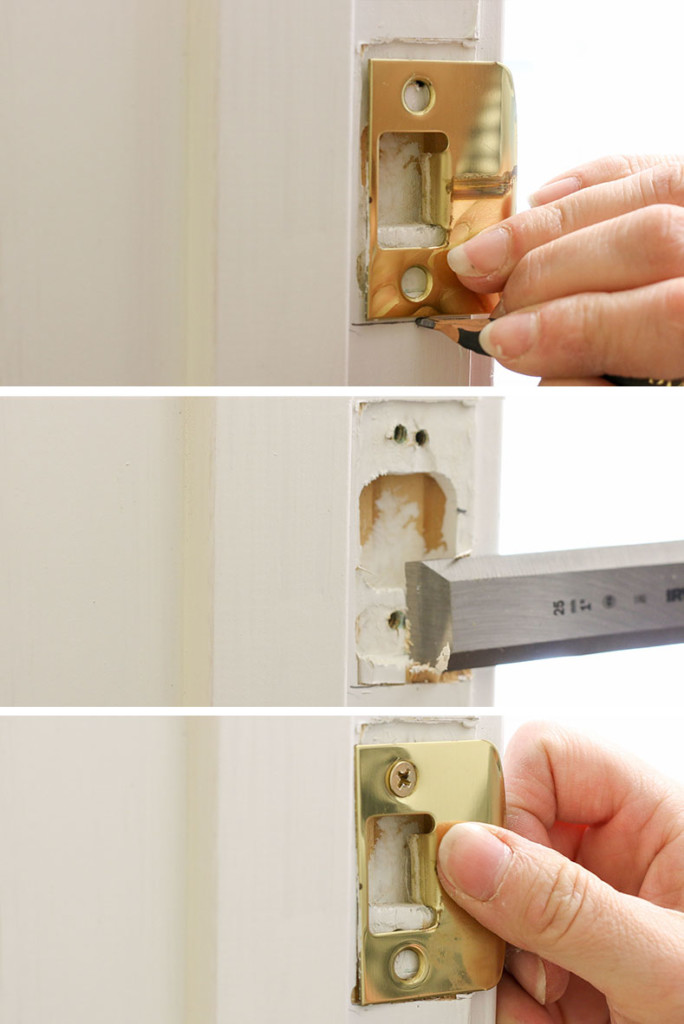
Reattach the strike plate and test the door. You can see in the photo below the latch is now centered with the strike plate and the latch can now slide into the strike plate properly.
(Like the knob above? It’s a Schlage Plymouth in Bright Brass, but comes in a variety of finishes.)
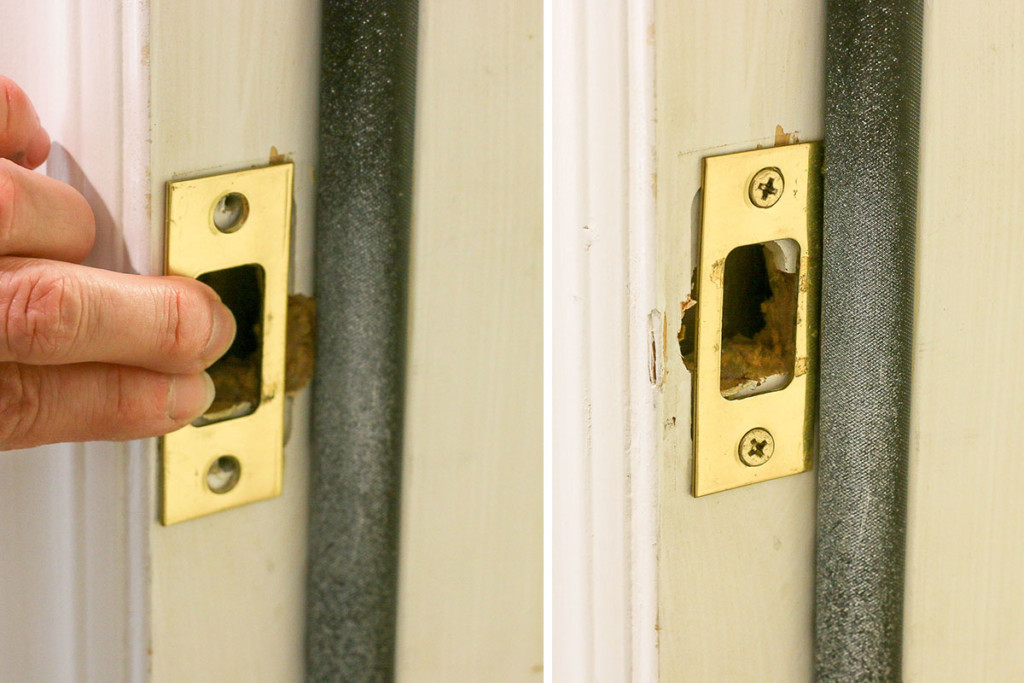
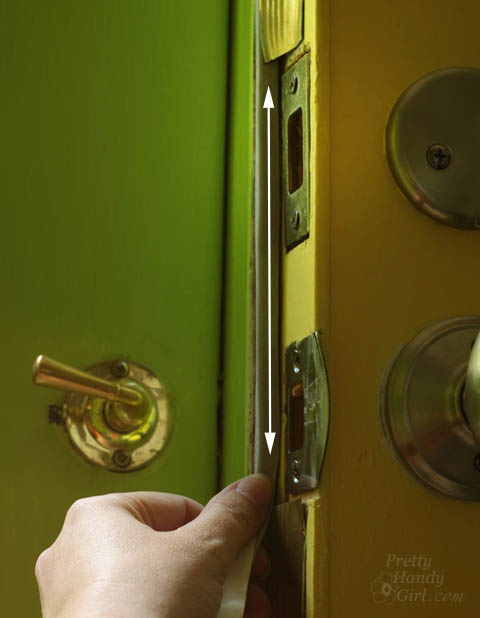
Door Not Closing Tight Against Stop:
If your door rattles loose in the frame and doesn’t close properly against the stop, it can be as simple as moving the strike plate closer to the stop.
Important: If this problem happens on a door between the garage and the house, it could be a potential safety issue! The door between the garage and the house must protect the residents from carbon monoxide gases potentially leaking in from a car’s exhaust. With this in mind, it’s important to fix this problem immediately!
Luckily, fixing a door that doesn’t close tightly is a simple one to remedy. But, there are two solutions depending on your type of strike plate. (Is your strike plate adjustable or non-adjustable?)
If You Have an Adjustable Strike Plate:
Look closely, does your door strike plate have a small screw holding a sliding tab to the strike plate? If this looks like your strike plate, the solution is simple.

Loosen this screw and adjust the tab closer to the door stop.

Tighten the screw and try closing your door again. Continue to adjust the tab until your door shuts properly and stays closed.
If You Have a Non-Adjustable Strike Plate:
Non-adjustable strike plates don’t have an adjustable tab, but your fix is still easy. Remove the strike plate and reposition it closer to the stop.
Sticking Doors or Doors that Won’t Close
Look at the space around the door. Is there a gap at the top or bottom? Normally, the door will stick at the top corner opposite of the hinges because over time the weight of the door will pull away from top hinges.
To fix a door that sticks or rubs in the frame, you can try one of these fixes:
- Tighten screws
- Add longer screws
- Add a shim behind a lower hinge
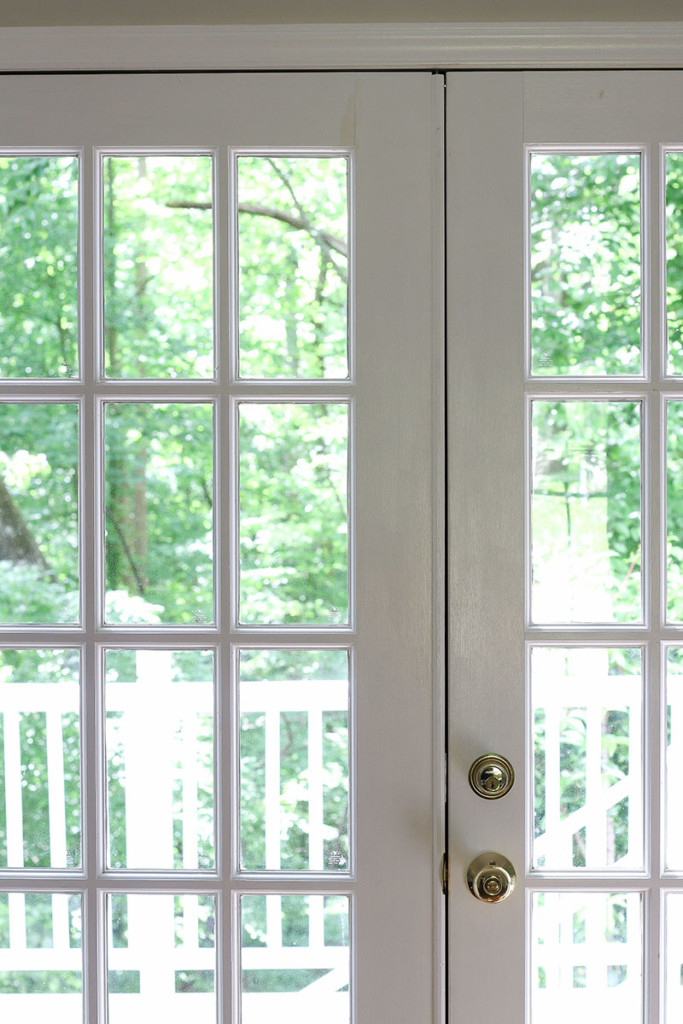
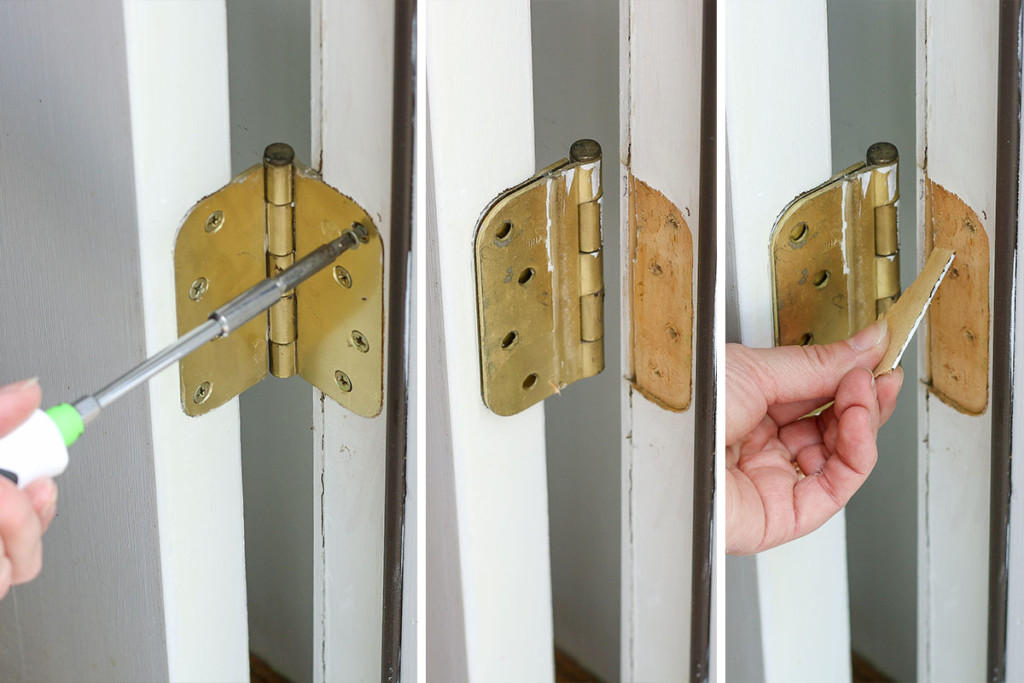
Let’s take a look at this french door. The door rubs at the top when trying to close it.
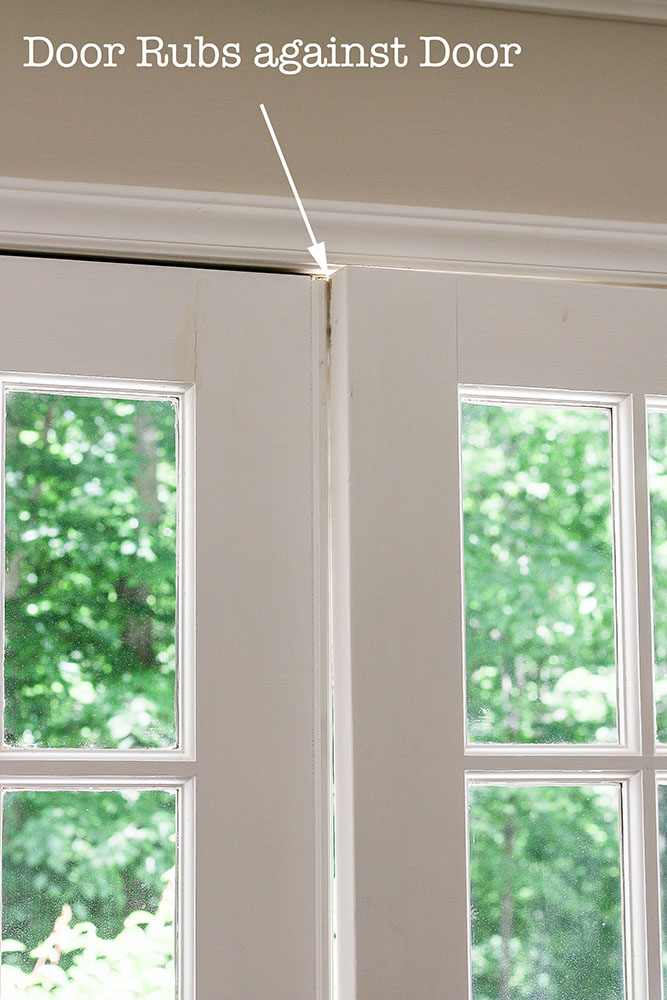
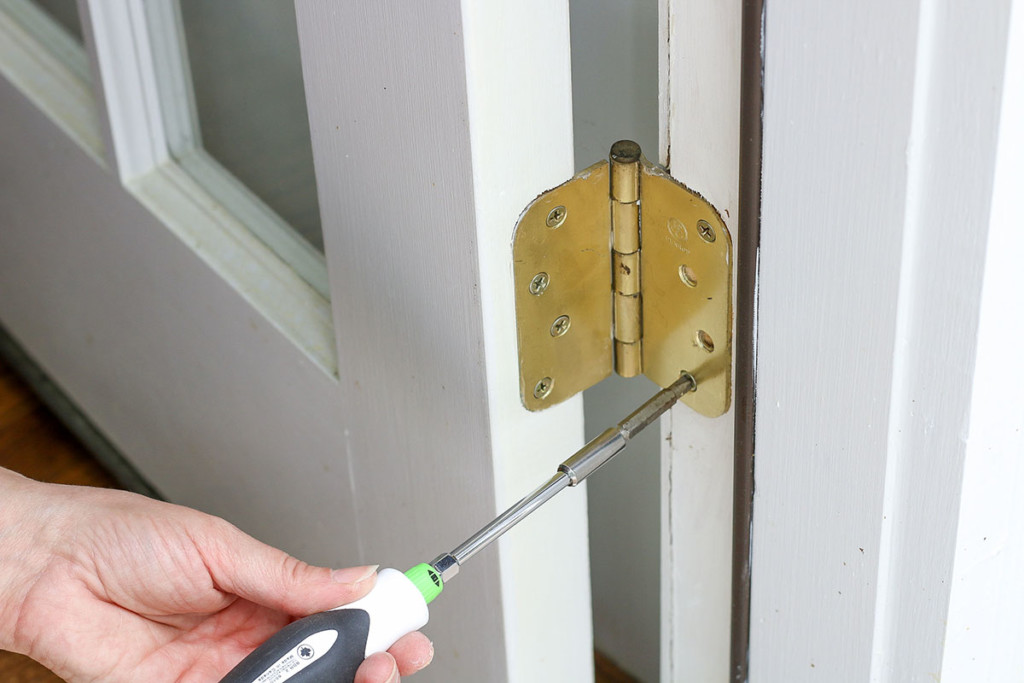
Open the door and look at the hinges. Do any of them need to be tightened? Well look at that! This door is missing a screw.
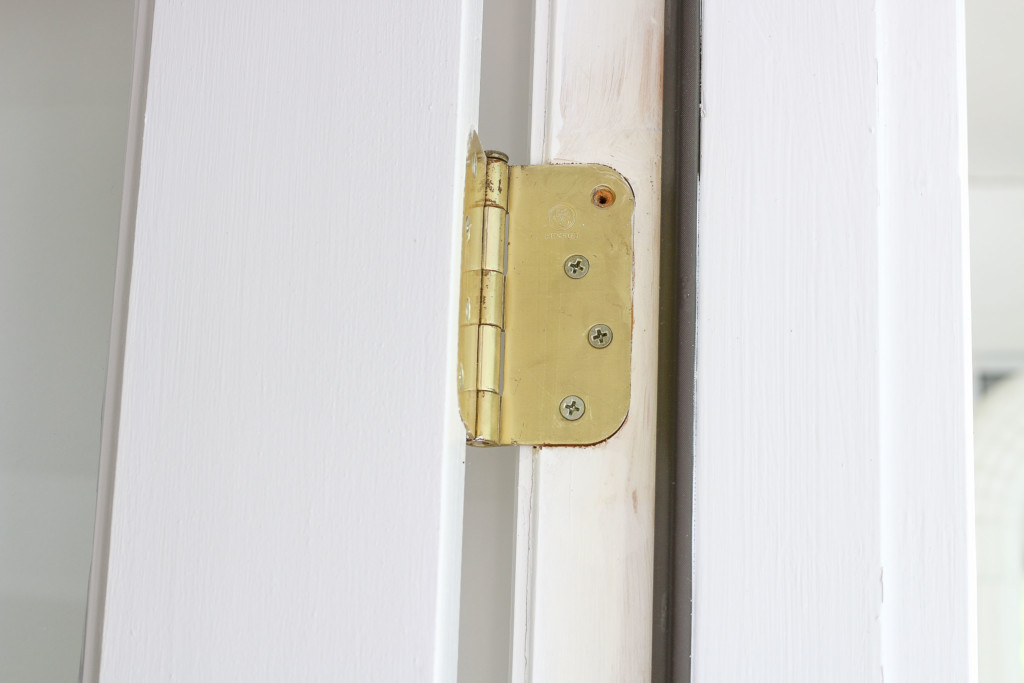
Try to tighten the screws. If they just spin, the wood has been stripped. You can either add longer screws or fill in the holes with toothpicks.
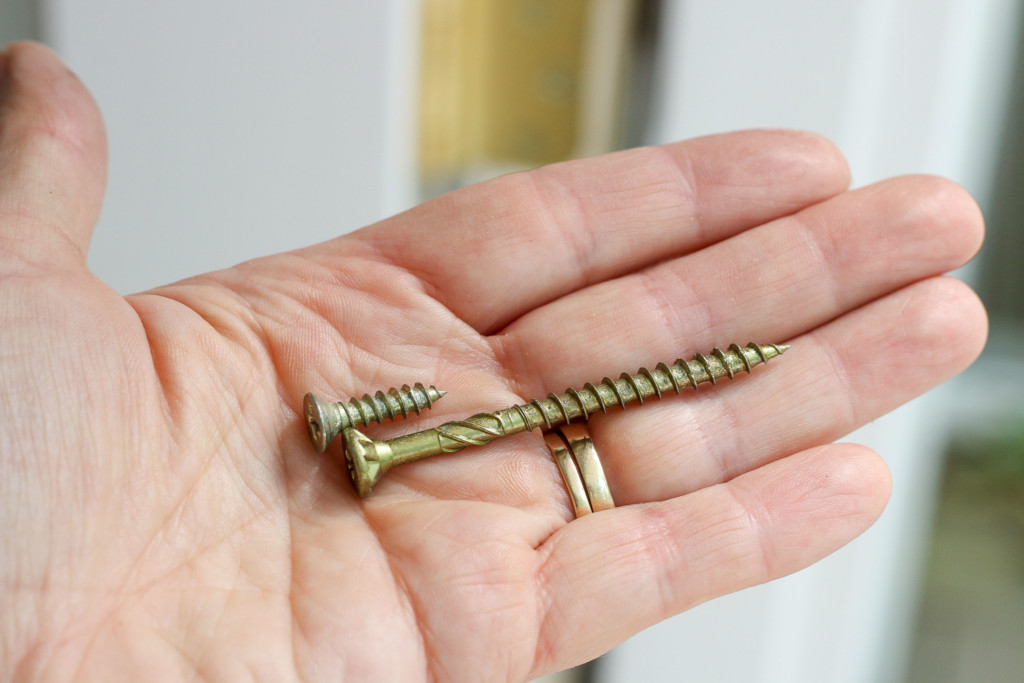
Replace with Longer Screws
Remove the hinge screws and use longer screws that drive through the door jamb and into the framing.
How to Fix Stripped Screw Holes:
Remove the screws from one hinge at a time. Squeeze some wood glue onto several toothpicks. Pack the hole with toothpicks.
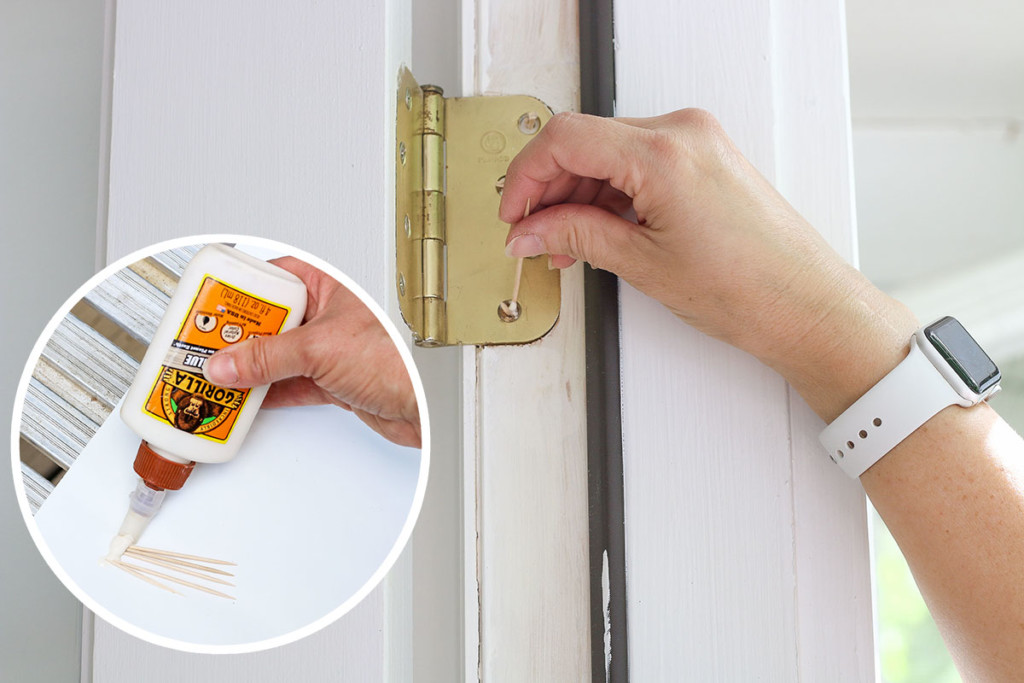
Let the glue dry. Cut off the excess toothpick with a utility knife (or use a chisel if you don’t have your knife with you.)
Drive screws back into the hinges.
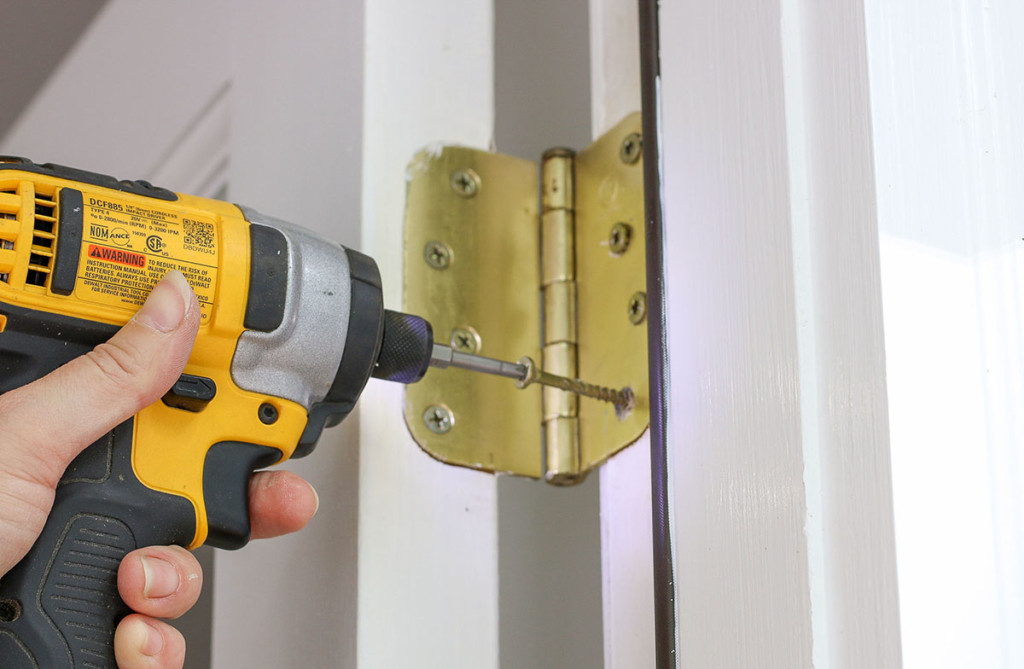
Better yet, replace the screws with longer ones that will grip into the framing behind the door jamb.
Hopefully this will fix your door. You can see below the door shuts and the spacing is even between the french doors.
Is Your Door Out of Alignment?
Door still rubbing? Occasionally a door will get out of alignment. To fix this, first, look at the door and determine where the gaps are bigger.
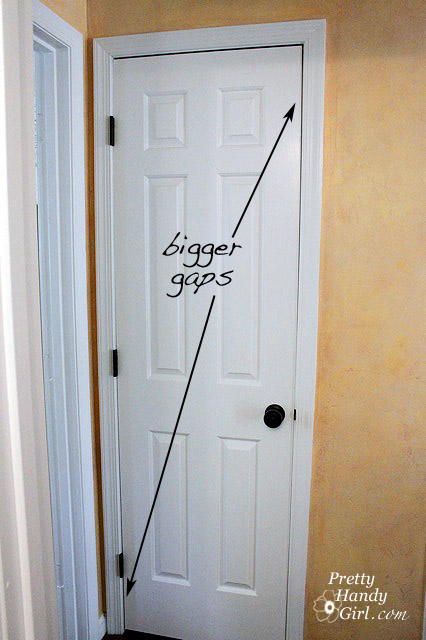
For the door above, try simply loosening the screws from the top hinge 1/4 turn or more. If this doesn’t work, try tightening the screws into the hinges at the bottom. If it’s still not fixed, you’ll need to try shimming the door hinge.
Shimming Door Hinges:
Sometimes a door hinge needs to be shimmed to adjust the door in the frame. If the spacing is tight behind one hinge, you can adjust it slightly to correct uneven spacing around the door.

The door above still shows a tight spot near the top right hinge. To shim it slightly, add a piece of chipboard (cereal box cardboard) behind the hinge.

If you need a thicker shim, you can use the end of a wood shim.
Replace the screws in the hinge and test your door. Is it still rubbing?
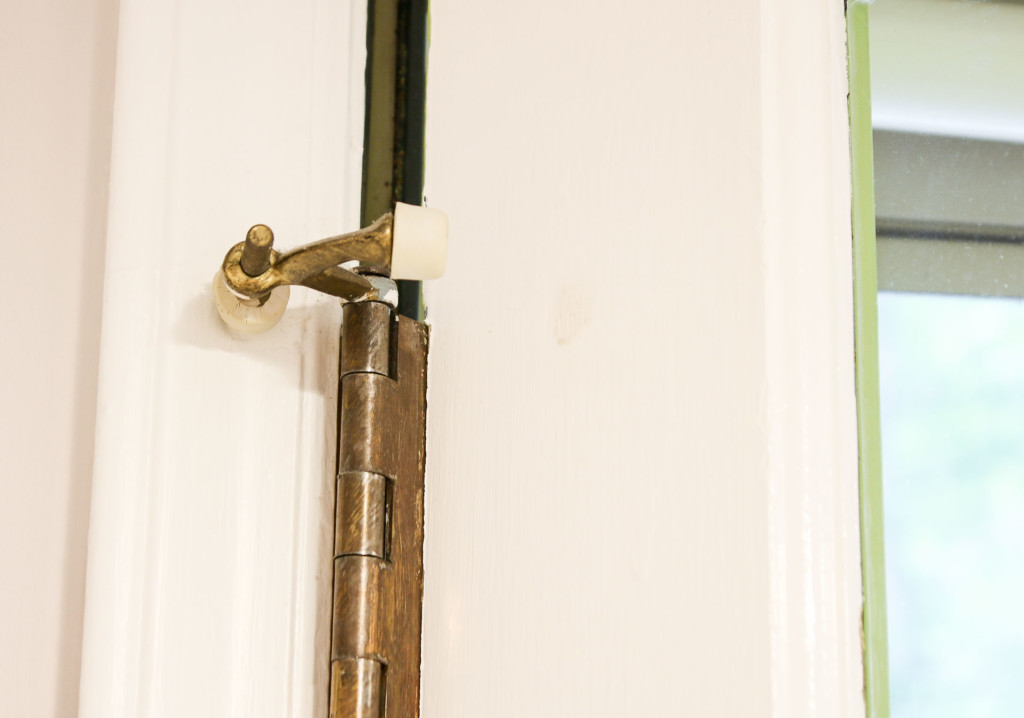
Recessing a Hinge:
Occasionally, you might need to set a hinge deeper into the door or the frame. You can use a chisel to remove a small amount of material from the jamb or the door. If you don’t have a chisel or are worried about taking out too much, use the small sanding bit on a Dremel.

Door Rubbing on Top:
Have a door that swells when the temperature or humidity changes? To fix a door that rubs along the top in different seasons, you’ll want to sand or plane the top. This doesn’t involve buying a ticket or boarding an airplane. Planing is removing material from the edge of wood. You can try using sandpaper with a coarse grit to sand it down, but if that doesn’t work, reach for a hand planer.
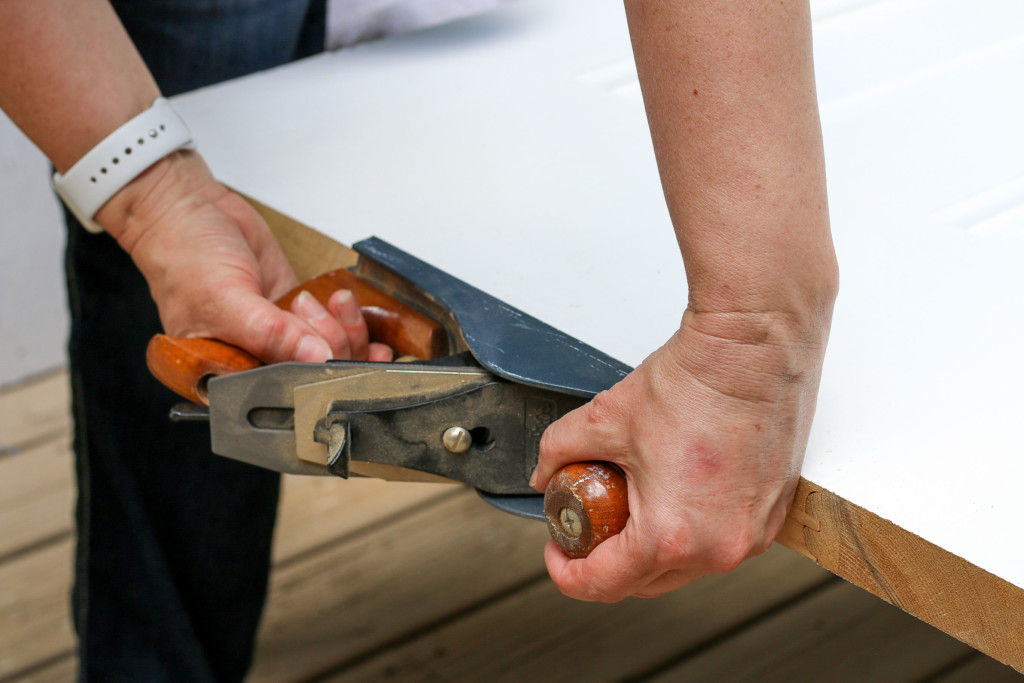
As you run the planer across the top of the door it literally shaves off some of the wood. Simple design, but very effective.
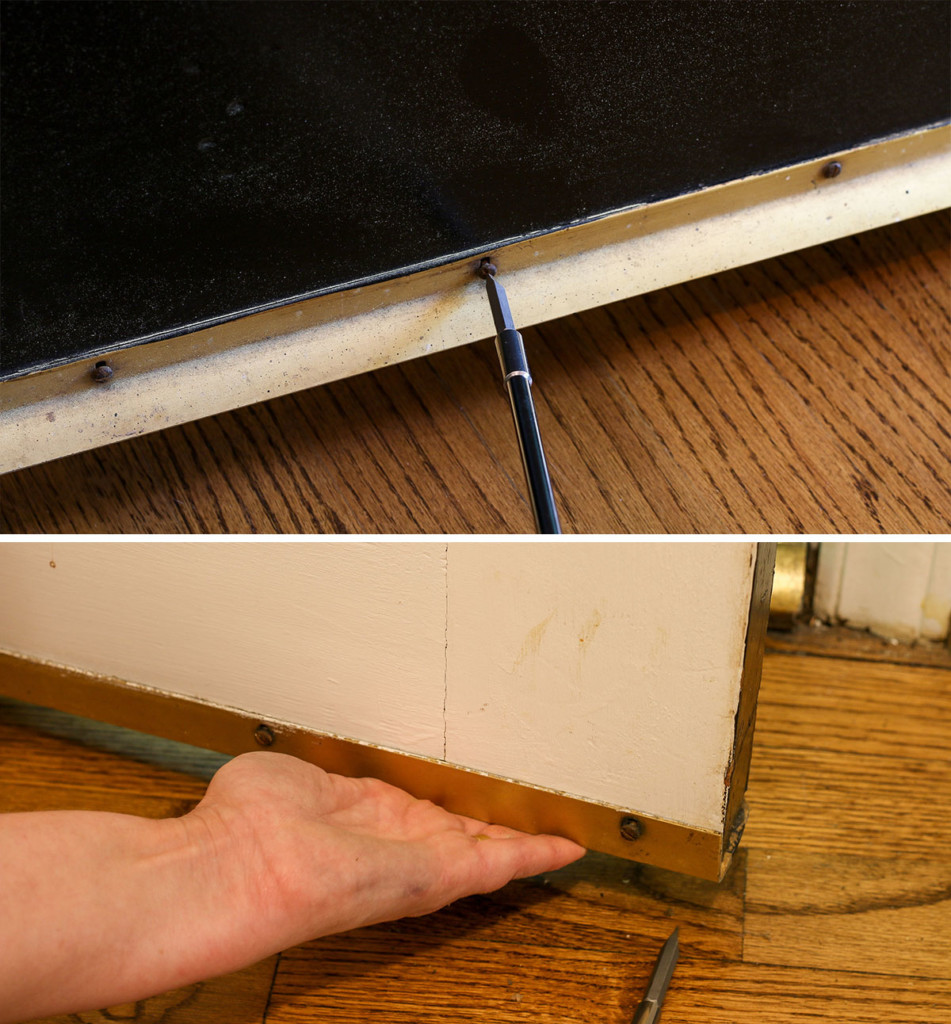
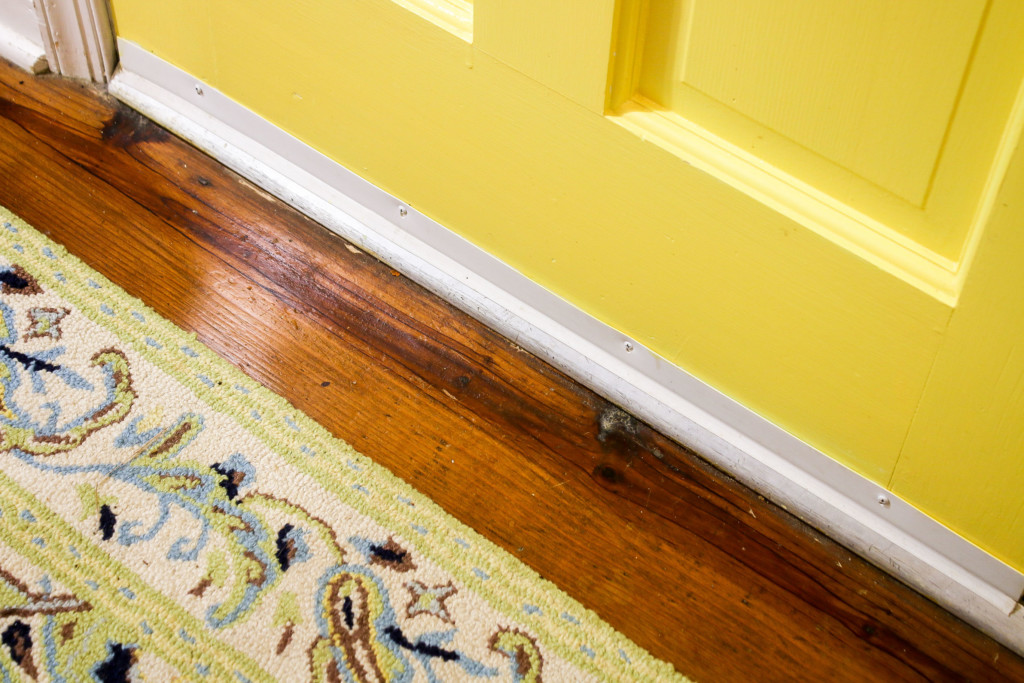
Door Scraping on the Floor:
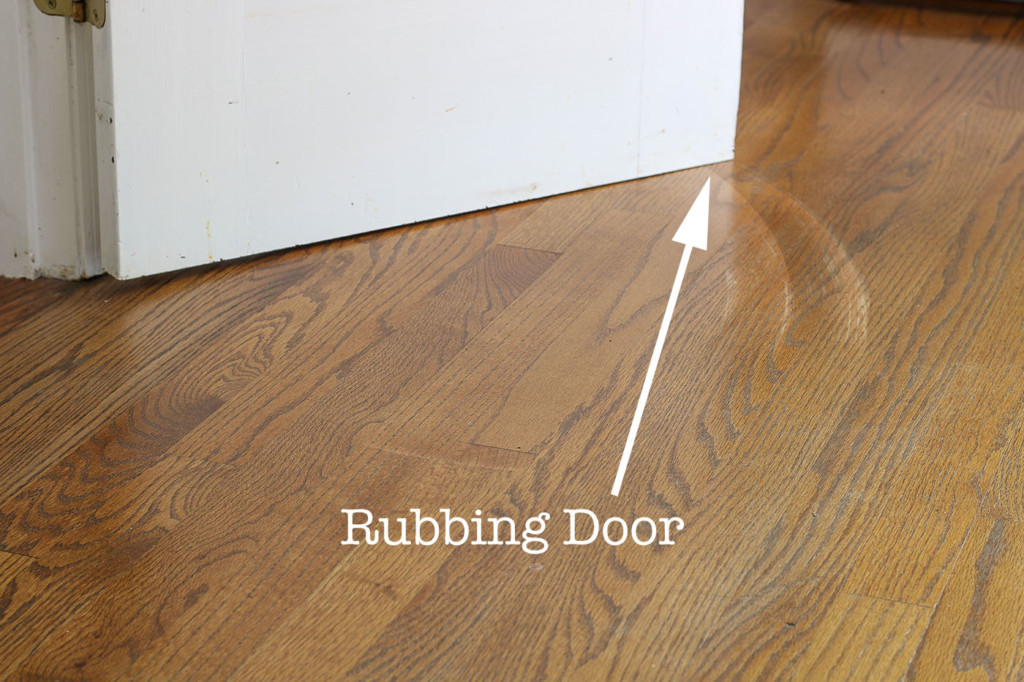
A door that rubs on the floor or carpet is not only annoying, but it can scratch your floors. Time to fix this problem!
Get a helper to assist with removing the door. Close the door completely.
Position a scraper or flat pry bar just under the hinge pin head. Gently tap the end of the pry bar with a hammer to raise the hinge pin. Remove the hinge pin from the top and bottom hinges first.
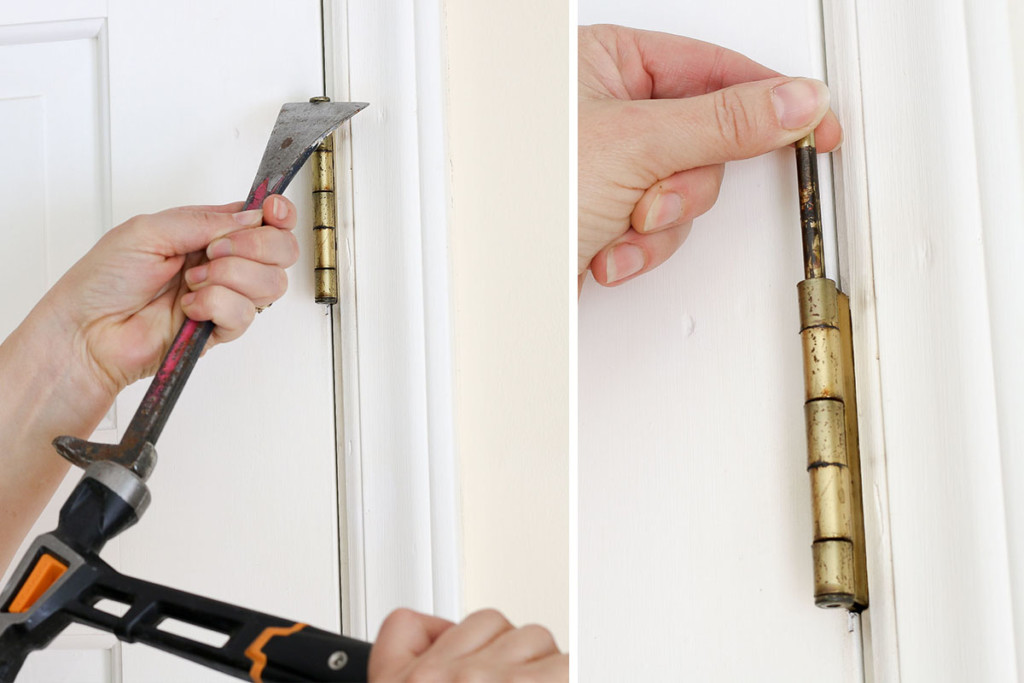
Remove the middle hinge pin last but have your assistant nearby to hold the door in the frame. As the assistant opens the door, be ready to lift it off the hinges.
Lay the door on sawhorses. Tape the button of the door with painter’s tape to protect from chipping.
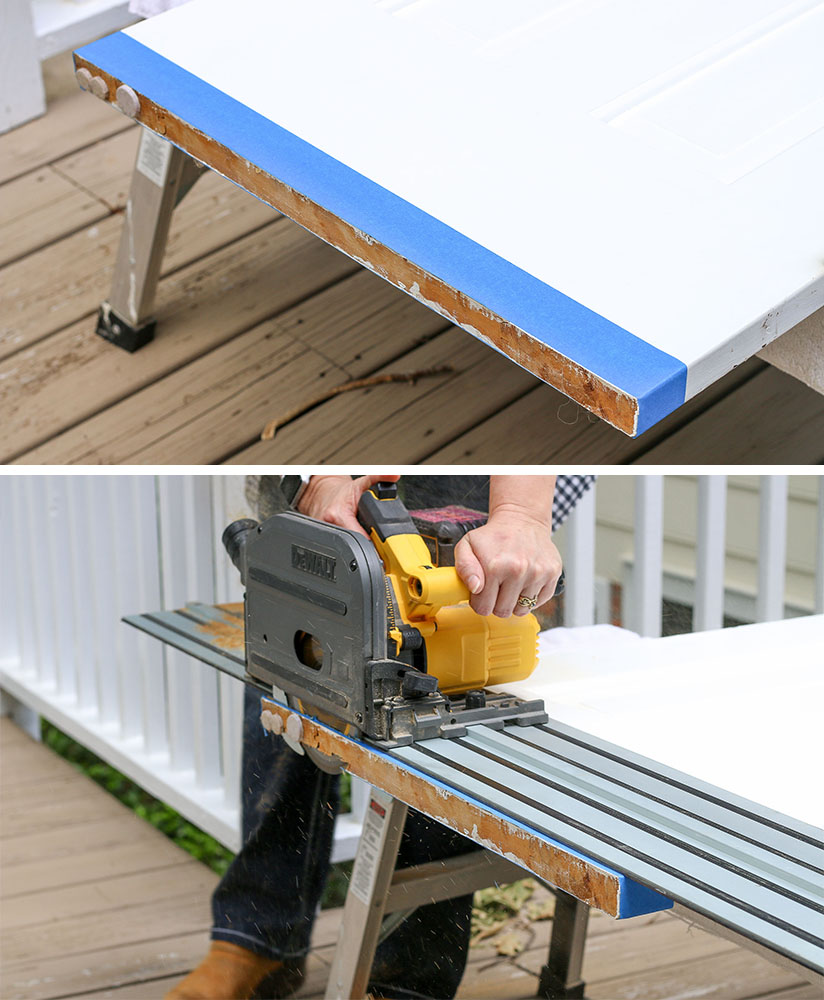
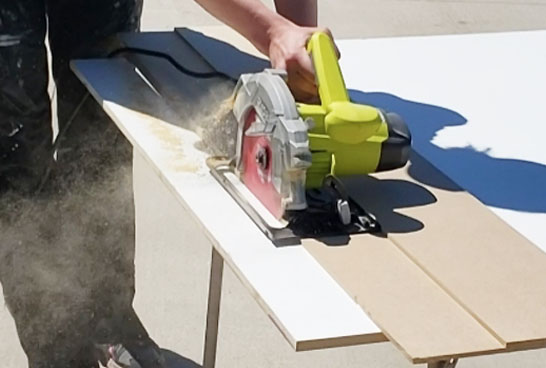
Use a circular saw, track saw, or power planer to remove a portion of the bottom of the door.
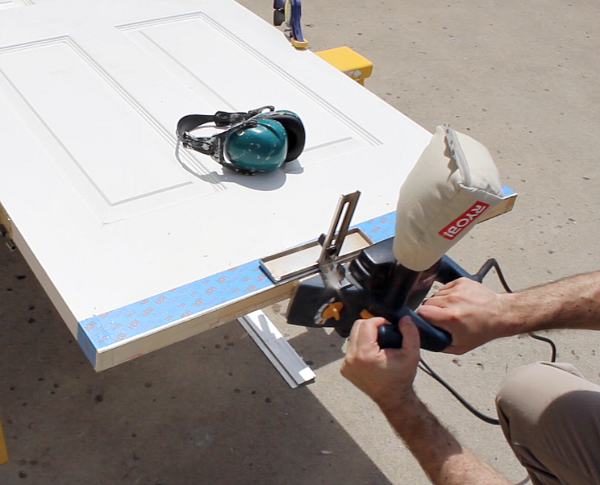
Replace the door and check to see if it still rubs.
Exterior Door is Hard to Open:
If your exterior door is hard to open, it might be from a loosened threshold piece. You can try to tighten the threshold screws or replace the threshold and sweep at the same time.
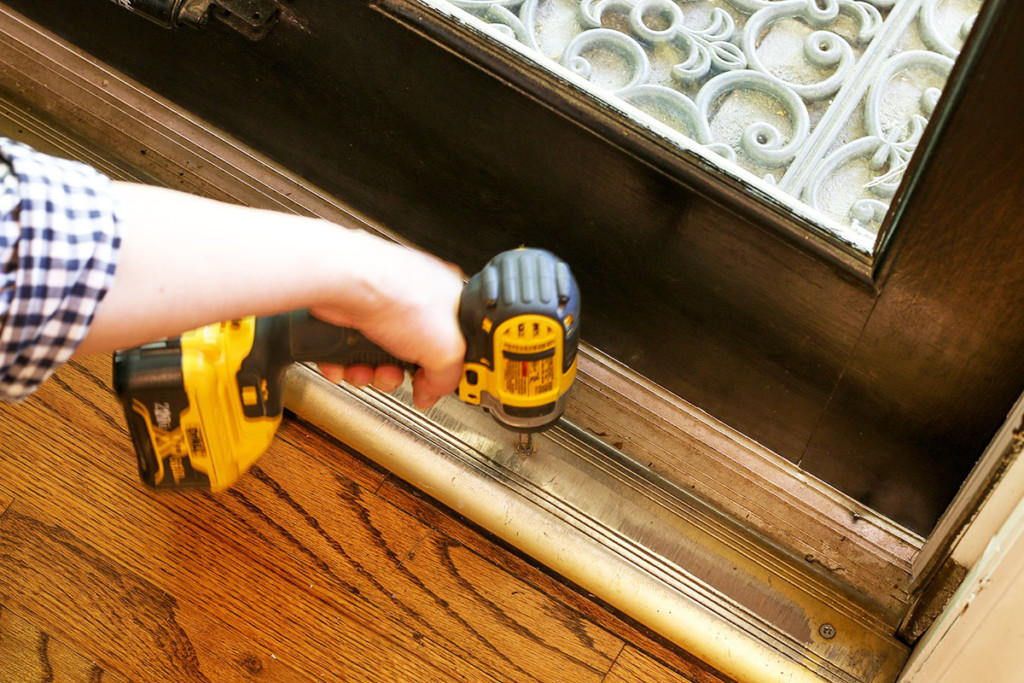
Also check to see if the door sweep has lowered. Unscrew the sweep and raise it on the door. Tighten the screws.
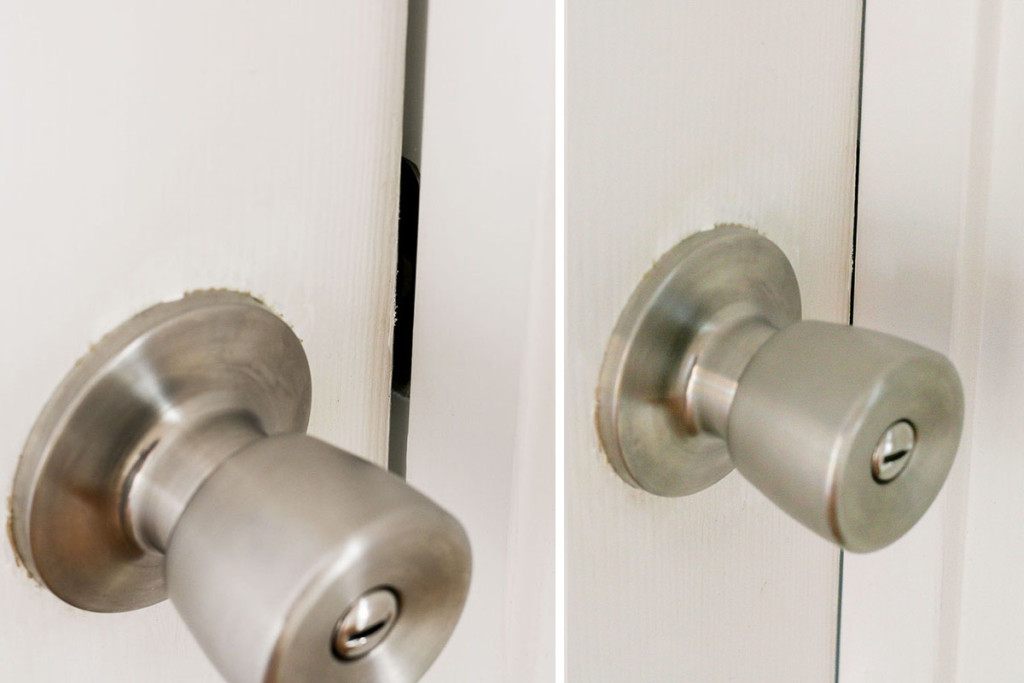
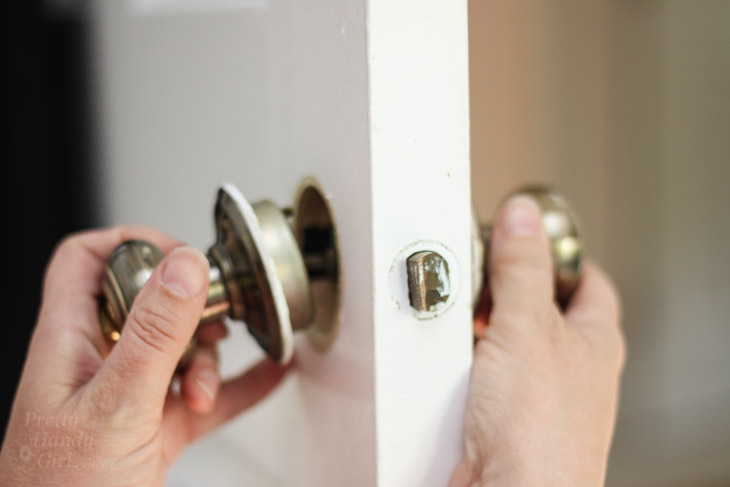
Door Latch Sticks in the Door
If the latch is sticking in the door, you can try one of three fixes:
- Loosen the screws on the doorknob. (Tightening the screws on your doorknob too much can cause the knobs to bind.)
- Remove the knobs, spray a little lubricant onto the latch inside the door. Replace the knobs and turn them to distribute the lubricant.
- Finally if all else fails, it might be time to replace the doorknobs. Believe it or not this is a quick fix and can be done in five minutes.
Save yourself the headache of doorknobs that stop working smoothly and purchase Schlage brand door hardware from the start. Schlage has been producing high-quality door hardware in a variety of types, looks, and finishes for more than a century and will continue to do so in the years to come. Whether traditional, modern, or technology, Schlage products offer a limited lifetime mechanical and finish warranty and a three-year limited electronics warranty.
Squeaking Doors
Doors that squeak mean the hinges need lubrication. Simply spray a lubricant like WD-40 just under the top of the hinge pin. Be sure to have a rag handy to catch any drips.
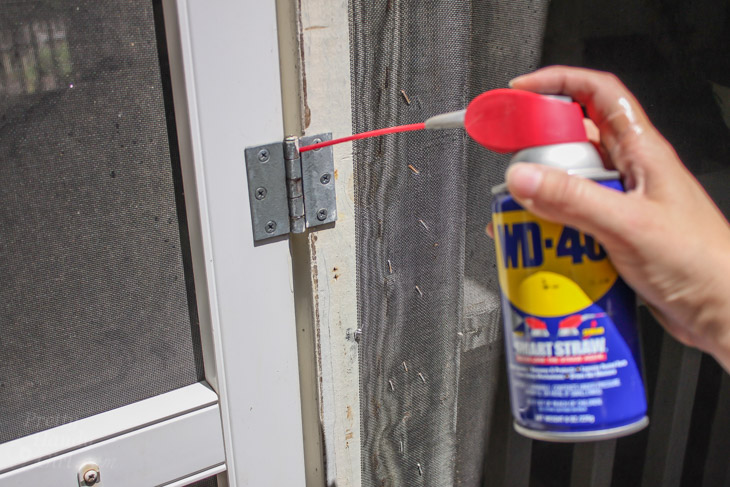
Open and close the door several times to help the lubricant work its way down the hinge. Your door should be squeak free now.
Door Knob Hits the Wall
Door knobs that hit a wall can put dents or holes in the wall if left alone. The solution is quick. Either add a door stop behind the door at the baseboard…
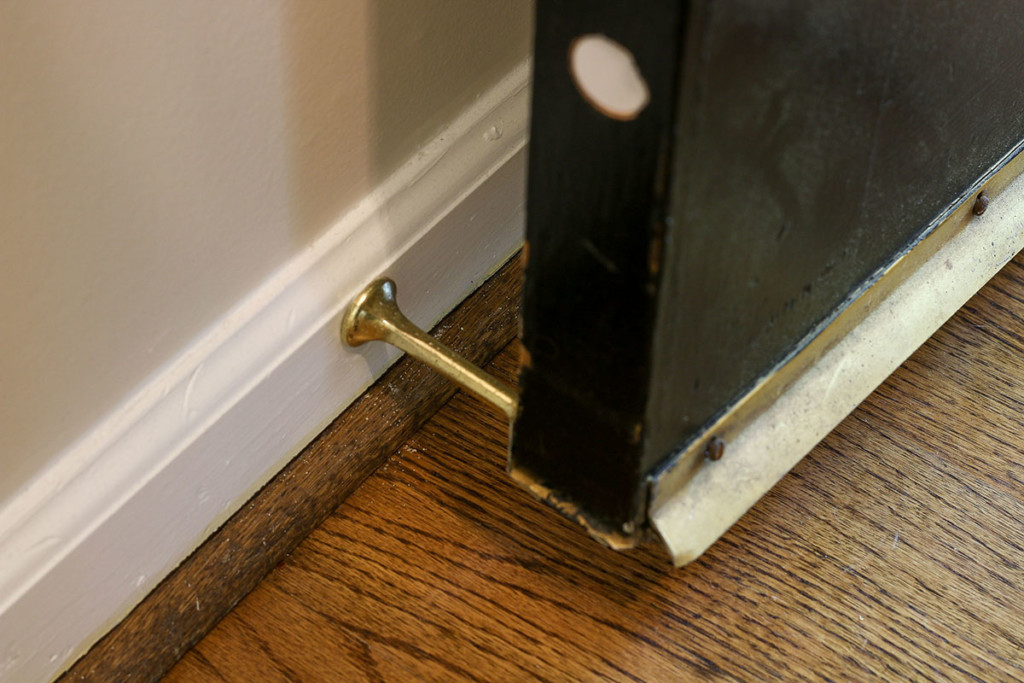
…or add a hinge pin adjustable door stopper to the top door hinge.
Drafty Doors
Cold drafts wafting in around your door? The solution is as simple as installing (or adjusting) the weatherstripping. If you can see light coming in around your door, it’s guaranteed to let drafts in too!
Simply adding adhesive-backed foam weatherstripping around the door will stop those drafts in their tracks.
Look Ma, no more light, no more drafts!
Adding a door sweep to the bottom of the door will keep out drafts from the bottom of the door. In addition, a well-fitted sweep will also keep insects and spiders from making an entrance under your door.
That pretty much sums up fixing common door problems. Next time you have an issue with your door, you can fix it yourself!
![]()
Disclosure: This article has been sponsored by Schlage. If you’ve been around here for a while, you know I’m very particular about the brands I work with. I only recommend products and brands that I use myself. I was compensated for my time, but I was not told what to write. All opinions are my own.
Pin for later!
 DIY Track Saw Jig for your Circular Saw


 Tool Belt Hack for Petite Builders or Kids


 ~ Discover more Tutorials from Lara ~
 Hi! I’m Lara, the creator of