How to Make an Air Conditioner Screen from Pallets

How to Make an Air Conditioner Screen from Pallets

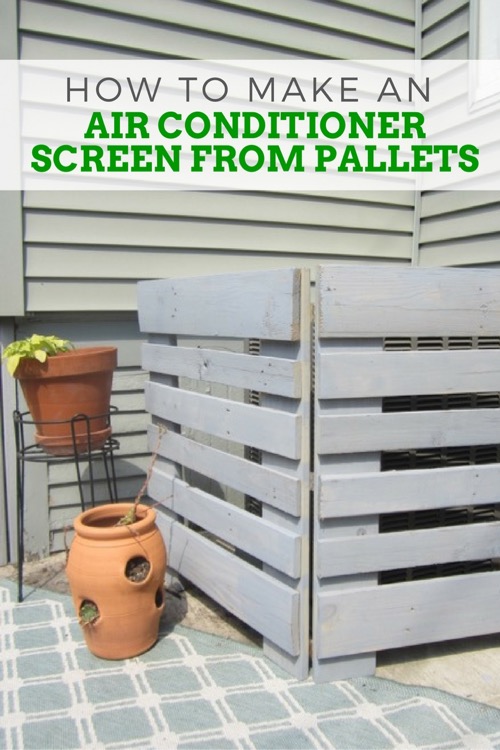
Hi friends. It’s Jessica from Decor Adventures and I’m here to show you an easy project that will improve the look of your yard.  If you are like me and are lucky enough to have central air conditioning in our home, but unlucky enough to have a large air conditioning unit taking up some of our backyard patio space, this project is perfect for you. We decided to create an air conditioning screen that would conceal the unit and help make our back patio into a better looking space for relaxation.

Making a screen to hide your air conditioner unit is easy. We elected to do this with pallet wood which (although it’s not the best quality wood) is free and easy to work with. Here’s how to make an air conditioner screen from pallets.

Materials:

  • Pallets
  • Reciprocating saw
  • Eye protection
  • Work gloves
  • Pry bar
  • Braid nails
  • Nail gun
  • Level
  • Measuring tape
  • Miter saw
  • Hinges and screws
  • Drill and drill bits
  • Exterior paint/primer
  • Paint brush
  • Water
  • Plastic drop cloth

How to Make an Air Conditioner Screen from Pallets

Instructions:

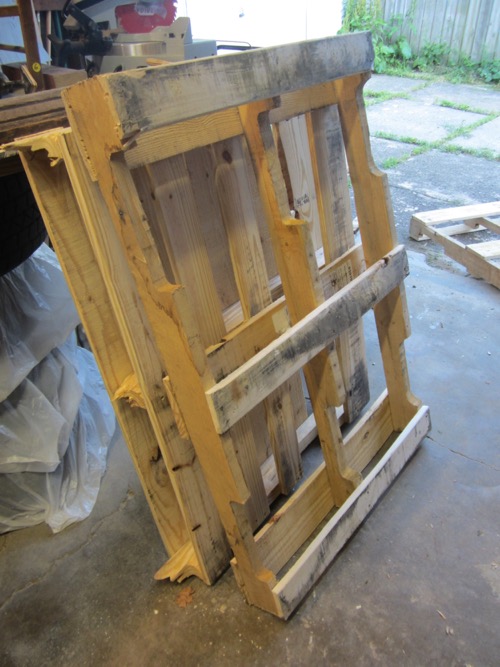
First find pallets to use for this project. We looked on Craigslist and found some listed for free. If you don’t see any, you can ask at places like automotive repair stores, home improvement stores, manufacturing warehouses, etc. Make sure to ask if you can take some and how many.

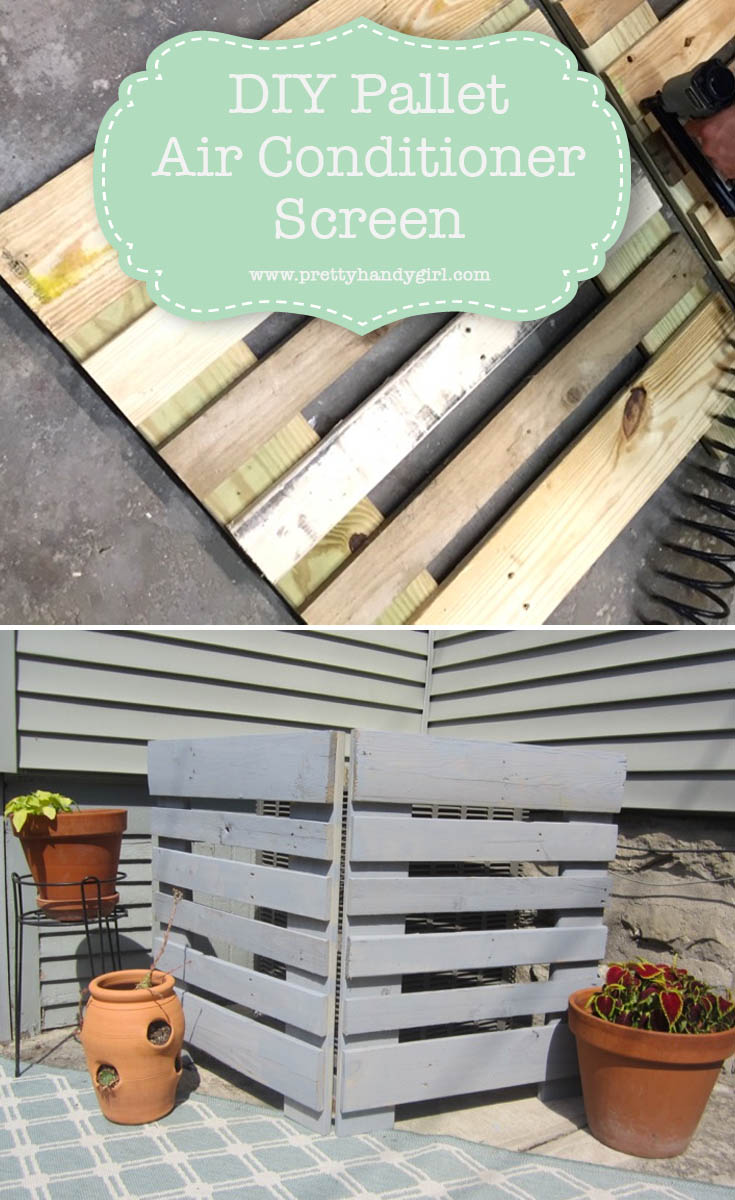
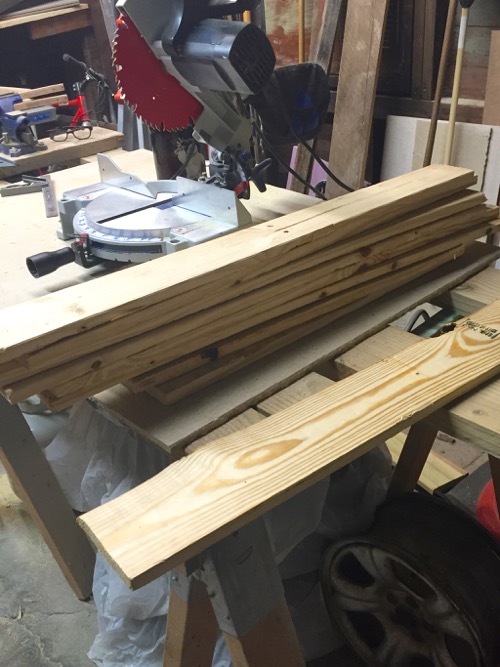
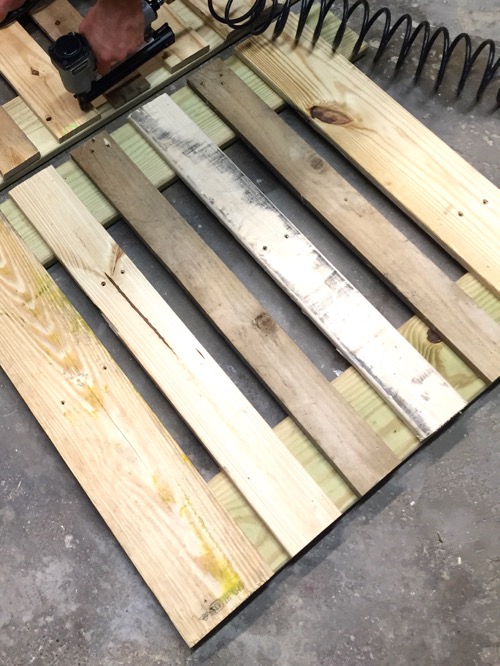
For this project we used about 2 pallets. Pallets aren’t the best quality wood, prying them apart can break the wood. We opted to cut them apart with a reciprocating saw. Cut apart each pallet until you get flat pieces of wood like this. We didn’t use the inside “frames” of the pallets for this, just the flat parts.

How to Make an Air Conditioner Screen from Pallets

Measure your air conditioner to determine the height and width of your screen. Add a few inches to the height and width. This screen has 2 sides hinged together but you could easily make a third or even fourth side if needed.

How to Make an Air Conditioner Screen from Pallets

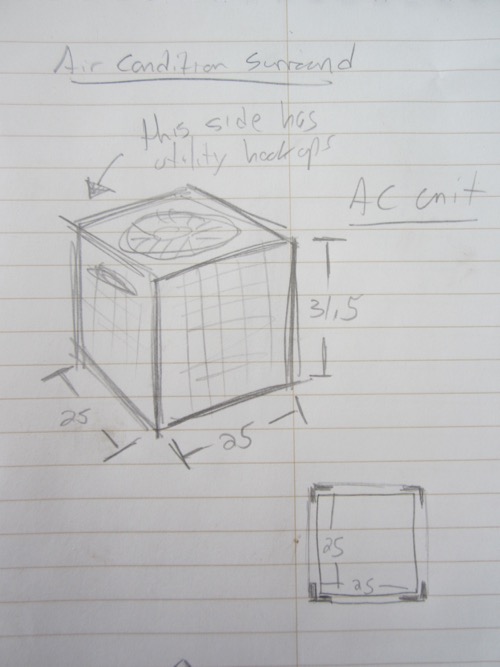
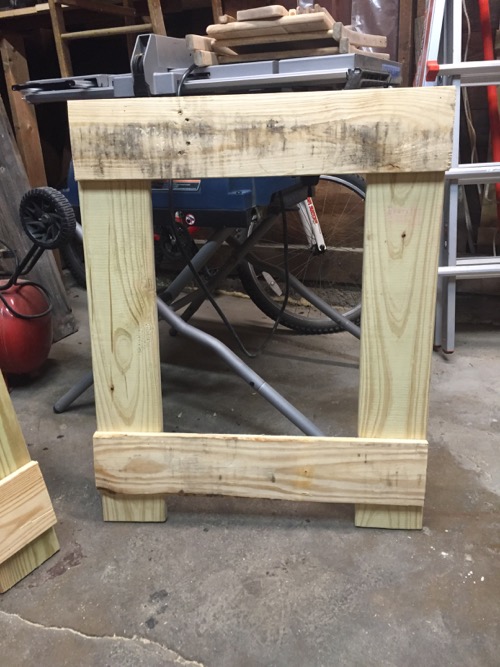
Next, use a miter saw to cut four pieces of wood to size for each side of the screen, two for the vertical sides and two for the horizontal rows for each side. This will form the frame for each side. The bottom board is a few inches off the ground to give the screen feet to stand on.

How to Make an Air Conditioner Screen from Pallets

Measure and cut more pallet boards to create the slats of your screen. Nail the pallet slats onto the frame, making sure the boards are level. Repeat the process to make a second side.

How to Make an Air Conditioner Screen from Pallets


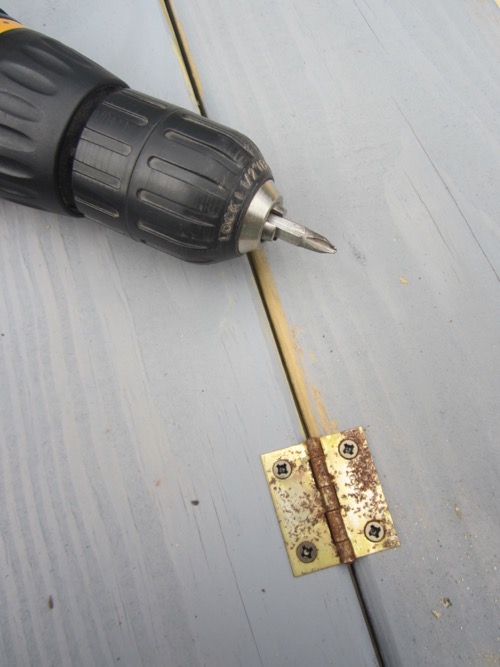
Take the two sides and lay them on a flat surface next to each other, with the back sides facing up. Locate two hinges. (I used small hinges we already had on hand, but there are a variety of sizes available at the home improvement stores.)

Mark where the hinges will go with a pencil and pre-drill holes for the screws. With your drill or screwdriver, attach all four screws for each hinge. (I used three hinges for this screen.)

How to Make an Air Conditioner Screen from Pallets

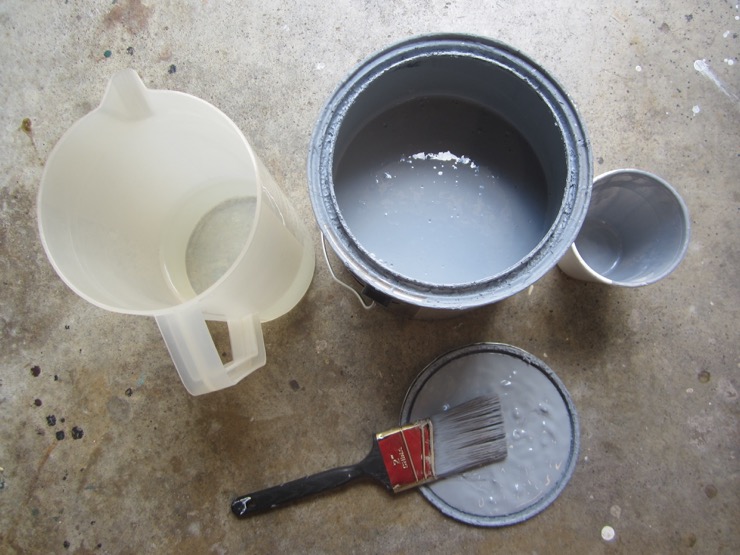
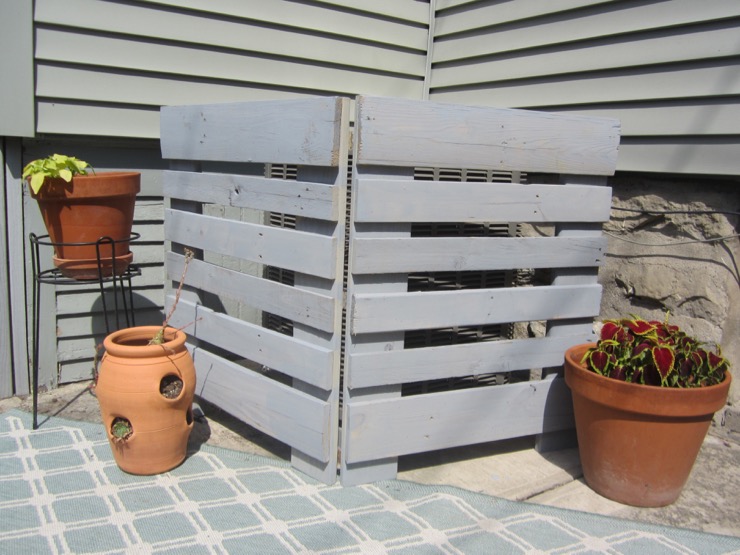
To conceal the air conditioning unit more, I elected to paint the wood gray to help it blend in more. Mix 1 part exterior primer/paint to 2 parts water and brush it on the screen. Blending the paint with water gives it a more washed look and lets some of the wood show through.

How to Make an Air Conditioner Screen from Pallets

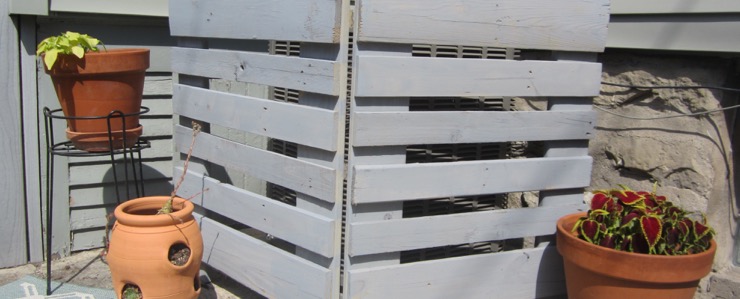
Let the paint dry and then prop it up around your air conditioner.  This makes a nice looking piece of furniture instead of a utility that takes up part of your yard or patio. You can even get creative and hang plants from it.

How to Make an Air Conditioner Screen from Pallets

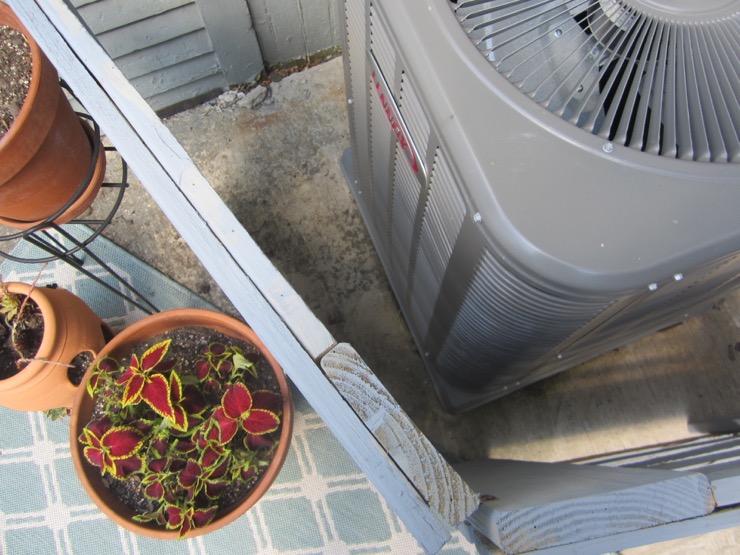
When you set up the screen around your air conditioning unit, make sure to allow at least 8-10 inches from the unit for the best air flow and efficiency of your unit.

How to Make an Air Conditioner Screen from Pallets

Learn more about maintaining your air conditioner here.

See you at Decor Adventures soon and happy building!

Decor Adventures Blog

~ Read more of Jessica’s tutorials ~


Pin for later!

DIY Sheet Metal Vase

DIY Sheet Metal Vase

Last month I shared an easy way to make faux flowers look real. It’s a simple way to add life and color to your decor. Today we’re going to make a vase for all of those flowers!

You can make containers or vases using a multitude of items. We’ll be using decorative sheet metal and spray paint to hold a faux palm leaf for a beautiful green arrangement. You can add your own creative touch to this quick project with your favorite colors and stems.

Fake Flower Arranging

Let’s get creative, shall we?

Materials:

How to Arrange Fake Flowers

  • Decorative aluminum sheet
  • Tin snips
  • Heavy work gloves
  • Eye protection
  • Spray paint (optional)
  • 19 gauge wire
  • Wire cutters
  • Glass vase
  • Stems of fake flowers

The glass vase and bamboo sticks are from the dollar store. The palm leaf was purchased at a craft store. The rest of the supplies can be purchased at your local home improvement store.

Instructions:

1. Get a piece of decorative sheet metal from the home improvement store. Wearing work gloves and using the tin snips, cut the sheet to a size that will roll around a glass vase with at least a one inch overlap.

(I spray painted my piece in copper for a different look. If you paint it, you only have to paint one side.)

2. Create a tube with the aluminum so the long ends overlap. Cut 3 small pieces of wire of equal length and bend them in half. Make sure you wear eye protection during this step.

DIY Sheet Metal Vase

3. Roll your aluminum sheet into a column to fit around your glass vase (making sure the ends overlap.)  Once in this shape, insert both ends of a piece of wire through the holes in the overlapped section of aluminum sheet. Repeat with the remaining two pieces of wire.  Twist the wire together to hold the sheet metal in place.

DIY Aluminum Sheet Vase

4. Twist the wire a few times around itself and trim off the excess with wire cutters. Notice the arrows where the wire is below.

DIY Aluminum Sheet Vase

Now your aluminum sheet “vase” will stay in its round shape and you can slip it over a glass vase. Add your greenery and faux flowers.

For this arrangement I used bamboo sticks and a large palm leaf from the craft store. Greenery adds life to any space. Every room should have some flowers or leaves to liven things up.

Fake Flower Arranging

When using a glass vase inside the aluminum sheet you can add water and real flowers if you like.

Fake Flower Arranging

Want more tips on arranging faux flowers?

Arranging Faux Flowers to Look Real

Have fun with your new flowers and see you at Decor Adventures soon.

Decor Adventures Blog

~ Read Jessica’s Other Posts ~


Pin for later!

Decorative sheet metal and spray paint are all you need to upgrade that boring glass vase! | DIY flower vase | Pretty Handy Girl #prettyhandygirl #DIY #craft

Five Great Tips to Grout a Shower

At first, tiling a space in your home can seem overwhelming and confusing, but it doesn’t have to be. Doing a tile project on your own can save you a lot of money and give you a lot of satisfaction.  Recently we renovated an entire bathroom in our basement that included tiling and grouting a shower floor, walls and bench.

Brittany has shared several posts on how to tile a backsplash, how to seal tile, and how to tile without mortar. See those posts for full step-by-step instructions on how to tile.

Today I wanted to share 5 Great Tips to Grout a Shower. When you are tiling a large space, it helps to have some ideas on how to prepare and work for the best results.

Materials:

  • Grout (We like Mapei UltraColor Plus Rapid-Setting Sanded Grout or Polyblend Unsanded Grout)
  • 5-gallon bucket
  • Grout Boost or VanHearron’s Grout Once
  • Corded drill that will accept a mixing paddle
  • Mixing paddle
  • Metal spatula
  • Grout Float
  • Grout Sponge
  • Painter’s Tape
  • Silicone Caulk
  • Rag
  • Buffing rag
  • Sponge
  • Water

5 Great Tips to Grout a Shower

1. Use Grout Boost or Grout Once

These are liquid products that mix with your grout instead of water so that you don’t also have to seal the grout. Follow the instructions on the package to prepare your grout (usually involves mixing, waiting and mixing again.)

Then apply the grout as usual. Then you don’t have to spray your grout with a grout sealer afterwards.


mix grout with grout once sealant in ice bucket

2. Work in small sections at a time.

This is not the time to apply all of the grout at once and remove the extra after you are done putting in all the grout. You have to apply small sections (4′ x 4′) of grout. Then go back to remove the excess grout on that same section right away.

Don’t wait too long or the grout will become dry and difficult to remove from the surface of the tile. As you’ll see below, I wiped off the grout with a damp sponge while the other area on the left was drying. It helps to move relatively fast so your grout doesn’t dry too quickly.

Five Great Tips to Grout a Shower

Read more

How to Clean a Humidifier

How to Clean a Humidifier

Winter is such a dry season, and the appropriate time to keep the air quality inside of your home healthy with moisture. This can be easily done with a humidifier. During the coldest days of winter it seems like our humidifier is constantly running. All that use can put a lot wear on it, but it’s easy to take care of your humidifier in just a few steps.

Here is How to Clean a Humidifier:

Materials:
(contains affiliate links)

  • Humidifier
  • New filter (find your’s on Amazon)
  • Sponge
  • Water
  • Vinegar
  • Rag

Before you clean your humidifier, consult with the instruction manual that came with it. If you can’t find the manual, do a search online. Usually companies have links to instructions on how to clean their appliances.

Instructions

1. First, unplug your humidifier. Take it apart and empty the water container. Separate the pieces and discard the old filter.

2. You’ll see the parts that need attention. They build up with residue that needs washing.  Make a spray with water and vinegar (or just pour vinegar into the base of the humidifier). Use a wet sponge to wipe down the base.

How to Clean a Humidifier

Read more

How to Remove Spray Paint from Metal

How to Remove Spray Paint from Metal

Spray paint is a great product to use to makeover almost anything. It comes in many colors and finishes and is great for imperfectly shaped pieces that you can spray much easier than brush with paint. It’s a DIYer’s dream!

But someday you might want to remove that spray paint from an object you made over.  Particularly a metal one like a wall hanging, hardware, or lamps.

How to Remove Spray Paint from Metal

While I love the deep blue color, I wanted to return this lamp to its former brass glory to add more metallic to our living room.

I’m happy to tell you that yes, you can undo your makeover in just a few easy steps.

Here’s how to remove spray paint from metal.

Materials:

How to Remove Spray Paint from Metal

  • Spray painted object
  • Citristrip
  • Paint brushes
  • Old toothbrush
  • Plastic scraper
  • Lint-free rags, such as an old t-shirt
  • Plastic gloves
  • Eye protection
  • Respirator
  • Acetone

Instructions

1. Place your object to be stripped on a rag.

2. Put on plastic gloves, respirator and eye protection.

3. Using a paint brush, spread the Citristrip over the piece in a thick coat. Follow the instructions on the Citristrip, letting it work for about 30 minutes. Test a section in 15 minutes. When the paint bubbles, you are ready to scrape it off. Read more