tiled and grouted marble subway tile backsplash around utility sink

Tile-setting-withouto-thinset-mortar

You may remember years ago when I installed Smart Tile adhesive tiles in our laundry room. Well, truth be told, they weren’t looking so smart after 3 years and a water leak. I had a few leftover marble subway tiles from our kitchen backsplash and decided to use them to freshen up the laundry room. While I was at Lowe’s I decided to try Mussel Bound tile adhesive used for tile setting without thinset mortar. I figured this would be a good place for a trial in case I didn’t like the product.

smart-tiles-peeling-off

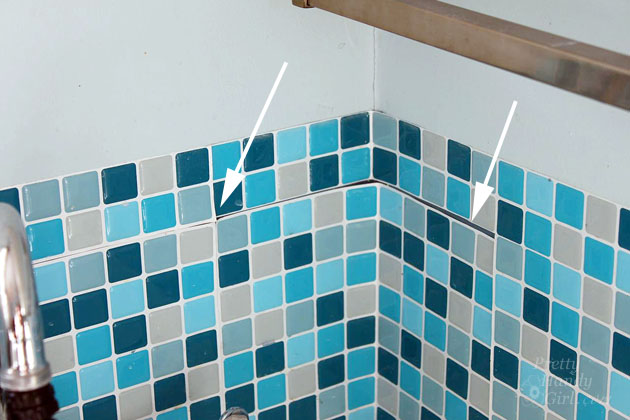
To remove the Smart Tiles you are supposed to use a hair dryer or heat gun to soften the adhesive. The tiles on my wall were already peeling off and they came off very easily.

peeling-off-the-smart-tiles

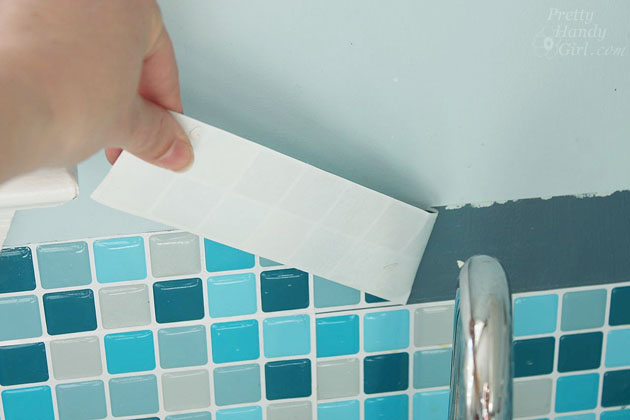
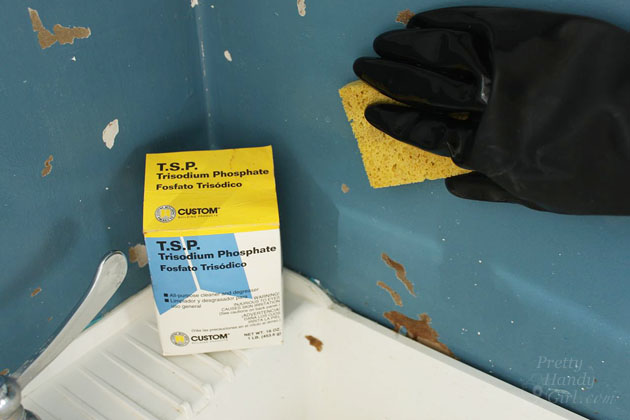
There was some minimal damage to the drywall, but if I had used the hairdryer it probably would have come off cleaner. To minimize any issues, be sure to clean your wall with a mixture of TSP (Trisodium Phosphate) and water using the instructions on the package.

Wipe the walls clean with a damp sponge after cleaning.

clean-wall-adhesive-with-TSP-trisodiuom-phosphate

Ready to start tiling with less mess?

Materials:
(Contains some affiliate links)
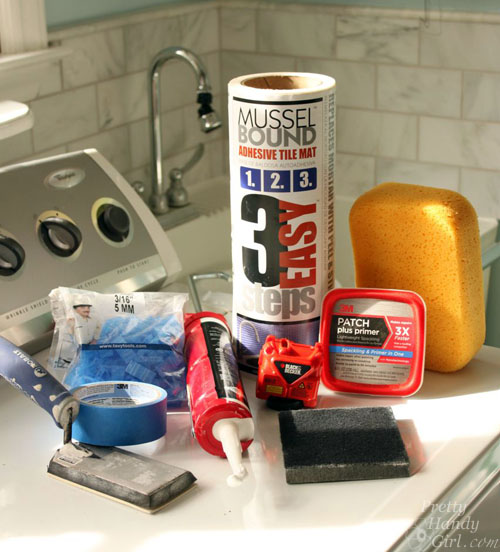
materials-mussel-bound-tiling

Optional: Grout Shield

Instructions:

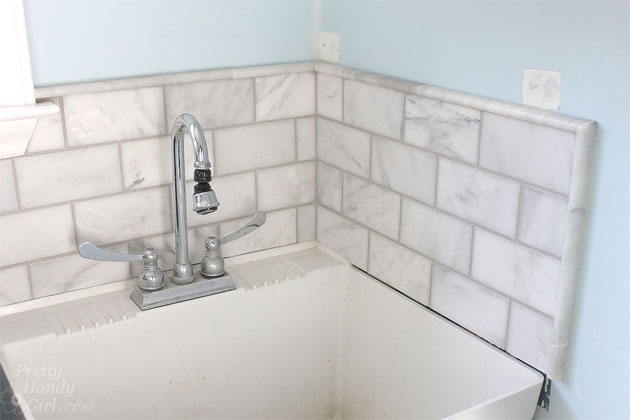
Before you begin, layout your tiles and spacers to determine the height you desire for your backsplash. Transfer this height onto the wall around the sink. Read more

Pretty Handy Girl's Guide to Tiling a Backsplash: Part 2 - Grouting

How did you do yesterday with the How to Tile a Backsplash: Tile Setting tutorial? Not too bad, right? Well, today will be a very gratifying day. Today I’m going to show you how to grout (and seal) your tiles and finish off your kitchen backsplash. You are going to love the end result.

(I’ve included affiliate links for your convenience. I earn a small percentage from a purchase using these links. There is no additional cost to you. You can read more about affiliate links here.)

Materials:

  • Grout (Used: Mapei UltraColor Plus Rapid-Setting Sanded Grout color: Frost)
  • VanHearron’s Grout Once
  • Two buckets (same size or one larger)
  • Water
  • Ice
  • Grout Float
  • Spatula
  • Rag
  • Buffing pad
  • Sponge
  • Basin filled with clean water

Prep work: If you are working with a natural stone tile, you may want to seal the tiles before grouting. I sprayed StainGuard5000 on a dry clean rag and wiped it onto all the tiles. Then buffed it off after five minutes.

Instructions:

If you are using a rapid setting grout, you might want to slow the “setting” process slightly. I learned this trick from our local tile shop: Start by filling one bucket with ice water. Nest the second bucket inside the first. Read more

It has been a whirlwind week. I’ve been doing my best to learn everything I can about tiles, flooring and cabinets. I’m so used to making do with what I have or buying things to upcycle. Picking out new is a real struggle for me. After multiple failed kitchen layout plans, we finally called in some professional help.

On Friday we met with Amy from Ferguson, the kitchen and bath suppliers. They have showrooms all over the US. Walking around the showroom was really helpful (and a bit overwhelming because I wanted everything!) But, ultimately Amy helped pull me back down to reality.

Here is one of the layouts that she proposed for our kitchen: Read more

Last week I shared with you some of the changes I made when Woman’s Day announced they were sending a photographer to shoot my garage. The back wall of my workbench was rough plywood, which results in sawdust particles attaching to it like velcro. I needed a sleeker and more industrial solution. But, I didn’t want to spend a lot of money (because this is the garage after all!) Read more