Upcycled Cabinet Door Quote Art | Pretty Handy Girl

Upcycled Cabinet Door Quote Art | Pretty Handy Girl

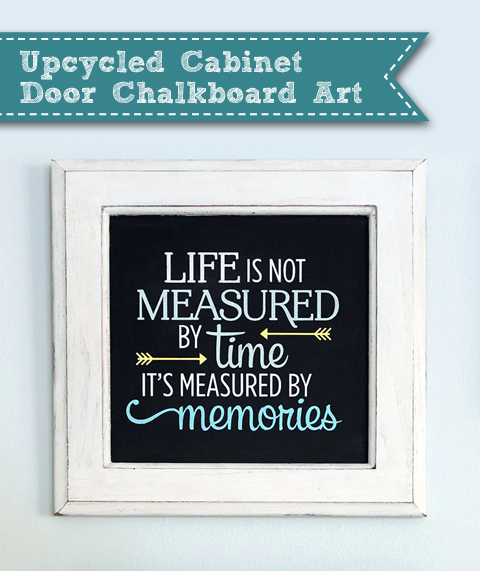
What do you do with an old cabinet door? Besides keep it with your wood scraps for ten years like I did (not recommended.) You can create pre-framed art! Today I have an easy Upcycled Cabinet Door Chalkboard Art project for you. If you have an old cabinet door, some paint, and a stencil, you can have yourself a unique and personalized art piece for your wall! Easy art!

Materials:

Upcycled Cabinet Door Quote Art | Pretty Handy Girl

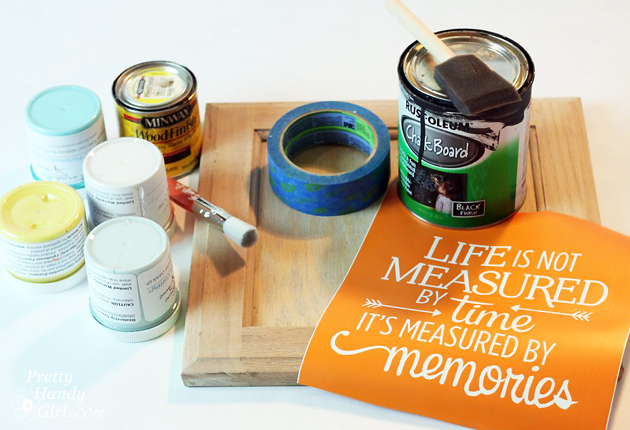
  • Cabinet door
  • Chalkboard paint
  • Foam brush
  • Sandpaper
  • Antiquing wax
  • Wax brush
  • Clean rag
  • Craft paint or chalky paint
  • Stencil brush
  • Painter’s Tape
  • Pencil
  • Stencil or cut vinyl

Optional: Stain and foam brush

Instructions:

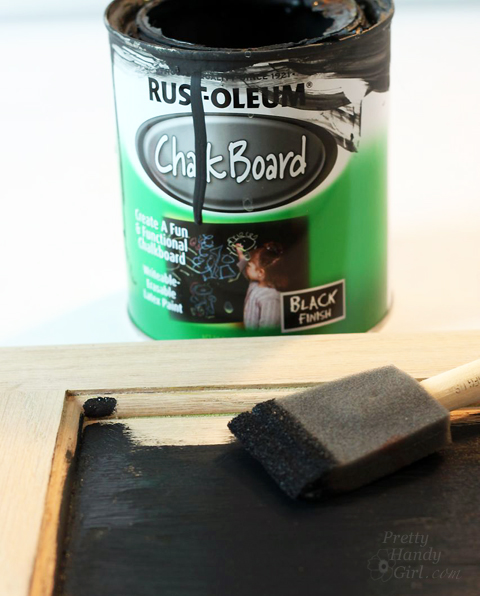
Paint the inside panel of your cabinet door with chalkboard paint. After the paint has dried, lightly sand any imperfections. Apply a second coat, brushing the paint in the opposite direction as the first coat.

Upcycled Cabinet Door Quote Art | Pretty Handy Girl

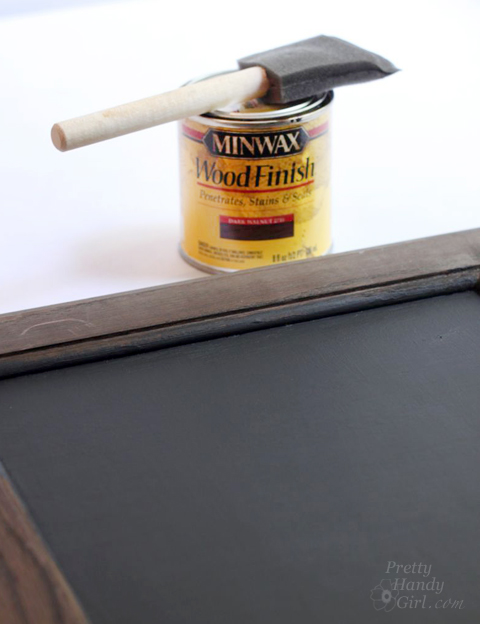
If you have an unstained cabinet door, you may want to stain it for an aged look.

Upcycled Cabinet Door Quote Art | Pretty Handy Girl

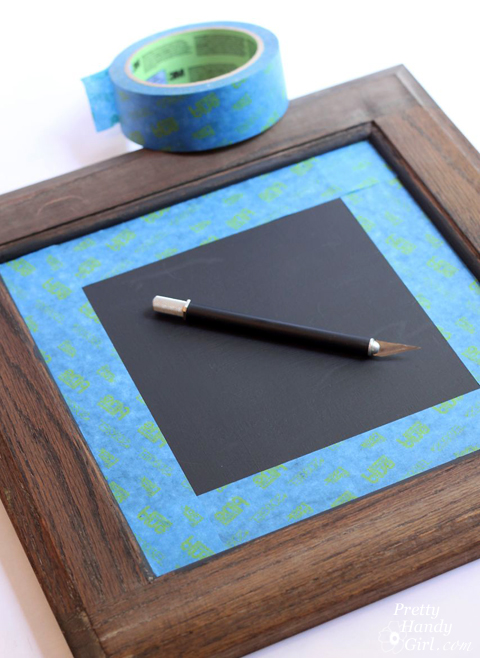
Apply painter’s tape to the inside face of the cabinet door.

Upcycled Cabinet Door Quote Art | Pretty Handy Girl

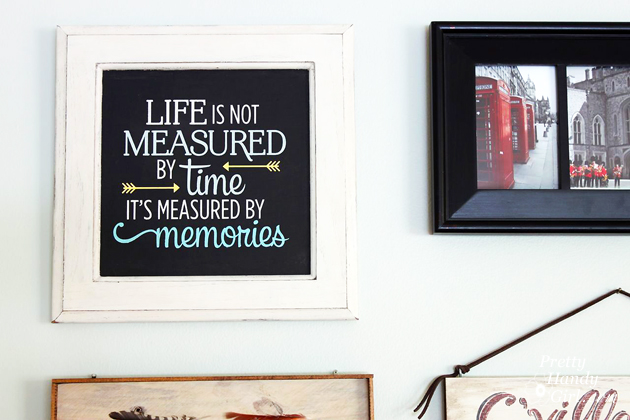
Paint the frame portion of the cabinet door. Allow to dry and apply a second coat of paint. Read more

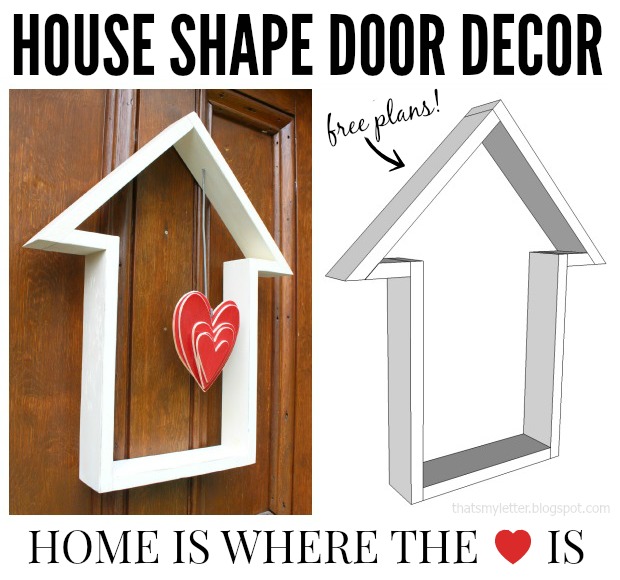
house-shape-door-decor-1

house shape door decor collage

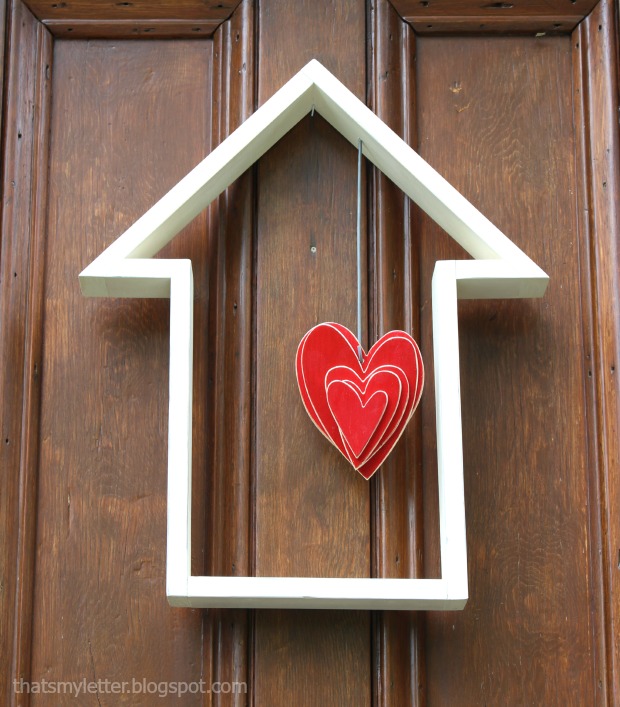
How about an unusual front door decor idea today?  Jaime from That’s My Letter here to share this house shape door decor project with free plans to make your own.

house shape door decor title

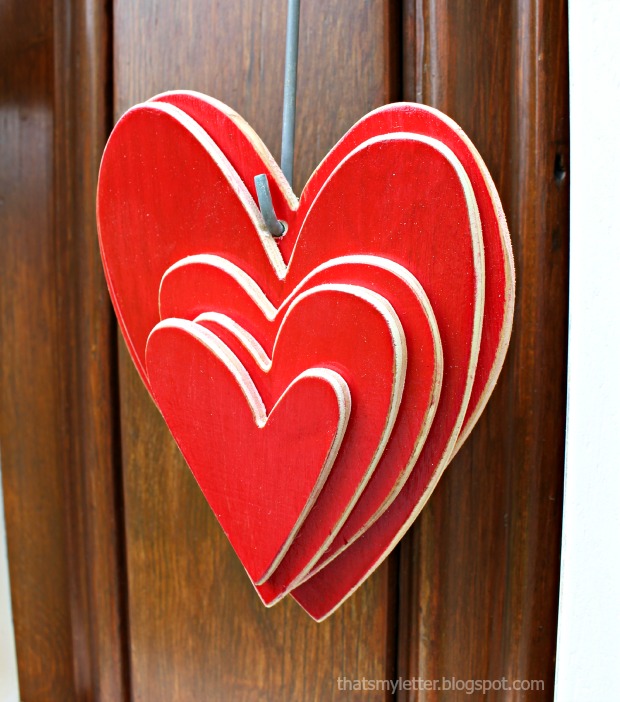
A little play on “home is where the heart is,” this door decor is definitely different and not your typical wreath.  I used 1×3 pine boards to make the house shape then added the cut out hearts to hang in the middle. (Yes the house shape does look like an arrow. If you want to make an arrow shape, those plans are below as well.)

house shape door decor 1

This would also make great indoor wall art. Imagine all the paint color possibilities!

house shape door decor hearts

Supplies:

  • 1 – 1″ x 3″ x 6′ pine board
  • 1/4″ plywood scraps
  • miter saw
  • measuring tape
  • pencil
  • wood glue
  • finish nailer
  • 1 1/4″ finish nails
  • 3/4″ finish nails
  • scroll saw or jigsaw
  • sandpaper
  • wire hanger
  • drill
  • 1/8″ drill bit
  • wood putty
  • white spray paint
  • red acrylic craft paint
  • paintbrush
  • clear exterior grade polyurethane spray

Below are the step-by-step instructions to make your own wood house shape door decor. Always follow all precautions and safety rules when using power tools.

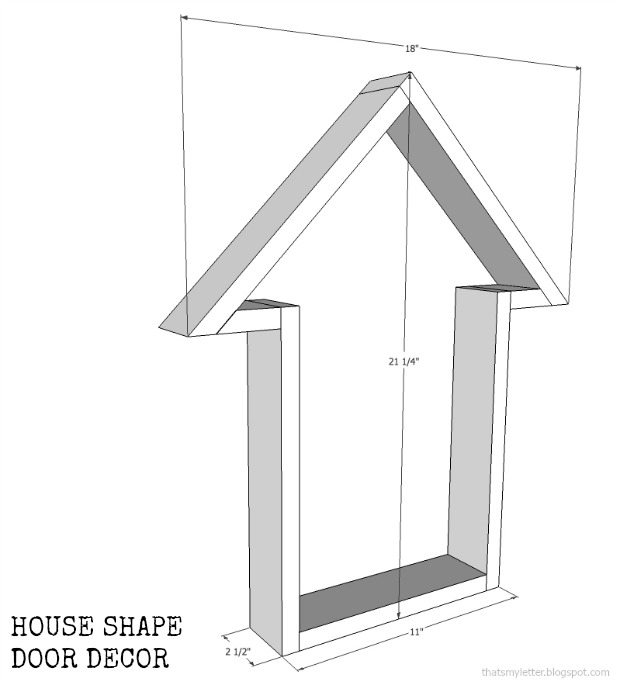
house shape door decor dimensions


Cut List:

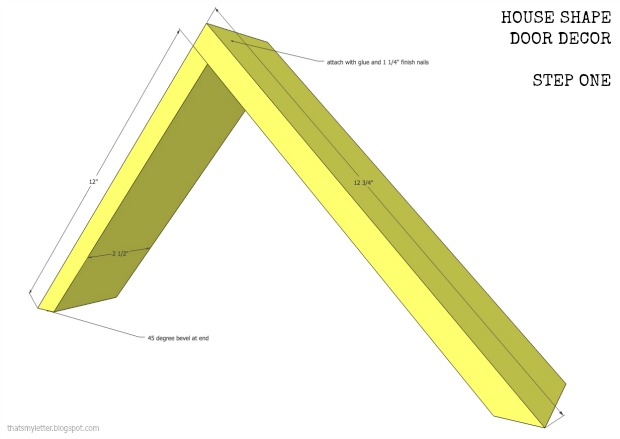
  • 1 – 1×3 @ 12 3/4″, one end 45 degree miter (roof)
  • 1 – 1×3 @ 12″, one end 45 degree miter (roof)
  • 2 – 1×3 @ 2 1/2″, one end 45 degree miter (roof overhang)
  • 2 – 1×3 @ 13″ (sides)
  • 1 – 1×3 @ 9 1/2″ (base)


Step 1: Assemble roof.  Attach long side to short side using glue and 1 1/4″ finish nails.
house shape door decor step 1

Step 2: Add roof overhang pieces to mitered ends of roof.  Use glue and 3/4″ finish nails here.  Below demonstrates how to cut these super short mitered pieces. Read more

Easy Plexiglass Art Frame | Pretty Handy Girl

Easy Plexiglass Art Frame | Pretty Handy Girl

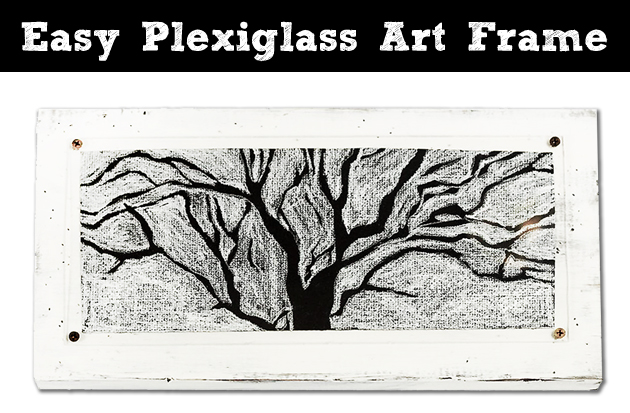
Have you ever wanted to frame a piece of art but didn’t want to pay the high cost to buy a custom frame? Or worse, you’re like me and too lazy to DIY your own frame? That’s where I found myself last week when I was creating the perfect gallery wall. I was at the corner of cheap and lazy. But, I stood my ground at that corner and created an Easy Plexiglass Art Frame!

I wouldn’t recommend this technique for priceless art, but for posters and other art that you want to frame quickly or easily, this is your tutorial!

Materials:
(contains some affiliate links)

  • Art poster or drawing
  • Double-stick tape
  • Plexiglass
  • Pencil
  • Jigsaw or plexiglass cutter
  • Board larger than the art (at least 3″ on each side)
  • Small wood screws
  • Sandpaper
  • Drill with drill bit smaller than screw diameter
  • Screwdriver bit
  • Picture hanging hook(s)

Optional: Paint and Paintbrush

Instructions:

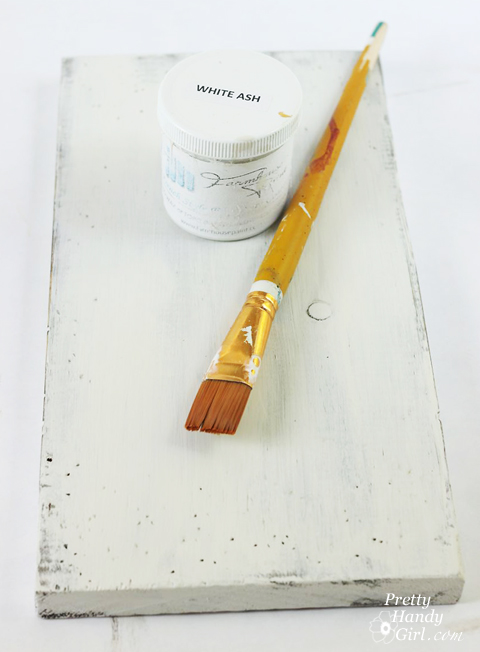
Cut your board to size. If you want, stain or paint your board ahead of time. Allow it to dry.

Easy Plexiglass Art Frame | Pretty Handy Girl

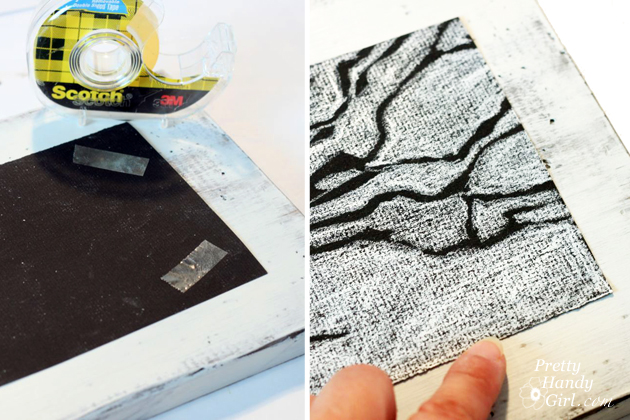
Put pieces of double stick tape on the corners of your art and position it in the center of your board.

Easy Plexiglass Art Frame | Pretty Handy Girl

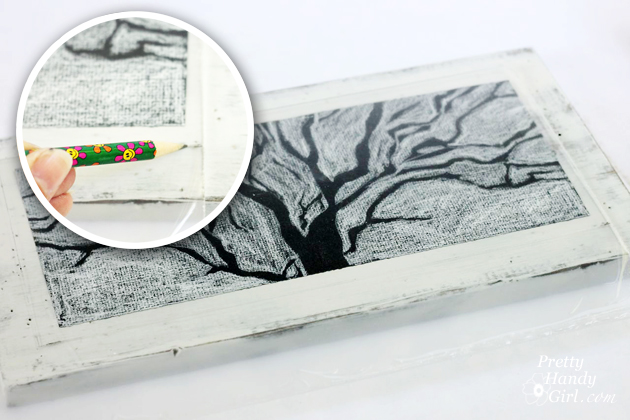
Lay the plexiglass on top of the art and mark where to cut the glass (allow at least 1/4″ overlaps.)

Easy Plexiglass Art Frame | Pretty Handy Girl

Cut your plexiglass with a jigsaw, bandsaw, scoring plexiglass knife or ask a local home improvement store to cut your glass exact. Sand the edges of the plexiglass until it is smooth. Read more

DIY-feather-art

DIY Feather Art | Pretty Handy Girl

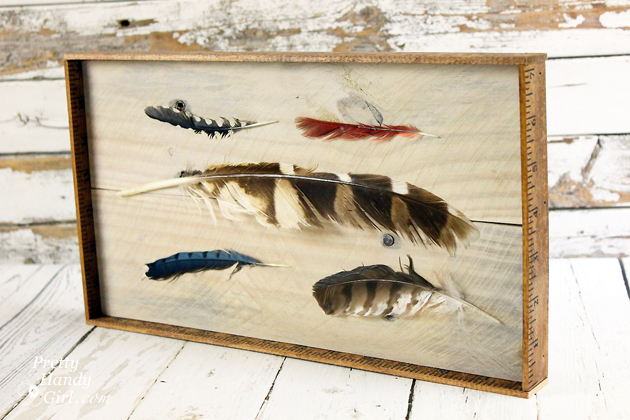
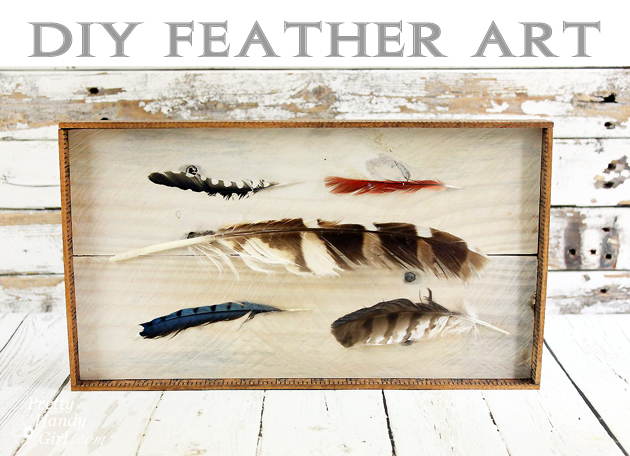
When I needed an extra piece of art for our living room gallery wall I created DIY Feather Art. You can create your own, but please purchase craft feathers, use fake feathers or paper feathers. (Per the Migratory Bird Treaty Act, it is illegal to collect feathers, nests and other anatomical parts of certain migratory birds.)

Materials:

DIY Feather Art | Pretty Handy Girl

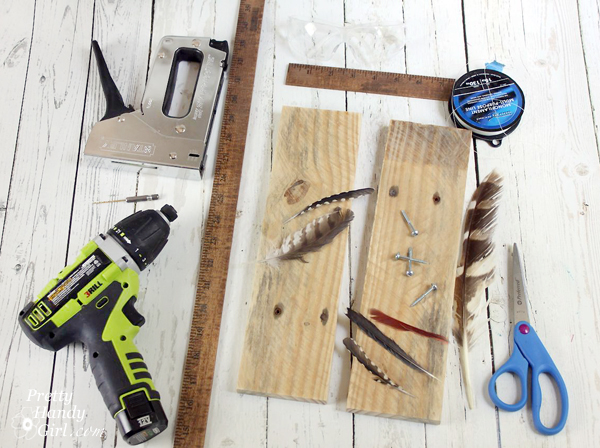
  • Rustic 1×4″ boards (I used pallet wood)
  • Wood yardstick or lattice boards
  • Watered down white paint
  • Paint brush
  • Clamp
  • Scissors
  • Kreg Jig
  • Pocket hole screws (1.25″)
  • Nylon line
  • Small drill bit
  • Drill
  • Staple gun
  • 1″ finish nails
  • Hammer or nailgun
  • Wood glue
  • Feathers
  • Pencil
  • D-ring picture hangers

Instructions:

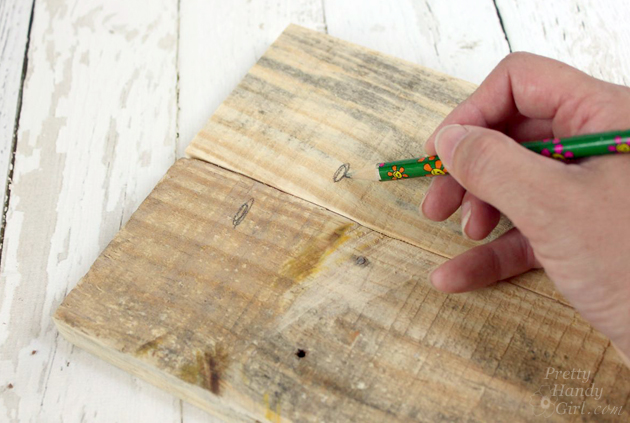
Cut your 1×4″ boards to size (or select one board the size you want for your art background.) To connect the two boards, mark the location to drill pocket holes.

DIY Feather Art | Pretty Handy Girl

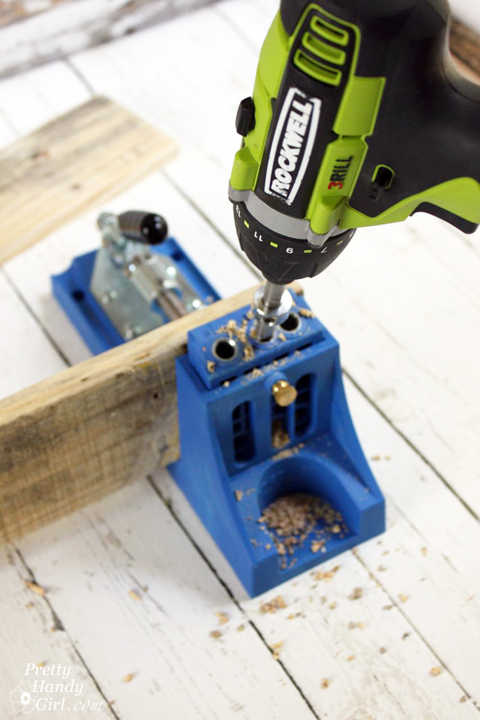
Use the Kreg Jig to drill pocket holes into the back of both boards.

DIY Feather Art | Pretty Handy Girl

Clamp the boards together and join them with 1 1/4″ pocket hole screws.

DIY Feather Art | Pretty Handy Girl

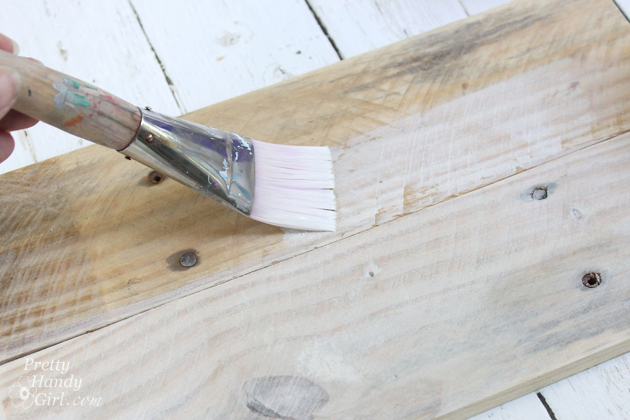
Flip the board over and paint it with watered down white paint for a white-washed look.

DIY Feather Art | Pretty Handy Girl

Mark the width of the white-washed board onto the yardstick. Cut two pieces the same length. Read more

Tips for Creating a Gallery Wall | Pretty Handy Girl

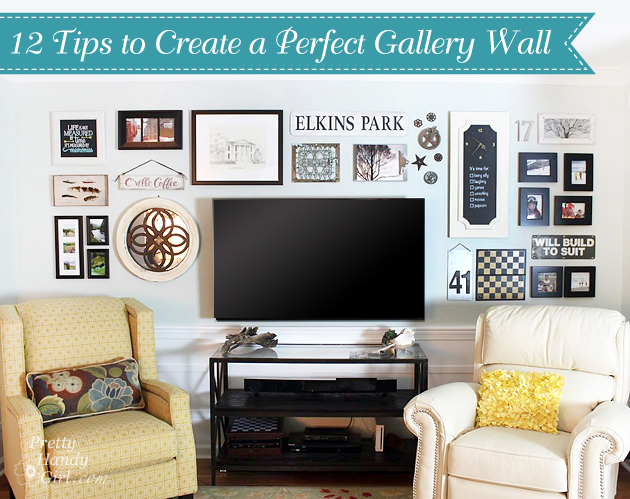
12 Tips to Create the Perfect Gallery Wall | Pretty Handy Girl

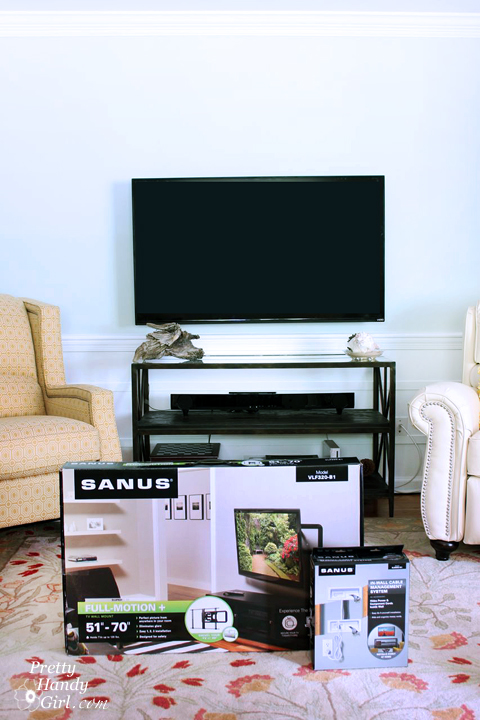
When you Don’t Love It, a room in your home can become a place to avoid. Last week I hung our TV on the wall in our living room, but was cringing because that big fat TV was screaming “Look at me! Look at me!” It was killing the cozy vibe I wanted to create in our room. This is the place that my family likes to chillax. It’s the room where wrestling matches happen and the room where we curl up by the fire. We watch movies and sports in this spot.  But, frankly, I didn’t love it. When I looked in the living room all I could see was a giant black elephant in the room.
Tips for Creating a Gallery Wall | Pretty Handy Girl

I agreed to let Pretty Handsome Guy pick out a big flat screen TV. But, I secretly devised a plan to keep me happy and let Handsome Guy have his big honkin’ TV.
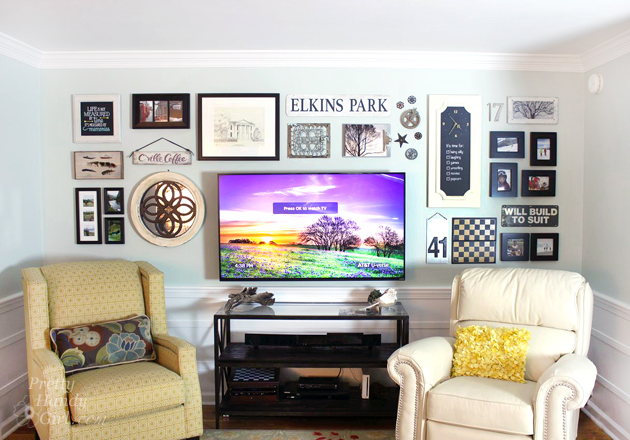
Tips for Creating a Gallery Wall | Pretty Handy Girl

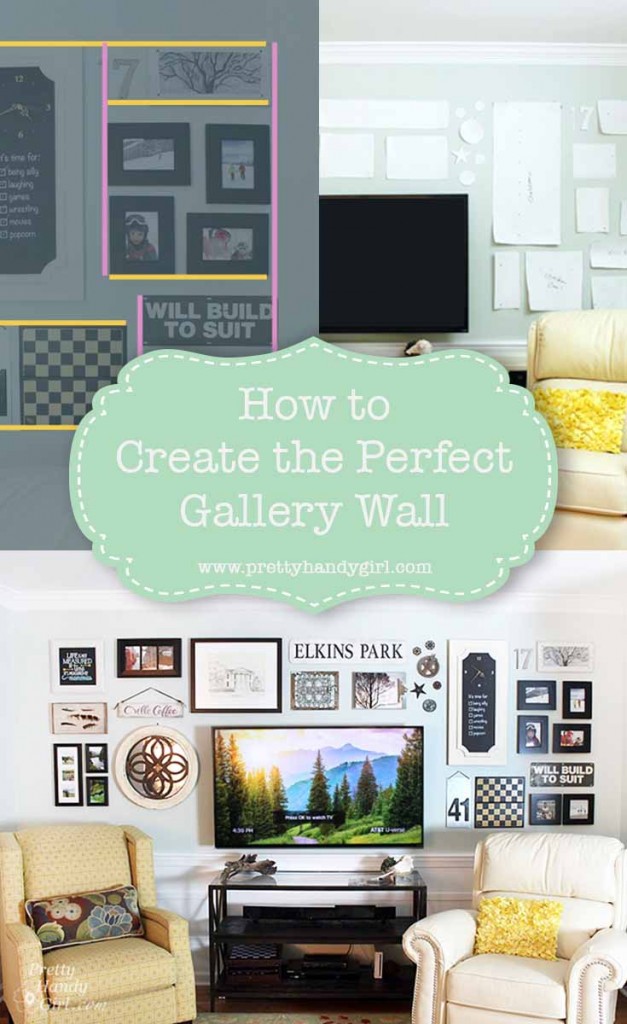
And I Created a Perfect Gallery Wall around the TV to de-emphasize its size and dominance in the room.

15 Tips for Creating the Perfect Gallery Wall:

#1 Start with a Level Line

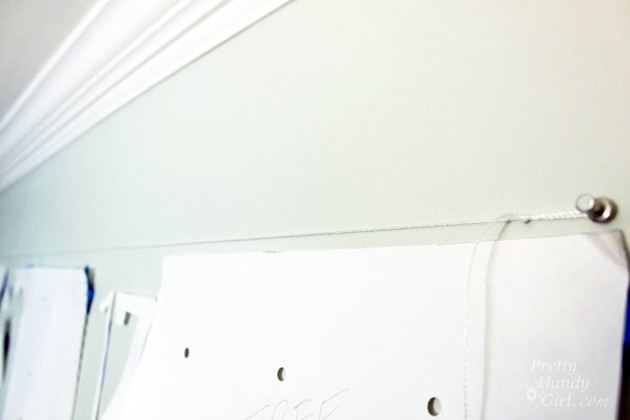
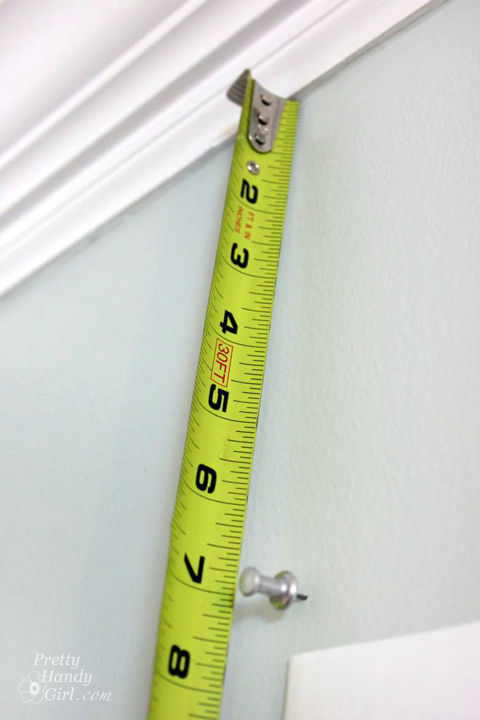
Determine the area you want to install your gallery wall. Measure down from your crown molding or ceiling to the top of the gallery area.
Tips for Creating a Gallery Wall | Pretty Handy Girl

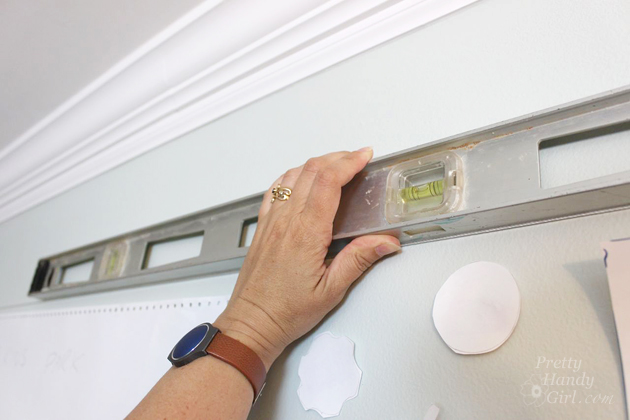
Insert a thumbtack or pin at that height. Run a piece of string from the thumbtack along the width of your gallery wall space. (It helps to have a friend hold the free end of the string, but you can use a piece of painter’s tape to hold it temporarily.)

Level the string and secure the opposite end with a thumbtack.
Tips for Creating a Gallery Wall | Pretty Handy Girl

Tips for Creating a Gallery Wall | Pretty Handy Girl

#2 Create Paper Templates

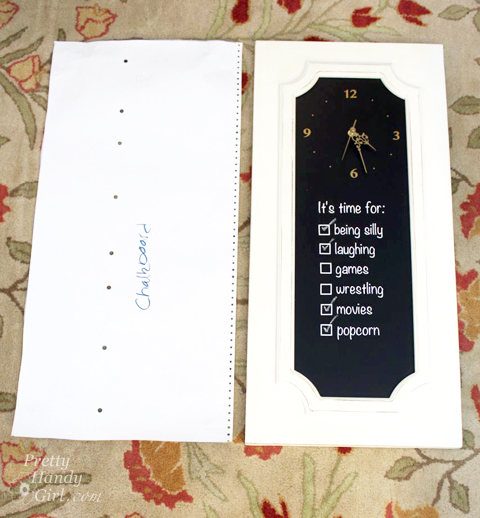
Pull together all your frames and art. Create a paper template for each object. (Craft paper, butcher block paper or old dot matrix printer paper works perfect for this task.)
Tips for Creating a Gallery Wall | Pretty Handy Girl

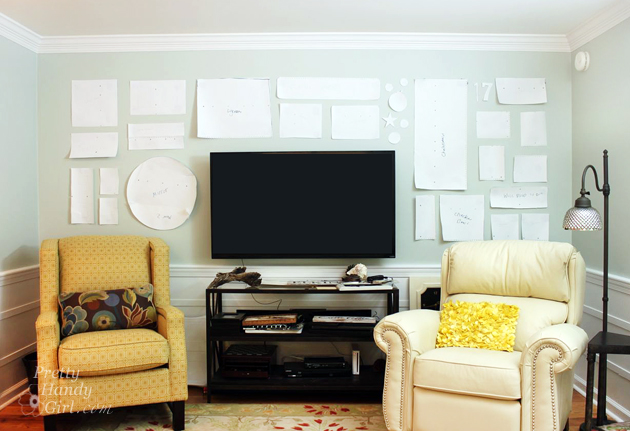
Use painter’s tape to secure the templates to the wall. Step back and look at the wall from across the room. Take a picture of the wall with your mobile device and look at the picture to see if you see any issues. Or face away from the wall and look at it in the mirror to look at the arrangement from another angle. Play with the templates until you Love It! I will be honest with you, this process takes a while. In the long run, you’ll love your gallery wall if you live with the arrangement for a few days before the final installation.
Tips for Creating a Gallery Wall | Pretty Handy Girl

#3 Pick a Color Palette

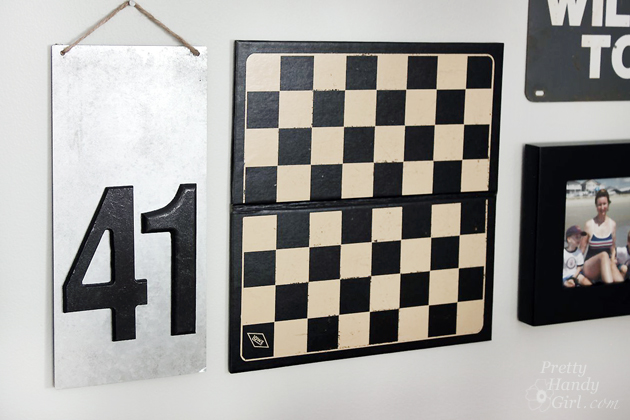
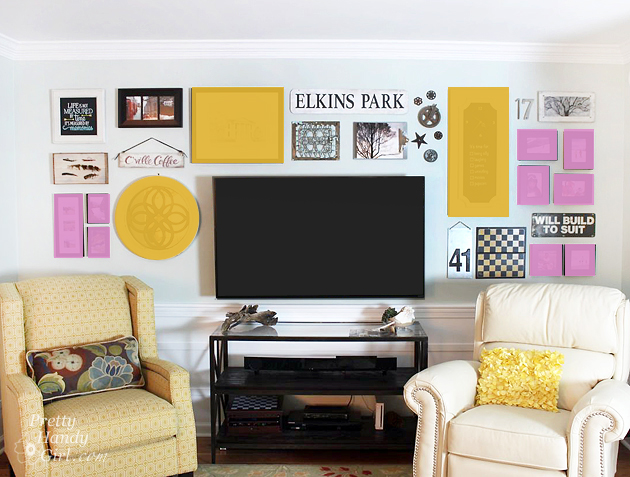
Choosing a color palette of 2-3 colors will help you create a cohesive look and make it easy to create a visually pleasing gallery wall. The easiest palette to work with is black and white, because you can use black, white and a variety of grays.
Tips for Creating a Gallery Wall | Pretty Handy Girl

You can also add a bold color to the mix and know that everything works with black and white!
Tips for Creating a Gallery Wall | Pretty Handy Girl

#4 Use a Variety of Shapes and Sizes

For more visual interest, use a variety of shapes and sizes. Gallery walls that use the same frame for the entire collection can look stunning and orderly. But, for a more organic and eclectic gallery wall, feel free to play with many shapes and sizes. Your color palette of 2-3 colors will keep it looking unified.
Tips for Creating a Gallery Wall | Pretty Handy Girl

#5 Balance Larger and Smaller Objects

When working with several shapes and sizes, it’s important to balance your arrangement. Space larger items away from each other and preferably on opposite sides. Pay attention to collections of smaller objects as well. Your wall would look unbalanced if all the large objects were on one side and all the small art on the other.
Tips for Creating a Gallery Wall | Pretty Handy Girl

While spacing the object templates, use the trick in #2 by taking a photo or using a mirror while playing with placement.

#6 Use Consistent Spacing and Align Edges

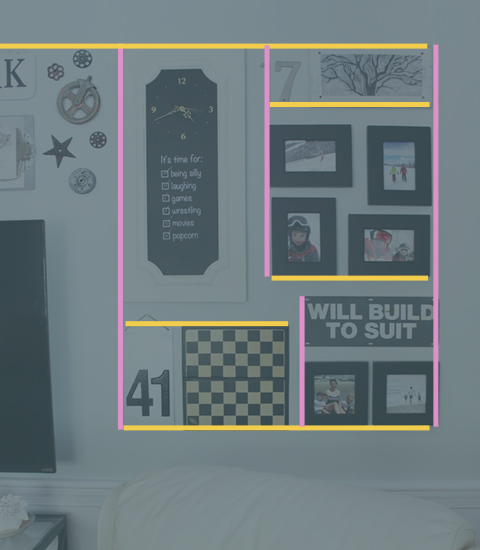
Use consistent spacing between your art. Smaller collections can visually work as one large object if you space them closer together. But, use a larger space outside the collection that equal to the rest. Try to align horizontal or vertical edges with adjacent art. They don’t have to be hung in a uniform grid, but creating a shared horizontal or vertical line can help create a pleasing installation.
Tips for Creating a Gallery Wall | Pretty Handy Girl

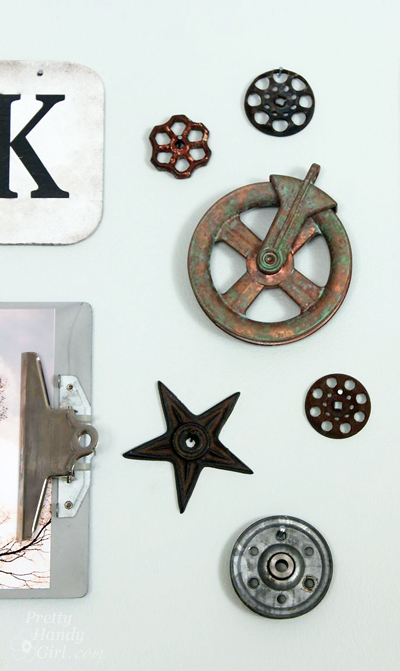
#7 Group Like Objects

As mentioned in #6, you can group smaller objects together to fill a larger space. Use objects of the same color, material or shape together as a collection.
Tips for Creating a Gallery Wall | Pretty Handy Girl

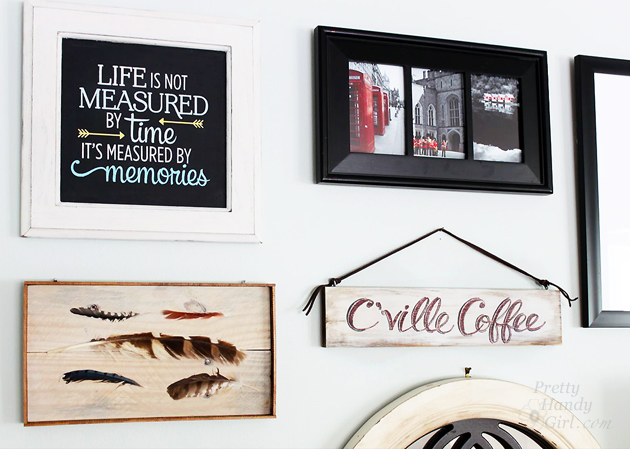
#8 Mix Textures

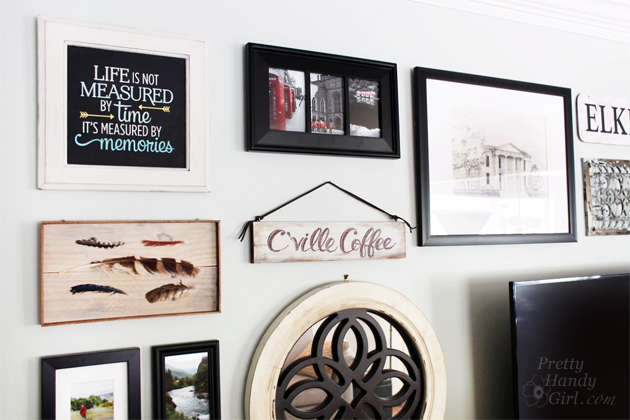
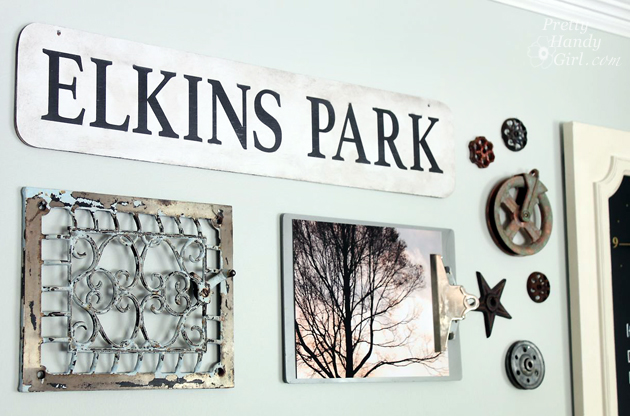
For lots of visual interest, introduce several different materials and textures into your gallery wall. Break up black frames with wooden art, metal signs and even natural elements like feathers, branches, found objects, etc. The sky wall is the limit (ha, ha). Have fun using your imagination.
Tips for Creating a Gallery Wall | Pretty Handy Girl

#9 Use Good Wall Anchors, Hangers, and Bumpers

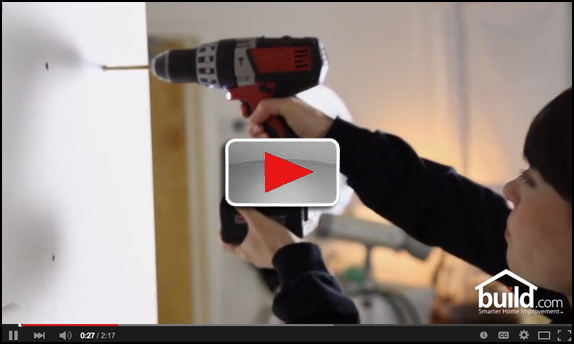
While hanging artwork, be sure to use picture hangers or anchors strong enough to hold your artwork. It’s so important to use a hanging hook or anchor that is designed to hold more than your art weighs. Watch the video on “Testing Drywall Anchors” to see why this is so important:

video-screen-shot-buildcom

Way to go Build.com for performing this test!

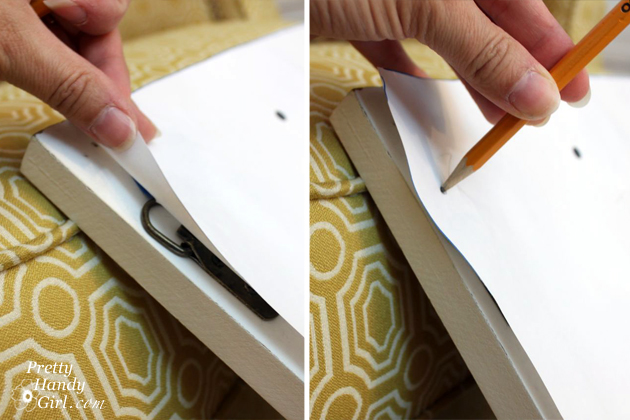
#10 Mark Hanging Hardware on Templates

This trick will save you time and save your walls from turning into swiss cheese! Set your template on the back of your art (the back side should be up) and poke a hole with a pencil where the hanging hooks, holes or wires are. Hang your template back on the wall.
Tips for Creating a Gallery Wall | Pretty Handy Girl

#11 Hanging Your Art Perfectly

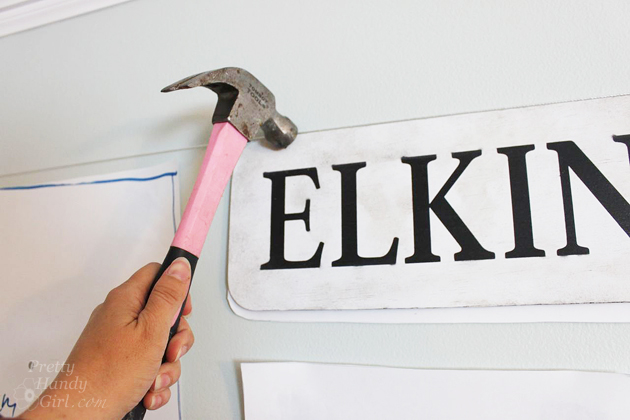
Ready to hang your art perfectly the first time? Grab your picture hanging hardware, nails and a hammer.

Make sure that each template is level. For art that has visible holes, line up the art on top of the template. Hammer the nail or hook through the hole.
Tips for Creating a Gallery Wall | Pretty Handy Girl

Then simply pull and rip the template off the wall from beneath the art.
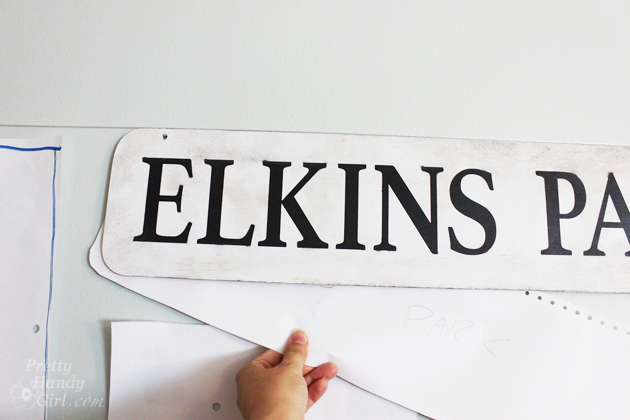
Tips for Creating a Gallery Wall | Pretty Handy Girl

For hanging hardware that is hidden. Hammer your picture hardware through the template lining up the hook or nail with the hole you poked through in tip #10.
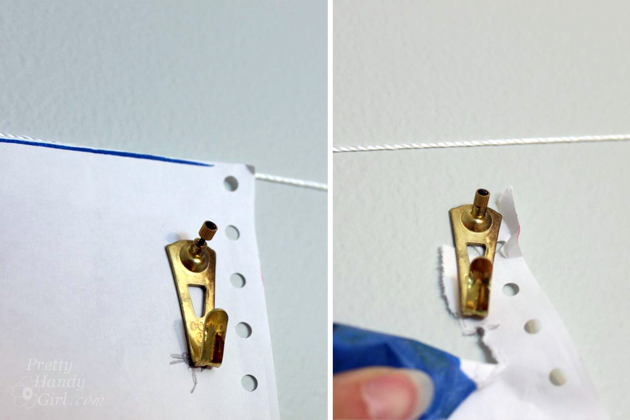
Tips for Creating a Gallery Wall | Pretty Handy Girl

Tear the template off after you have your hangers installed. Hang your art on the hooks perfectly the first time!
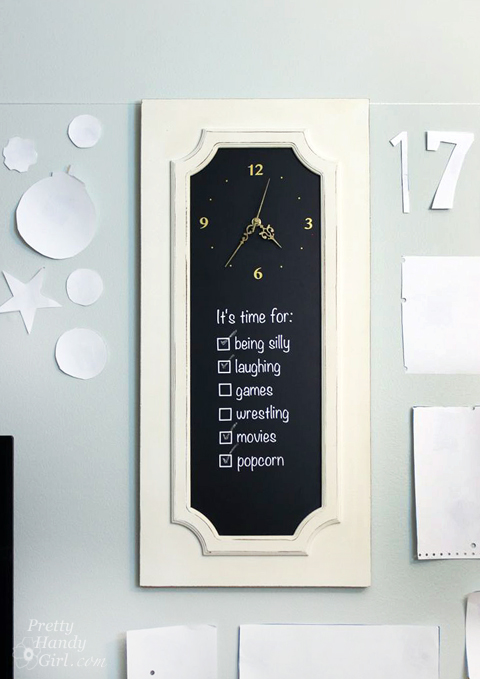
Tips for Creating a Gallery Wall | Pretty Handy Girl

#12 Make it Personal

Make your gallery wall a reflection of you! Use vacation photos, messages and art that has meaning to you and your family.
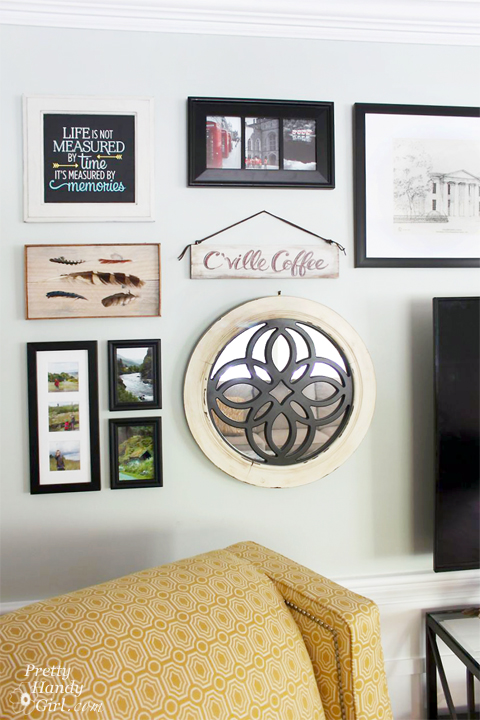
Tips for Creating a Gallery Wall | Pretty Handy Girl

I smile every time I walk into our living room. It is filled with memories and art that makes me happy.
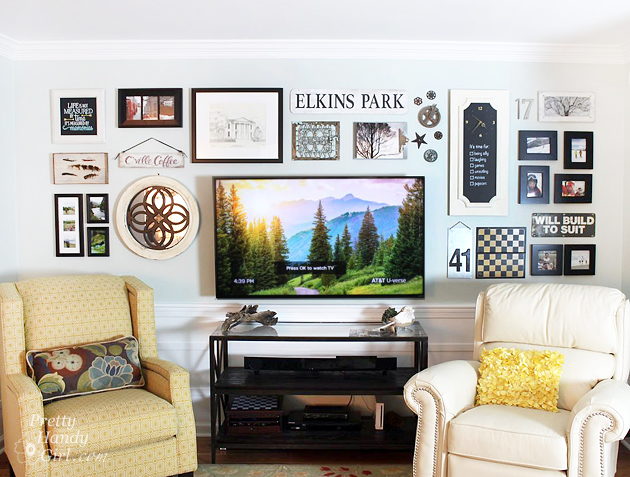
Tips for Creating a Gallery Wall | Pretty Handy Girl

PHGFancySign

Disclosure: Thank you to Build.com for sponsoring today’s post and inspiring me to discover my #LoveItMoment 

Pin for later!