31 Days of Handy Home Fixes | Pretty Handy Girl

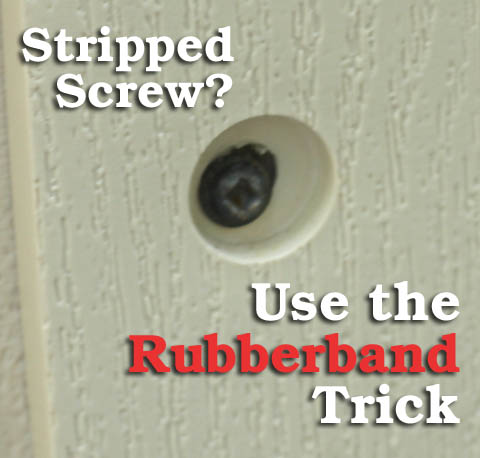
Welcome to Day 4 of my 31 Days of Handy Home Fixes.  What happens when you strip a screw head just enough that the screwdriver won’t get a good grip? Or the screw has been painted over so many times that you can’t get the screwdriver head in the hole? Ahhh, well, I have two quick tips for solving this problem!

Grab a thick rubberband, your screwdriver and a hammer.

Day 3. Removing a Stripped (or painted) Screw

If your screw is painted over, this tip will probably work for you. Set the screwdriver in the screw head (be sure to line up the grooves in the screw with the screwdriver cross. Use the hammer to give the screwdriver one good whack.

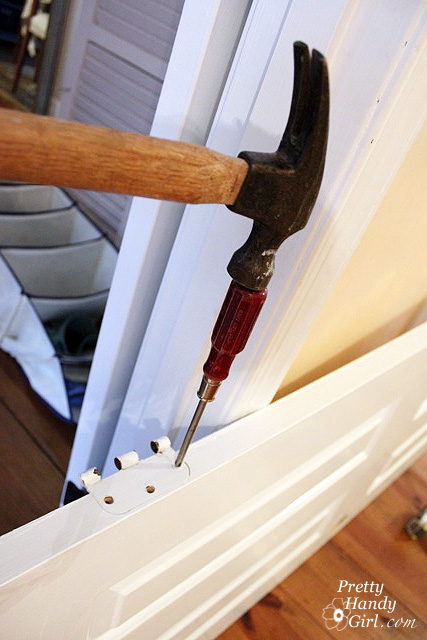
The pressure will either crack the paint or set the screwdriver in just enough to get a grip on that stubborn screw.

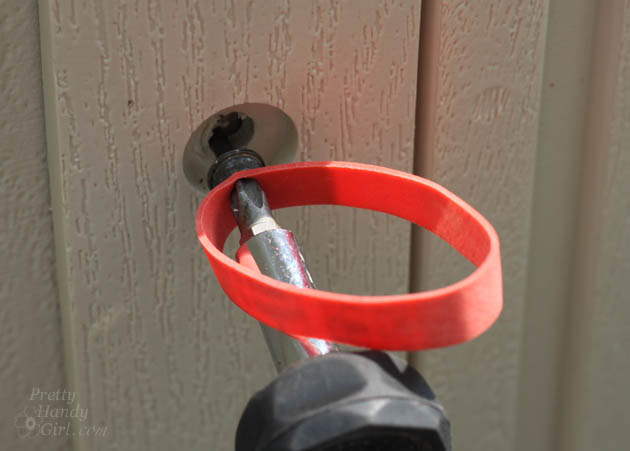
Need a plan B? Use a rubber band!

Stripped Screw? Use the Rubberband Trick | Pretty Handy Girl

Slip a thick rubber band over the end of the screwdriver. Insert it into the screw head.

Stripped Screw? Use the Rubberband Trick | Pretty Handy Girl

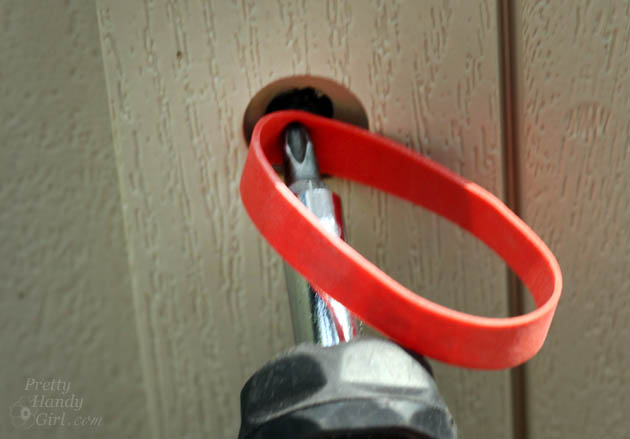
Turn to remove the screw. The rubber band will fill in the hole and give some gripping power while turning the screw.

Stripped Screw? Use the Rubberband Trick | Pretty Handy Girl

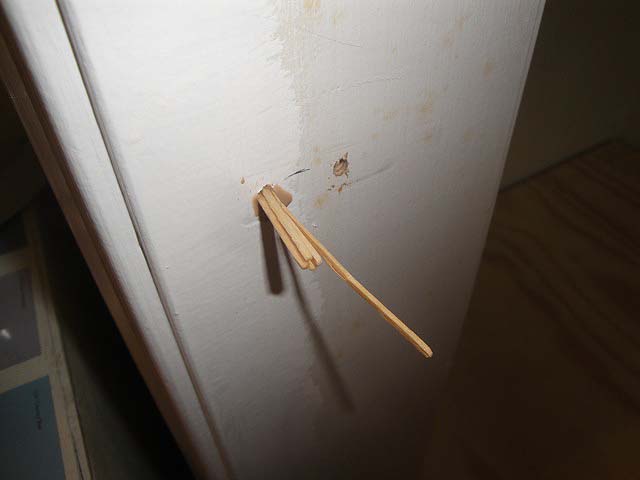
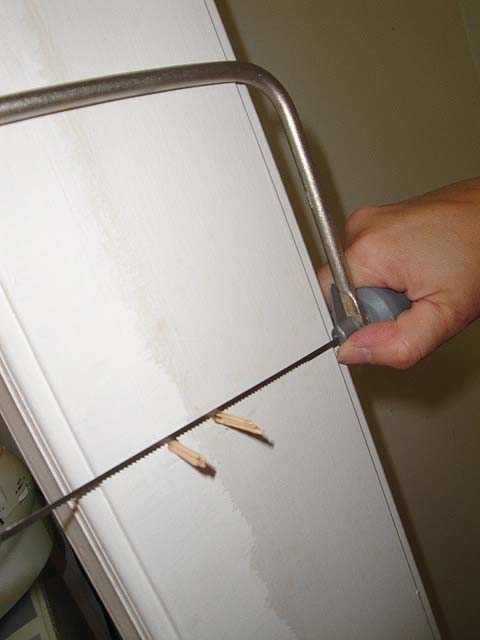
Uh oh, the screw still won’t come out? Here’s plan C: Use a dremel to get the screw out!

PHGFancySign

Also check out other participants in Nester’s 31 Days Challenge.

31 Day Writing Challenge

For the entire month of October I’ll be bringing you tips and fixes you can do to protect your home, save money and save time. Stick around to learn more tips tomorrow. Sign up to get all the tips in your email:


Sign Up for Email Subscription


Other tips in the 31 Days of Handy Home Fixes series:


How to Fix Stripped Holes in Wood | Pretty Handy Girl

31 Days of Handy Home Fixes | Pretty Handy Girl

Welcome to Day 3 of my 31 Days of Handy Home Fixes.  Have you ever tightened a screw 1,485 times before you finally admit that the hole is stripped? Procrastinate fixing that stripped hole no more!

Grab some wood glue and tooth picks and we’ll fix that hole in a jiffy.

Day 3. Fixing a Stripped Screw Hole

Remove the screw. Squeeze some wood glue into the hole. Add a little more on the end of a toothpick.

How to Fix Stripped Holes in Wood | Pretty Handy Girl

Shove as many toothpicks as you can into the stripped hole.

How to Fix Stripped Holes in Wood | Pretty Handy Girl

After the wood glue has dried, snap or cut the toothpicks off with a hand saw.

How to Fix Stripped Holes in Wood | Pretty Handy Girl

Drive your screw into your newly fixed hole!
PHGFancySign

Also check out other participants in Nester’s 31 Days Challenge.
31 Day Writing Challenge

For the entire month of October I’ll be bringing you tips and fixes you can do to protect your home, save money and save time. Stick around to learn more tips tomorrow. Sign up to get all the tips in your email:


Sign Up for Email Subscription


Other tips in the 31 Days of Handy Home Fixes series:


31 Days of Handy Home Fixes | Pretty Handy Girl

Welcome to Day 2 of my 31 Days of Handy Home Fixes. Today I’m going to show you a tip for fixing a rubbing or sticking door.

Day 2. Fixing a Sticking Door

Do you have a door in your home that rubs on the frame or gets stuck certain times of year? Our bathroom door used to stick in the summer (but not the winter.) The excess humidity in the air caused the door to swell just enough that it rubbed at the top of the frame. The fix literally took less than five minutes!

Take a look at your door and determine where the door is rubbing. Assess which direction you need to nudge the door to break the contact.

The simplest fix is to try loosening or tightening the door hinge screws. Take a look at the door below. The door was too tight in the upper left corner. To relieve the rubbing loosen the screws a half turn in that top hinge. Test the door again. You may also need to loosen the screws on the middle hinge and tighten the screws on the bottom hinge.

Is your door still sticking? Try removing the screws completely from the door frame. Instead of shimming with a wooden shim (which would be too thick) cut a piece of thin cardboard (think cereal boxes and product packaging) and inserted it behind the hinge. Then drive the screws back in.

Shim a door hinge

95% of the time the above two tips will resolve your issues. If your door is still sticking, you may have to take more drastic measures like routing out more material from the door frame with a Dremel or using a power planer to trim down your door.

PHGFancySign

Check out other participants in Nester’s 31 Days Challenge.

31 Day Writing Challenge

Don’t miss a single tip! Sign up to get all the tips in your email:


Sign Up for Email Subscription


Other tips in the 31 Days of Handy Home Fixes series:


Water alarm

31 Days of Handy Home Fixes | Pretty Handy Girl

Welcome to Day 1 of my 31 Days of Handy Home Fixes. I am always amazed at how a great house can fall into disrepair. This doesn’t have to happen. Each day you can learn a quick fix for your home. For the entire month of October I’ll be bringing you tips and fixes you can do to protect your home, save money and save time. Follow along to learn a new tip each day. Also check out other participants in Nester’s 31 Days Challenge.

31 Day Writing Challenge

Day 1. Protect Your Home from Water Leaks

If you’ve been following my blog for a while, you probably read about the great leak of 2012. We ended up having to gut our kitchen and rebuild it. Unless you want to rebuild your kitchen from scratch, there’s a simple device you can use to protect your home from a costly leaks.

Simply purchase a few of these Water Sensor and Alarms:

Water alarm

They cost $10 each, but they can save you thousands of dollars! Add batteries and put one underneath every sink. Place one behind the clothes washer and your fridge too!  Speaking of your fridge, here’s how to prevent an ice maker leak.

protect_from_ice_maker_line_leaks

Stick around to learn more tips tomorrow. Sign up to get all the tips in your email:


Sign Up for Email Subscription


Pin for later!

water detector picture

Other tips in the 31 Days of Handy Home Fixes series:


Birch Tree Pillow

Birch Tree Pillow

One thing that gets me ready for the fall season is to bring natural elements into my home. Although, they don’t actually have to be real, you can create them with some fabric and a little sewing. I’ve wanted to change up the pillows in our living room for a while, and these birch tree pillows are the perfect touch for fall. They are super easy to make, without any special tools!

I made these with fabric I had on hand and 20″ pillow forms, however you can adjust the size based on pillow forms you have. I also made them with a 1″ “trim” around the edges as an envelope cover (meaning the pillow form slips inside the cover without the use of a zipper.)

Materials

  • Fabric in your choice of color for the pillow base
  • White felt for the trees
  • Measuring tape
  • Scissors
  • Pencil
  • Fabric glue, optional
  • Sewing machine
  • 20″ pillow form

Instructions

1. Prepare the fabric to sew it into a pillow cover by cutting a piece that is 21 1/2″ x 45″ long. This shape will make up the front of the pillow and overlap in the back to form the envelope. Iron the cut piece to remove any wrinkles.

Birch Tree Pillow

2. Sew a hem on both of the shortest 21 1/2″ ends so you have a nice finished seam on each. You will see one of these from the back of the pillow.  Set this piece aside for the moment.

Read more