Wall-Mounted Kitchen Hutch Tutorial

Have you heard the term sandbox when talking about software development? It’s the term used for the testing area where the engineers can “play” with their ideas before they go live to the public. Well, this little kitchen desk and hutch (kitchen command center) was my sandbox before I ordered our kitchen cabinets. It was my place to play with colors and style before making the very big step of ordering all the kitchen cabinets. When I had finished with the desk and hutch I was so thoroughly smitten with the colors that I had no problem ordering most of my kitchen cabinets in the same Sherwin Williams Copen Blue color!
Last week I showed you how I raised and transformed the Habitat ReStore desk into a counter-height desk. At the same time I bought the desk, I found a sheet of finish grade plywood that was an old folding table top. At $25 for the sheet, I brought it home and used it to create a wall-mounted hutch. After mounting it on the wall, I worked with my electrician to wire a lamp in the hutch. (Exterior wall mounted light from Lowe’s.) The result is a charming cottage style desk and hutch where I keep our lives organized!

Are you ready to build your own wall-mounted hutch? Grab your tape measure and saw and let’s get busy!
Materials:
- 1 sheet finish grade plywood (or several 10″ maple or poplar boards)
- Jig saw
- 1 Fat corbel (or two narrow corbels/shelf brackets)
- Box of 1.5″ wood screws
- Tape measure
- Level
- Drill with drill bits
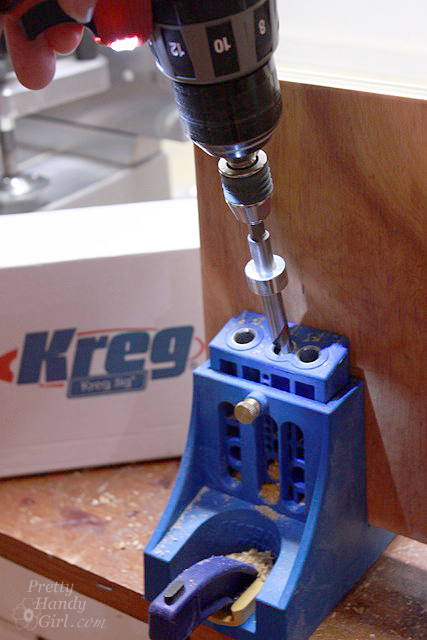
- Kreg Jig
- Sander
- Hand saw
- Clamps
- Wood glue
- Finish nails
- 1 Sheet of beadboard
- Hammer
- Pkg. of brad nails
- Pencil
Instructions:
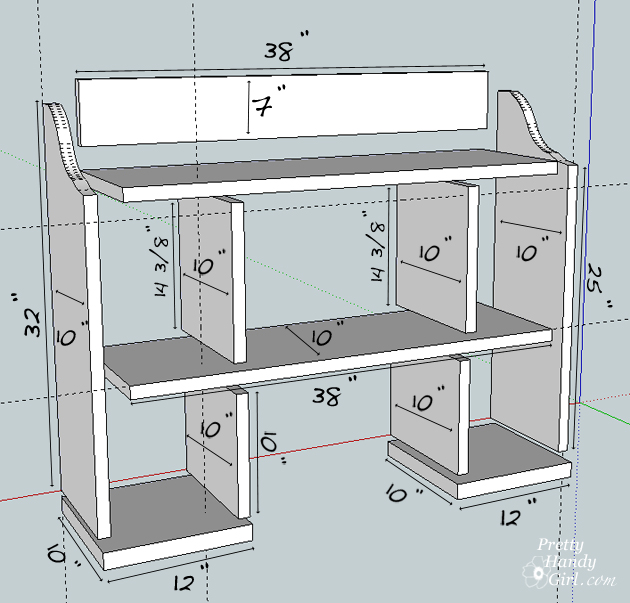
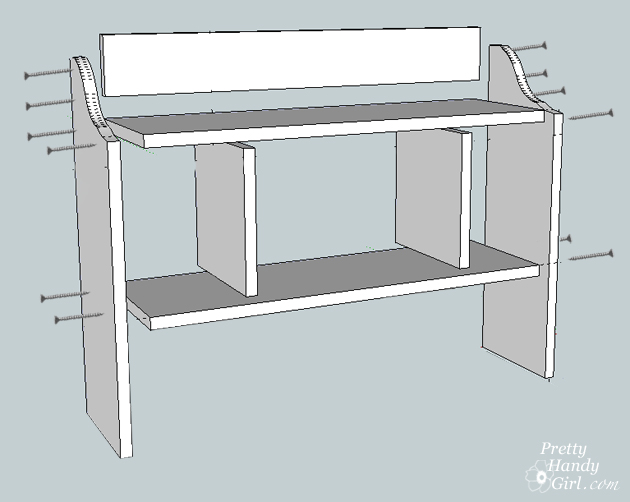
Begin by cutting all your boards into the dimensions below. The two side boards should be 32″ tall before cutting the profile into the top.
To cut the profile into the top of the side pieces, trace your corbel onto the 32″ side board. (I turned the corbel on it’s side for a wider profile.)
Cut out the profile with a jigsaw.

Trace the same profile onto the second side and cut with a jig saw.
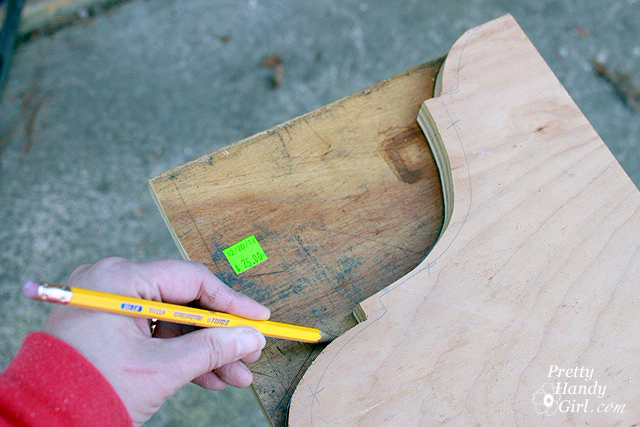
You should have two sides with matching top profiles.

Dry fit all your boards together. Make any adjustments to size now. (I also made sure my lamp was going to fit in the hutch.)

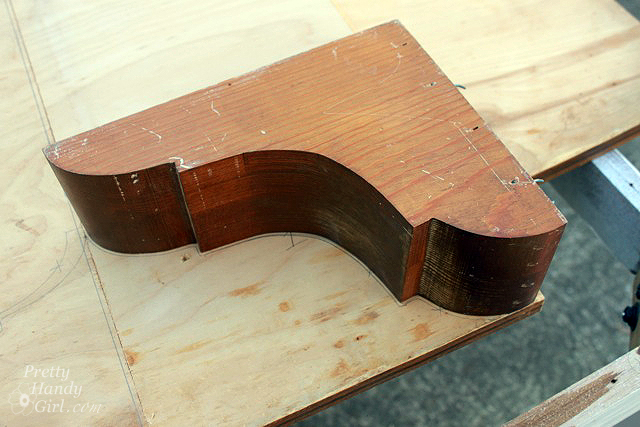
At this point I decided that my corbels were too chunky for my hutch, so I set one up on the bandsaw and cut it in half.
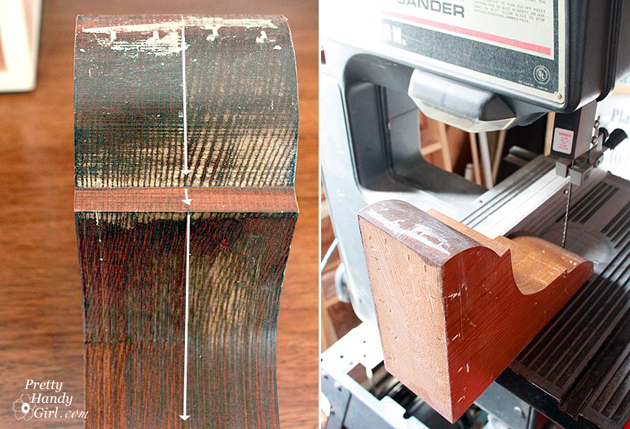
The corbel was a little too tall for the bandsaw, so I finished the cut with a universal handsaw.
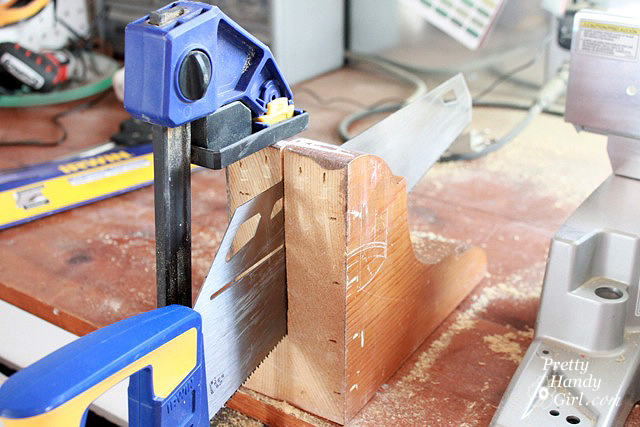
Sand both corbels (they will now be the shelf brackets for the hutch.)

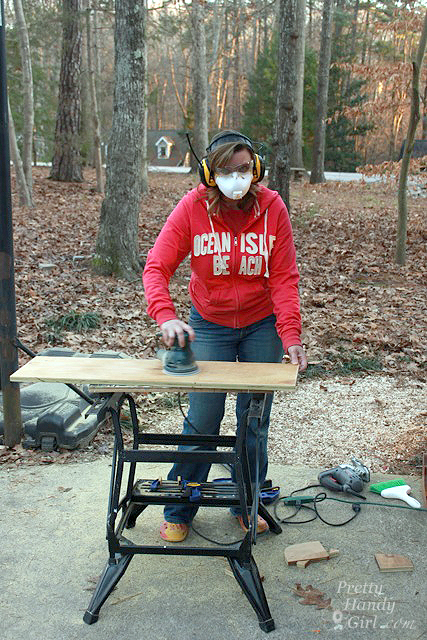
Sand all the parts of your hutch until they are smooth. (Don’t you just love when you find a random shot on your camera from when the hubster snuck up to take your picture when you looked like a psycho maniac sander? Yup.)
To assemble your hutch, begin by setting the top shelf into position against the sides. (I found it helpful to clamp the middle and bottom dividers to act as guides for the shelf placement.)
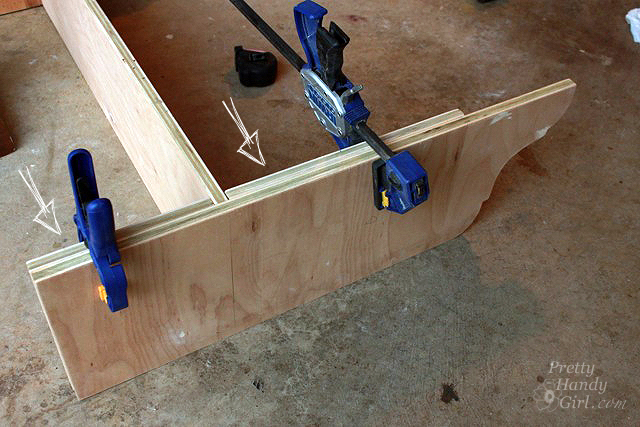
Check that the shelf is square.

Mark on the outside of the side where to drill pilot holes for the screws. Drill holes and drill a small countersink hole to recess the screw head.
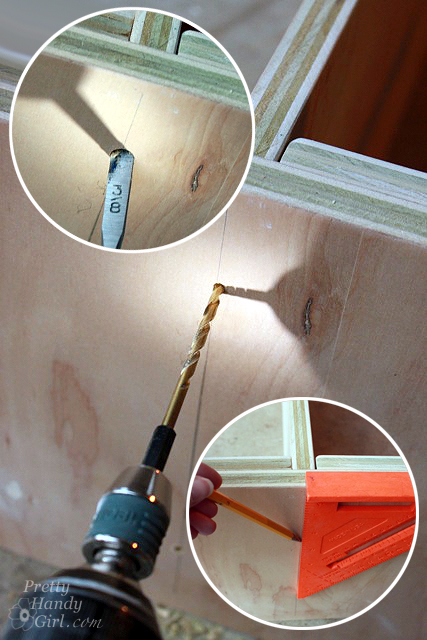
Attach the top shelf and the top back piece with wood screws. Repeat the process for the other shelf.
A view of the hutch with the top shelf secured by screws:
To secure the middle shelf dividers, drill pilot holes and countersink four screws per divider as shown below:
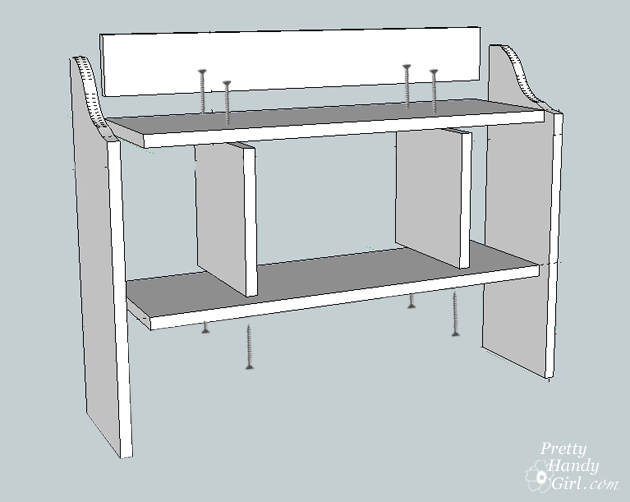
The bottom two shelf dividers will be secured with pocket hole joinery (see details below). The two bottom shelves of the hutch are then secured with wood screws.
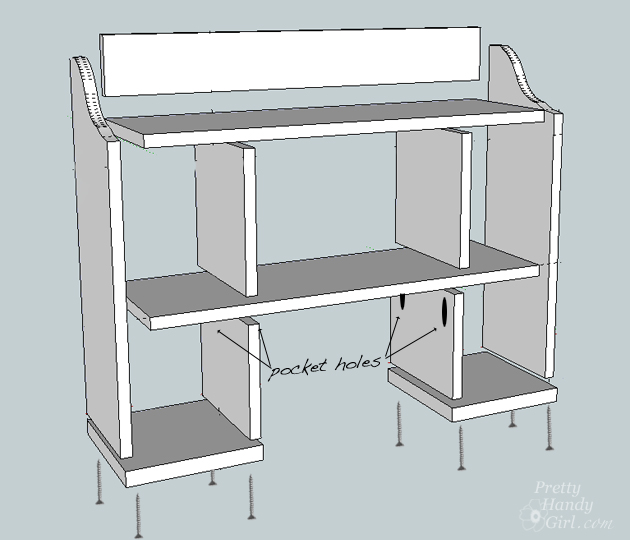
Use a kreg jig to drill pocket holes.
Attach the two divider boards to the underside of the middle shelf.

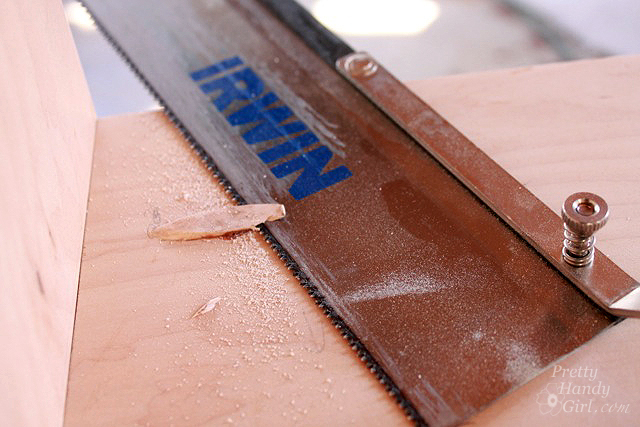
Glue wood plugs into the pocket holes. After the glue has dried, cut off the plugs with a hand saw.
Fill the ends of the plywood and any screw holes with wood putty.
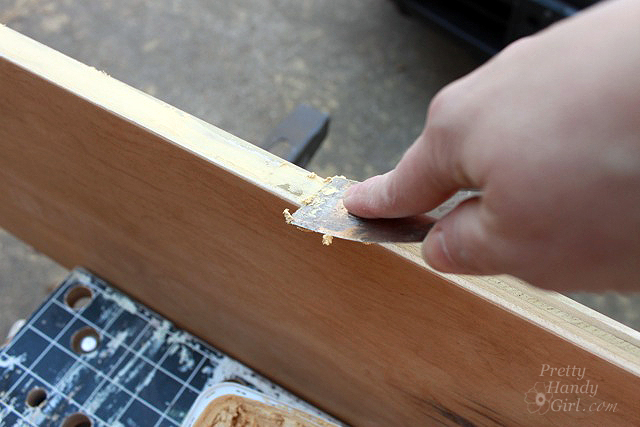
After the putty dries, sand down everything until smooth.

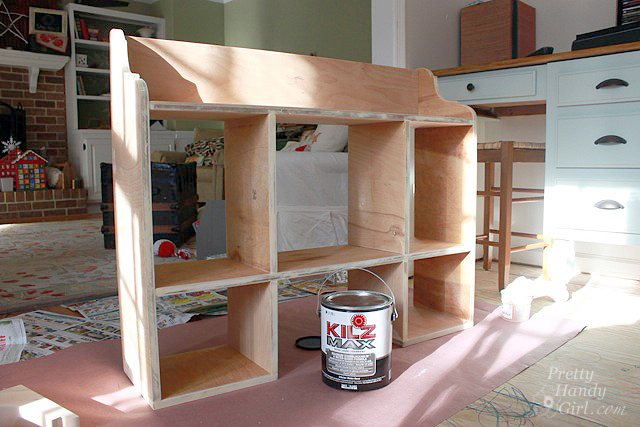
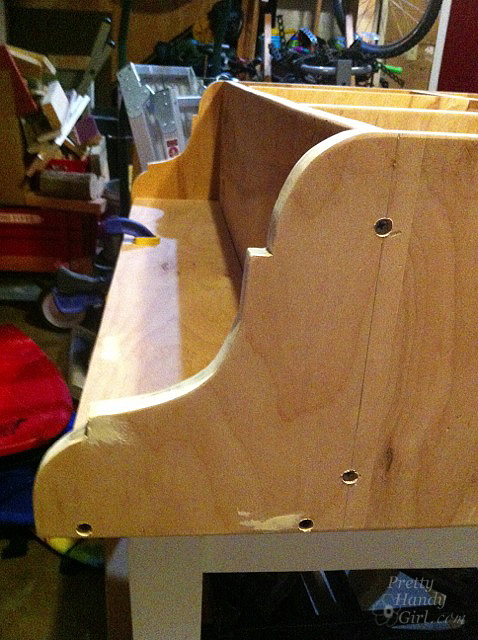
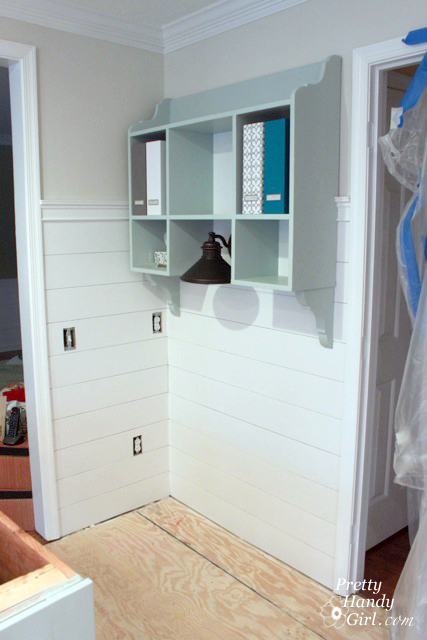
The assembled hutch should look like this:
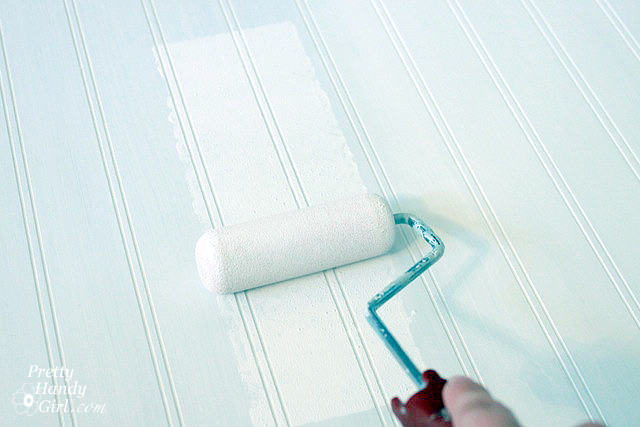
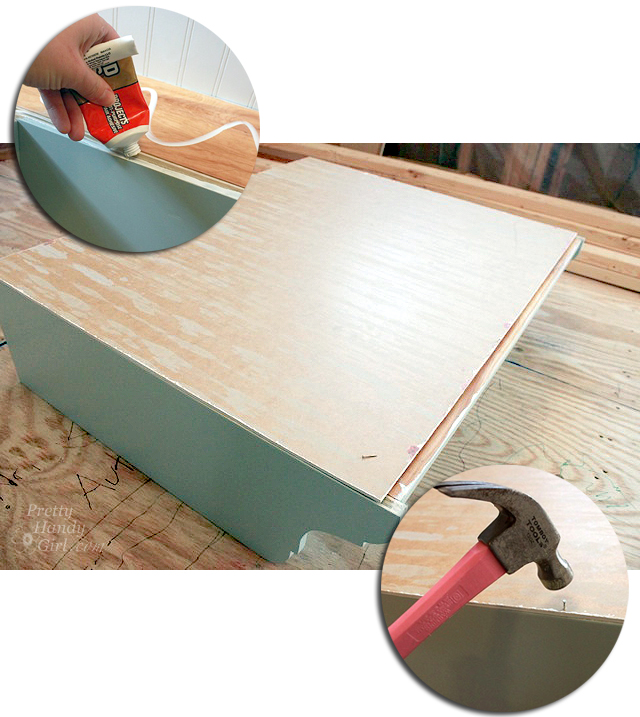
Cut a piece of beadboard to fit on the back of the hutch. Prime and paint the beadboard before attaching it. Prime and paint the hutch as well.
Run a bead of construction glue on the edges of the hutch shelves and dividers. Center the beadboard on the hutch and attach with small brad nails.
Prop the hutch up or have a helper hold it to determine the height you want to mount it.

Using a level, mark where you wish to line up the bottom of the hutch on the wall.

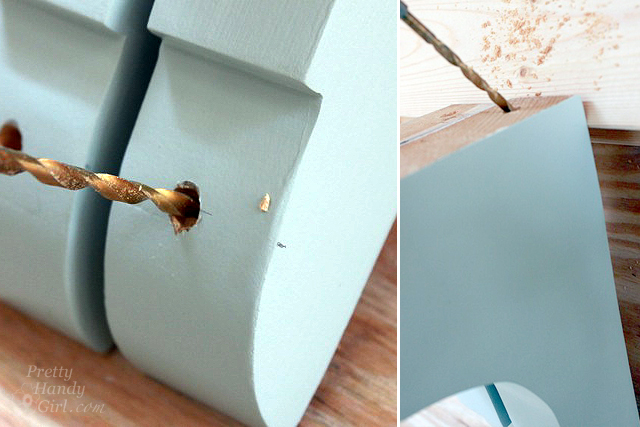
Drill pilot and countersink holes into the base of the brackets. Drill pilot holes at a 45 degree angle into the top of the brackets.
Attach the first bracket by drilling a long screw into the base of the bracket into a wall stud (or into a wall anchor.) Make sure the bracket is level.
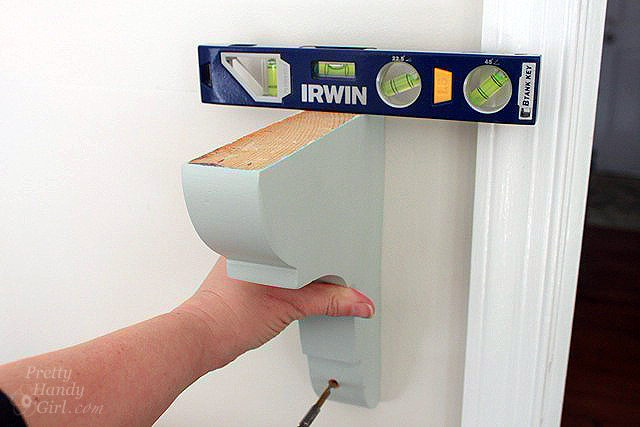
Use a level to check before attaching the second bracket. Drive screws into the top of the brackets down at a 45 degree angle into the wall studs.
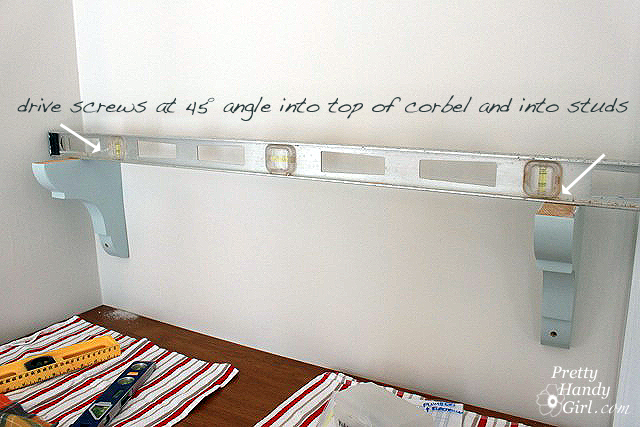
Hoist the hutch onto the wall and secure it by driving a few screws through the back of the hutch into wall studs.
If you want a wall mounted desk lamp, work with a licensed electrician to wire and install a junction box under the hutch.

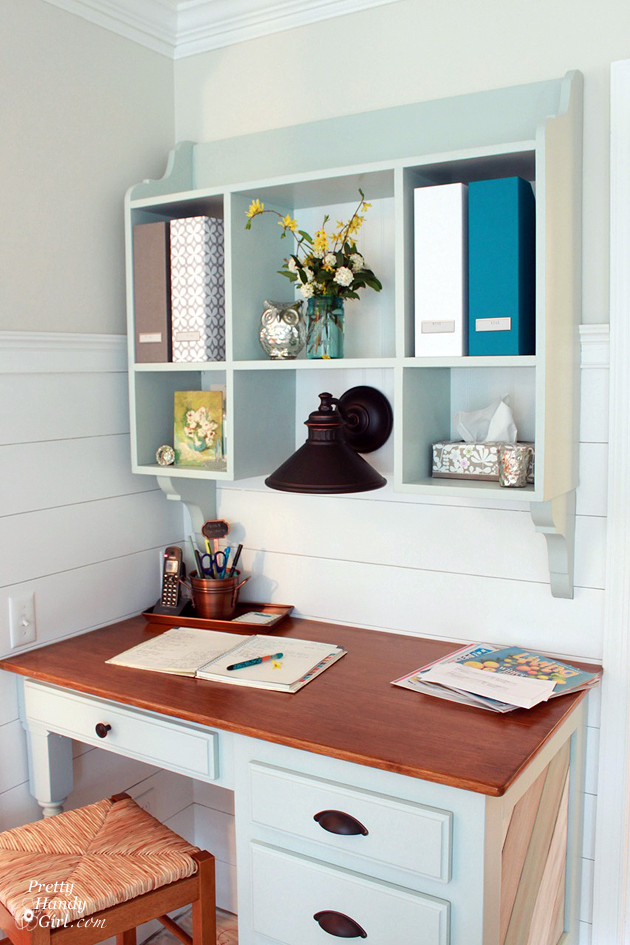
Fill her up with a few magazine boxes, some flowers and you have one organized wall mounted hutch.
Do you like it? It’s quite a sandbox project, don’t you think?


This is awesome. *runs off to reproduce my own*
Thanks Victoria!
very nice
Where did you find your magazine holders? All I can find are plain white and black.
Jennifer, I bought them from The Container Store 😉
Thank you!
You never cease to amaze me with your creative ideas. The desk is beautiful. Can’t wait to see how you made the desk side. I have 2 questions though.
1. What is the name of the paint color. I just love that shade of blue.
2. I studied the pictures of when the shelf was mounted on the wall. In one picture, it shows it just mounted on the plain wall. In the next one, showing the completed project, there is bead board on the wall. How & when was it put up?
Louise, the desk color is Sherwin Williams Copen Blue. And the planked walls were installed after the hutch. Here’s the tutorial for those: https://prettyhandygirl.com/2013/05/how-to-plank-walls-kitchen-renovation-progress.html
Love the desk and hutch! We are remodeling our family cabin and something like this would be great. Have you shared a tutorial about the painted/ distressed wood panel on the side of the desk? Seeing it sparked an idea to do a headboard like that for my of my girls. I am a beginner so directions would really help. Thanks for inspiring some long dormant creativity!
I haven’t shared the tutorial for the distressed sides, but will soon. 😉
I’m glad I passed by here. It’s very timely since I’m also planning to make my own wall-mounted kitchen hutch to save some space in the kitchen. Your tutorial is exemplary. Thanks you so much for sharing your expertise. 😉
This seems like a pretty simple project that comes out looking very cool. Thanks for sharing it with us and look forward to trying it.
Love this idea cause it frees up space on the desk which is always a good thing. Thanks for sharing the step by step process
We make time to do what we love. This is something that can be done all at once or in stages like I did.
I love everything about this little desk area! The light above it is perfect and so is the color. I also love the different color wood slats on the side of the desk! So cute!
Absolutely love this! Wish my kitchen had room for it. Would you be willing to share the paint color you used on your walls? We have deep colors on our walls and I am longing to lighten it up but am having a hard time finding the right shade. Thanks!
Erin, the walls above the planks are Aesthetic White by Sherwin Williams. The planks are Oxford White by Benjamin Moore (or Sherwin Williams, I forgot which and had the paint matched in Benjamin Moore.)
Thanks!
I LOVE, love, LOVE it!
Thank you Ida. I love it too 😉
Beautiful job & tutorial Brittany! Looks so stunning & such a handy place for work & organization.
Thank you Colleen. I think it turned out better than I imagined!
wow. i thought that hutch was store-bought! it looks amazing. well done!
a question — do your earmuffs have a radio in them? i see an antenna sticking out.
p.s. i like your owl 🙂
Isn’t she cute. A sweet gift from Roeshel at The DIY Showoff. We had a fun little Secret Santa swap.
Well, Helen you just paid me the highest compliment on my hutch! Thank you!
Wow! This is a complete tutorial. The outcome is really beautiful and classy. I think I can do it. Anyway, PHG will always be my favorite site. I’ve just bookmarked this post. Thanks a lot! 😀
Thanks Raine, and glad you liked it!
Love this! It’s so pretty, but the addition of the light on the wall really makes it special.
Korrie, thank you. And yes, I’m soooo happy that I had the light wired in. It really helps my old eyes. 8-D