
Picket Fence Planter Basket {Lowe’s Creator Idea}
Happy Friday! I hope you had a great week, but better yet I hope you have a fabulous weekend!
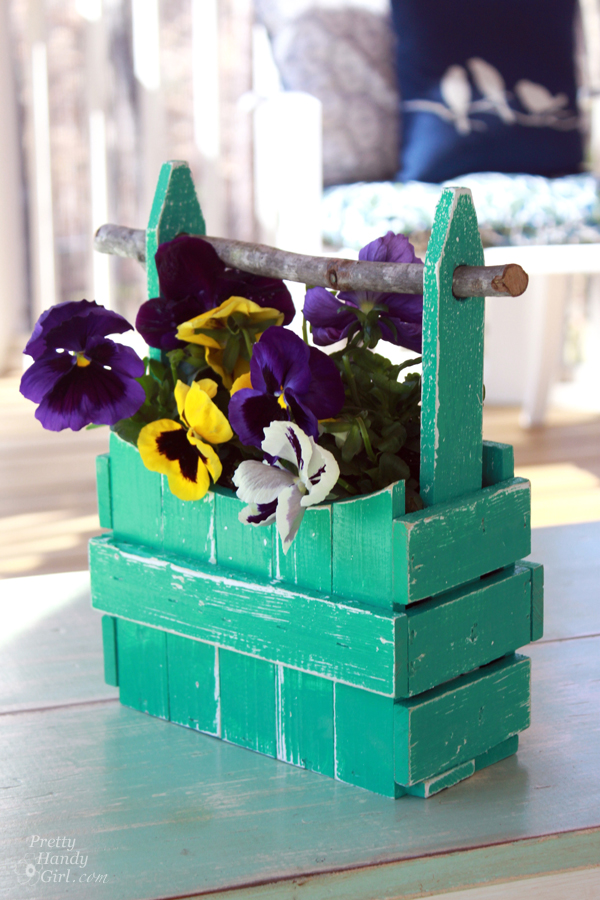
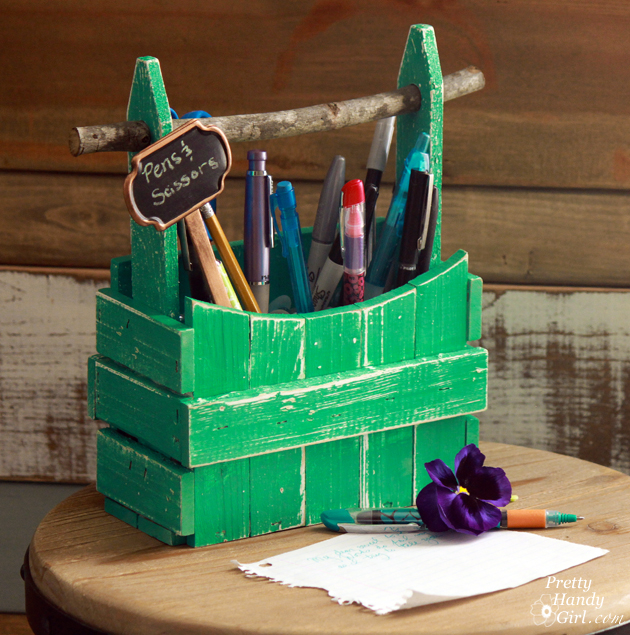
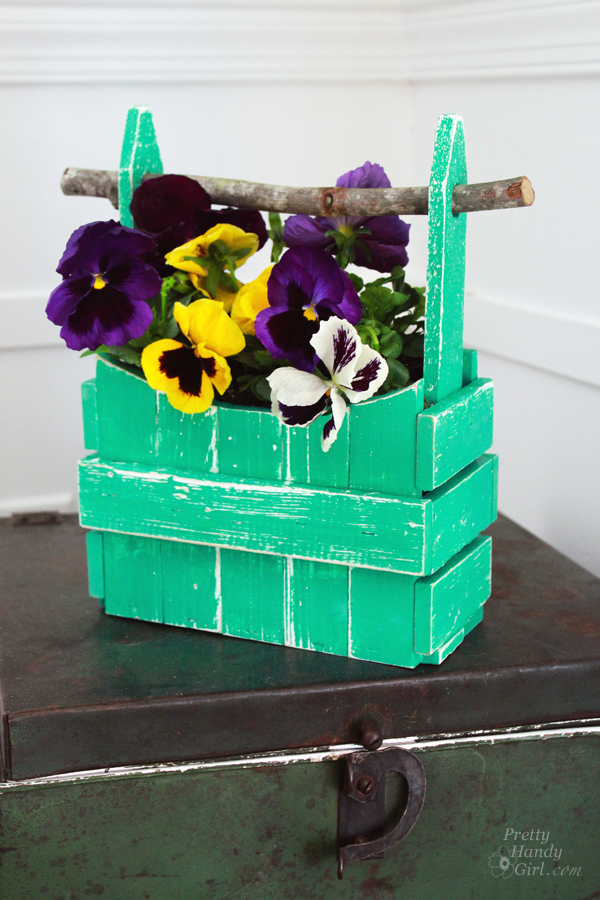
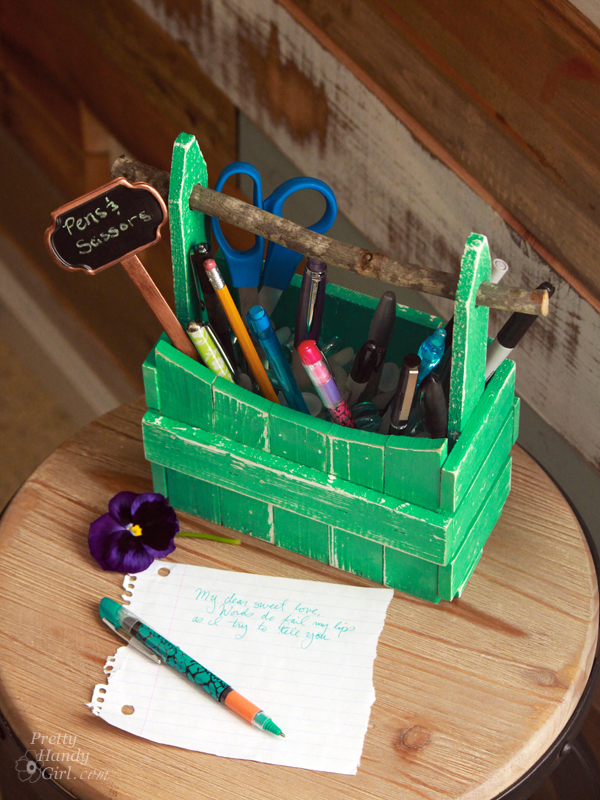
I have a fun little multi-purpose project for you today. I’m going to show you how to make this adorable little picket fence planter basket. You can use it as a planter. You can use it as a fun home décor item or you can fill it with glass beads or rocks and use it as a pencil caddy! Don’t you love versatility?
Best of all, the materials are inexpensive. The fence border section was under $5! And you can use leftover paint if you want. Or you can try out Valspar’s new emerald color. I’ve been seeing that color pop up all over the design world. (Lowe’s provided me with a gift card to give that new Valspar paint color a whirl.)
Materials:
(I’ve included affiliate links for your convenience. I earn a small percentage from a purchase using these links. There is no additional cost to you. You can read more about affiliate links here.)
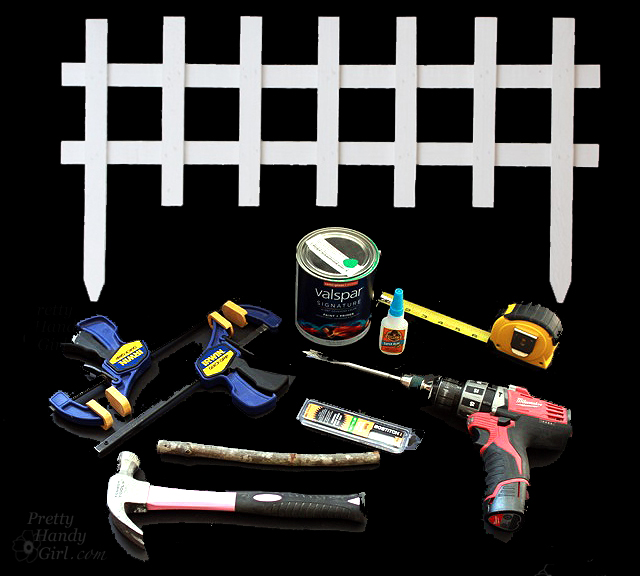
- 1 section of picket border fencing (approx. 18″ tall)
- Flat end pry bar
- Miter saw (or universal hand saw)
- 2 clamps
- Tape measure
- Gorilla Glue Super Glue Gel (or other strong bonding glue)
- 1″ Brad nails
- Pneumatic nailer (or a hammer)
- Branch from yard (approximately 3/4″ in width)
- Drill
- 3/4 inch spade bit
- Paint
- Sanding block (or sandpaper)
Optional: Jigsaw, Plate (or round object to trace a curve)
Instructions:
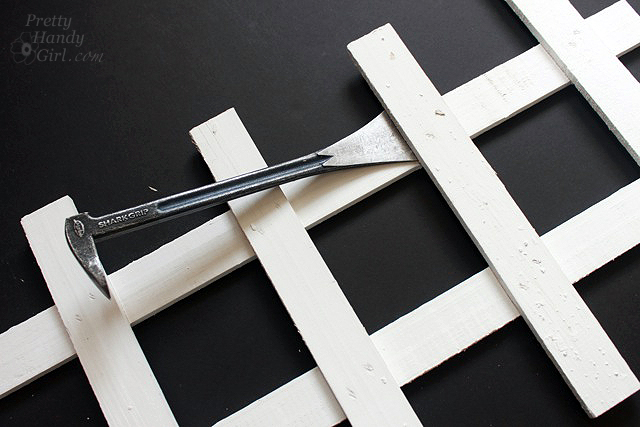
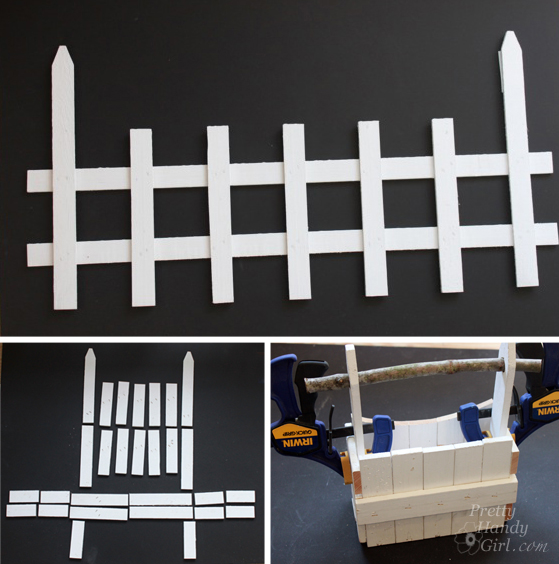
Pry apart the fencing with a flat end pry bar.
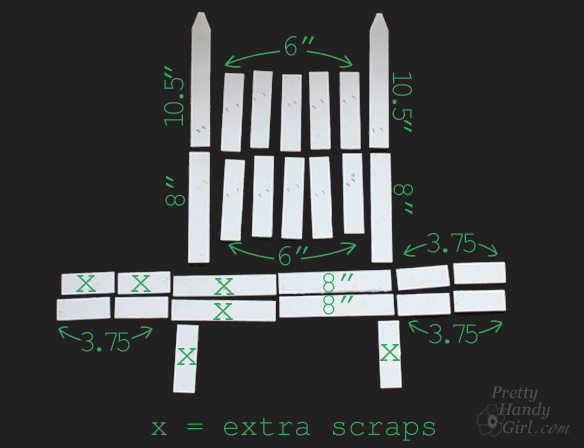
Use a saw to cut the pieces of the fence into the sizes shown below. Note that the sections marked with an “x” weren’t used in the final project, they were just scrap.
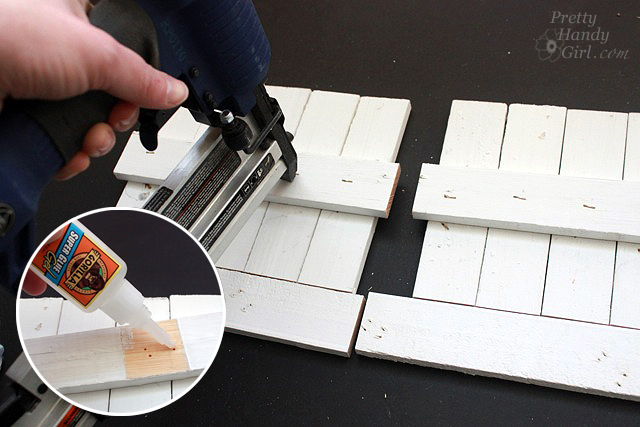
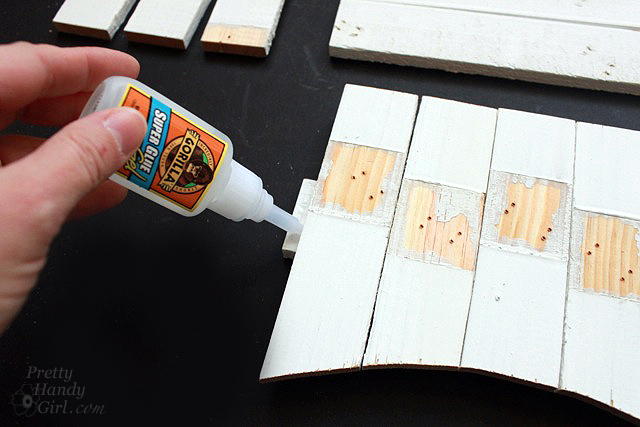
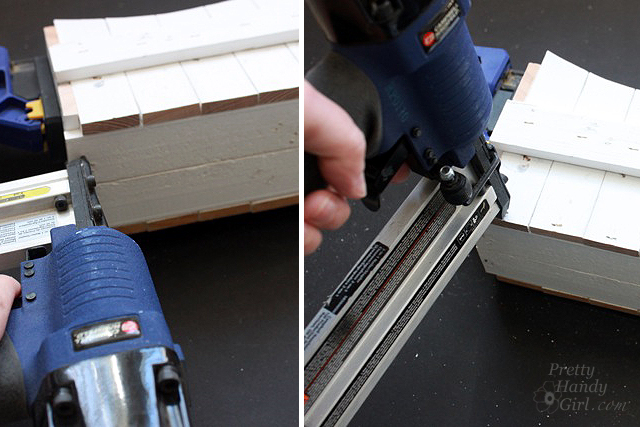
Line up five of the 6″ pieces next to one another. Put a small dab of glue on back of the 8″ piece. Lay it across the 6″ pieces and secure with brad nails. These will be your front and back picket sections for your planter.
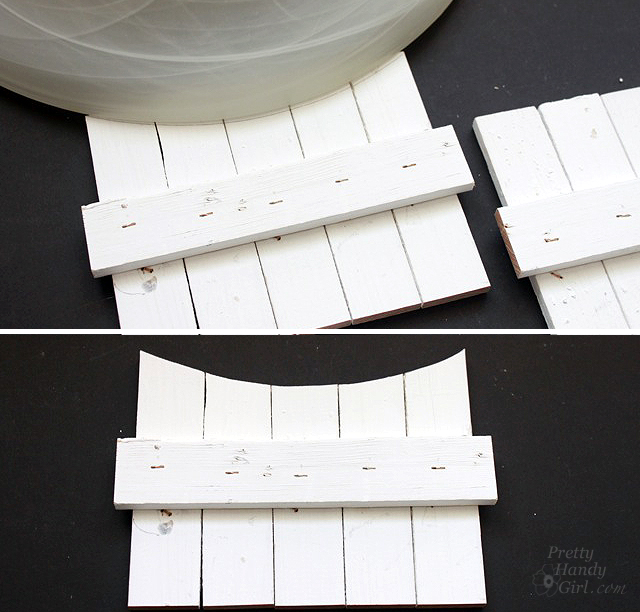
Optional: Use a plate or round bowl to draw a curve on the top of the section you just created. Cut along the curved line with a jigsaw.
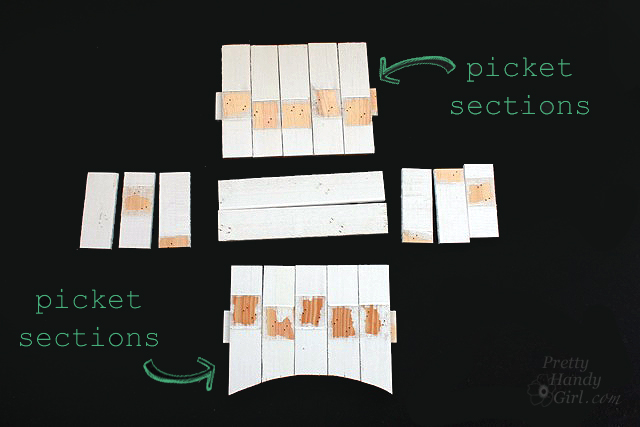
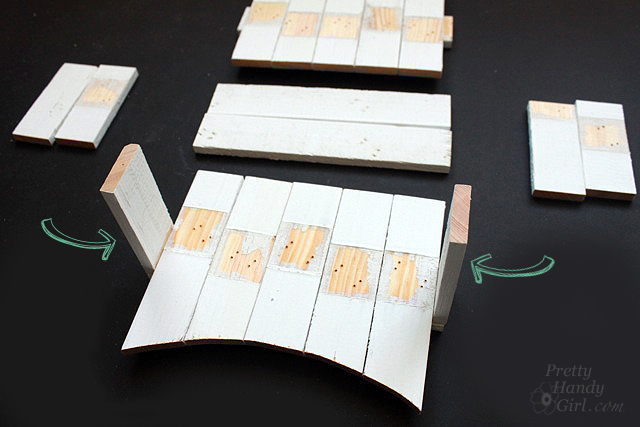
Lay out the front and back of the planter as shown below. Use three 3.75″ sections for the two sizes and the remaining 8″ sections for the bottom.
Add a small dab of glue to the tabs at the end of the picket sections.
Set two of the 3.75″ sections on top of the tabs.
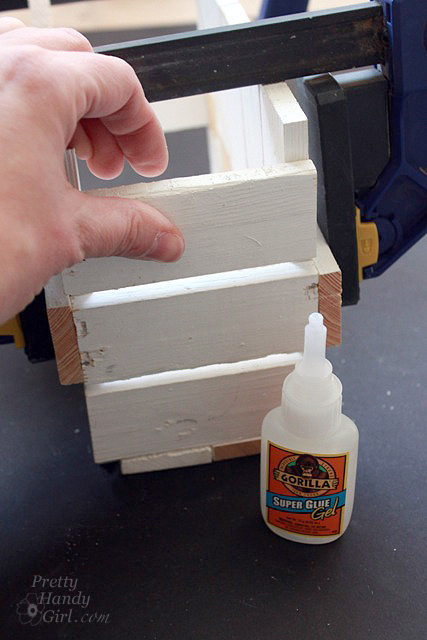
Add glue to the tabs on the other picket section and secure it to the other picket section and sides you just glued. Clamp both sides and the front and back together. Add a brad nail at the joints to reinforce the glued tabs.

Add glue to the other 3.75″ sections and position them on the sides of the planter. For more strength, secure them with brad nails, too.
To create the bottom of the planter, put a small dab of glue along the ends of the 8″ sections. Then set them in place on the bottom of the planter.
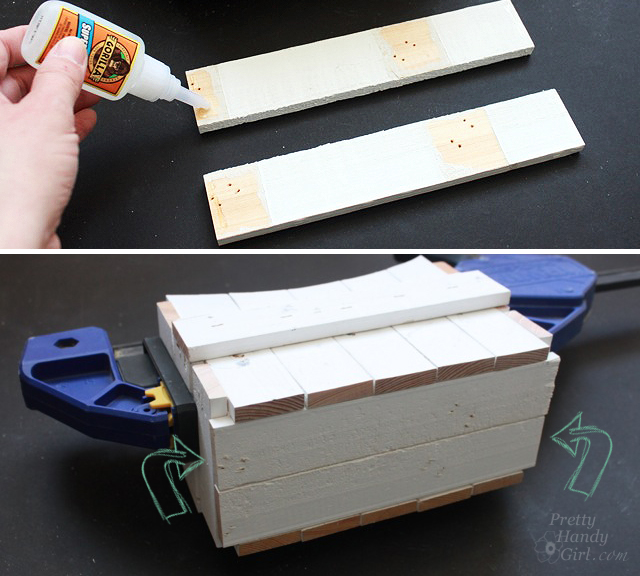
Secure the bottom with brad nails. And secure the picket section to the bottom with more nails.
Drill holes into the pointed end of the 10.5″ picket sections.
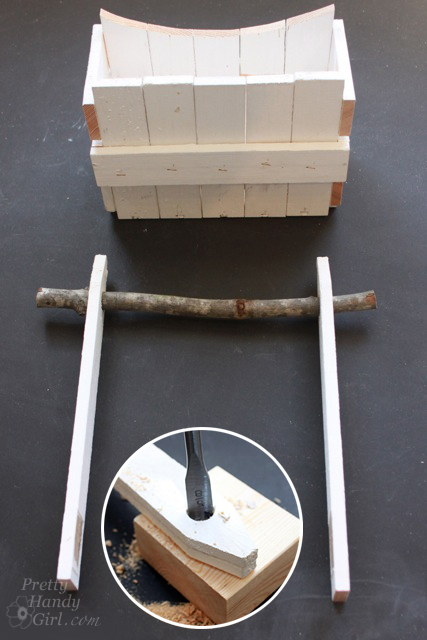
Thread the branch through the holes and secure them inside the planter with glue and brad nails.

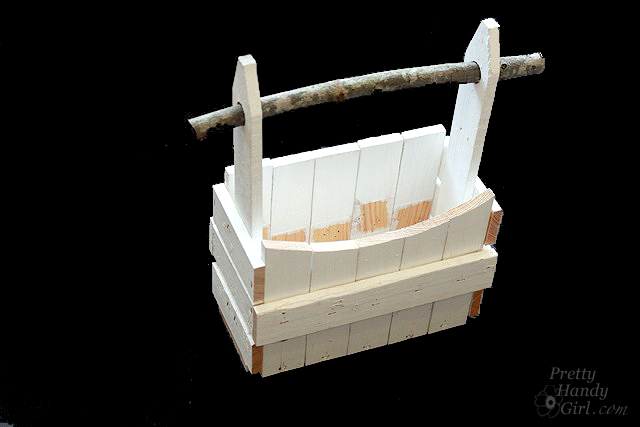
Your planter caddy is completely assembled now.
Paint the planter with a fresh Spring-inspired emerald paint. After the paint has dried thoroughly distress the edges with a sanding block.

Plant some pretty flowers inside and give it as a gift…
…or keep it for yourself.
After the flowers have died, you can fill the planter with glass beads and store pens and a pair of scissors inside.
Have you already figured out what to give your Mom for Mother’s Day? If not, this would make such a cute Mother’s Day gift! Or you can find loads of other creative ideas at Lowe’s Creative Ideas:
![]()

Disclosure: As a #LowesCreator, I was provided with a Lowe’s gift card to purchase supplies for this post. I was not told what to write. All ideas and words are my own.

Made one already…….. Love it! Great tute, thanks again for sharing your skills and creativity.
This is so adorable and I am totally making 1 or 7. I finally used the kreg jig I won from you over the weekend. I love love love it! I will tag you when I post it. Thanks so much!!
Johnnie, I’m so glad you used your Kreg jig. Did you like it?! And I understand that we missed meeting at SNAP ;-(. Are you going to Haven?
So I know I already commented this week but I seriously can’t tell you how much I LOVE this caddy! I’m going to post it in my Friday Favorites round up today, and then will need to hit up Lowes this weekend 🙂
LOL, oh Kate. Thank you and you are welcome to comment as much as you like. It’s like little love notes in my lunch box. ;-D
OMG this has to be the cutest thing I have ever seen!!!!!!
Thanks Jessica, but it’s not cuter than you 😉 xxxooo
This is really wonderful idea..! Thank you so much for a great idea.
For being part of production team, I can suggest this idea to my leader. She is a interior designer and I’m sure she like it too because we trying are best to save in everything we do.
I’ll try it to make it bigger, so I can put also comics, news paper or books. That is nice right?
Thank you again for great and creative idea.
– prince
Prince, OH BIGGER would be AWESOME!!! I’d love to see a picture if you make one. Would you use a full size picket fence? That would rock!
Very clever indeed Brittany! Great idea & you always have such great instructions! Thank you! XO
Thank you Colleen. I try, it helps to hear that you thought they were easy to follow.
I love this! I was wanting to do a fun, creative and short-in-time commitment project this weekend and this is it! I can see some flowers in it already-thank you for this post!
Jemma
Joyce, I hope you do make one. And when you do I’d love to see pictures!
Thats very pretty and I love the pansies too:)
Maude
Very cute! What a great idea!
This is AMAZING – I want one and the color is perfect! This is definitely going on my to do list, thanks for such a fun, creative and inspirational idea 🙂
~Kate
Kate, I’d love to see your’s when you make one.
I love this little caddy! I’ve pinned it, I think I could do this. Thanks for the information.
Debbie 🙂
Debbie, you know what…I KNOW you can do this! Don’t get hung up on set backs, just forge forward. 😉
What a clever idea! Great results too!
Thank you Jean.