How to Plank Walls – Kitchen Renovation Progress

Today’s post is all about filling in the plank and how to plank walls! I love a good play on words…and I love the planked wall look which harkens back to a simple country farmhouse look. Previous to the water leak we had beadboard walls that I had installed shortly after moving into our house. But, I was tired of the beadboard and really wanted a look that was casual, cozy and all about the farmhouse look. I’d fallen in love with The Lettered Cottage’s guest room walls:

Those lucky ducks uncovered the planks under the drywall! I knew we wouldn’t be lucky enough to find anything but termite damage under our drywall. Then I saw the House of Smith’s installed their own gorgeous planked walls using ripped plywood planks and two nickels:

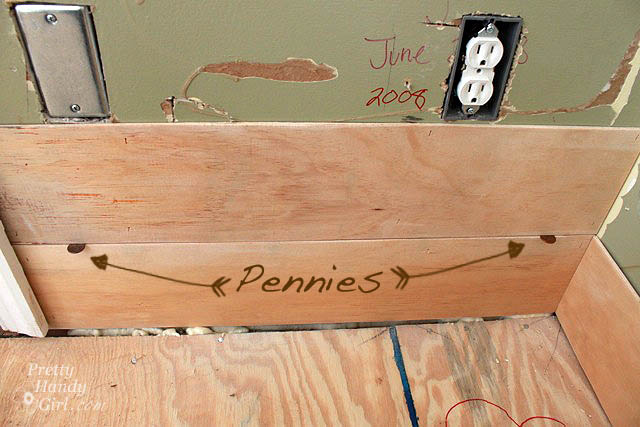
I decided I could do it for cheaper, so I used two pennies. LOL. Get it? Cheaper than two nickels. 😀
The process of installing plank walls is really very simple. And the planks are great for covering a multitude of sins on your wall. (Like previously glued beadboard walls.)
Materials:
- 3/16″ plywood subfloor sheet ripped (cut with the grain) into 5 7/8″ planks
- Edge molding (90 degree angle) for exterior corners
- Sanding block
- Finish nailer and compressor with 1 1/4″ nails (or finish nails and a hammer)
- Construction glue
- Level
- 2 Pennies
- Pencil
- Jigsaw
- Wood putty
- Putty knife
- Primer
- Paint
- Paint roller
- Paint brush
- 5-in-1 Paint tool
- Howe casing molding
- Caulk (paintable latex)
- Caulk gun
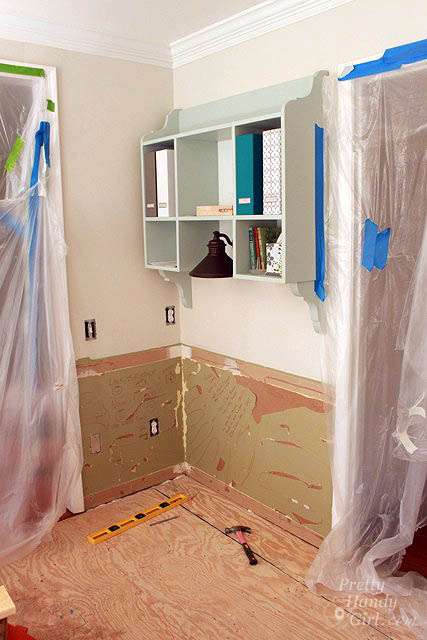
Prepping your plywood.
Look for the thin 3/16″ plywood subflooring. Our local Lowe’s sells it for $13.28 a sheet. You can get 8 planks out of each sheet. When you purchase the plywood, ask an employee in the lumber department if they can rip the sheets for you. Because the sheets are thin, they can usually layer 2-3 sheets on the saw at a time. If they rip the planks at 5 7/8″ there will be one row left that is 6″. Keep that row for the bottom on all your walls or your horizontal lines will be off.
After you get home with your planks, put on a movie or DIY Network and hand sand all the edges of the planks to remove any splinters.

Installing the plank wall:
Measure and cut your first plank and set it at the bottom of your wall.
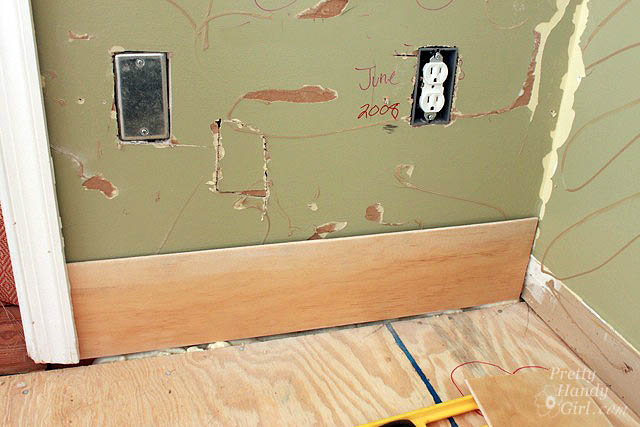
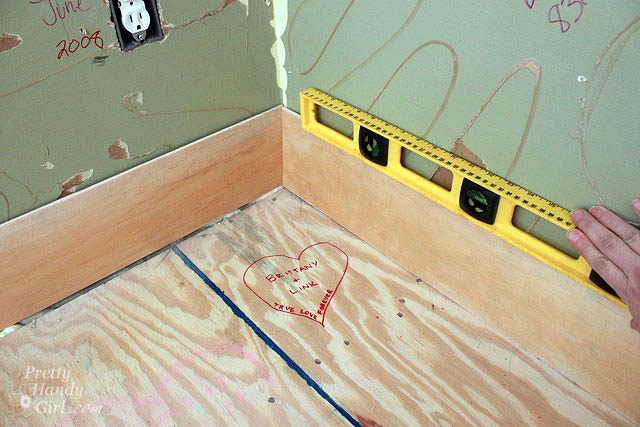
Cut your second plank for any adjoining walls. Make sure to level both planks and line them up with each other.
Add construction adhesive to the back of your planks and secure them to the wall with finish nails. Add nails as needed to keep the planks from waving.
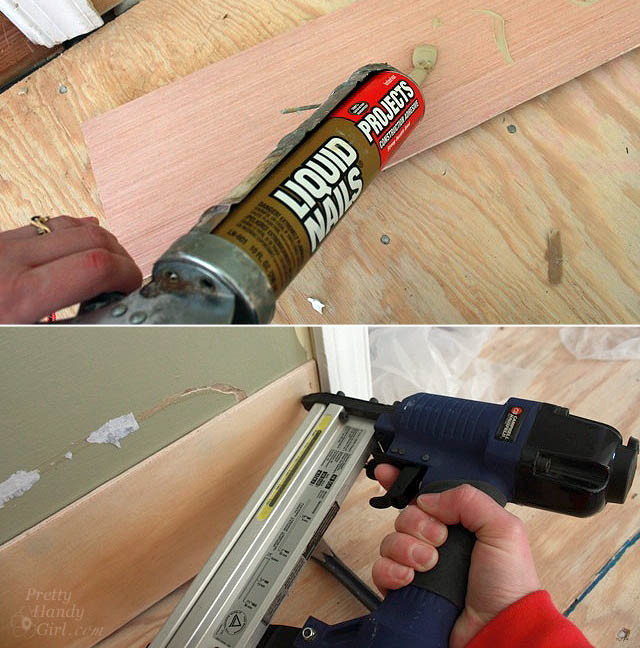
Cut your planks for the next row. Add adhesive to the back of the plank. Insert two pennies between the first and second plank for a spacer and nail your 2nd row to the wall.
At some p0int you’ll need to cut holes in the planks to work around outlets and light switches. You can measure the location of the switches and then cut out the hole with a jigsaw, or use this technique for marking where the outlet is with lipstick.
Note: If you are working with walls that exceed 8 feet in width, you should cut your boards to random lengths and stagger your seams.
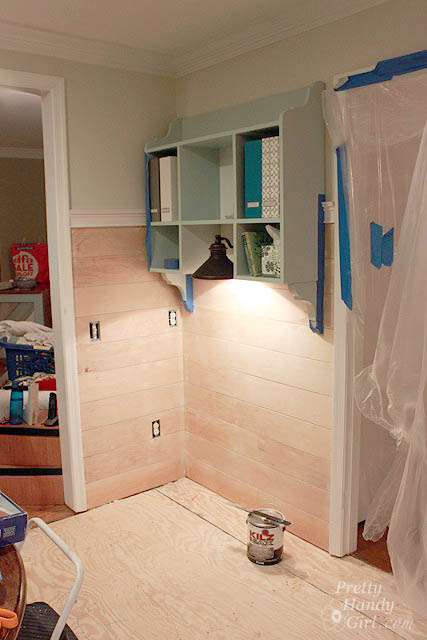
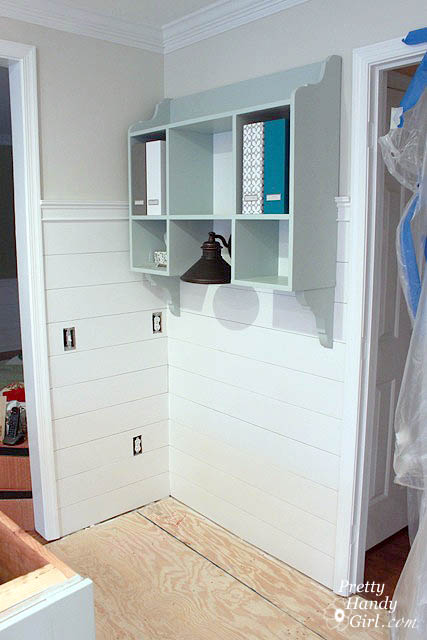
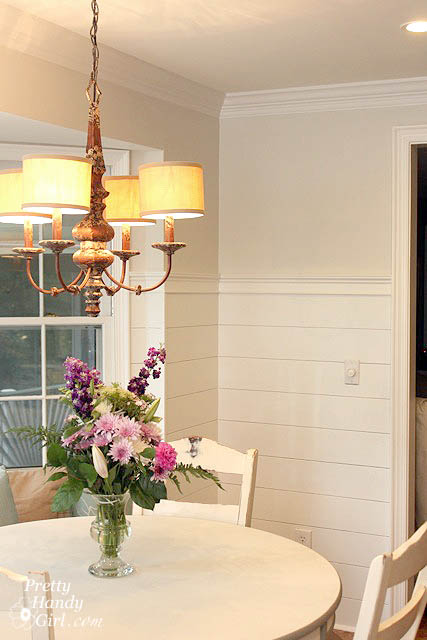
Continue working your way up the wall. You could go all the way to the ceiling. I chose to stop about 5′ up and capped off the planks with Howe casing.

This provides a nice visual break in our 8′ tall room.
For outside corners, add corner molding below the Howe casing by nailing it in place and then caulking the seams.
Fill all the nail holes with wood putty and sand when dry. Fill the inside corners, seams and cracks between the door casing and the planks with caulk.

Prime the planks and molding.

After the primer has dried, gently sand any rough spots. To paint the planks, roll the paint on first. Use your paint brush to smooth the paint and maintain the wood grain. Use a 5-in-1 paint tool to scrape any paint out of the grooves.
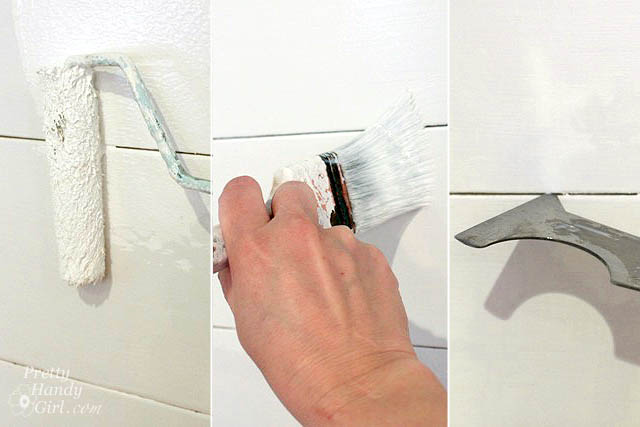
Use at least two coats, allowing the paint to dry between coats.
(Side note: I used the Benjamin Moore Advance paint on the planks and molding. The paint is a waterborne alkyd, in other words, an oil paint with dryers added. This means you get the durability and smoothness of an oil paint with the drying and clean up of a latex paint. The finish is amazing! I used satin and the paint has great leveling, low VOCs and a strong finish.)
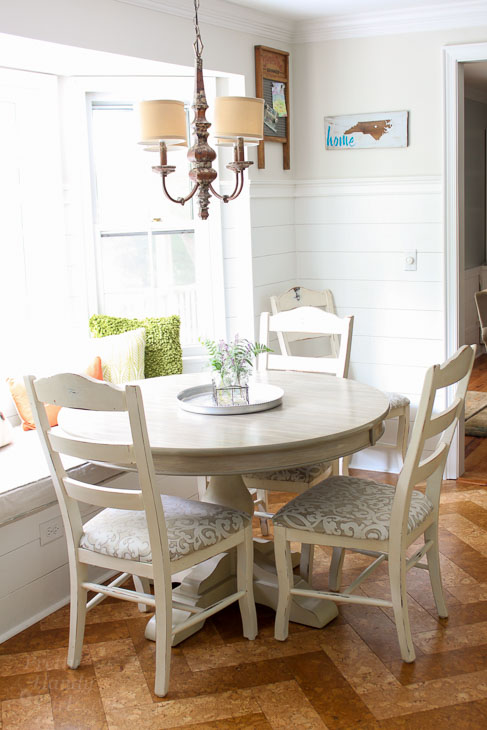
The planked molding treatment looks great in our kitchen.

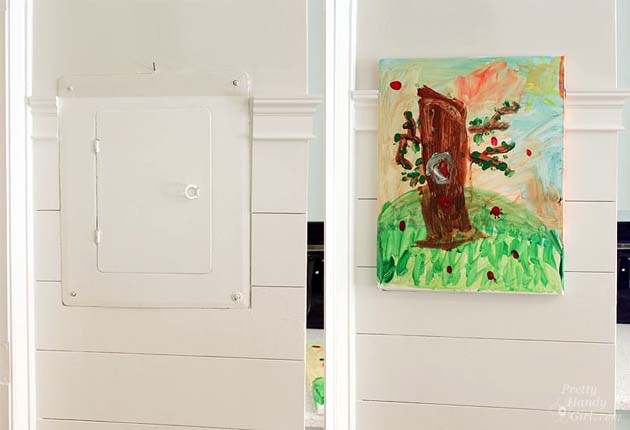
Unfortunately, I had to run the molding around the circuit breaker box in the kitchen. But, my son’s artwork disguises the ugly box.
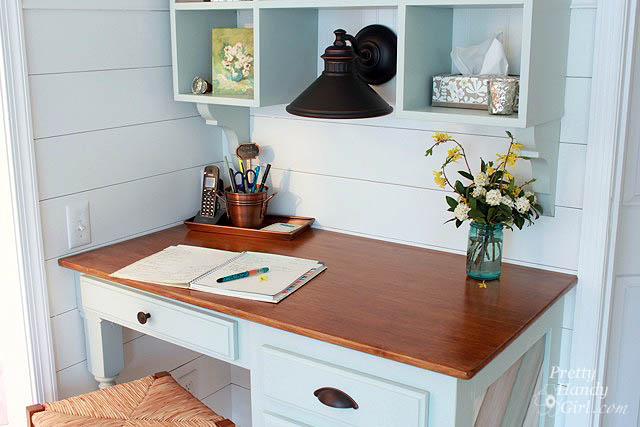
The planks look great as they hug the kitchen command center (tutorial to come.)
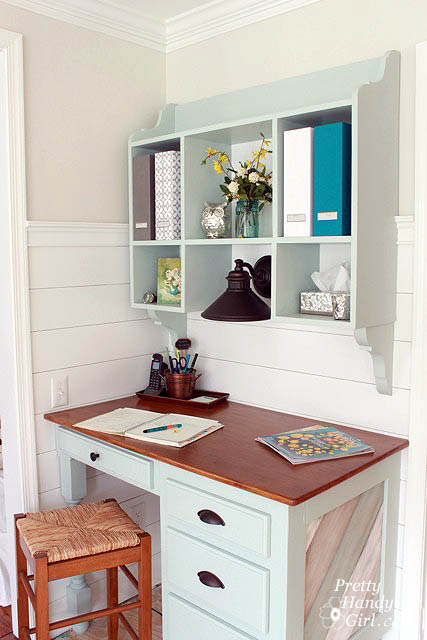
It’s a cozy spot for me to get organized.
I’m really liking our clean white cottage farmhouse walls. They were super easy!
I know you could do this too because Pretty Handsome Guy easily installed a few walls ;-). Have a great weekend!

Just getting caught up on our kitchen renovation? You can read ALL about how we went from a small water leak to bare studs to a working kitchen!
- Polybutylene Pipe Leak turns into Moldy Mess
- My World Upended, Asbestos Discovery and Removal -All You Ever Wanted to Know About Asbestos
- Planning New Kitchen Layout and more
- Planning Colors and Materials for the New Kitchen
- Let the Demolition Begin
- How to Remove Soffits
- Move Back in the Kitchen Temporarily and Throw a New Year’s Party
- Termite Damage and Kitchen Update
- How and When You Should File for a Permit during a Kitchen Renovation – Your Questions Answered
- Everything You Should Know about Termites and Termite Damage
- How to Survive without a Kitchen During Renovation
- Furing out the Wall, Ceiling Patch, and Clean Air
- Drywall Installation Tips
- How to Finish Drywall Seams
- How to Install Recessed Lighting
- Installing Cork Tile Flooring
- Installing a Hardwired Pendant Light

I love how beautifully your kitchen looks! Thanks for taking time to put it online for a tutorial. I want to do the plank walls in our entry and half wall in the kitchen. We live in the country and so lots of dust and dirt comes in. My sister warned me that planked walls would be a dusting nightmare. What do you think?
We’ve had ours for five years. No problem with dust because the planks are sanded smooth and painted. No more dust can collect on them than a painted wall.
I planked my kitchen using your tutorial — LOVE it!! Thanks!
Wow, I have never thought to use planks as a wall decoration. It adds so much texture and design to the room! I also liked how you covered up the eye sore from the ugly box. Awesome work!
This is such a great project. Like you said, not only can it cover up some imperfections, but it also adds so much character. We’re definitely sharing this on Pinterest – nice work!
Did you consider routing an equivalent groove at the same spacing? Considering planking a garage, it could be a lot less cutting and handling.
I have been sitting on the fence about doing this in our front entry… This post decided it! It looks fantastic.
Hi!
I love the clean look of your white wood wall… and that you added character and kept it simple by only going half way up the wall. We recently installed a wood wall in our baby girl’s nursery but stained it instead. It turned out great.
Kassy
Love this. My husband just did this in my new office. At the sanding stage. What color BM paint did you use?
Jill, Oxford White ;-).
I want the look of an old farmhouse wall. I’m thinking of eliminating the ‘caulk between planks and putty nail holes’ stage. But I’m a big chicken. Thoughts?
Barbara
Barbara, I say go for it! Do what you want, it’s your house. And, hey, if you don’t like it, you can caulk and touch up paint later! 😉
Looks great! Thanks for the tutorial!
You are welcome and thanks for your comment John!
Absolutely beautiful!! I love the planked walls!! The desk area is great too!!
this looks great! i like your circuit breaker box cover.
Hee, hee. I do too and double like it because my son painted it ;-).
Thanks for such a great tutorial! And I just used that Advance paint on my son’s kitchen cabinents. LOVE it. Worth every penny. See them here: http://cottageinstincts.blogspot.com/2013/04/my-kids-kitchen-before-and-afters.html
We’re having our home built over the summer, but hope to add lots of cottage character, so I”m pinning away on your blog 🙂
Cindy, your son’s kitchen is beautiful! Love the two-tone look. Added to my Facebook wall.
My hero – once again! You know your way around wood and saws! Your son’s artwork is the perfect touch to disguise those ugly boxes the builder installs in random places! Once again, you’ve outdone yourself!
Kelly
Beautiful & so well explained. GREAT JOB Brittany! You rocked out your walls, or er, you planked out your walls!
Brittany, how did you finish the outside and inside corners? Did you miter and putty the edges? Btw, I love the look. Before you are finished you are going to have a brand new house!
Hannah, the inside corners are just caulked. The outside corners have corner molding on them that I attached with finish nails and then caulked the seams. Excellent question!
Love it! I’d like to do this in my kitchen, but my wall is about 15′ long. what do you suggest doing where you have to join 2 pieces to get the length? Put a thin strip of molding over the join? Use wood filler to fill the join? Any ideas would be appreciated.
Excellent questions Jody. You would stagger your seams. So, maybe cut your lengths uneven (8′, 5′, 3′, 4′, etc.) then stagger them like you would on a wood floor. That will look really cool. I had to do that a little under our window seat.
I never would have thought of that, but of course! Totally makes sense. Thanks so much!
They look great. I will take your tips when I do that.
Absolutely beautiful – why didn’t I think of using plywood for this???
This is very informational and easy to follow. Thanks.