How to Build a Decorative Shelf With Crown Molding
Jacque, my wife, and the other half of The DIY Village has been kindly reminding me that I promised to make her a decorative shelf for our downstairs half bathroom. She only had a few requests. She asked that I incorporate crown molding into the shelf, along with some hardware to hang hand towels. As luck would have it, she found some scrap wood and crown molding that I had left over from a recent project! Since I already had the materials, I couldn’t find a good excuse to put the project off any longer! So I set out to make a decorative shelf with crown molding!
Materials:
- Safety Glasses
- Hearing Protection
- Miter Saw
- Kreg Crown Pro
- Drill
- Kreg Jig
- Kreg 1-1/4″ Coarse Thread Screws
- Compressor
- Finish Nailer
- 1-1/4″ Finish Nails
- Construction Adhesive
- Caulk Gun
- Latex Caulk
- Clamps
- Pencil
- Tape Measure
- 2- 1x6x4 Pine Boards
- 1- 5′ Piece of Crown Molding
- 3- Wheel Handles
- 1″ Wood Screws
- Primer and Paint
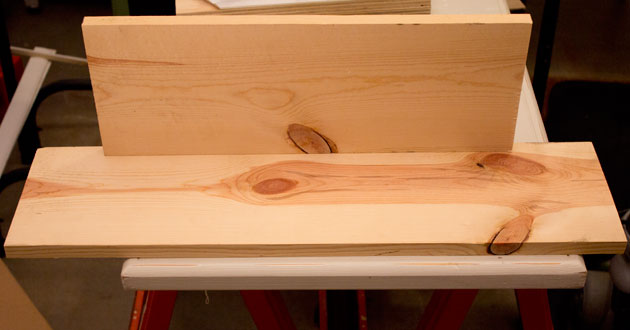
The easy part of this project was constructing the actual shelving unit. I took two scrap pieces of 1×6 and used one as the top and the other as a back. I simply attached them together using pocket hole screws. (If you’re not familiar with pocket hole screws, Brittany has a great photo tutorial on How to Use a Kreg Jig.)
Once the shelf was constructed, I set it aside and began working on the more challenging part of the project…the crown molding.
If you’re anything like I used to be, the idea of using crown molding for a project was an intimidating undertaking! But, I recently had a change of heart when I added the Kreg Crown Pro to my arsenal of workshop tools!
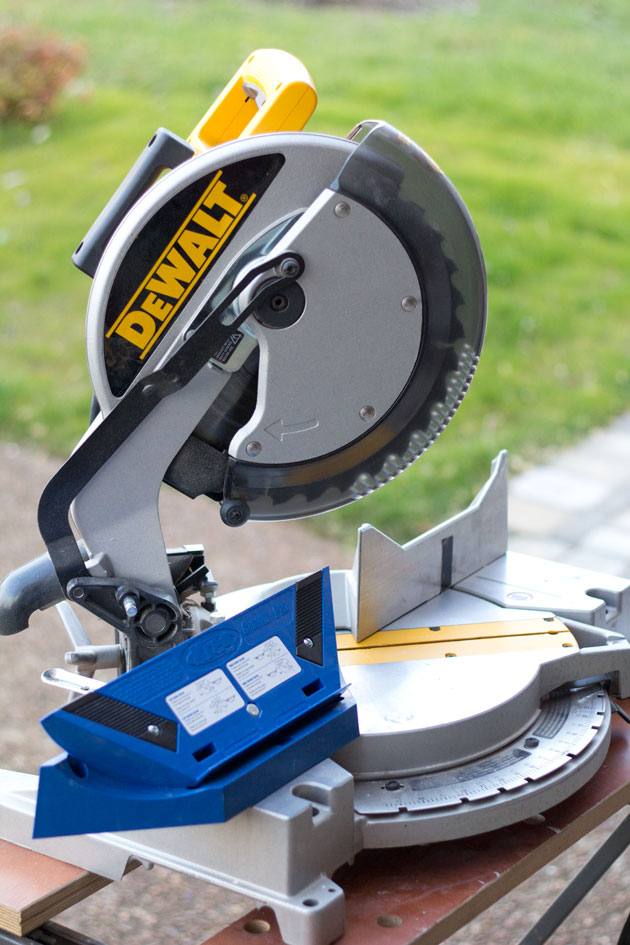
There’s a diagram on it’s front face that shows the proper set up for cutting inside and outside crown molding.

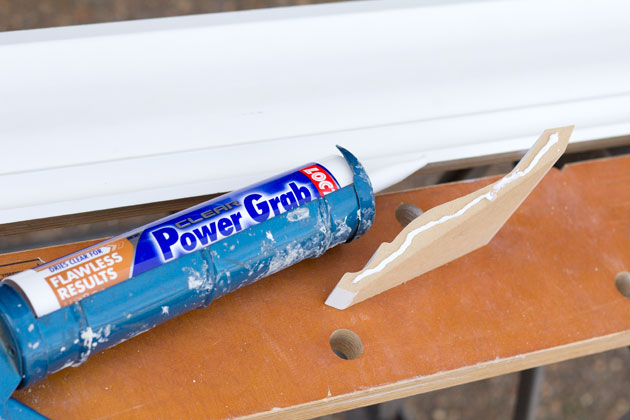
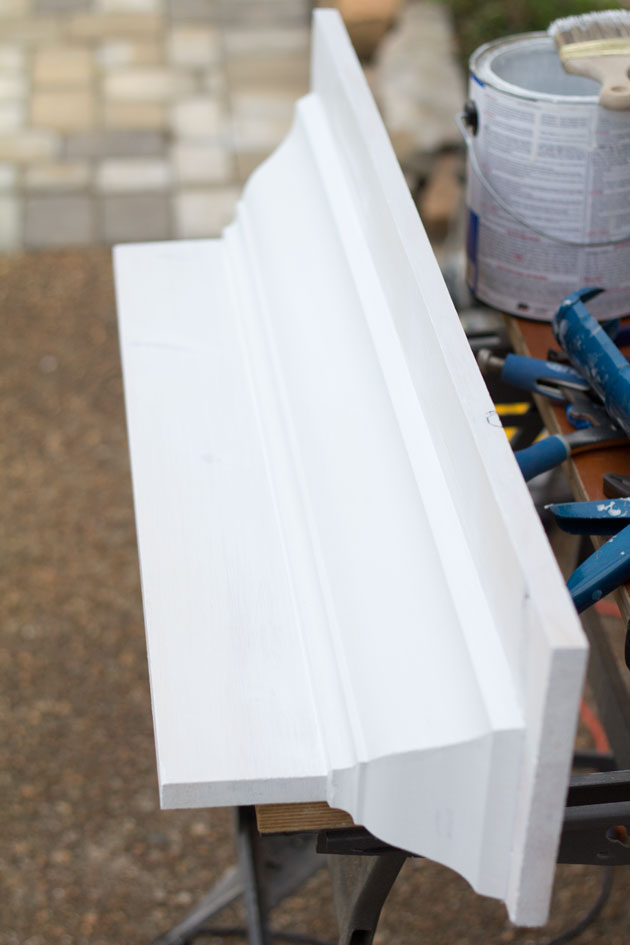
For the purposes of building this shelf, you’ll need three separate pieces of crown molding, a piece long enough to span the length of the shelving boards, and two pieces that are called return stops. (A return stop is basically a transition that ends a run of crown molding)
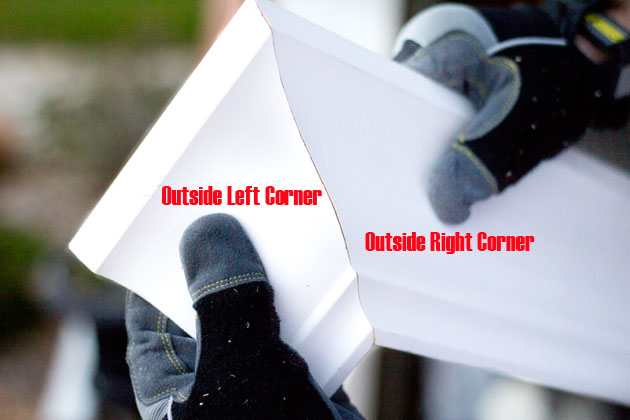
Only two different types of corner cuts are needed, an outside left and an outside right. To cut an outside left corner, position the Kreg Crown Pro to the right side of the saw blade and place the crown molding upside down onto the angled surface. Then rotate the saw blade 45 degrees away from the Crown Pro. (To cut an outside right corner, just mirror the set up.)
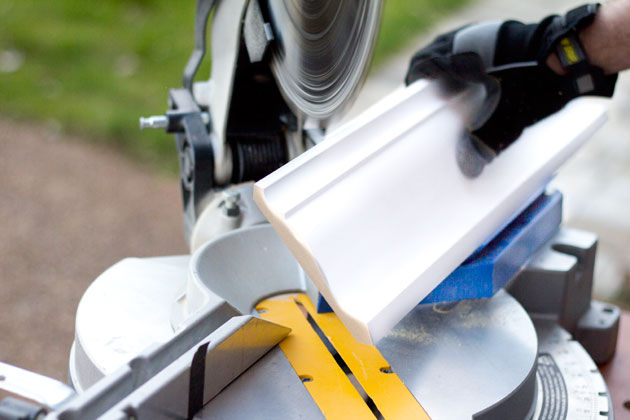
One of the return stops can be seen on the left and has an outside left corner cut. The piece on the right is the molding that spans the length of the shelf and has an outside right corner cut.
Attach the return stops to the front piece of crown molding with a quick drying construction adhesive.
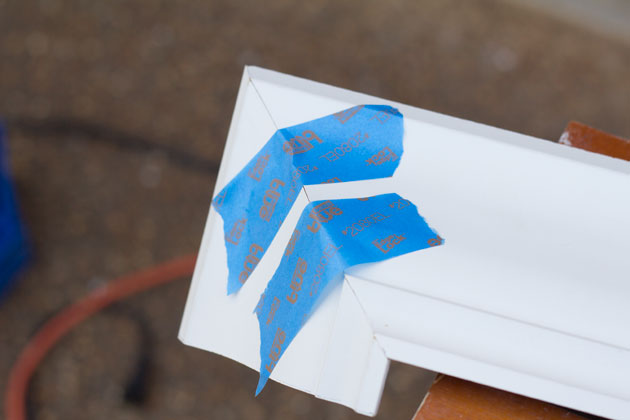
The adhesive dries pretty quickly, but as an added safety, apply some tape to help keep the crown pieces from shifting.
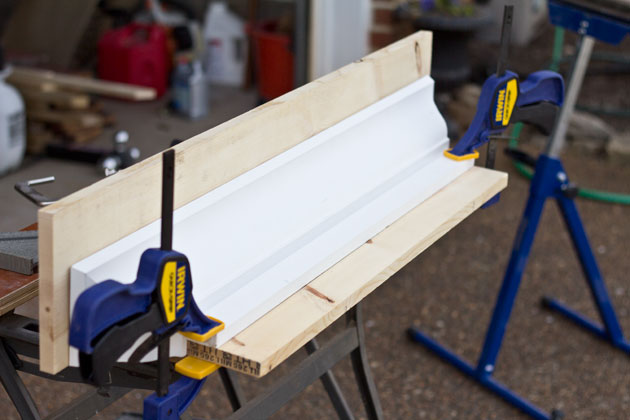
Once the adhesive had dried on the crown molding, it’s time to fit them onto the shelving boards. To hold the crown molding at the correct angle, clamp a straight edge onto the shelving board that acts as a stop for the molding pieces. Then secure the crown to the rest of the shelf with a few finish nails.
The only thing left to do before priming and painting is to caulk all of the joints on the shelf. Tape up to the joint lines and then apply a bead of caulk. When the tape is removed, you’re left with a nice crisp and clean joint line.

I was then instructed asked by my better half to paint the shelf white…Which I did, no questions asked. (I always try to remember, happy wife, happy life)
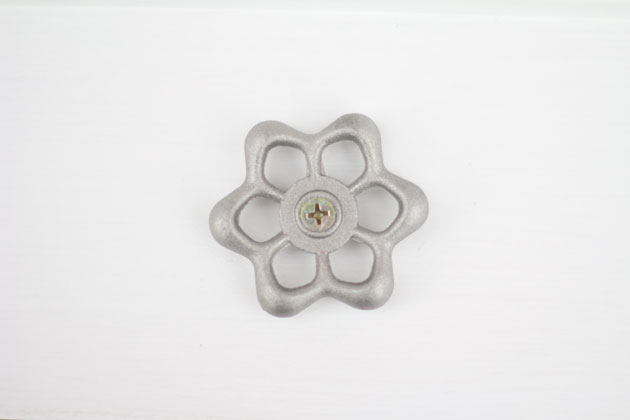
I had recently acquired some wheel handles that are normally used on hose spigots. But I thought they’d make some awfully cool hardware for this fancy new shelf.
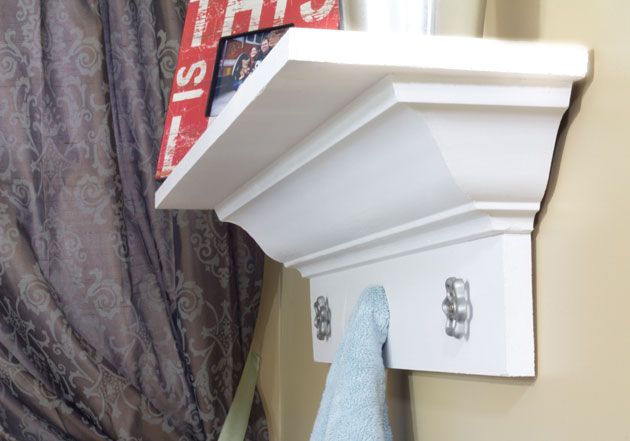
With the addition of the wheel handles, the shelf was ready to make it’s way into our half bath. I barely had enough time to get the shelf hung before Jacque started bringing in the accessories.

Judging by Jacque’s speedy desire to decorate, I’d consider this project a success. I can finally mark it off of our honey-do-list and now I’m a little less intimidated by crown molding. Sounds like a win-win for sure!


Replacing the wax ring is a lot less difficult and expensive than replacing the toilet, but
if you have wanted a new commode, this is your chance. The kitchen and bathroom are the places
that we hang out in, at the end of a hard day. Simply feed the
auger into the pipe until the snake meets the obstruction.
Hi Matt & Brittany! I love this tutorial and the reason I found it; I was over at sweetpickinsfurniture.com and saw the wonderful crown molding shelves in Sausha’s Craft Room. Those shelves are beautiful. I read through the comments because I was hoping Sausha would provide a link for a tutorial, but no dice. Sausha was kind to provide a brief explanation, but didn’t document the process. As I continued to read the comments, I noticed Brittany had posted her comment. I quickly clicked over to PHG’s site to search for a tutorial to build crown molding shelves. Lo and behold I find Matt’s cool tutorial. Matt, I was wondering if you could take a look at the shelves Shauna built and advise what thickness of wood she used to create her shelves? If you look at the ninth picture you posted above, this is where I get lost. In Shauna’s shelves, it appears to be a second piece of wood the crown molding is attached to is flat and running in the same direction as the primary top piece of wood. Am I correct? Would it be to much to ask you to do another tutorial for a shorter version of Shauna’s shelf just so we can all understand the additional steps to create this project? If there indeed are additional steps. The visual story helps out so much. I hope you can help. Click over to http://www.sweetpickinsfurniture.com/2012/12/my-craft-room.html to see Shauna’s beautiful shelves. Thank you.
Cindy, her shelves look a lot like the ones that Jaime from That’s My Letter made. I would use her tutorial and adjust to the size you need: http://thatsmyletter.blogspot.com/2013/07/c-is-for-crown-molding-ledges.html
Umm, it looks like I’m alone on this one…but I don’t care for it. The top piece makes it look bad…maybe if it had some trim. I don’t know, it looks disjointed and clunky. Not his best. I do like the helpful hint of using the tape.
Gina, I respect that you have different tastes. I think you could make your own to reflect your style using Matt’s awesome tutorial.
Thanks for a great tutorial Matt! I used your crown cutting tips yesterday to trim out our window.
Brittany, I’m glad to hear in came in handy! I’ll be putting Cristina’s tutorial on trimming out windows to good use soon!
You made me chuckle Matt with your “instructed” quote, haha. We’ve got something in common.
Nice touch with the wheel handles. I’ve gotta check out more of Kreg’s stuff.
Glad to hear I’m not alone Jeff! Definitely take a look at the Kreg tools website. They’ve got a ton of product that I would love to get my hands on!
This is really pretty and I especially like the use of the faucet handles. Very inventive:)
Maude
What clear and concise instructions Matt, you’re the bomb! This is definitely a keeper!
I am new to all things DIY and thank goodness I have found your blog! My hubby is getting a new assignment and will be gone lots more, so my 4 boys and I will be getting our hands dirty way more often. That saw is going on my shopping list.
Kresta, You’ve definitely come to the right place to learn about all things DIY! Brittney has a great series of tutorials on how to use all kinds of power tools!
Love it!! It is absolutely fantastic!! The crown molding adds a touch of class and elegance to the shelf. The wheel handles were genius and look awesome!! Thanks so much for the tutorial!! Great job!!
Its beautiful. White makes it more elegant yet simple. Nice job on the power tools! I love that you try to use scrap materials and make it something useful.
Rose
I like the fact that you could make the shelf the exact length you need, as well as the depth. Looks cool.
Very nice, is this something that is real expensive?
Tammy, Almost everything I used was scrap leftover from a pantry project, but if one was to purchase the base materials, I would expect to spend less than $30.
I love this! I think it adds so much personality to switch up the knobs like you did. Crown molding is such a perfect way to bring a project up a notch. Well done!
Great job, Matt! Love the faucet knobs instead of hook. Saw some at a flea market recently that would have worked perfectly. 🙂
Sending this idea to my mom- she is in the middle of a bath makeover.
Love it – great instructions!! Shelves can be expensive to buy ready made and the beauty of your DIY is that you can make it any size you want!
Definitely looks like a success – it’s perfect!
maybe this is a dumb question, but how did you attach it to the wall? looks great! love the hooks
Hey Sheila! No such thing as a dumb question! I used heavy duty velcro fasteners made by Scotch. It’s as simple as peeling off paper backing and attaching the sticky side of one of the strips to the back of the shelf and one to the wall. Each heavy duty fastener will hold 2lbs, so I used a total of 4 fasteners, which will hold a combined 8lbs. Great question!
This is fantastic! Love the hooks…brilliant touch!
Thanks Janel! Those types of wheel handles will probably make a few more appearances in some of our future projects! Thanks for stopping in!
This is Off the Hook! Great job Matt!
Ha! Thanks Jen! It hardly took any time at all! Makes me wonder why I put it off for so long!
Holy DIY! That is awesomely beautiful, Matt!!!