Drywall Installation Tips and Kitchen Progress Update
I’d rather not say that I’m seeing the light at the end of this long renovation tunnel (for fear of jinxing myself.) But, I definitely have caught a glimpse of the finish line. Last week my kitchen designer emailed me to let me know that my cabinets will be arriving soon and could she schedule us for installation on March 25th? I seriously might have let a four letter word escape my lips as I read her email. I mean, yes I’m happy, but there is no way I feel ready! There’s still so much to get done before the cabinet installation.
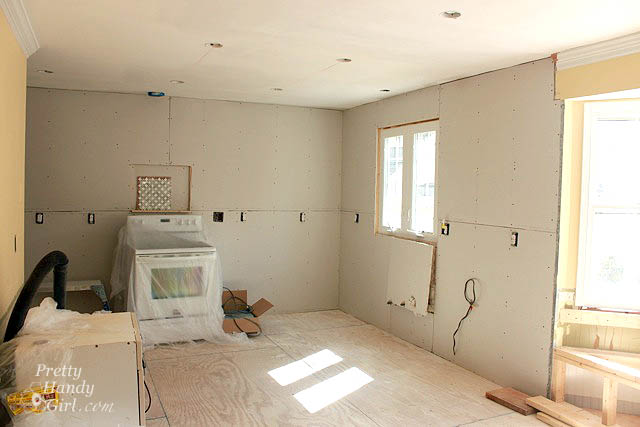
Up until this past weekend we still had exposed wall studs and wiring.
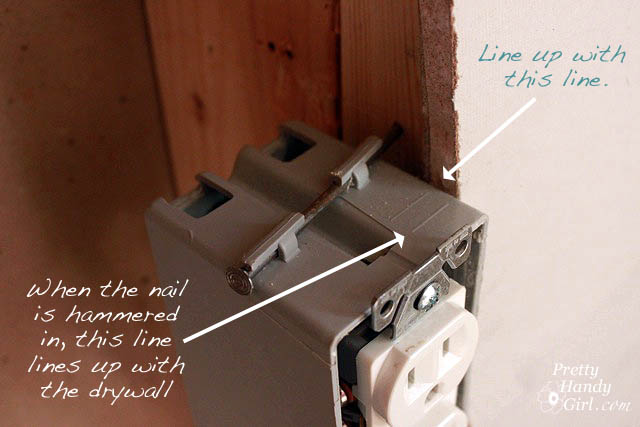
I did have to move the outlet boxes forward so they would lay flush with the drywall after it was installed.
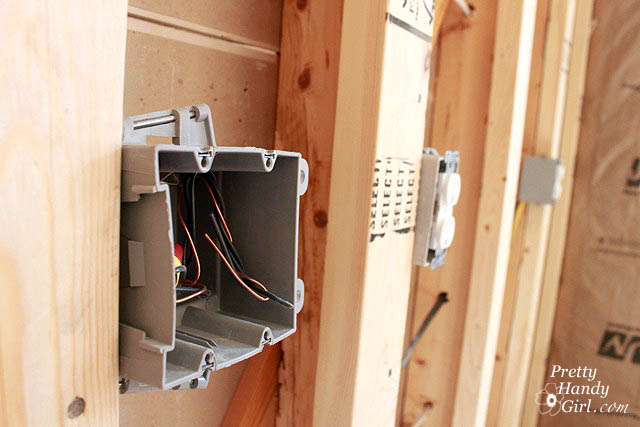
To do that, I simply pried the boxes off the stud, then aligned the first line on the box up with the stud. When the nail is hammered in, the box recesses to line up with the second line (because the nails are angled into the wall.) The secured outlet sticks out from the stud just enough to be flush with the drywall. But, because I’m adding a tile backsplash, I moved our boxes out a little further.
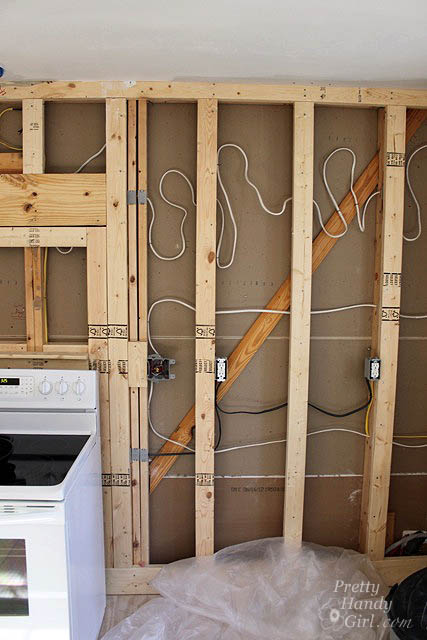
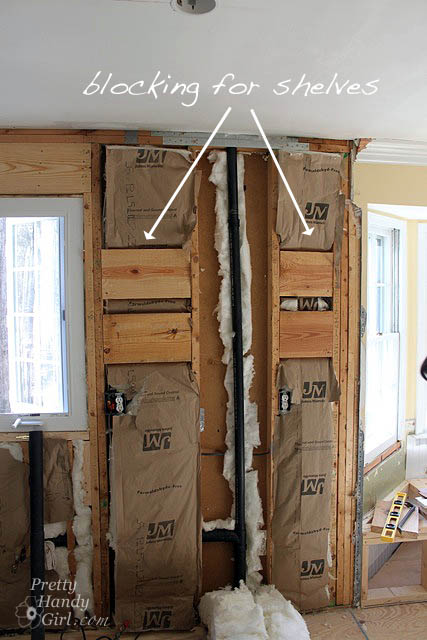
This was the perfect time to take pictures of the wiring and plumbing pipe locations for reference later. It was also the perfect time to plan ahead for the future. The wall to the right of our sink will have open shelves to hold our everyday dishes. To create a strong foundation to secure the brackets I added blocking between the studs.
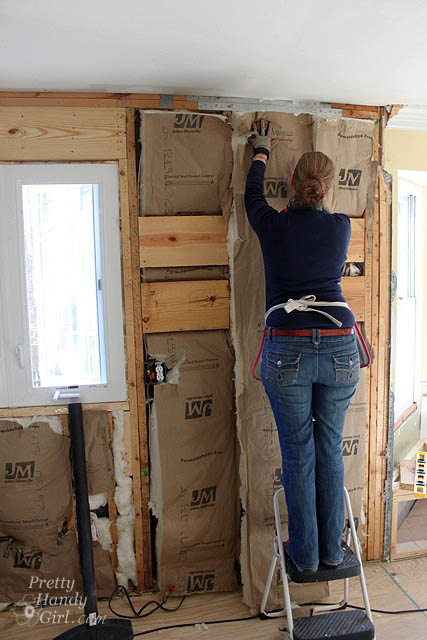
We upped our energy savings by adding new R-15 insulation. (I’ve been using my Apron/tool belt made by That’s My Letter daily, and absolutely love how light it is.)
And then there was one last thing to do before we closed up the walls:
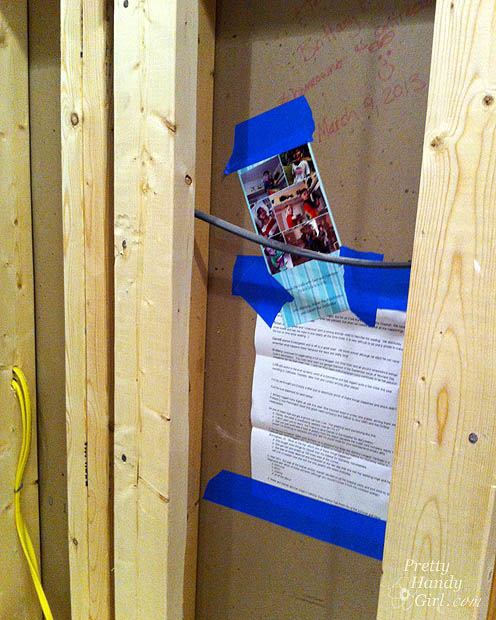
Insert a time capsule! I taped our Christmas card with pictures of us during demolition and our Christmas letter onto the wall. Then I signed and dated the wall. I’m thinking about the day that some future homeowner finds our little message ;-). I also taped the structural engineer’s drawing into the wall should anyone open it up and wonder why the heck there is a second wall attached to the first.
And it was now time to get our drywall game on! There is definitely a science to hanging drywall. But, the most important tip is to sink the screws the right depth.
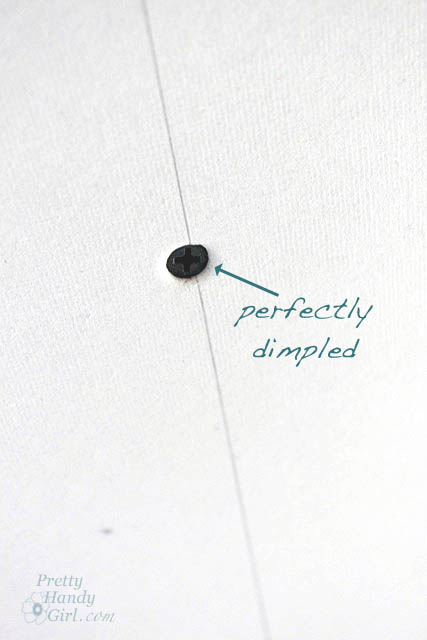
The screws need to recess just below the surface, dimpling but not breaking the paper around it. Above is a perfectly dimpled (recessed) screw.
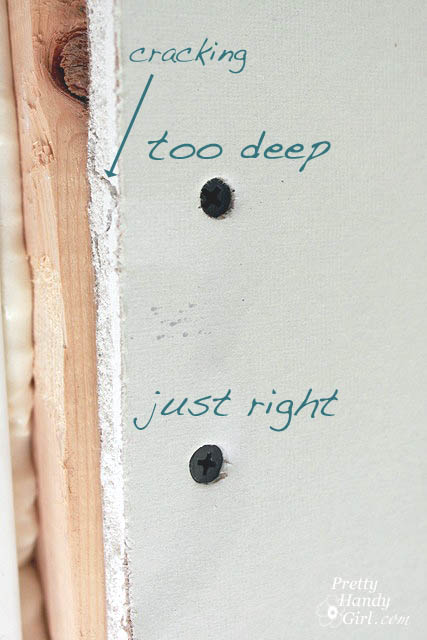
If you go too deep, the drywall won’t hold and could crack inside. The only remedy is to put another screw near the one that’s too deep.
Pretty Handsome Guy chipped in to help me hang the sheetrock.
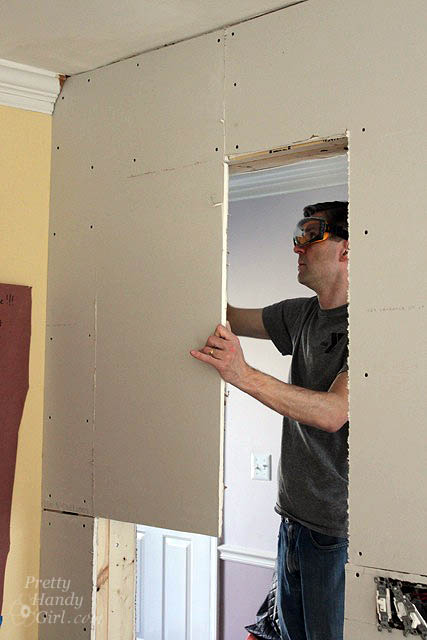
Below he’s demonstrating how it is easier to add sheetrock over a doorway instead of cutting the piece to size ahead of time.
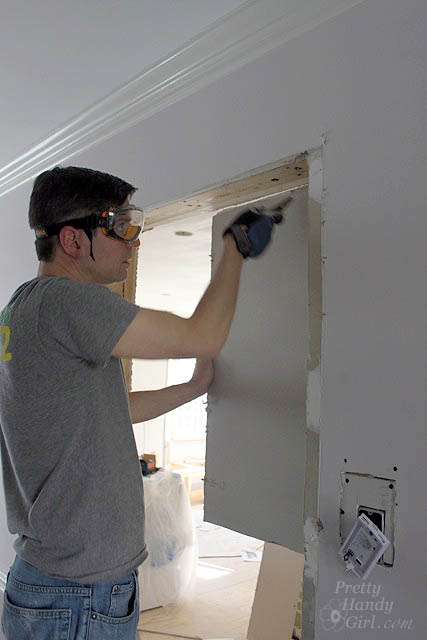
After the drywall is attached, you can cut around the opening with a drywall saw and a utility knife.
Be sure to read my tutorial for mudding drywall joints and seams!
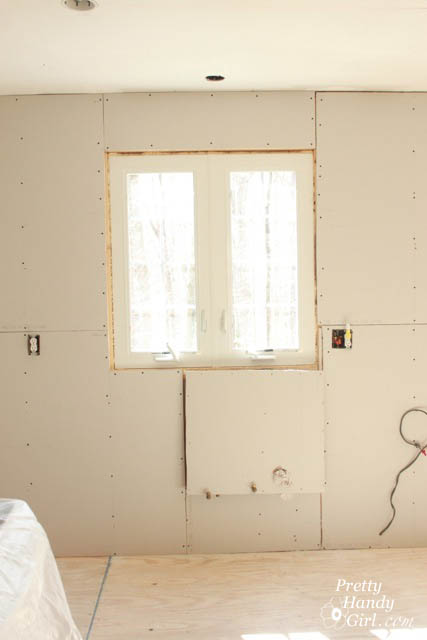
Unfortunately we couldn’t replicate this technique around the window, so I did my best to cut pieces to fit around it.
Speaking of window…that is our new casement window that I installed with the help of my handyman two weeks ago. (Ummm, yes, I may have had a little touch of tool envy. He has a bigger nail gun than I do.)
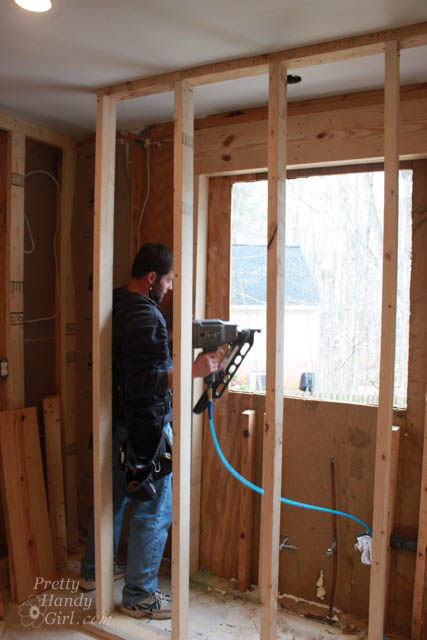
I honestly don’t think I could have installed that window without his help. It took us all day, because we had to build a support wall and then spent time re-framing out the new opening. The new window isn’t much bigger than the previous window, but it lets in more light and it is easy to open on a breezy spring day. And that makes me happy!
You know what else makes me happy? Receiving pretty tiles in the mail. I ordered a small box of marble mosaic tiles for the little niche over the stove. (I found them on eBay.)

I’ve been told that the rest of my tiles are arriving direct from Italy and expected to clear customs in a week or so. I ordered them from TheBuilderDepot.com. After a lot of research (and looking for the perfect tiles for our kitchen), I chose to work with The Builder Depot because they have the best prices and the best customer service! David, my rep from The Builder Depot, has been emailing me with some great ideas for tile designs, and I truly appreciate his expertise.
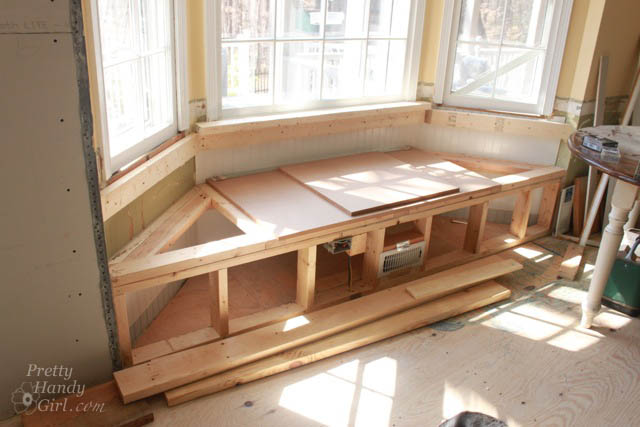
After the kitchen drywall was done, I turned my attention to our cozy window seat. I am currently framing in a back rest and was able to get Pretty Handsome Guy’s help moving the gigantic (and very heavy) MDF sheet to cut out my seat panels. When it is complete, we’ll have storage underneath. We’ve decided that this will be the perfect place to store board games for Family Game Night!
You could definitely say that we worked our tails off this weekend. Frankly, I think our activity wore out our “tailed” supervisor:


You can read more about our kitchen disaster and renovation in these updates:
- Polybutylene Pipe Leak turns into Moldy Mess
- My World Upended, Asbestos Discovery and Removal -All You Ever Wanted to Know About Asbestos
- Planning New Kitchen Layout and more
- Planning Colors and Materials for the New Kitchen
- Let the Demolition Begin
- How to Remove Soffits
- Move Back in the Kitchen Temporarily and Throw a New Year’s Party
- Termite Damage and Kitchen Update
- How and When You Should File for a Permit during a Kitchen Renovation – Your Questions Answered
- Everything You Should Know about Termites and Termite Damage
- How to Survive without a Kitchen During Renovation
- Furing out the Wall, Ceiling Patch, and Clean Air


Just an FYI, I read that you should never have seams at door/window corners as they will be prone to cracking since doors/window shift over time.
Cathie, excellent tip. Thanks for chiming in.
Love a kitchen do-over! Cannot wait to see the finished product. And I really enjoy your blog. May I share my kitchen remodel? Big IKEA fan when it comes to kitchens. Thanks! http://chezsabine.com/2013/03/16/for-the-love-of-ikea-6-kitchens-you-should-see/#
Great drywall tips Brittany.
The time capsule is such a cool idea.
Thanks for mentioning Builder Depot, I’m always on the lookout for unique tile 😉
For less than $20, you can use a drywall clutch bit on a standard drill to set screws to the perfect depth. You can find them at building centers and on Amazon.
I can’t wait to see how the window seat turns out. Be sure to post pictures:)
Maude
Bless you heart Brittany, I can see you are working like crazy here. It looks wonderful and I can’t wait, as everyone else can either, for the final completion. Not as anxious as you are but what a great job you guys are doing. You are definitely to be admired for all your skills and hard work!
Thanks Colleen!
I’m in awe of your skills and ambition. I’m not planning to do a project like this–ever–but I still find it interesting. I took a mini workshop on electrical wiring, and the teacher mentioned that new codes require many more outlets than we’ve had in the past, to accommodate all our modern appliances. I can see you have lots; did you have to plan where they’d be located based on the layout of the counter space, or is it every so many feet? And why is there so much extra wiring in the wall? Just curious. Did your electrician make all these decisions, or did you read up on it yourself? Love the family game night idea.
Cath, yes, for every four feet of counter space you need to have an outlet within 2 feet of any point on that counter? So, essentially an outlet every four feet on the counters. My electrician left lots of extra wires in the wall for the undercabinet lighting plug that will go in the cabinet. I think he just wanted to make certain that he could move the outlet if he needed to.
I spy your apron!!!!! so glad to see it’s getting some real use. Drywall is serious progress (you and Ana are on the same schedule!) and love that little time capsule idea, so clever. Itching for cabinets, can’t wait to see what color you decide to paint them.
Jaime, yup! Love it, but man it is DIRTY! I have to wash it as soon as I’m not using it daily. Thanks for reminding me it was in the picture. I need to link to your shop ;-).
So love following the journey! When it’s done.. oh my, it’s going to be a beauty!! What a great idea sealing up the photo and letter. How fun that will be years from now when someone discovers it.
We went through a entire gut reno of our kitchen. Hang in there… it’s worth it in the end :)))
We are on the tail end of our kitchen remodel…I feel for you! Just when I’m finally cooking in the new kitchen it was time to stain and poly the hardwood floors. This week it’s back to no kitchen again! Can’t wait to see the finished product!
I too never seem to see light at tunnels end. It looks like you’ve made tremendous headway!
Your drywall looks great! It always feels good to get drywall hung! you feel like you’ve accomplished something!
I am so anxious to see what you decided upon for your kitchen cabinets! So exciting!
Your tile choice is brilliant and that window seat…heavenly!
Keep up the good work …
This very day, after not having a kitchen in this house for 7 years!
I cooked in my new kitchen!
Yeah Donna! I’m so excited for you!!
Oh wow oh wow oh wow!!! What an intense project. But…there’s light at the end of the tunnel!! It’s happening!! And girl, that tile is fabulous!
Thanks Janel!