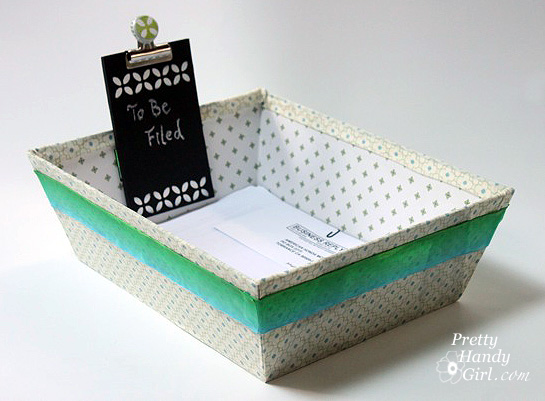
Make Your Own Customized File Bin with Mod Podge

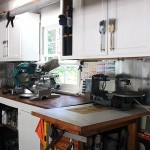
I’m just curious if I’m the only person who loses sight of her desk every week? I spend Monday mornings clearing the clutter and figuring out my plan of attack for the week. I could really save that 30 minutes each week by corralling my clutter in one place! On a recent excursion to Walmart, I found the perfect storage solution!

I also found lots of other goodies at Walmart. My friend Su and I had a blast shopping together. Su is the stay-at-home mom of five. She has a wonderful vivacious personality and is loads of fun to be around. If you haven’t met Su yet, head over to her blog The Intentional Home.

Being crafty gals, we set out to find some inspiration for a new craft project using the Plaid products that were sent to us.

(The Plaid paint selection is just like the candy aisle for me. Drooool!) In the past I have ordered aprons and canvas tote bags for teacher gifts, but now I know that I can pick them up at Walmart!
Sorry if I digressed a little, but that happens to me in those big super stores. Back to my storage solution. I found the perfect sized file bin at Walmart, but the design wasn’t cute enough for me. While browsing the aisles, I also picked up some cute pillow cases, and soon a plan was hatched to give my storage bin some personality. Here’s how I did it:
Materials:
(I’ve included affiliate links for your convenience. I earn a small percentage from a purchase using these links. There is no additional cost to you. You can read more about affiliate links here.)

- File box/storage tray
- Pillow case or cute fabric
- Scissors
- Paint brush
- Brayer
- Mod Podge
- Paint brush
- Ribbon
- X-acto knife
- Plastic or wax paper to cover your work surface
- Clothespins
- Folk Art craft paints
- Foam brush top or stencil brush
- Plaid border patterned stencil
- Binder Clip
- 4″ x 6″ Black foam board
- Double-stick foam tape
- Folk Art chalkboard paint
- Ribbon
- Scrapbook paper
Instructions:
Cut the pillowcase (or fabric) so there is enough to wrap over the sides of the bin plus add an extra inch to fold under the raw edge.

Paint on liberal amounts of mod podge onto the sides and bottom of the bin. Leave the handled front and back untouched for now.

Wrap the fabric around the bin. Start by centering it on the bottom and then pull it tightly over the sides. Use the brayer to smooth out any air bubbles in the fabric.

Using the paint brush, spread mod podge on the front and back of the bin. Neatly fold and tuck the corners of fabric. Put mod podge between the folds for added adhesion.

After tucking and folding, the corners will look something like this:

Trim any excess fabric from the corners. Fold under the raw edge twice. Spread a line of mod podge onto the top of the bin and press the fabric into it.

Use clothespins to hold the corners in place as the mod podge dries.

For more personality, attach a ribbon onto the exterior of the bin using mod podge. Because the corners of the bin are beveled, cut a separate piece for each side and slightly overlap the edges of the ribbon at the corners. Use copious amounts of mod podge on both sides of the ribbon.

Take out the black foam board. Coat the board with Folk Art Chalkboard Paint. (Just one coat worked fine for me.) Let it dry.

Center the pattern stencil on the chalkboard board. Use white (or another light colored paint) and pounce paint into the stencil with the brush top applicator.

Clip a cute binder clip over the top of the foam board. (For a cuter look, embellish the clip with a button or bottle cap that is glued on with E-6000 glue.)

Use strong double-stick foam tape to attach the chalkboard to the inside of the bin. What a great spot to clip receipts and small things. Use the chalkboard to label your bin or leave yourself notes.
You could stop here, (unless you are neurotic and can’t stand the inside pattern on the bin), or you can rip off the chalk board. Cut pieces of scrap book paper to fit inside the bin. Use slightly tacky coats of mod podge or spray adhesive to hold the paper in place.

Overlap the corners and trim off any excess with an x-acto knife.

Then re-attach the chalk board clipboard. Ahhh, much better (in my opinion.)

Now you have an adorable customized file bin. Fill it up with all the clutter on your desk!
I just saved myself 30 minutes each week! What ever will I do with my time? Well, I do need to uncover those things that used to be a dresser and bookcase in my son’s room (but are now hidden under who knows what!) Wish me luck because eight year olds can accumulate a lot of crap stuff! Anyone else have an eight year old? I need one ginormous file bin to contain all the clutter in that room.

Disclosure: I wrote this post as part of a paid campaign with Plaid Crafts and Blueprint Social. I was sent a box of supplies and given a gift card to purchase items from Walmart. I was not told what to write about or what project to complete. The ideas, tutorial and opinions in this post are solely my own. #WalmartPlaid
Want to see some other projects using Mod Podge and Plaid craft projects? Check out the Walmart Crafts Pinterest Board or the Plaid Crafts Pinterest Board. Or my fellow bloggers’ creative projects.
Brilliant as usual, but I wouldn’t expect anything less. You have such great skills – looks so well made!
What an easy idea!!
I wish I had the creativity to think of such idea!!
I suppose that is why I enjoy your blog so much as you gals always come up with fantastic items!!
I love the little clipboard! I could use several of these. 🙂
How cute Brittany! 🙂 great tute. I need to be more organized, but I think I’m hopeless!
see ya at Haven!
gail
You have some serious AWESOME corners! 🙂 Love this project thanks for the tutorial!
So cute! I can’t believe you got the fabric podged so smoothly! (I always forget the brayer :p)
Only one way it could be even cuter – put a copy of Woman’s Day on the top, heehee.
Ah ha! Using the clothespins in the corners is so smart! The last time I used Mod Podge around something with corners I sat there and held it down with my finger. (Fail.)
Fun!! Nice way to customize a file bin for an office!
I have that little tool set you showed in the photo. Well it’s my 7 year olds but I use most of the items when we work on projects together.