Lamp Shade Makeover – DIY Talent Positively Splendid
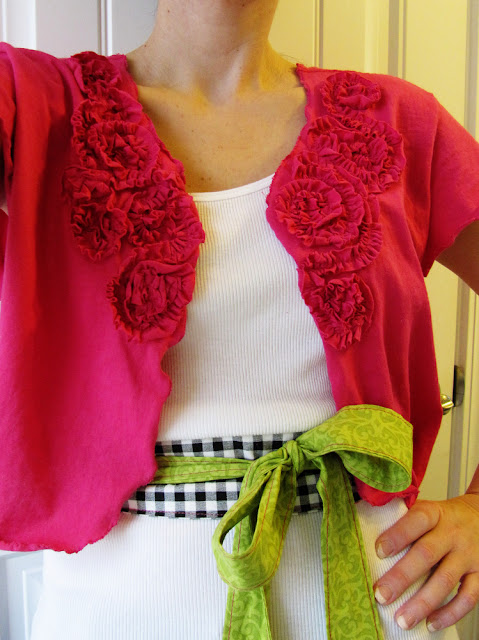
I am amazed that we’ve had great weather for the entire two weeks of the DIY Talent Parade! Are you enjoying the parade so far?! Well, get ready to have your socks knocked off today. Our talented guest is an amazing multi-tasking mother of four. She cooks, she sews, she crafts and she makes everything she touches beautiful! Amy is beautiful inside and out which makes it no surprise that she has the talent to turn ordinary objects into gorgeous creations. Like this t-shirt turned bolero.
Wait, I think I see her coming this way…ummm…is she dancing? Why yes, she is! My goodness is there anything this girl can’t do?! Turn your heads this way and welcome the very lovely and very talented Amy from Positively Splendid.


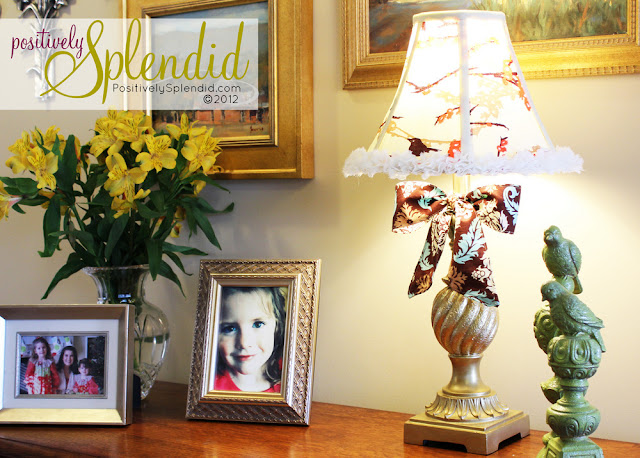
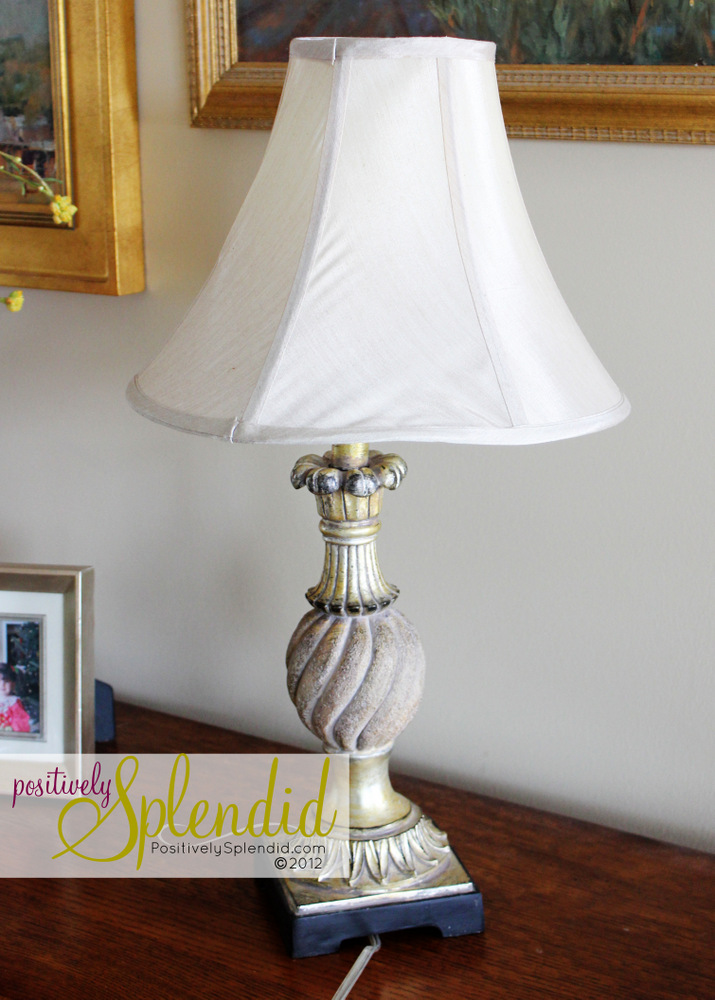
PS is all about innovative craft and DIY projects that boast vibrant color schemes and a cheerful sensibility. Having been raised in a home brimming with sewing notions and paintbrushes, I strive to use my passion and enthusiasm for creativity to encourage others to tap into their innate creative potential with step-by-step tutorials suitable for crafters of all skill levels. I would love for you to stop by for a visit! As a decorating enthusiast, I tend to find myself wanting to update my decor far more than my budget will allow. To get my decorating fix, I am always on the lookout for ways that I can use only what I have on hand to achieve the looks I love, and today I am going to share with you one of the recent lamp updates I completed for the table in my front entry. For this project, I used only items I had on hand to transform this sad little guy…
…into this!
Did you know that it is possible to take an old lampshade and completely recover it while keeping the lining intact? This is a great way to showcase fabrics you love in a polished, professional-looking way. Because the original shade on my lamp was misshapen from an unfortunate incident involving one of my son’s Hotwheels (don’t ask 😉, I opted to use a shade that was in the giveaway pile in my garage for this project. The basic process I use for shade-recovering projects like this one is really quite simple. Let me show you how to do it! For this project, you will need…
- An old lampshade
- Fabric
- E6000 adhesive
- Scissors
- Packaged double-fold bias tape (one package of three yards was more than enough for my smallish shade here)
- Other decorative trim (optional)
To start, carefully remove the trim from the shade, placing all of the pieces in a pile as you go. (You’ll need these for their dimensions later on.)

Once the trim is removed, start to work removing the fabric from the shade. The key here is to remove only the outer fabric layer from the shade and not the inner lining. To start, use very sharp scissors to pierce the top layer of fabric along the bottom edge of the shade, and then simply cut around the perimeter of the shade along this edge to remove the fabric. Cut up one of the side seams, and then cut around the top edge in a similar fashion.


Lay your removed outer fabric piece on a flat surface, and take a good look at how it is assembled. Is it all one piece, or does it consist of various sections? The fabric for my shade was actually comprised of six separate pieces sewn together, so I cut each section apart at their seam line. If your shade fabric is all one piece, you can use this piece in its entirety as a pattern for cutting your fabric. If it composed of pieces stitched together as mine was, cut the pieces apart at their seams.
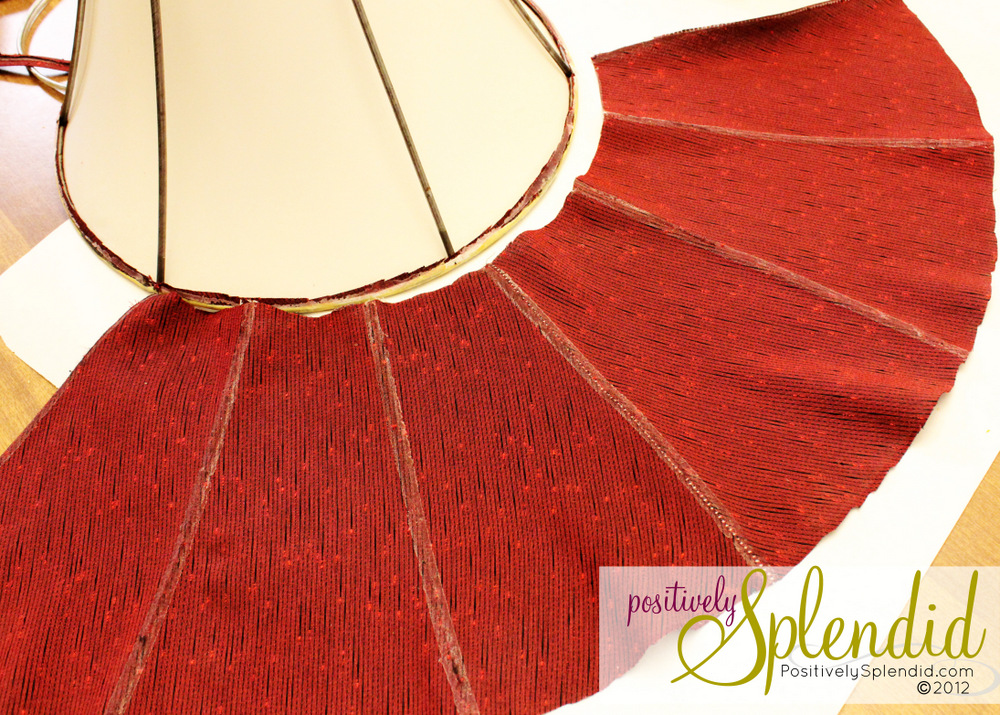
Using the fabric piece(s) as a pattern, lay each one on top of your new fabric and cut 1/4″ around each one. (This extra 1/4″ compensates for the seam allowance of the original pieces, and it gives you wiggle room to adjust the fabric pieces when you affix them to the shade later on.)

Next, take your lampshade frame and start affixing the fabric pieces to it using your adhesive. I used E6000 here because it is strong enough to hold up over time, but it dries clear and flexible, making it perfect for fabric projects. See how this frame is divided into six sections?

If your frame is composed of an even number of sections like this one (most are) you will adhere fabric to three of these sections first, leaving a blank space between each section. To start affixing fabric to the frame, run a thin line of the adhesive around the entire perimeter of the first section: top, bottom, left and right. Then, place your fabric on top of the adhesive, stretching it gently to make it taut. If your fabric overlaps into the next section or over the top and bottom of your shade, don’t worry: you can trim away the excess later on.

Skip over the section of the shade directly next to the fabric you just adhered. Adhere your next piece of fabric in the same manner in the space on the other side of the section you just skipped. When that piece is adhered, skip another section and then adhere your third fabric piece in the same manner. Allow these pieces to dry for 15 minutes or so, and then use sharp scissors to carefully trim away any of the excess fabric that hangs over the edges of each section. (Skipping a space between each section as you work allows you to clean up the edges of these pieces, something you could do if you did them all in a row. Make sense?)
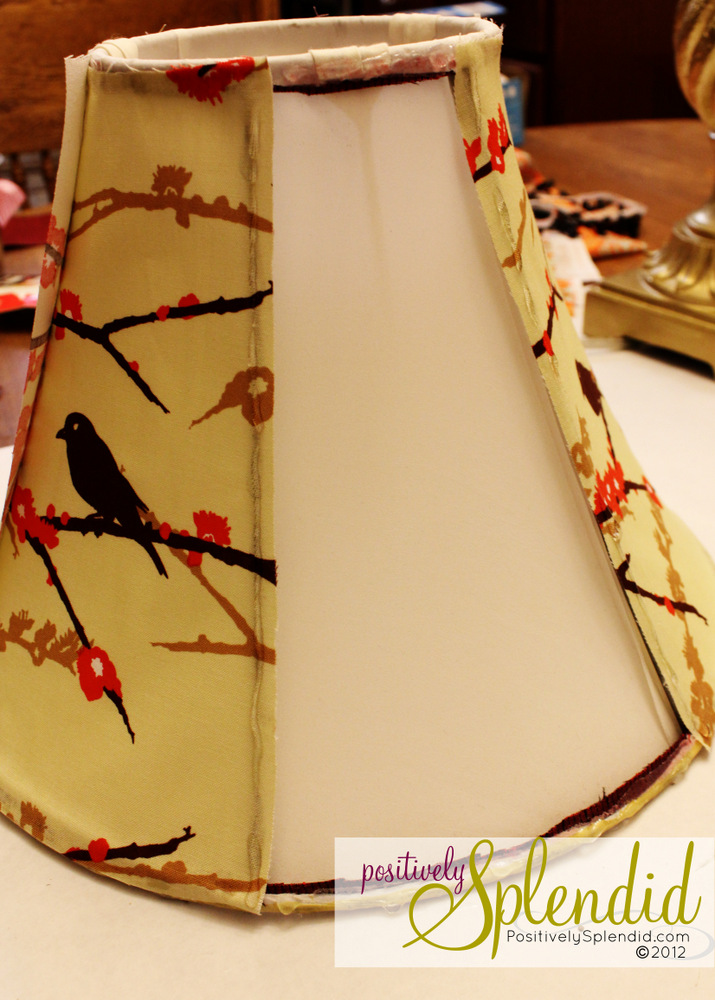
Now, fill the remaining three blank sections of your shade with fabric, adhering and trimming in the same manner.

Using the trim pieces you reserved earlier, cut pieces of pre-made packaged bias tape (or custom-made bias tape, if you’re feeling particularly ambitious) to these lengths. Working at the overlap line between your shade sections, run a thin line of adhesive from the top tot he bottom of your shade, as shown.

Adhere a short bias tape piece to this line. Unfold the tape, and run another line of adhesive on the inside of the piece, pressing it to close. Repeat with each of the remaining vertical overlap lines on your shade.

Now, run a line of adhesive on the top of your shade, and attach the corresponding bias tape piece to this line. When you get to the end of this piece, fold it under by about 1/2″ and then glue this down to conceal the raw edge.


Repeat the preceding step on the bottom edge of your shade. Or, alternatively, glue a decorative trim to this edge instead of the bias tape. I used a section of pretty organza ribbon.
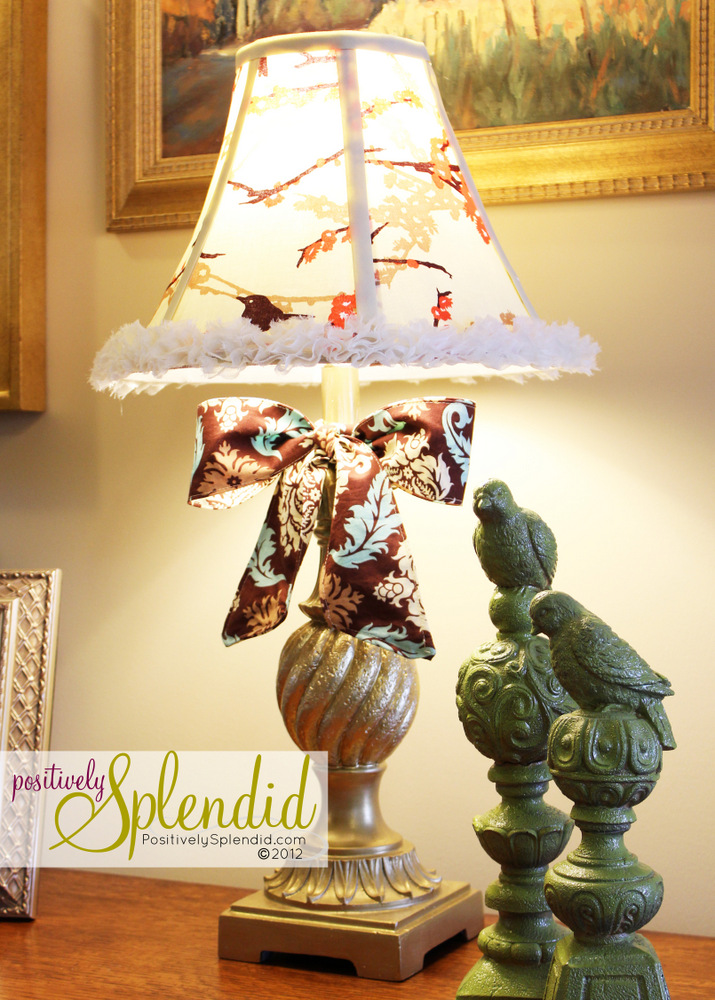
Your good-as-new, recovered shade is complete!
For my base, I primed it before applying a coat of brass liquid gilding and then a coat of acrylic spray sealer.

I finished everything off with a sash made of coordinating fabric before popping on my newly updated shade.

I love the way the bright Joel Dewberry fabric pops against the warm metallic tone of the base, and I think the organza ribbon adds such a feminine touch.


I hope this project has inspired you to take a fresh look at the items you already have in your home before embarking on your next decorating project. Once you have tackled recovering one lampshade, you’ll probably want to start giving a facelift to every shade in your home!
Thanks so much to Brittany for having me over today! Y’all are welcome to visit me at Positively Splendid any time, and you can also find me on Twitter, Facebook and Pinterest!

![]()
A round of applause for the very talented Amy from Positively Splendid! That lampshade makeover was absolutely adorable! This gives me some ideas to salvage those lamp shades that my boys have knocked over one too many times.

Okay, not it is your turn! Gather your most talented post and…
…Join the parade tomorrow morning at 7am EST!
The parade party will be open all week, so hurry on down.

Does the E 6000 glue withstand the heat of the lampshade?
I’ve been looking on Pinterest for instructions for a lampshade makeover and this the very best one I’v found. It’s very detailed and has good pictures ! Thank you !
Thought I saw you were in NC! Raised there and miss home. In Jax, fl now. Love your site
Great tutorial! This makes it look easy enough anyone could update their old lampshades. Thanks for sharing.
Thanks for having me over today, friend, and also for your kind words! You made my morning. 🙂