Creative Gift Wrapping Day #2 – Frosty and Rudolph Gift Wrap

Are you ready to have some fun today?! Making recognizable holiday characters is sure to be enjoyable. It brought me back to some preschool craft projects we used to do in school.
Materials:
- Black felt or black construction paper
- Cake size paper plate
- Buttons (2 eyes, 1 nose, 5-6 mouth)
- Red Ribbon
- Snowflake stickers, snowflake paper punch, and/or other embellishments
- Wrapping paper in a plain color
- Elmer’s glue
- Hot Glue Gun
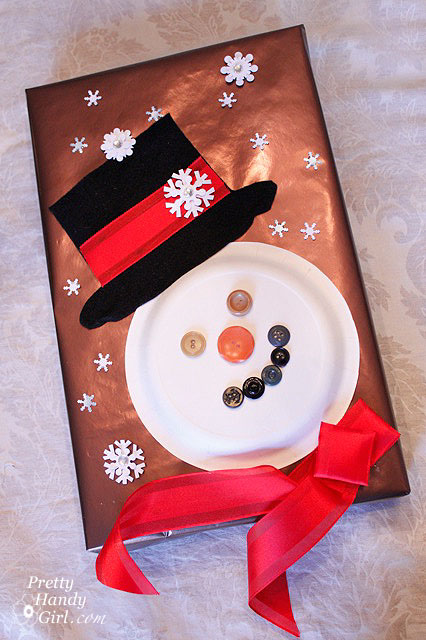
Preheat your hot glue gun. Wrap your present with the plain wrapping paper.
Cut out a hat shape using the black felt or construction paper. Feel free to use this template or make your own.

Cut a piece of red ribbon for the brim of your snowman’s hat. Then gather your snowman pieces and lay them on the package.
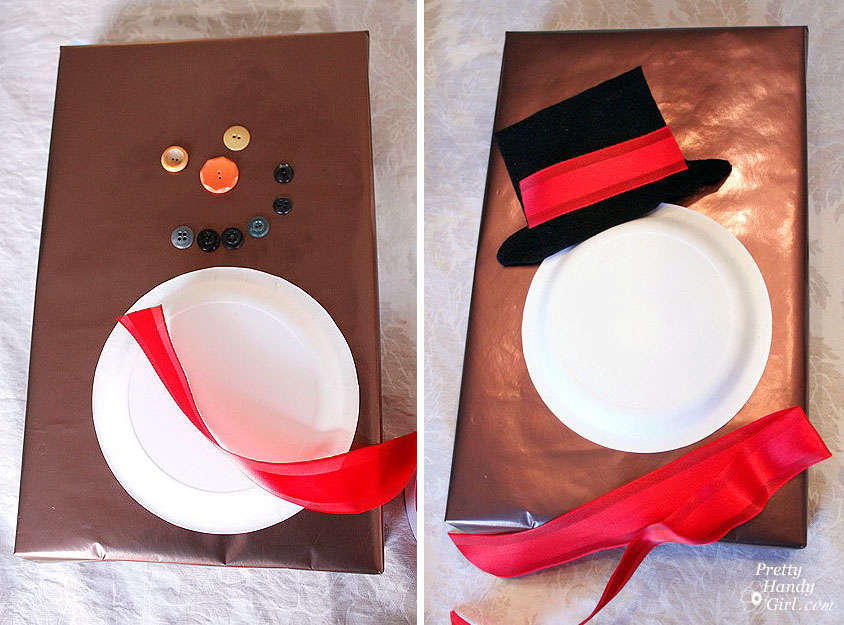
Use the hot glue gun to glue the cake plate upside down to the package. Glue the ribbon onto the hat. Attach the hat on the package letting the brim overlap the cake plate.
Cut another piece of ribbon (12″ or more) for the snowman’s scarf and fold it in half. From the fold, pinch and fold about 2 inches back on itself. This will be the snowman’s scarf knot. Play with the scarf and “knot” until you like how it looks, then use the hot glue to affix it to the gift box.
Use hot glue to adhere the buttons to the cake plate in the shape of a face.

Embellish your package with snowflake stickers and/or paper snowflake hole punches. Glue the hole punches with a small dot of Elmer’s glue.

Well look at that! You just brought Frosty the Snowman to life!
![]()
Materials:
- 2 twigs
- Brown craft paper or paper bag
- Wrapping paper (preferably a plain color)
- 2 buttons for eyes
- 1 Red pom pom
- Red Ribbon
- Snowflake stickers or hole punches
- Jingle bell
- Elmer’s glue
- Hot glue gun
Preheat your hot glue gun. Wrap your present with the wrapping paper.

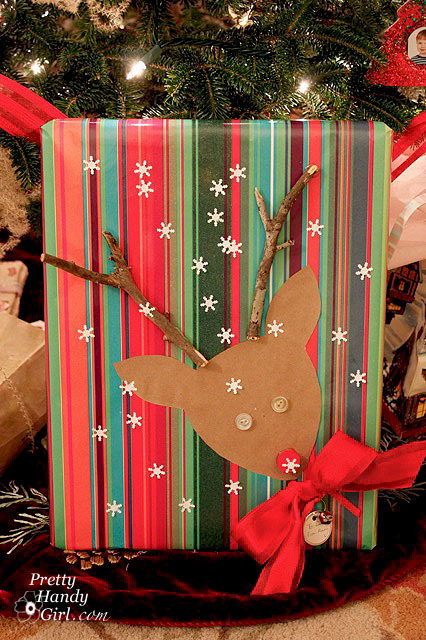
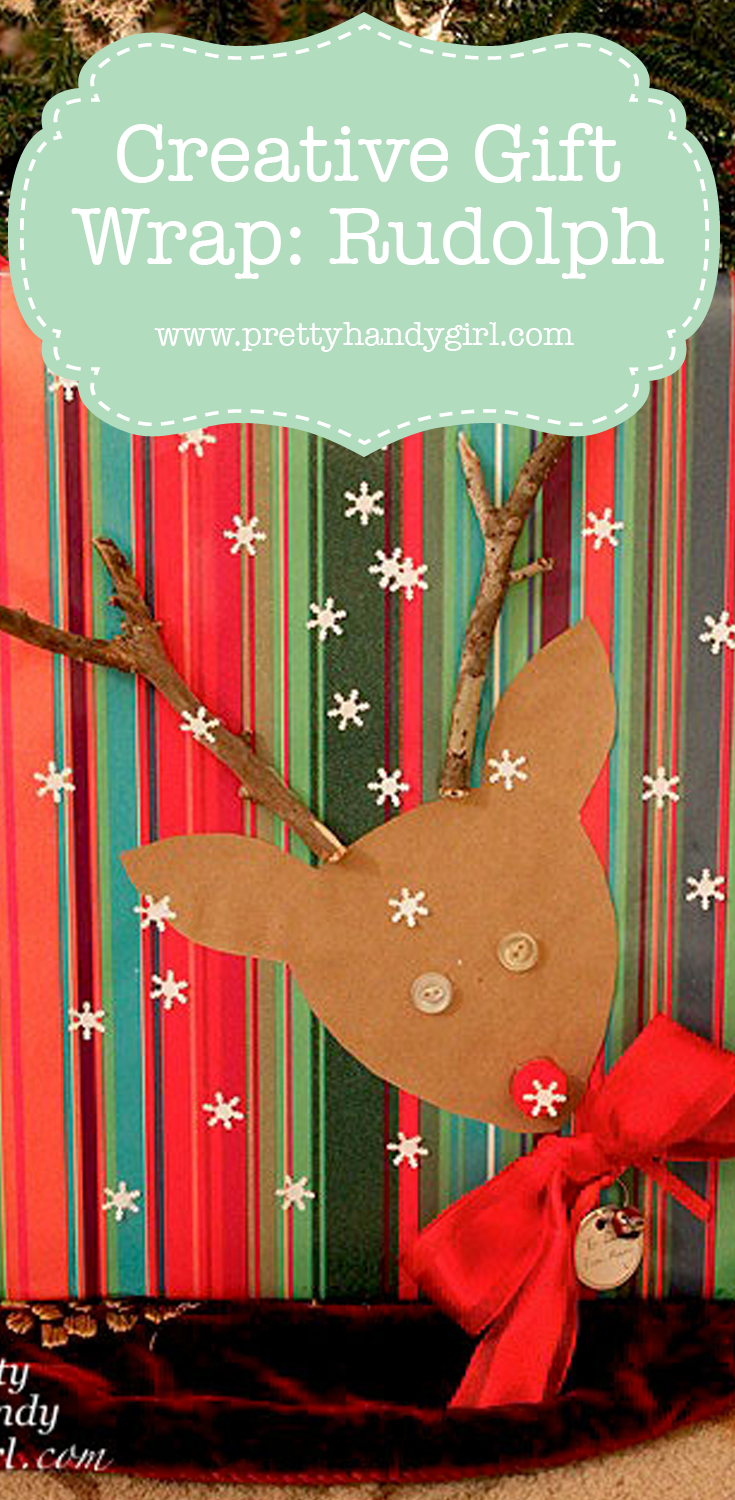
Cut out a reindeer head from the craft paper or a paper bag. Feel free to use this template or make your own.

Lay out the head, sticks, buttons and pom pom nose on the package .
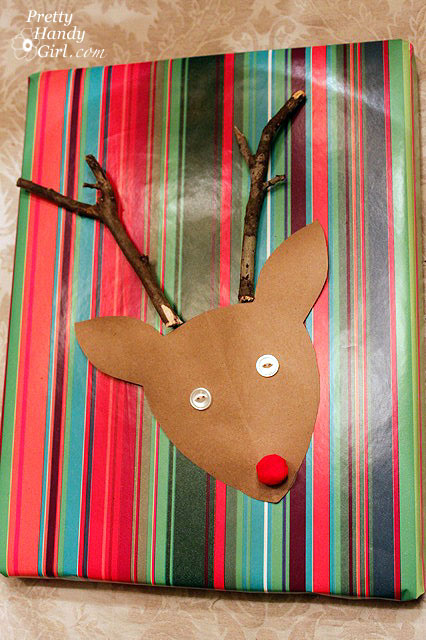
Coat the back of the reindeer head with Elmer’s glue and attach it to the gift. Run a thick line of hot glue onto the back of the twigs and attach them over the reindeer head. Attach the eyes and nose with hot glue.
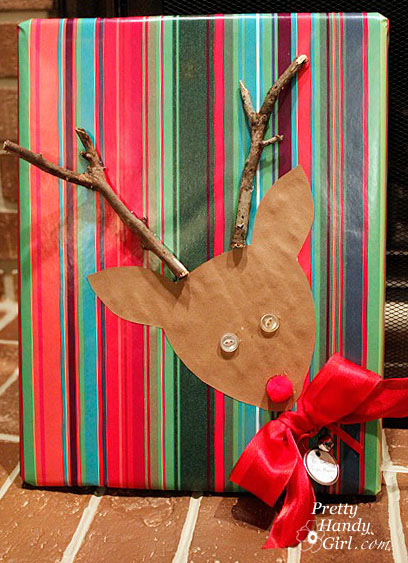
Tie a bow with the red ribbon. Attach a gift tag and jingle bell to the bow and then hot glue it to the package.
Add paper punch snowflakes using Elmer’s glue and/or snowflake stickers.

I think Rudolph is pretty cute, don’t you?
Stick around, I’ll have some more creative gift wrappings for you tomorrow!

Pin for later!

How fun! The gift wrapping is often better than the gift — at least wrap like this is greatly appreciated. Oooohhh, aaaaaahhhhhhh — love ’em.
These are so much fun. Thank you for taking the time to share them with us.
I love that idea, I will have to try that next year!
Yay! An early Christmas present for me! Thank you, dear friend.
Have a warm, wonderful Christmas full of blessings! I’m honored to include you in my list of blessings this year.
Thanks for the ideas! I’m a “brown paper packages tied up with strings” type of gal for the most part, but I love these! I may use them for my presents for my nieces and nephews.