
Tool Tutorial Friday – How to Use a Cordless Drill
A cordless drill is an essential tool for any DIYer. If you don’t have one, stop reading this and go buy one! Seriously, a cordless drill is one of the most important tools for your toolbox.
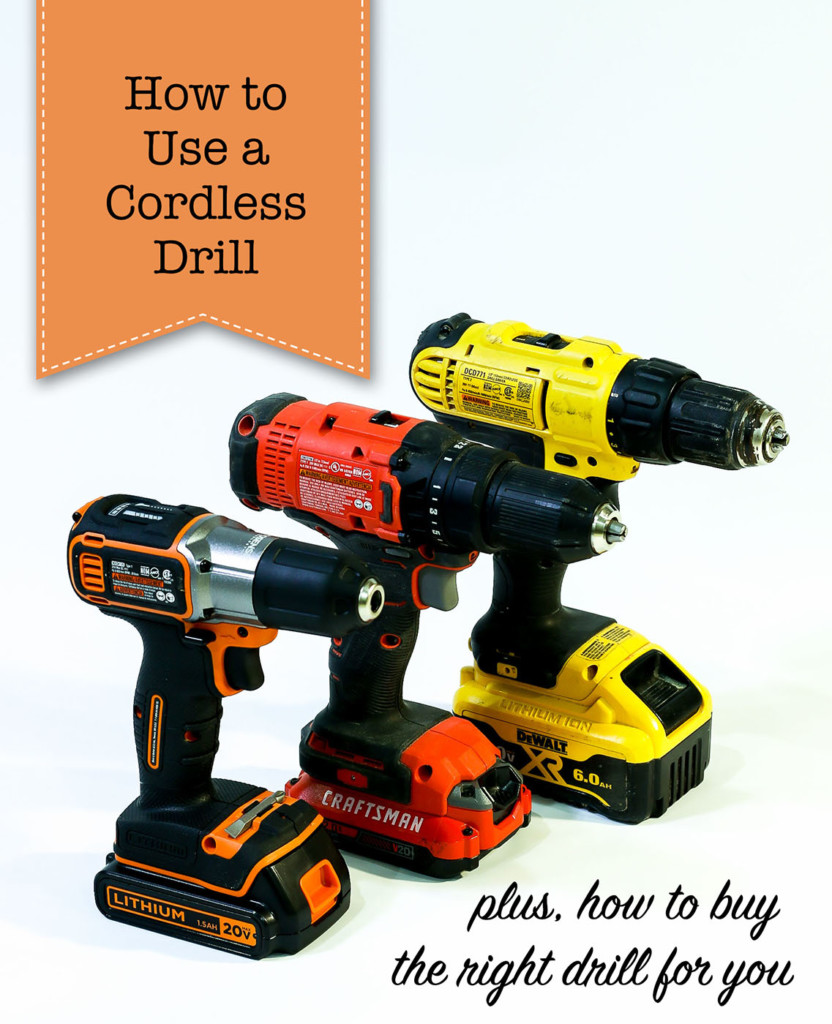
How to Use a Cordless Drill
If you’ve been reading my blog for a while you know I use a cordless drill for almost every project. You could say, my drill is my right-hand man. Over the years, I’ve used many different brands with a variety of features. Today we’ll discuss how to use a cordless drill and a list of features you should look for when buying a new drill. Consider this your comprehensive guide to cordless drills.
(I’ve included affiliate links for your convenience. I earn a small percentage from a purchase using these links. There is no additional cost to you. You can read more about affiliate links here.)
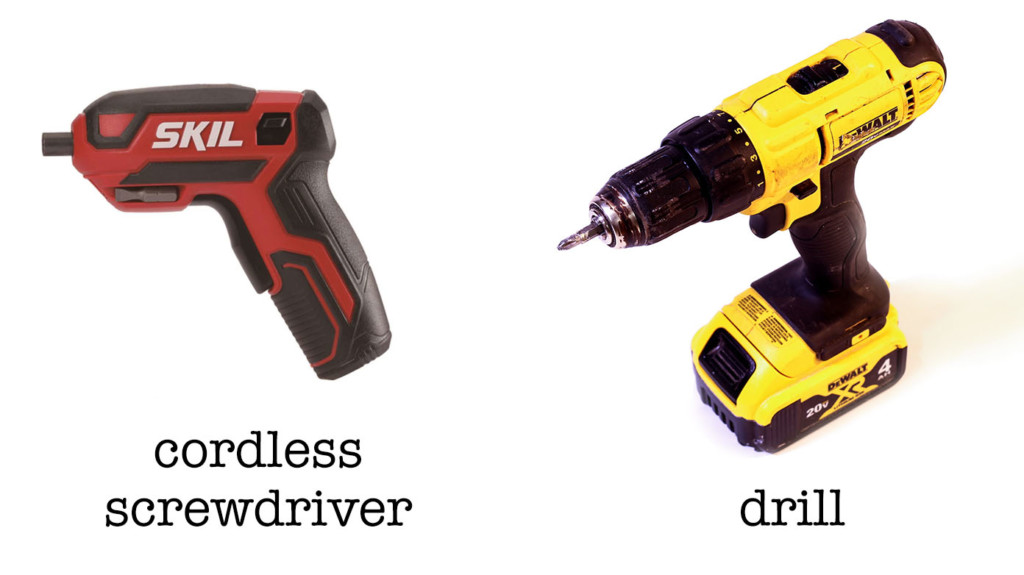
These Tools are Not a Drill:
Before we talk about how to use a cordless drill, I want to explain to you the difference between a cordless drill, a cordless screwdriver, and an impact driver. Although they may look alike, impact drivers and cordless screwdrivers are not drills.
Cordless Screwdriver:
Some may look like a drill, but a cordless screwdriver does not have the power or speed to drill holes, or drive screws into hard materials. It also has no torque or speed adjustments. In fact, a cordless screwdriver is strictly for loosening and tightening screws.
Impact Drivers:
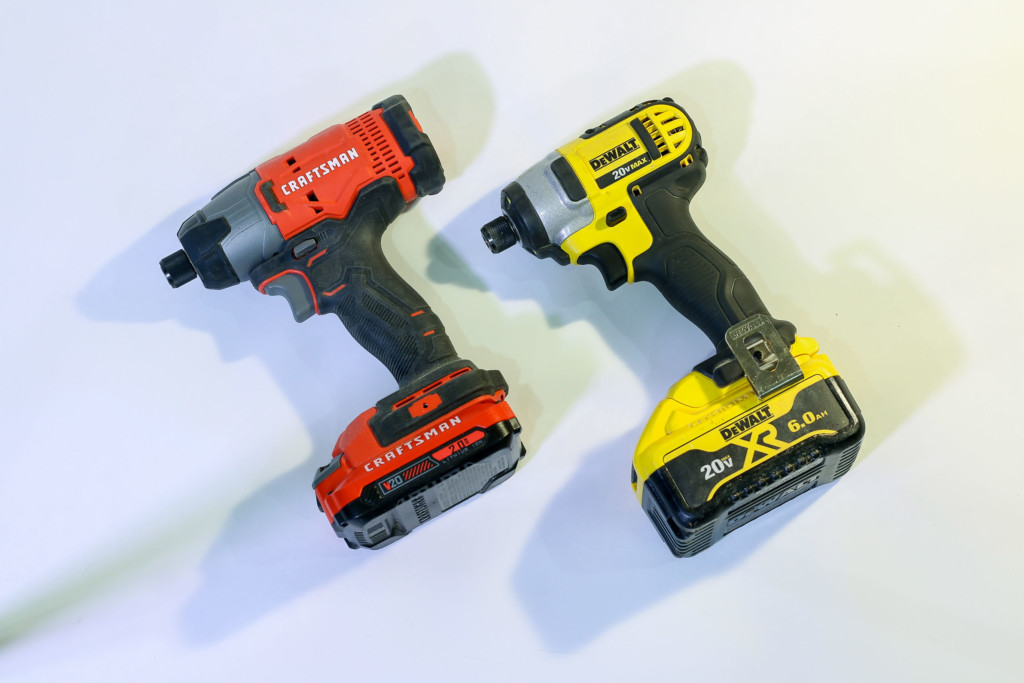
Although they also look like drills, impact drivers are solely meant to drive screws or bolts into tough material. But, can also be used with a quick change drill bit for small holes. An impact driver has rotational force onto the sides of the bit giving more force when driving screws or bolts. Unlike a drill, the impact driver does not have torque adjustments or a twisting chuck to change bits.
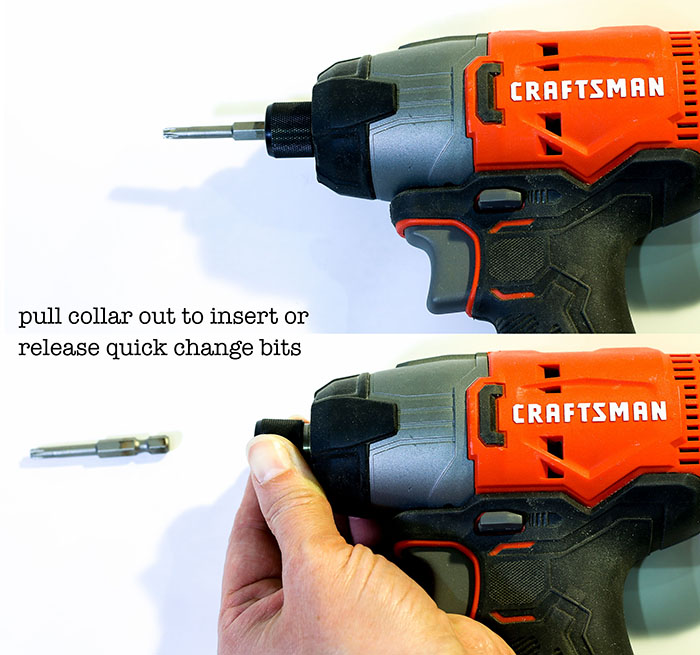
Impact drivers don’t have a chuck to hold the bit. They use a collet to hold bits. Impact drivers accept 1/4″ hex and quick change bits. The collet releases the bit when pulled away from the tool.
Now that you know the difference between a drill and a cordless screwdriver or impact driver, let’s talk about the features on a cordless drill.
About Cordless Drills:
When you first pick up a cordless drill, all the buttons and symbols on the drill may seem confusing. Have no fear, I’ll break it down and give you a little more information about torque, speed, and those symbols to simplify things.
What is Torque:
Torque is the amount of force your drill uses to turn an object (like a screw or drill bit.) All cordless drills have a clutch to change the torque setting. The clutch on your drill is the dial on the front of your drill just behind the chuck.
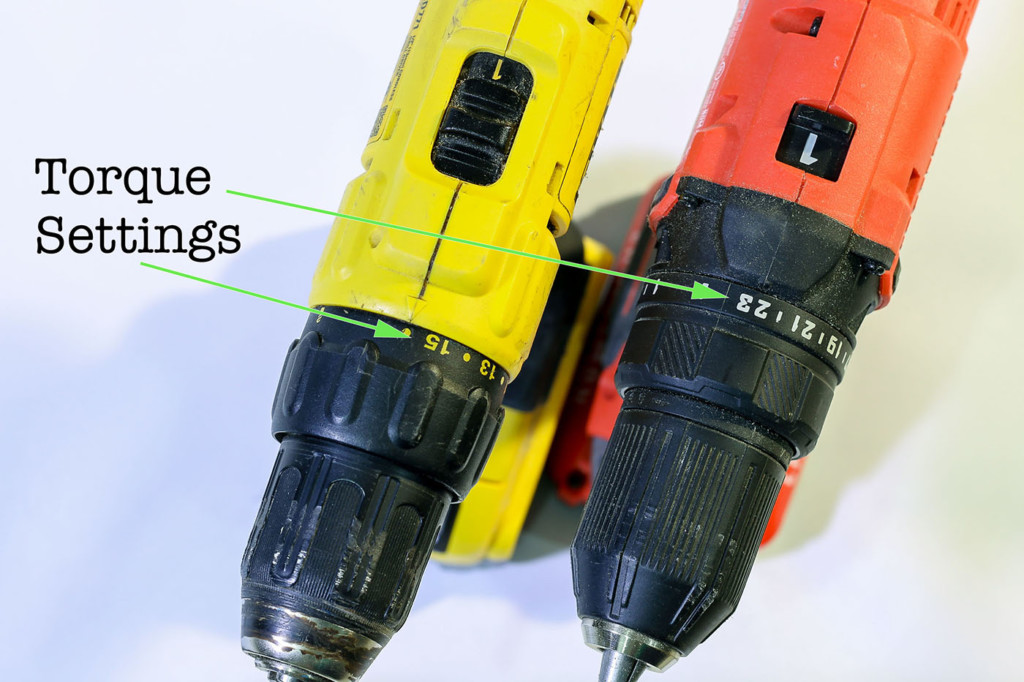
If you need more torque, use a higher number. But, if you are driving screws into softwoods, use a lower setting for more control and less likelihood of driving the screw too far into the wood.
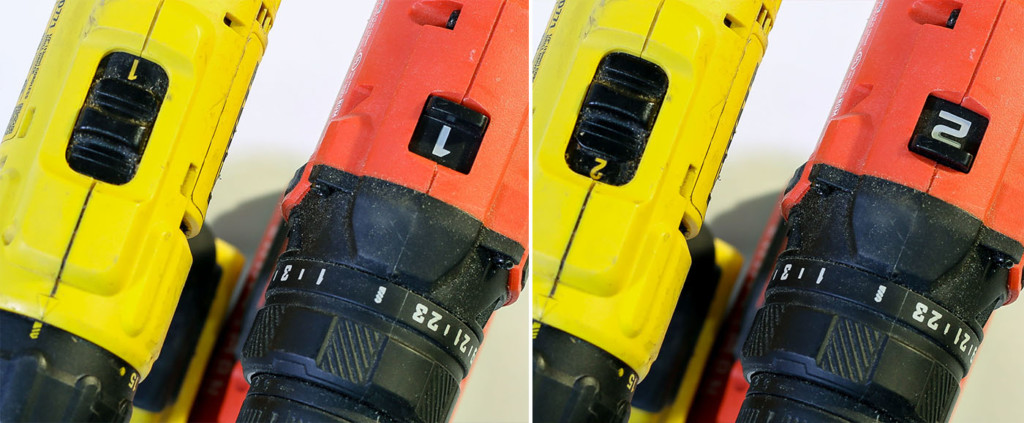
Speeds on a Cordless Drill:
Some drills have an adjustable speed setting (or gear) switch on the top of the drill. Switching between one or two will give you access to more speed or less speed. Selecting the number two will produce higher speed and more power for drilling and driving bigger screws. This is a nice feature and helps when you need to switch from driving smaller screws into softwood vs. driving larger screws into hardwood or drilling.
Direction Selection:
There is a button on each side of the drill just above the trigger that is used to change the drill rotation direction. Clockwise to drill and drive screws. Counter-clockwise to remove screws and bolts.

Optional Features on a Cordless Drill:
Drills come with a variety of features. Depending on your needs, you may be fine with a standard drill that drives screws and drills holes. But, if you are working on more difficult tasks, you may want a drill with a hammer drill setting.
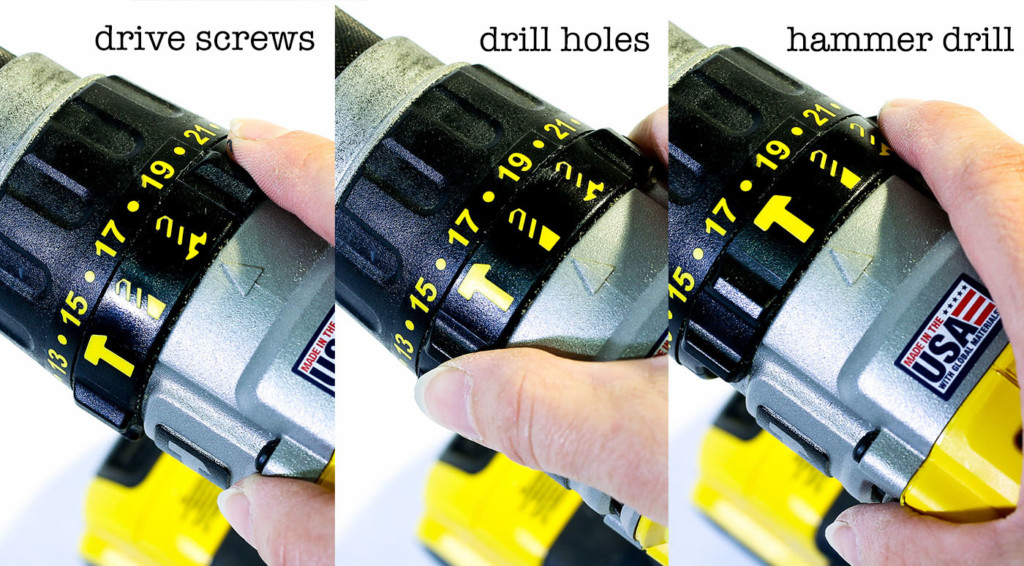
Task Selection:
- Drive Screws: The first function is self-explanatory. Use the drive screws function to screw in fasteners or remove them.
- Drill Holes: The hole drilling function runs at the fastest speed and is used for drilling holes with a drilling bit.
- Hammer Drill: A hammer drill is useful for drilling holes or driving bolts into tough material. A hammer drill has a hammer action from the rear that pulses force directly onto the bit (like a small jackhammer.) In contrast, an impact driver has a rotational pulse on the sides of the bit. (See above for more information about impact drivers)
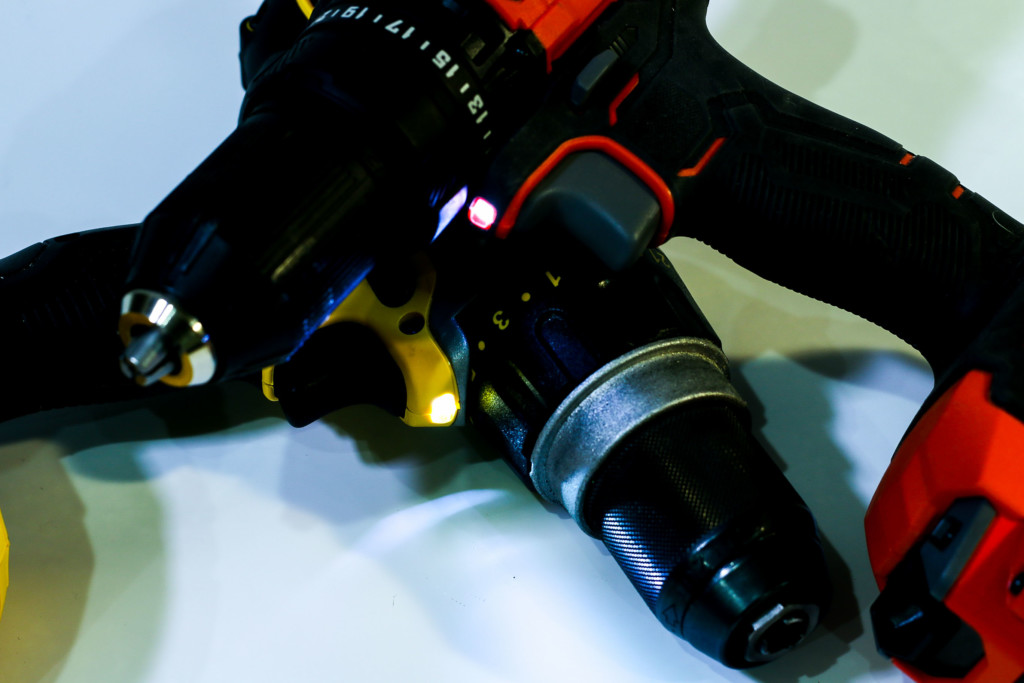
Light Up Your Task:
Another nice feature to have on a drill is a light. Most mid-range to upper range drills have a light that is activated when pulling the trigger on the drill. Although not 100% necessary, anyone who has tried to see inside a cabinet while using a drill appreciates the light feature.
Belt Clip:
Having a belt clip on a drill is one of those features that a tradesperson finds exceptionally helpful when juggling tools on a ladder. Instead of setting the drill precariously on top of the ladder, it can clip onto your belt.
Magnetic Holder:
One of my favorite features on a drill is a magnetic bit holder. This is not standard on drills and frankly I have only seen a few drills with this feature, but I wish more were manufactured with it.

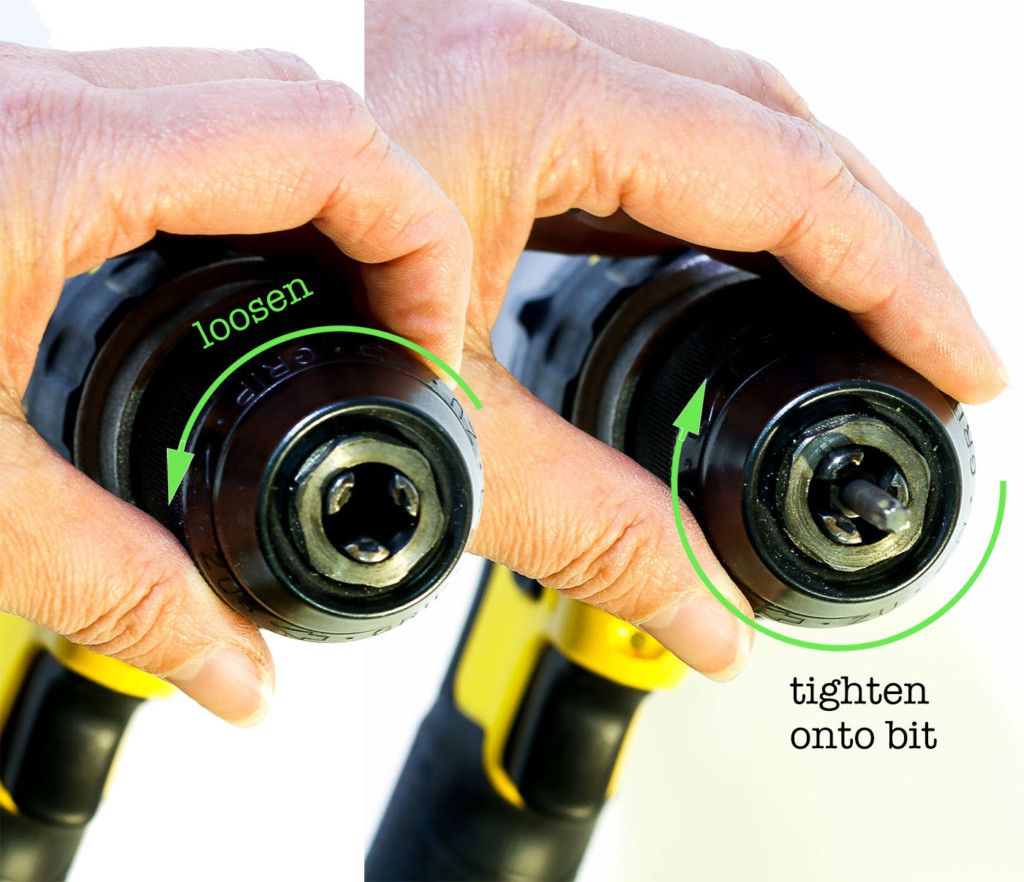
How to Replace Bits on a Drill
Cordless drills have a keyless chuck. To change the bits, simply turn the chuck counter-clockwise to loosen. Insert the new bit and turn clockwise to tighten onto the new bit (making sure the bit is centered in the claws of the chuck.)
A keyed chuck is found on most corded drills. The key (black tool shown below) fits inside the hole on the side of the chuck and turns the gears on the chuck to loosen or tighten it.

Costs for a Cordless Drill:

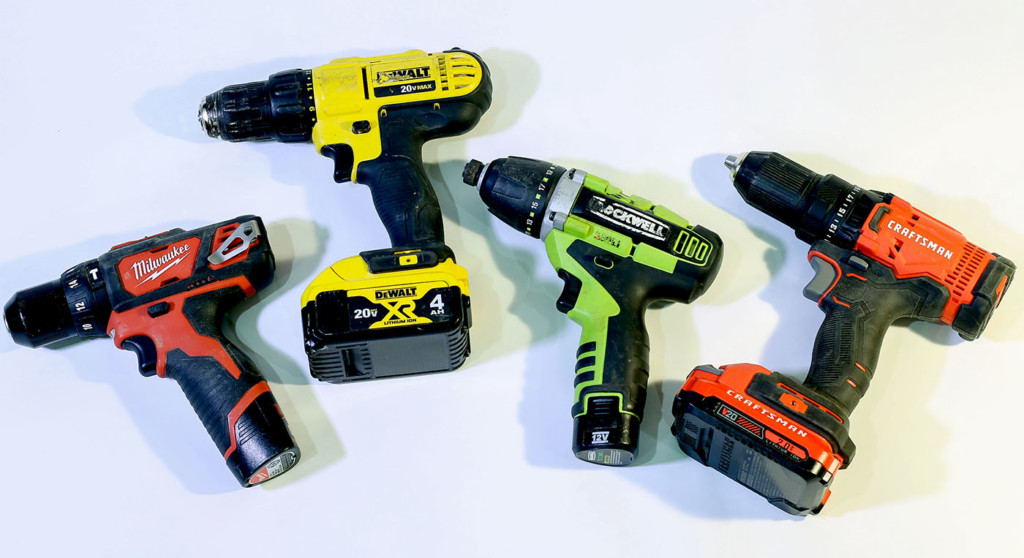
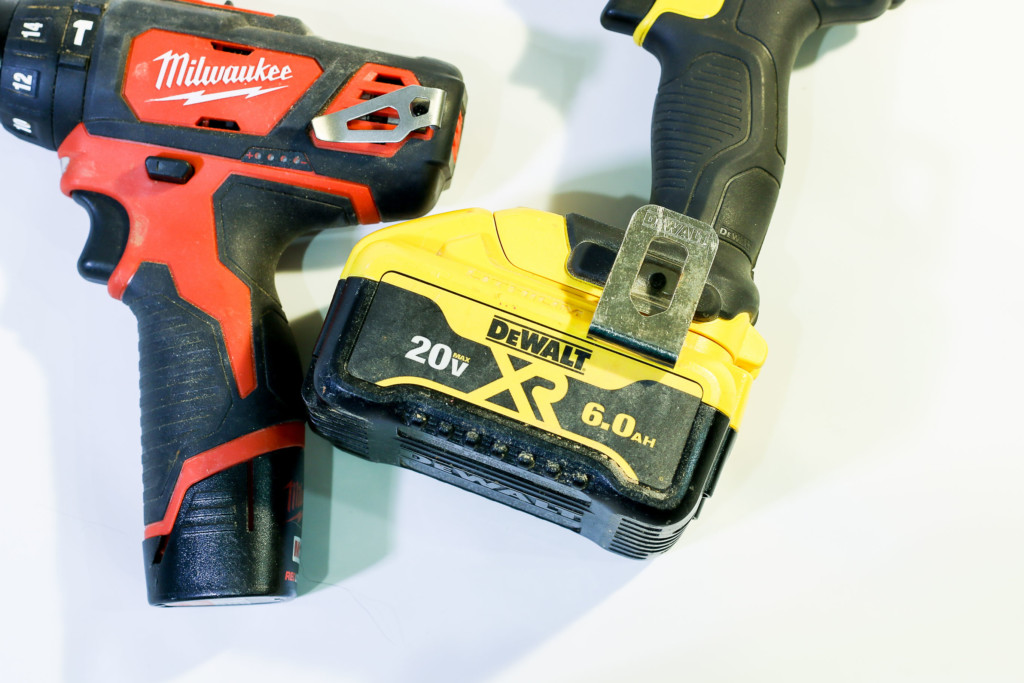
Brand and features factor into the price of a cordless drill, but typically a DIYer can expect to spend $50 – $150 on a drill. My first drill was a Ryobi 12 volt Lithium Ion cordless drill, but I quickly upgraded to a more powerful Milwaukee Drill/Driver. Now I’ve switched over to a cordless DeWalt drill/driver set because most of my cordless tools are DeWalt cordless tools. Keeping all your cordless tools in one family will save you money, space, and the hassle of having too many different batteries in your toolbox. (Side note: DeWalt batteries are cross-compatible with most of their 20v tools? The exception is the 12v tools that will only run on the 12-volt batteries. And the 60V and 120V tools will need the stronger FlexVolt batteries.)
How Many Volts Do I Need?
You may be curious about what the volts mean on the drill you’re considering. In short, the volts equal the power of the drill. The higher the voltage, the stronger the drill. In all honesty, I would recommend purchasing an 18-volt drill if you plan to use it for multiple DIY projects. In the beginning, you might try a 12-volt drill, but as your projects grow you’ll find the 12 volts don’t have the power needed to muscle through hardwoods and other tough materials. The DeWalt drill I use now is a 20 volt, but I needed the power to muscle through old-growth lumber in the renovation I was working on.
Batteries: Ni-Cad vs. Lithium-Ion
When I first wrote this article, lithium-ion battery drills were just coming onto the market. Lithium-ion is the latest battery technology. Lithium-ion batteries will last through many more recharges than a Ni-Cad battery. And, they don’t lose charging capacity over time. The lithium-ion batteries also maintain power as the battery runs low. As the battery loses charge, it will stop when the battery runs out.
Luckily over the years, lithium has become more the norm in the cordless department. If you are in the market for a new drill, be sure to make sure you are purchasing a lithium-ion battery-powered drill. Beware of used or inexpensive Ni-Cad battery drills. You will save money on one now but will need to replace the battery (or worse not be able to purchase new batteries) for it before long.
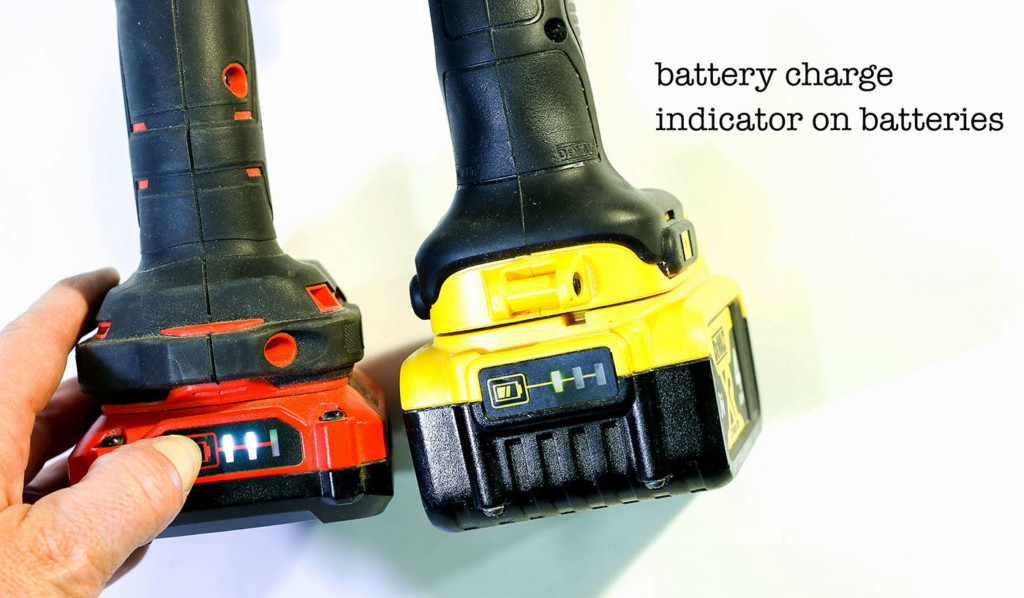
Speaking of battery life, I recommend choosing a cordless battery that has a charge indicator on it. There’s nothing worse than grabbing a battery you thought was fully charged only to realize it’s not.
Feel the Weight of the Drill:
Now that you are honing on in the features you want in a drill, let’s talk about weight and balance. I highly recommend trying a drill before you buy it. Go to the hardware store and ask to hold the drill with its battery inserted. Some drills (especially the higher voltage drills) will be significantly heavier than a smaller 12-volt battery drill and may cause wrist fatigue if you aren’t used to the heft. You also want to feel the balance of the drill in your hand. A nicely balanced drill can easily be held with one finger wrapped around the trigger and the tool resting balanced on your hand. A front or back heavy drill can put extra strain on your wrist.
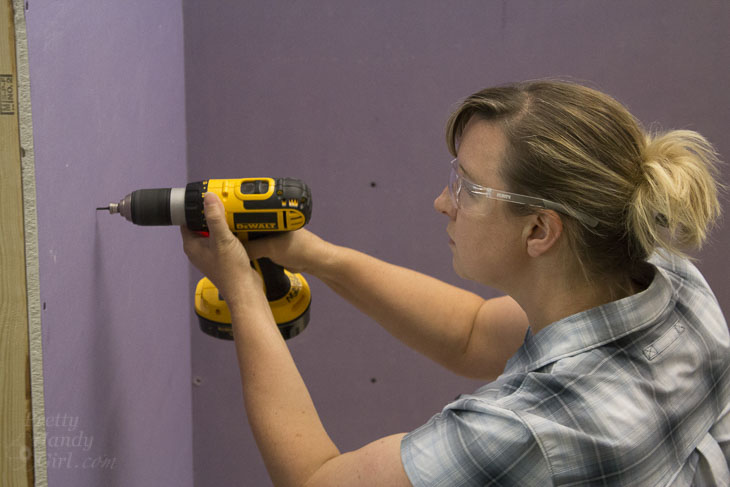
How to Use a Cordless Drill:
Time to start using a cordless drill! This is a very user-friendly tool as long as you know a few simple safety tips.
Safety Tips:
Never wear loose clothing or gloves when using a drill. Keep long hair tied back. You don’t want anything to catch and wind up into the drill. Always keep hands away from the drill bit, screws, or fasteners. Never put your hand behind the piece you are drilling into. Always wear safety glasses when using a drill. (Ear protection is a good idea when using the hammer drill function.)
To Drive Screws:
Set the drill on a low torque setting. Hold the screw perpendicular into the wood (hold it up at the top against the smooth portion of the screw if there is one.) Slowly squeeze the trigger to rotate the screw clockwise far enough into the material for the screw to start to grab. Remove your hand, keep pressure against the drill as you depress the trigger again and drive the screw into the wood. Stop when the screw is flush with the material (or slightly below the material).
Troubleshooting Screw Driving Issues:
If the bit is spinning and not gripping the screw, try one of these solutions:
- Apply more pressure against the back of the drill
- See if your bit or the screw is stripped
- Try lowering the torque
- Check the bit size, if it’s too small or large it won’t grip the head properly.
- DO NOT continue to let the drill bit spin on top of the screw. This will strip the head.
If your drill makes a loud sound and stops turning the screw, try changing to a higher torque or speed setting. This usually means, you need more torque for the task.
To Drill Holes:
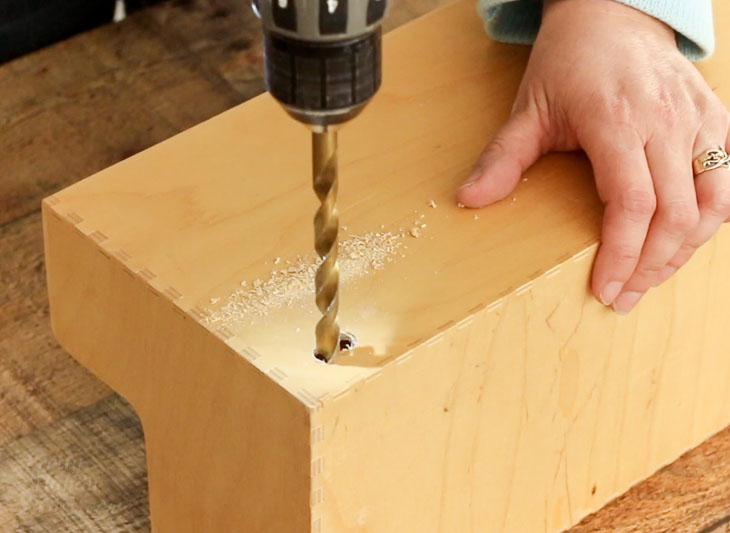
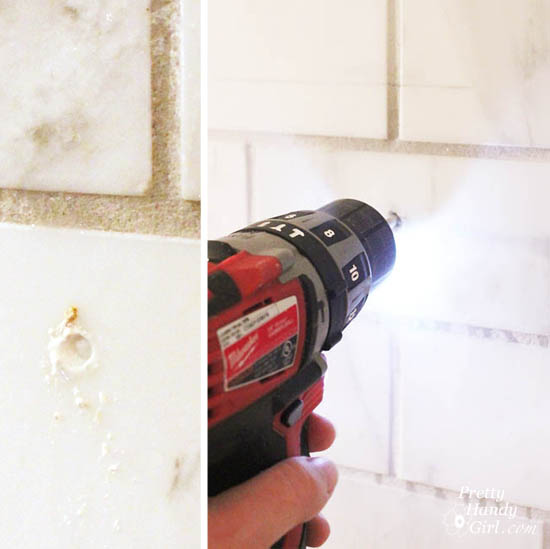
Measure and select the appropriate drill bit for the hole size you need to drill (and for the material you are drilling into.) Insert the drill bit into the chuck and tighten, making sure the bit is centered in the chuck. Set the drill onto the drilling setting. When drilling into wood, gently depress the bit into the wood to create an indentation to keep the bit from sliding. If you are drilling a hole into metal or other slick surfaces, try using a piece of painter’s tape on top of the material to keep the bit from sliding.
When drilling holes into masonry, ceramic, porcelain, and other hard surfaces, be sure to cool the bit occasionally with water.
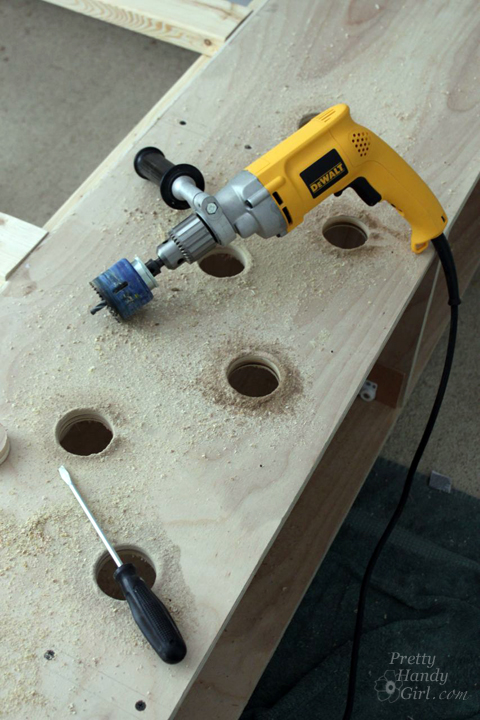
To drill large holes, use a hole saw or a Forstner bit. It helps to use a corded drill with more power for drilling large holes.
Trick for Drilling Holes to a Certain Depth:
Use a piece of painter’s tape wrapped around the drill bit to the depth you want to drill to. Stop when the painter’s tape is even with your surface.

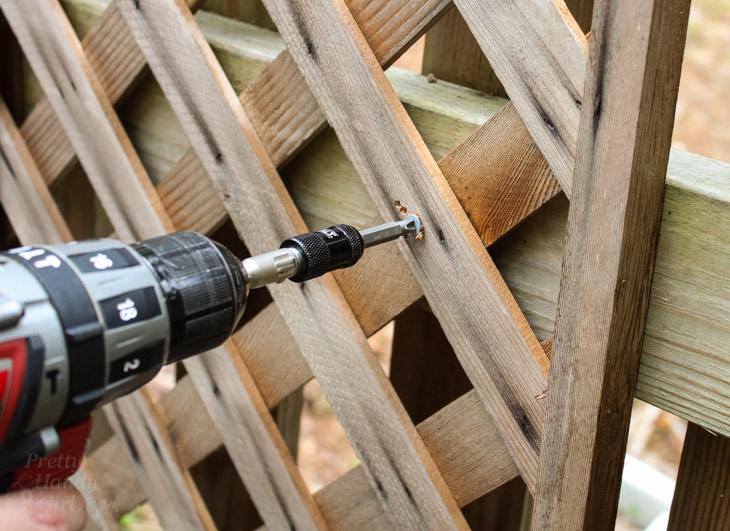
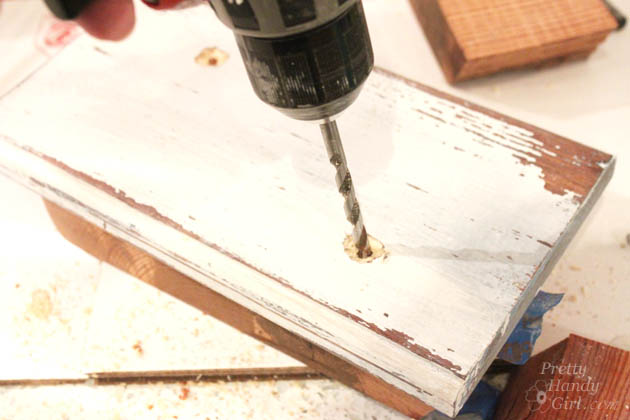
Trick for Drilling into Lumber at an Angle:
When drilling into wood at an angle, start by drilling into the wood perpendicular to the surface about one-eighth to 0ne-quarter of an inch. Then change to the angled direction. This will keep your bit from sliding on the surface of the lumber.
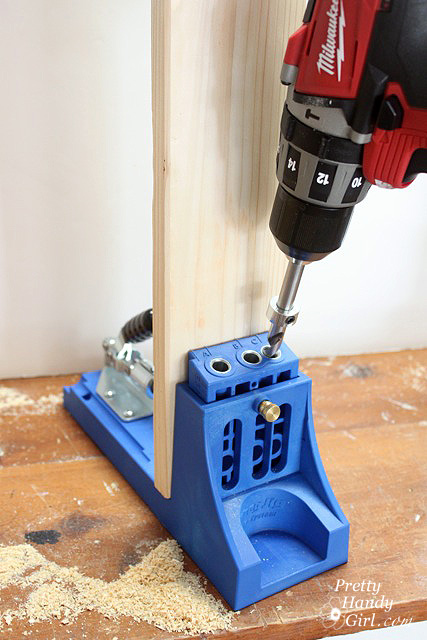
Alternatively, you can use a jig for drilling at an angle (especially helpful for drilling pocket holes.)
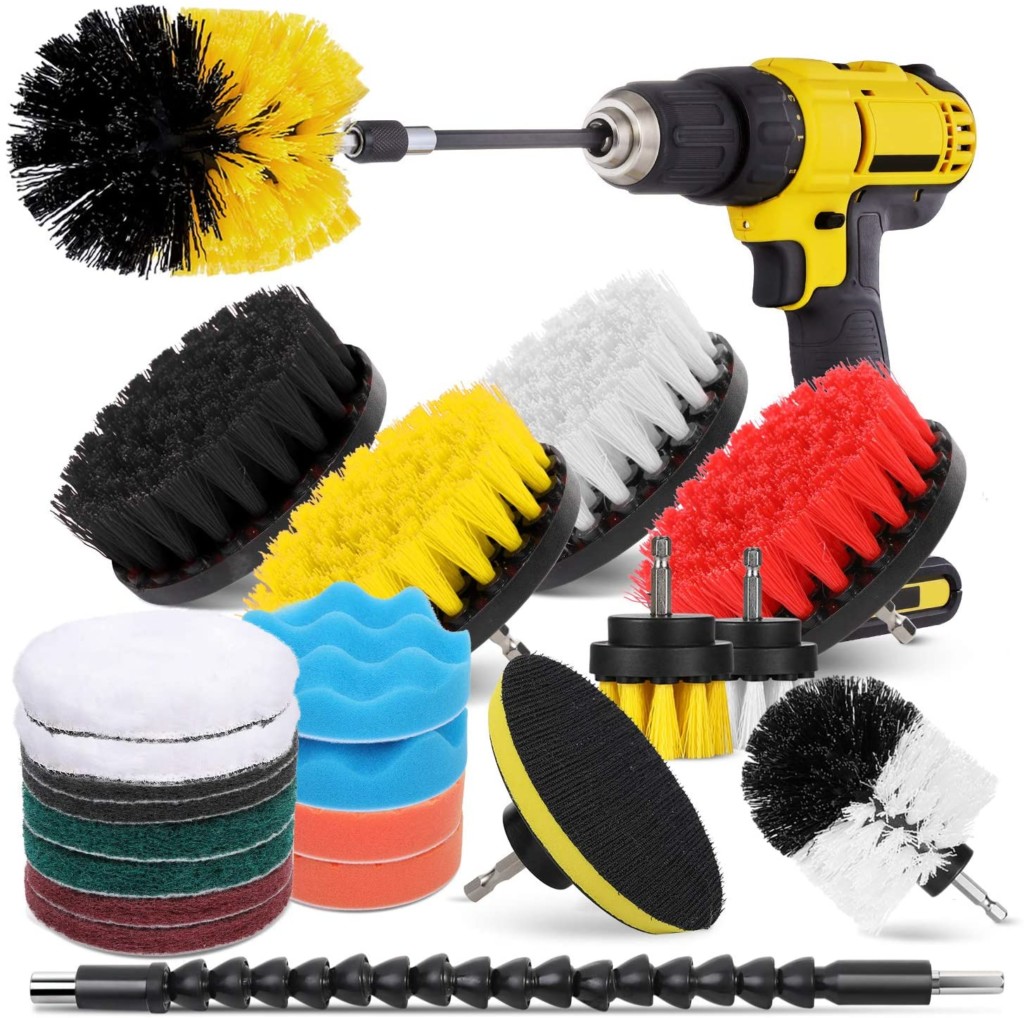
Various Attachments for Drills:
Did you know you can also clean with your drill? Yup! Check out this attachment set for cleaning a variety of things around your house and your automobile!
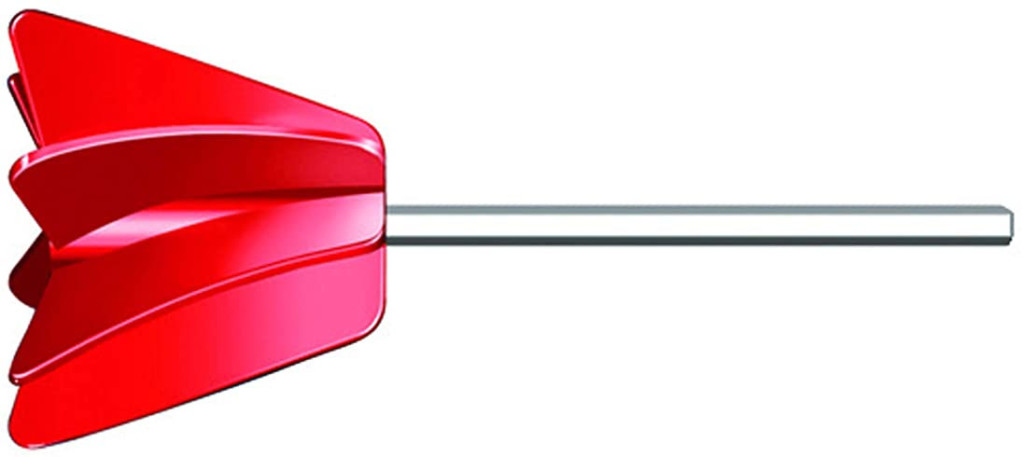
Besides the cleaning and buffing, you can also use a drill to mix paint! A paint mixer attachment can be used to mix up an old can of paint or mix new colors.
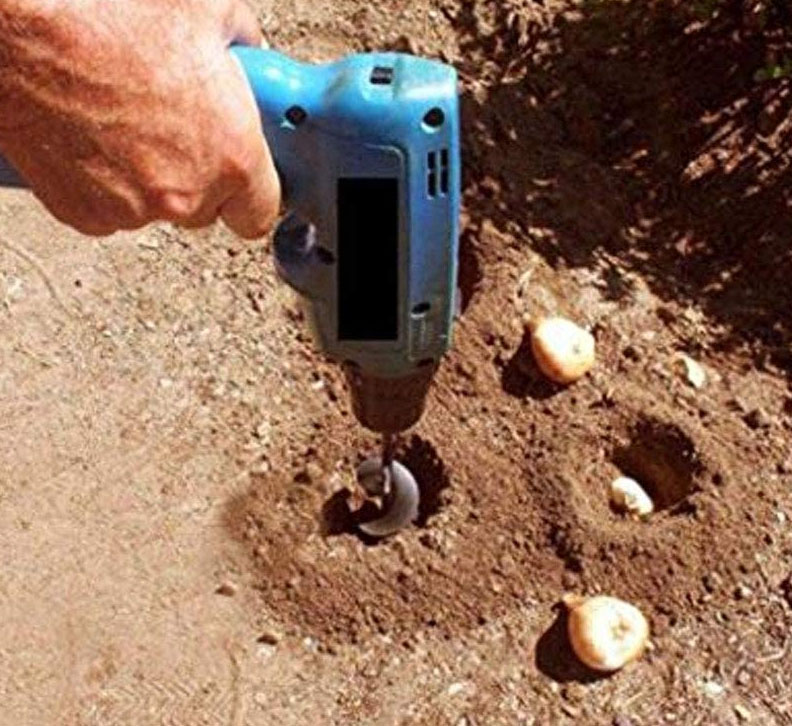
There is also an attachment for your drill that will dig holes in the ground when planting bulbs. I think this is next on my wishlist.
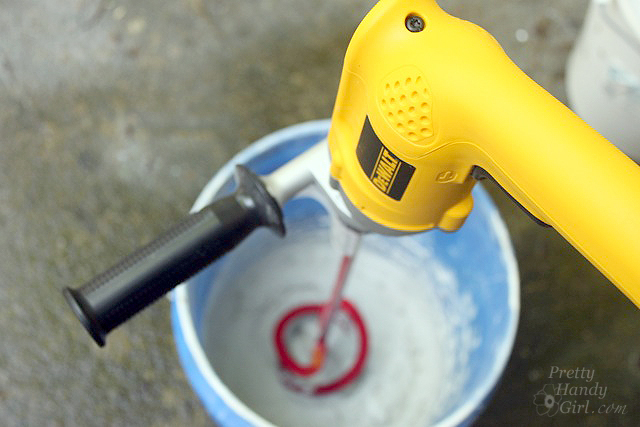
Can you Mix Mortar or Concrete with a Cordless Drill?
You may be able to mix mortar or concrete with a powerful cordless mixing drill, but chances are your standard cordless drill won’t stand up to the challenge. It either won’t have the power to mix, or you’ll burn out the motor. It’s best to use a corded drill to mix heavy mixes.
Video Tutorial on How to Use a Cordless Drill:
I hope the video tutorial helped you learn how to use a cordless drill. It’s definitely one of the most used tools in my toolbox.

Great tutorial. I didn’t know much about a drill. I am putting up a glass shelf and it called for a 5/16 drill bit. I didn’t know what the numbers meant on the collar so I decided to look at your tutorial. My husband passed 5 months ago and he had a Ryobi 18v battery operated drill.
Thanks for making a gal in her 60’s comfortable using a drill.
.
Sharon, first I’m so sorry to hear about your husband. You are in my thoughts. Second, your commend made my day. I’m so glad you found this tutorial and the courage to pick up your husband’s drill!
Great tutorial! I like it. Thank you so much for this video. Love your tutorials! I’ve been meaning to pick up a cordless drill.
We have the same drill! And now I know what all the buttons do! Xx
So glad you found my tutorial. I have since upgraded to a more powerful drill, but still like this little guy. 😉
Hi! Thank you so much for this tutorial! It was so easy to understand and follow. I was having a hard time with a project earlier today. After I read your blog and watched your video, I was able to get the project done within MINUTES!
Thank you so much for this video! Great reference point.
Below are really the 5 essential factors you should think about in choosing:
Very first thing is 1st, just how much are really you interested in to pay out for the vacation abroad?
If you find yourself planning a holiday, the very most important considerations is most likely the budget.
This doorway to door service is really convenient and also dependable, most
especially for anyone which have concerns and/or do not
talk any sort of Spanish. The Marina Bay Sands Convention Centre provides public spaces for rent, and
is appropriate for trade shows, banquet features, and additionally actually training events and seminars.
My only question is.. With all of the available attachments available, do they come with or fit in the case. I would lose them.
Dawn, no they won’t. It’s best to have a small kit for your bits.
Heya i’m for the first time here. I came across this board and I find
It really useful & it helped me out much. I hope to give something back and
help others like you helped me.
Does your site have a contact page? I’m having problems locating it but, I’d like
to shoot you an email. I’ve got some recommendations for your blog you might be interested in hearing. Either way, great site and I look forward to seeing it grow over time.
I remember when your friend’s Mom, sent her daughter’s first lost tooth from Thailand to us in the mail during a snowy winter. She wasn’t quite sure what to do, not knowing our traditions. Unfortunately the light weight airline letter must have dropped out of our mailbox, and we did not find it until the snow thawed. Of course the Tooth fairy sent her a long apology letter with her money.
Love your tutorials! Keep ’em coming! I do have my own little cordless Black & Decker drill, but it doesn’t have a removable battery. We bought a Ryobi set of tools a couple of years ago and it had a drill, circular saw and reciprocating saw – need a tutorial on that 😉
For most jobs around here, the cordless tools really work well and my husband now saves the corded tools for the really heavy duty jobs.
Helen, thanks for your comment. Sadly I don’t own a reciprocating saw yet! But, someday 😉
I WOULD LOVE TO WIN ONE OF THESE. As of now I don’t own one. I have to ask my husband to drill things for me. Love the tutorial. Thanks.
Angie, the giveaway is for a magnetic hammer. I hope you win ;-).
Great tutorial; need a second battery pack for my drill.
Second chance:
Blue slip-joint pliers!
I’ve been meaning to pick up a cordless drill. Your post and tutorial reminded me how handy it can be. Thanks!
Great tutorial! Shared it this morning at A Pinch of Joy.
Thanks for sharing my tutorial Charlene. Gotta empower as many people as possible, right?!
I recently used a Craftsman model with great torque and was sold. It made putting up window blind hardware a cinch. I have a client with 15 windows. It took me less than a half an hour to get all the hardware screwed on to the windows with this drill. It was like magic!!! I did not need to use the back up battery at all, but was good to know I had it. I will probably never use my corded drill again. Great tute – Brittany.
Thanks for your comment Diane!
Getting better every week, Brit! Saw a little distraction part-way through, someone making faces off camera? LOL.
We just bought our first home, inspection on Monday (SO EXCITED!!!) and I’m making a list of the tools I need in my new workshop in the partially finished basement. I’ll finally have the studio space I need for all my projects, and I’ll be leaning heavily on your tutorials in the coming months. Thanks so much for keeping this going. You’re a real asset to me, and to the DIY work that I’ve done both here in my rental, and the soon-to-be in our first home.
LOL! That was my son, I was just hoping he wouldn’t ruin my take.
2nd chance: beginner’s drywall kit
Thanks, Brittany! Now I know what I want for Christmas! Really good tutorial.
Definitely a cordless drill would make a great Christmas gift! My first one was given to me by my father-in-law. Loved that drill!
Wow, I didn’t know you could remove the drill bit by hand, I have always run by depressing the counterclockwise button. I yanked my wrist hard that way and it still hurts after a year.
Great tut. Thanks.
2nd chance … blue slip joint pliers
Nice tutorial!
For 2nd chance …. they have a “blue Mosaic Tiling Kit”. Thanks!
Great tutorial! Thanks for the chance to win!
We’ve got a couple of cordless drills around here. An old one that is HEAVY, but handy for bigger projects and a smaller, lighter one that is quick and easy to use.
One thing that is handy to have is a countersink bit for those times you don’t want screw heads to show.
My only problem with a cordless drill is training my husband to put the batteries back on the charger when he’s done using them! Every time I go to use it, all the batteries are dead! Any tips/suggestions for solving this problem???
Ha, maybe hide the drill AND the batteries from him ;-).
My advice would be to forget buying an 18V cordless drill and buy a nice corded one instead. A corded drill will always have more power, never goes dead in the middle of a project and will be lighter (no battery). Yes, it has a cord, but it is also a great drill to have in your toolbox. you might be surprised at how often you choose to use it.
Thanks for your comment. My sister really likes her corded drill and you are right it has lots of power. I just don’t like being tethered ;-D.