Time to Clean Your Dryer Ducts – Prevent Fires

Once the weather turns cold and the heat kicks on, your home starts to get dry and static electricity arrives once again. This minor nuisance that causes siblings to shock each other for fun can actually be dangerous if it ignites lint that has built up in or around your dryer.
Why you should clean out your dryer ductwork:
According to The Consumer Product Safety Commission, ( CPSC ), annually there are tens of thousands of Dryer Fires leading to many injuries or death, due to dryer exhaust duct fires. You should clean your dryer hose and around it once a year, and inspect the vent and hose for any blockages at least every 6 months.
You could pay a professional to clean your dryer ductwork, but the price could be anywhere from $65.00 to $150.00! Ummm — no thanks — I’ll keep my money and do this myself. It only takes about 15 – 20 minutes to do and it is easy! As long as your ductwork is fairly accessible, you can handle this!
If your dryer exhaust hose tube is longer than 10′ this may be a bit more difficult. And if it is longer than 10′, did you know that your dryer may be working extra hard to dry your clothes? Worse yet is if you have a long tube that goes up into the attic (or the eaves) and then out the roof. The warm moist air from the dryer enters the cold attic, and condensation forms in the exhaust tube. Do you know where this little story is going? Well, at first your dryer can’t dry as quickly because the tube is blocked by water. Eventually it will fill with enough water to cause the exhaust tube to split and guess where all that water goes? Through your ceiling, that is where! Trust me on this one, it happened to us in our old house.
So, why don’t you sit back down and let me give you a little tutorial on cleaning out your dryer exhaust ductwork.
Instructions:
Start by unplugging your dryer and turn off the gas if you have a gas dryer.
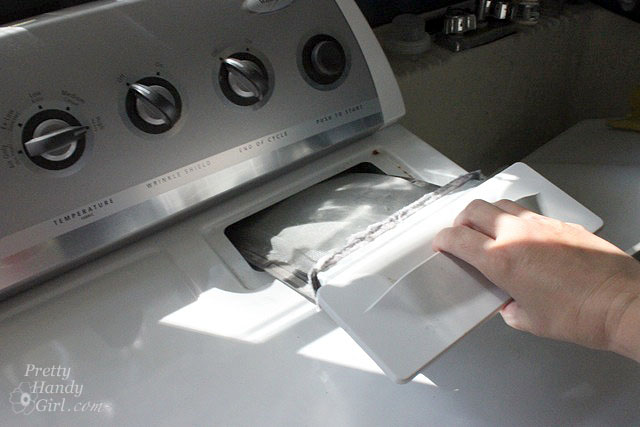
Remove your lint trap and remove any lint from the screen.
Using a brush (designed for cleaning out the coils under your fridge) bend the brush and run it inside the lint trap. Then follow up by using a shop vac or vacuum to suck up any lint and dirt loosened by the brush.

Pull the dryer away from the wall and disconnect the exhaust duct tube from the wall and the dryer. There are normally two kinds of hose clamps holding the tube to the dryer and wall port. The first is a ring with two prongs. Simply squeeze the prongs toward one another to loosen the clamp.

The second type of hose clamp requires a screwdriver to loosen the bolt attached to the clamp.

Slide the exhaust tube off the dryer and the port (hole in the wall.)
Use your vacuum to clean out both the dryer and wall ports.

Then use the vacuum to clean out the dryer exhaust tube.

If you have an older style vinyl tube, it is important that you replace it with a metal one. The vinyl and foil ones are fire hazards. Also, if you can’t get your tube clean, go ahead and replace it.
If your tube is long or difficult to clean out, you may want to purchase a hose brush like this one:
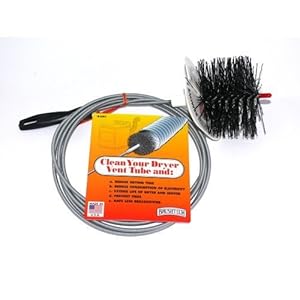 Amazon.com: Brushtech B68C 10-Feet Long Dryer Vent Duct Cleaning Brush: Home & Garden. (affiliate link)
While you have the dryer pulled out, vacuum off the back of the dryer, the washer, and the wall behind both. Eliminate as much lint as possible. A clean laundry room is safer than a lint covered one.

Re-attach the dryer tube to the wall and the dryer.

Gently push the dryer back towards the wall being careful not to crush the tube.

Locate your exterior dryer vent.

If you can reach the exterior vent, go ahead and clean it out also. Make sure the vent closes properly when the dryer isn’t running.Otherwise you may get birds, rodents or bugs in your vent. I don’t think I need to tell you that they won’t be helping your dryer’s efficiency!

And that is it?! That was easy wasn’t it. Be sure to keep your home and family safe by cleaning your dryer exhaust ductwork yearly.
Update: I wanted to let y’all know that the flex foil pipe shown in this tutorial is FLAMMABLE! Luckily I found this out before we had a fire.

Read about installing semi-rigid non-combustible duct in this easy tutorial!

You might also like:
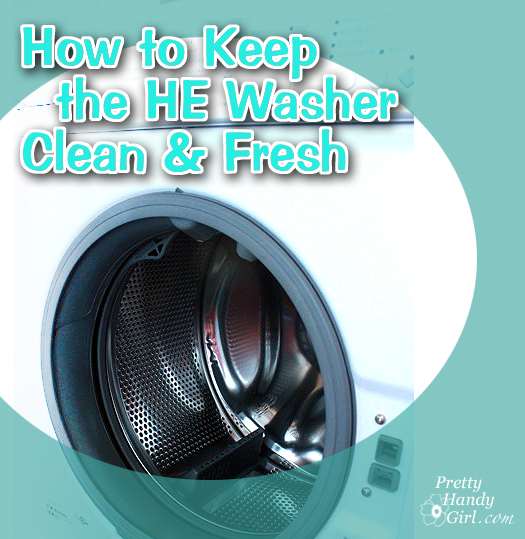
Learn how to keep your HE Washer Clean like the day it was delivered!

DIY Laundry Detergent & Miracle Stain Remover


I’m missing that plastic grate that you removed from the outside. Which model is that I need to replace that grate. It is identical to the one I have.
Allen, I’m not sure of the brand but I bought it at Lowe’s.
Thank you for a great advice. How often does one need to do this?
Vy, it’s a good idea to do it every six months if you run several loads a week. At the bare minimum, do it in the fall before dry air and static is more prominent.
Thanks for your great info! We are cleaning our line now from behind the dryer to the vent in the roof soffit. The lint is coming out very wet. The drill is charging up before we give it another go.
Why the wetness though? Condensation from the long haul up the wall, across the attic & out the roof vent? Is there a fix for stopping the wetness? Thanks for your thoughts!
Oh no. Cathy, it sounds like your exhaust line is too long. We had a similar situation in our old house. The cool air in the attic was causing the warm moist air to collect in the hose. One day the weight of the water brought the hose down and it spilled through the ceiling. After that we re-routed our dryer out the overhang of the front of the house. Not only did it solve the moisture problem, it also improved the speed of the drying time drastically!
These are some very useful tips! My ex was taking care of the ducts and other parts and appliances that needed cleaning of some other care, and I’ve never did this before by myself. Your tips and advises seem to work perfectly for me and I’m cleaning my dryer’s ducts right tomorrow. Thanks for sharing all this nice info!
There are also some picturesque temples and hillsides lined with the crumbling
weekend homes of French colonials. They were quiet, an important quality with
lions and elephants roaming around, and had strong
eyesight and an excellent nose for hunting. Vietnam has quickly become one of the
most popular and sought-after destinations
for travels across the world, so it’s no wonder that – Vietnam Tourshave become so desirable.
Very useful information you shed with us… Thank You!!
Thanks for your comment.
My dryer’s lint trap is in the front, below the door when it is open. Do you have instructions for cleaning that – with pictures?
Judith, I’m sorry I don’t. Try doing a google search. There has to be a tutorial somewhere 😉
I don’t have any pictures, but it’s pretty much exactly as shown above. The only real differences are that (a) before using the brush, you should use the vacuum hose to pull lint off the grate toward the inside of the dryer, and (b) don’t bend the brush. (The first prevents as much of that lint as possible from falling down the vent, where it’s harder to get out; the second because there isn’t a curve to get around.)
An extra hint: If you haven’t done this in a while and there’s a lot of lint built up down at the bottom, you can also slide a yardstick down in there and move it side-to-side to loosen things up a little. The yardstick can even be used to substitute for the brush if you can’t find or can’t afford one, though it’s noticeably less effective.
I almost forgot — if the spot on the back where the tube hooks on is in the middle, try using the rigid extender for the vacuum hose to get in closer to the front, which will get even more lint out.
Thanks for replying to Judith with these tips! (It takes a village to get those dryers clean. 😉 )
PHG,
I’m so appreciative of all the info here! I feel inspired to get my dryer clean! We have a lot of lint outside on the ground by the dryer vent opening (is thst a bad sign?)
Also, totally off topic but can I ask you what color paint that blue us in your laundry room? 🙂
Thanks!
It’s not a “bad” sign, but it is a good idea to try to vacuum or brush the lint off the outside 1-2 times a year. As for color, it is Tropical Surf by Glidden Here’s a post I wrote with 25 dreamy blue colors in case you want more ideas: https://prettyhandygirl.com/25-dreamy-blue-paint-color-choices/
Sealing those holes around water pipes also prevents loss of heat/cooling. It’s amazing how much heat or AC can be lost through small holes.
Brian,
i have an electric dryer and i recently bought a close elbow and attached a foil exhaust to it , but my new dryer has a two inch duct coming out of the back of it and when i attach the elbow can i use the foil TAPE behind the dryer or is this too hot for that foil tape.
thank you ,
and thanks to Brittany for this site
tina
Tina, when you say Foil Tape, I hope you are talking about true Duct Tape. If so, yes you can use that. The foil duct work that was shown in this post is actually vinyl painted to look like it is metal. That’s what you want to steer clear of. I created a new tutorial where I installed semi-rigid duct work instead: https://prettyhandygirl.com/installing-semi-rigid-dryer-hose-to-prevent-fire-hazard/
Dear Pretty Handy Girl, I am a professional dryer exhaust vent cleaning specialist. I would like to clarify few things on your page. First off I think it is great that you encourage your fans to clean the flex duct and exterior themselves. As a professional I would like to still recommend do it your self twice a year and have the duct work inspected and professionally cleaned at least every other year. Also I would like to address one issue I have noticed on your forum. You and the one gentle man are correct some of the foil looking flex ducts are a fire hazard. more particularly the vinyl ones. I would like to point out that not all of them are. I also would like to point out that semi rigid metal duct is an option, however if installed improperly (99.9% of the time it is) it can cause more damage than it is worth. Most state code including international code recommend the use of transition duct that is listed and labeled in accordance with UL 2158a, which can be found in your local hard ware store. this is a foil style duct which is flame resistant. as a side note the semi rigid duct does not get an air tight seal and can cause exhaust to enter into the home. this then causes water damage to the wall increased lint in the home which also can blow back into the dryer and present a fire hazard also. I encourage you and your fans to please research this further and decide on your own which you feel is best for you. I recommend to all of my customers a specific brand of foil duct that is listed with UL as 2158a and does not ignite like shown in the video on your site. If you do still feel semi rigid duct is best for you I suggest that you take a heat resistant foil tape and work this tightly around the area where your transition duct meets your internal hard duct to increase the air tight seal.
Brian, thank you for your advice. I think I’ll look into that heat resistant foil tape for our own dryer.
I was very fortunate to have a Mom and Dad who believed everyone should be able to take complete care of themselves. So he taught my Sister and I how to build, mix cement, tamp and level it and do repair and do maintenance jobs around the house. He also taught my brothers how to cook, bake, do laundry, etc..so they are all capable of looking after themselves also. I didn’t appreciate their intelligence then…but I sure do now that I have my own house, single…and I’m remodelling my home with my power saws, etc. and know how to use all this equipment. I’m so thankful to my Dad and Mom for being way ahead of their time! I raised my two daughters the same and they too are very thankful!!
Sounds like your parents are wonderful and smart! And glad you are passing on the tradition.
Where did you get the 360 brush (the first one pictured used for cleaning fridge coils)?? I have been looking for one for a while.
Thanks,
Marcia
Lowe’s in the same area as the water hoses for washer. So sorry this reply is so delayed, I didn’t see your comment until now.
when almost done hook up a wetvac or leaf blower to the vent hose to blow anything loose through to outside. works great, you won’t believe what you get after all these instruction are followed
In addition to using our electric leaf blower to blow the lint up and out, you should also WASH your lint trap with soap and water on a scrub brush at least once a month, especially if you use any type of fabric softener. The fabric softener clings to the mesh of the lint trap preventing the air from circulating properly.
Shari, that’s good advice. Luckily I don’t use dryer sheets or fabric softener.
I know this is late but I noticed it appears you’re hooking the dryer flex hose right to the back of the dryer itself.. you’d likely get better airflow hooking a 90 degree elbow to the back of the dryer and then attaching the hose.. also using a better more rigid hose like the ‘Whirlpool 4396033RP 5-Feet Simple Connect Dryer Vent’ available at Amazon provides for better airflow as well as less accumulation of ‘debris’ inside the duct.. you can still bend the hose as well where needed.. I tried it after having used the typical flex duct for years and this more rigid duct is much better and less restrictive inside the duct..
Great posting. I love when things that are discussed that are so often overlooked. It is indeed a fire hazard on top of interfering with the effectiveness of your dryer.
We had a fire in a dryer that was less than a year old! He told us the above but also that you NEED TO OPEN THE BACK AND VACUUM. I have told several people that their dryers need to be cleaned, but no one listens. This is an amazing hazard and should have warnings on all dryers.
Oh my goodness!So scary, thanks for sharing your experience and recommendation.
I can not tell you how important this is not only for safety but for the life of your dryer. I had a dryer heating element burn out from getting over heated. Cost me a bundle. It could have been prevented had I known this tip.
I would like to echo some of the things that were already said, but also add a few thoughts. One person commented above that cleaning your dryer venting should be left to the professionals. I agree that some people have no business even picking up a screwdriver. These people usually know who they are and should not try to clean their own dryer venting, but for most people dryer vent cleaning is a relatively safe project.
As said above your venting should use rigid or semi-rigid venting for maximum air flow and safety. Also the inside of the dryer is just as important to clean out as the venting. (You should do a post on this.) This requires taking the whole dryer apart. The Whirlpool dryer in the picture above is prone to get a lot of lint stuck in the chute where the lint screen is housed. Lint also starts to build up in the bottom of the dryer next to the igniter. (open flame and lint = not good) Be sure to unplug your dryer from the wall outlet before attempting any repairs. If you keep both the inside of your dryer and your venting clean of lint and debris your dryer will last longer and you will find yourself not needing to replace as many parts. 🙂
P.S. Great post and I like your pictures. 🙂
Thanks for your comment and the information. All good to know. I’m going to have to do a little research this weekend and take apart my dryer!
Blowing or sucking air through those flimsy, flexible aluminum dryer vents with a shop vac will more often than not punch a hole through it. These dryer vents are just as prone to dryer fires and the vinyl ones. It just takes a little more heat. Most states don’t allow them as the violate their building codes. Use hard aluminum or galvanized pipes (they are pretty cheep) to build your dryer vent. Limit the number of bends to no more than 3 ninety degree turns. Insulate any vent that goes through an attic or crawl space. Long runs of dryer vent are not advised due to condensation problems. The hard dryer vents can be custom made for a little more than a professional cleaning, and they contain any fire that may occur. The biggest culprit contributing to dryer fires is dryer sheets. The leave a plastic film on the surface of the vent every time one is used. Lint gets caught in this film and creates the greatest chance of a fire. Most of the build up occurs in the first foot of the vent, especially in the elbow near the dryer. Check that regularly. One more thing, never use “duct tape” for any kind of ventilation. It degrades with time causing problems. Always us aluminum vent tape to connect or cover holes in ventilation of any kind. It never degrades.
J, thanks for taking the time to comment. As you stated, the flexible hose shown in the post is hazardous, which is why at the end of the post I mentioned that and show a link to a new post on changing out the dryer hose. Thanks for keeping us safe ;-). Oh, and excellent point on not using Duct tape!
I apologize if this has already been mentioned but use your shop-vac not only to vacuum it out but to also blow it out! We take off the cover of the vent outside and then after vacuuming what we can we blow and that shoots a lot of stuff out of the vent. Then we vacuum from the outside too. We have a serious problem with the amount of lint we are accumulating and are thinking about replacing the lint trap screen to see if that helps. (though it is only 5years old)
I live in an apartment and have one of those combo/compact washer/dryer units. Any tips?
Gina, does the dryer have a duct running out the back? If not, you might need to do a little more research. I know when we were in Europe, there were lots of those. One I learned you had to empty a water reservoir when it filled.
Hi. I came across your post today while searching for ways to clear out my dryer vent. I recently discovered I have something living in the tubing, and at first thought it was lizards. I saw what I deduced to be lizard poop near the area in my apartment. My dog was always sniffing around the dryer area inside, and the vent on the outside, yet I never saw anything except the poo. Last week I told maintenance about it, but as of today, still nothing was done. I decided to take it into my own hands and see if I could get it all straightened out. I have never hooked up or unhooked a dryer before. Someone has always done it for me.
The other day I saw a sprig of leaves sticking out of the vent outside. Whatever it was was not lizards, and had pulled it into the vent to build up their nest. By this time I was thinking mice or something similar.
Today, I pulled out the dryer, and the tubing came off on its own when I pulled the dryer out too far. I then saw what looked like fur sticking out the end of the tube. The it moved, and I freaked out. I got a pillowcase around the end, and got another pillowcase and put it around the other end when I got it unhooked from the wall. I put on gloves (just in case whatever it was tried to bite me), twisted up the ends of the pillowcases around the ends of the tube, and took it outside to the grass, behind some garages. When I dumped it out onto the ground, a young possum came out, and ran off. Needless to day, I was a bit shocked when I saw something that big come out of my dryer tubing, since I was expecting maybe mice or something way smaller. This little guy had brought leaves into the tube, and also into the hole leading into my dryer. I am so glad I went with my instinct and took it all apart, because I really do not need a fire in my apartment. I also didn’t want to hurt whatever was in the tube by running the dryer. I got leaves out of the elbow from the dryer, the hole in the dryer, and the tube itself. Because of the possum, there was no lint buildup in there. So I guess that was one good thing! LOL
Sorry for being so long-winded. I just wanted to share my adventure with someone. But now that I know how to do it myself, I will try to remember to check it more often for lint buildup. I do know about the waxy buildup on the screen lint trap, so I do try to keep that clean. I keep an old toothbrush and after drying a load, I pull of the lint, then scrape the toothbrush over the edges and the screen to get the little lint pieces off.
Thank you for your helpful tips, and all the great comments on here, offering further advice and tips. I’m glad I found your site today. Have a great holiday weekend!
Wow! What a great story with a happy ending. My goodness, a possum! LOL. And so funny that it brushed the lint out for you ;-D. Ask mainenance to put a new vent exhaust on the outside with a cage.
I always clean the lint on the mesh after every dryer load. My husband says that is very important and usually sufficient.
Though, I might have to call the apartment’s maintenance folks to clean dryer ducts; don’t want to take the risk of causing fires!
I appreciate that you’re aware of dryer fires and that do it yourself is an admirable quality to have. However, there are 3 issues that need to be addressed here : 1) what if the homeowner has a gas dryer and 2) the type of dryer vent that you have in the picture is a fire hazard ( it’s clearly stated on the warning label at the back of the dryer … DO NOT USE PLASTIC , DO NOT USE FOIL …. FAILURE TO FOLLOW THESE INSTRUCTIONS CAN RESULT IN FIRE OR DEATH.
and #3) Dryer fires most often occur INSIDE THE DRYER where lint accumulates on the heater and then spreads to the rest of the venting.
Getting back to what if the homeowner has a gas dryer … well, I think that’s quite obvious really, you’re playing with danger here – carbon monoxide is definitely a huge concern.
Pay the money and get a professional dryer fire prevention company to do the work – and make sure that if you have a gas dryer that a qualified licensed gas technician is working on your unit. Saving your home , your life and your family’s life is really much more important that a bit of money for safety and piece of mind.
Thanks for promoting the awareness – but remember- most people would not be able and should not attempt to service their dryer vents especially if it’s a roof vent – could be very dangerous – just not worth it.
Joe, excellent points, thanks for taking the time to share with my audience!
This a perfect DIY post. Great to do at the change of each season or more often if you wash a dozen loads of laundry each week. 🙂
great way to describe with the help of pictures. It will definitely help the visitors.
YOu should add to your post to NEVER use the silver flex pipe you have but the more ridged aluminum flex pipe…what you have there is usually flammable in most cases.
Shawn, I actually just posted today about that flex pipe! I wish I had known earlier: https://prettyhandygirl.com/2013/02/installing-semi-rigid-dryer-hose-to-prevent-fire-hazard.html
Another good and tried and true method is the air compressor. I live in an old farmhouse where my washer and dryer sit in my bathroom. The vent work is through the floor between the machines and there is metal solid tubing that runs under the bathroom floor to the side of the house. I pull the washer and dryer out and vacuum behind them and vacuum off the wall sometimes up to 3 times a month. But, at the beginning of every season we have what I call an air compressor party. Air compressors are grand for getting into cracks and crevices and blowing all that extra lint out. HOWEVER, something major that wasnt mentioned here is the lint trap screen. Wax collects on that screen from fabric softner and dryer sheets. Take your lint trap out, clean it off and run it under water. If the water goes through you are safe. If it doesn’t you have wax build up and that can be a fire hazard. Clean your lint trap screen with warm soapy water and a brush. Check your screen by running it under water again.
Our dryer backs up against a wall and it is in a closet (in our kitchen) our dryer vent runs up into the cieling and then runs outside over our front door. Because of how it’s wedged against the wall it’s difficult (if not impossible) to get to. Do you have any advice on how to circumvent this issue? I can pull out the lint trap and vacuum/clean out in it, but as far as the tubing goes I don’t know how to clean it without being able to disconnect it from the dryer. We’ve lived in our house ten years and its never been cleaned so I can only imagine the horrors that exist in it, and I worry every time we run our dryer.
Also, do you have any tips on how to clean air ducts? Like for a central AC/Heat unit? Or do I have to get those professionally done?
Thanks!
Kristina,
In order to access your dryer hose you would have to pull your dryer out of the closet. But, based on what you are telling me, you may want to hire a professional who has long brushes to clean it. Usually companies that clean central heat and air ducts can do your dryer vents too.
The leading cause of lint build up is the rings in the flexible vent tubes. The uneven surface is a place for lint to collect. You should really uprgade to the smooth steel ductwork.
We just had our ducts changed from the foil bendy type to more rigid and smooth type metal because the professional who did it told us that the foil bendy type catches more lint and causes more fires. You can easily see this because it has more grooves. for lint to catch in. While it is code it is not ideal. We changed ours out for $110. This included labor.
Allison, good to know. I actually bought the smooth duct work, I just haven’t had the chance to replace ours. Maybe I need to make time for this, right?!
I know this is an older post but so cool to find. I’ll be checking mine tomorrow I don’t think the outside vent has a screen on it because the lint if not in check will be on the lawn YIKES! I’ll be updating that.
Another thing to do to get a better suction on the vent is once you have the hose in the vent in the wall, put duct tape around the pipe and opening to seal the host in there. This will give it much more suction. Once finished just take the tape off…
Excellent idea! Thanks for your tip.
I appreciate all your helpful posts. Thus one could actually save lives.
An electrician told me once that he would NEVER leave his house with the dryer running, something I used to do all the time, but he felt it was dangerous, even with clean vents ducts.
Keep up the good work.
Barbara, I agree with your Electrician. I don’t run mine while I’m away either! Okay, I lie, I’ve done it maybe a handful of times if I REALLY need to get the next load in. BUT, I NEVER leave my dog alone in the house with the dryer running because I’d never forgive myself if a fire started and he couldn’t get out ;-(
This is so funny…I just cleaned mine for the very first time night before last. It was a much bigger mess than I though it would be. Good thing I had already declared war on cleaning out and reorganizing my utility room..he!he! One of the buildings in our complex burnt down this year because of this issue. One person died. So please take heed!
Thanks so much for this post. I’ve known that this is important, but I’ve had no clue how to do it. This kind & the how to use a tool posts are my favorite. (I’m a single mom who has four brothers and a dad and an ex-husband — who while we were married insisted on doing all the “manly” stuff — and the mom who insisted I only learn stuff like sewing and home-ec … Pretty hopeless.) It’s been so nice to learn how to do a lot of these things for myself. Better still to have the confidence of knowing that I can do them, that they are easier than I expect them to be, and that I can teach my daughters some of these basic skills that they may or may not need to know, but may enjoy knowing how to do anyway.
Thanks again!!
Thank you so much for another detailed explanation/how-to. Your tips are so valuable and motivating for jobs that we typically put off. I appreciate your blog so much. Thanks!
Hi Brittany-
Funny I just did this. My dryer was really getting hot and then I remembered that I had to clean all the lint out of the ducts. What a huge difference it made.
Ooooo, Diane it scares me to think about that. Did you mean your dryer wasn’t getting hot enough. Or the motor was getting hot?
I think I’m good about cleaning my dryer vent and hose. But thanks for the reminder. I’m sure it won’t hurt to do it again.
Never hurts to be cautious. Thanks for your comment.
I would recommend 101lintbusters I have heard a lot of good reports about them
Thank you! I think I will tackle this over the weekend. Hooray for shopvacs, right? This will motivate me to get crackin’ on my laundry room re-do.
Good for you! Thanks for your comment.
I (unfortunately) had one of those homes that had the dryer vent hit the wall, do a 90 degree turn, head up to the attic, do a 45 degree angle, then up and out of the roof. It was over 18 feet long!!! How is that NOT against fire code? My awesome dryer went from being able to dry a load of jeans in less than 50 minutes to it taking almost 3 hours for the same load. I had to routinely clean out the vent every 3 months. IT SUCKED! It is now on my list of deal breakers when buying a house.
Erin, can you get a handyman out to look at re-routing it? That is what we did. We actually had it vented down through the floor out out the soffit over the front door. Not ideal, but it really improved the performance. We did have to vacuum the front door every few months though.
We need to reroute ours too. It also goes through the attic and out the roof, probably well over 18 feet long! We also have a front-load washer and dryer and they are stacked, so I have to pull both units out to get behind them. Not fun, and they are very heavy.
Christy, I remember watching a handyman who re-routed our dryer hose when I was 8 mos. pregnant. He couldn’t get the hose back on and it was “KILLING” me to watch. I wanted to jump back there and just do it, but sadly I wouldn’t fit back there anyway I turned. LOL!
Twice a year, i use the leaf blower into the long ducting to blow everything out. Has done ok for years
That is what we do also. It gets really loud in the house but it really works well.
If you have a gasoline powered leaf blower please be careful of carbon monoxide in your home!! be very careful to ventilate well.
The code for dryer vents states 25 feet is the maximum length of venting allowed. This is the length the maximum length a dryer can force air. You subtract 5 feet for each 90 degree turn and 2.5 feet for each 45 degree turn. Using this method you can calculate the maximum length of vent for your dryer vent run.
Peter, good information to know, thanks for your comment.
Good knowledge…
I have know homes that have had fires because of dryer lint. Good tips.
Great post. I need to do this!
Thank you for this tip! In addition to cleaning our dryer vent, I need to seal around the exterior vent. The gap between the vent and the hole in the wall/siding is too big to caulk. What is the best way to do this? Thanks! Love all the tips and projects on your blog!
spray foam insulation is my suggestion.
Good suggestion Erin 😉
Angela, use Great Stuff expanding foam to seal it. While you have the can out, look under all your sinks and seal the holes around the water pipes coming in your home. That is where a lot of the creepy crawlies get in 😉
Brittany
thanks Brittany for reminding me, I’ll have that on my weekend to do list!
This is a great tip. I have been using a professional to clean the dryer ductwork as it is vented through a crawlspace…initially it was not or had been disconnected and was venting into the crawlspace and could have been a fire hazard (dryer was getting very hot). Amazing blue wall, btw!
I had a “professional” come and clean out the long hose running from my dryer…a few months later my dryer was not drying my clothes in a timely manner so i called Sears. The Sears technician opened up the drying and around the moter it was packed with lint. He said it was a definite fire hazard. Frightening to learn that when you think someone knows what they are doing does not….he put my entire family at risk.
I need to do this myself twice a year to make sure it gets done correctly. Thanks for the advise all