
Painting Like a Pro – Step 3. Painting and Touch Ups
Welcome back, I hope you are ready to paint with me today! If you are just stopping by and haven’t prepped your room for painting, you may want to take a moment to read Painting Like a Pro Step 1 and Step 2.
Okay, are you ready? I’m going to show you how I painted my downstairs half bathroom, the professional way!

Before

After
Materials:
- paint tray
- two plastic grocery bags (optional)
- a paint roller with a regular nap for smooth walls. If you have a textured wall (orange peel, cottage cheese or as “My Boy’s Teacher” showed me: sand texture) you may need a thicker napped roller.
- 2.5″ angled painter’s brush
- edger (optional)
- Painter’s tape (I prefer the Scotch Blue Delicate Surfaces tape)
- a damp rag
- sanding block with 200 grit or higher sand paper
- damp sponge with a bucket of fresh water
- x-acto blade (optional)
- small flat artist’s brush
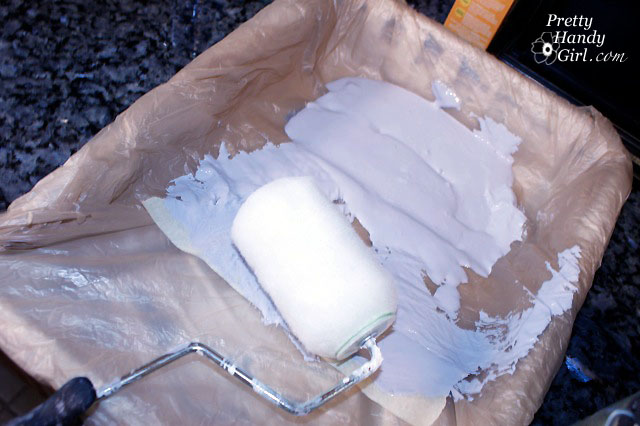
Go ahead and pour your paint into a paint tray (make a liner with grocery bags as I show HERE.)

Only fill the tray about half full (more than shown in the picture), you need some blank space at the top to squeeze the excess paint out of the roller by rolling it back and forth.
Painting Walls and Ceilings:
When I paint a room, I always paint the ceiling first, unless it REALLY doesn’t need painting. It is more efficient to paint the whole room while you have the tarps down and supplies out. Besides, you know you won’t go back and paint the ceiling another day. Am I right?!
You can paint the ceiling the same way I paint walls, just use an extension pole and a two-step ladder for painting the border. Don’t worry about taping off the walls or trim right now. I’ll tell you when to tape later. The only time I would use tape now, is if I need to mask off something like the vanity, a light fixture or a wall I’m not going to paint.
1. Begin by painting the border on your wall. Use either a paint brush or the edger. If you are using the Aura paint, let this border dry before you move onto the next step. If you are using another brand/type of paint, work quickly and move onto the next step.

2. Use your roller to roll out a 3 – 4 foot “W” shape. Try to roll into the edge while it is still wet (unless you are using Benjamin Moore Aura paint.)

3. Roll the roller back and forth, up and down and in random directions until you have filled in a 4′ square section of wall.

4. Roll the roller very lightly over your square to make sure the coat of paint is even; feather the edges; and to rid the wall of any start and stop roller marks.
Start on the next section with another “W” shape and repeat steps 1-4 until you have covered your wall in paint. Then move on to the next wall. Keep in mind that you will need at least two coats of paint. You’ll get a more durable paint job, more even coverage, and it will look professional if you use two coats of paint. So, own up to the fact that you will need two coats!
A few words of caution while painting:
- If your paint has started to dry and {{gasp}} you see a spot you missed or a bug in your paint, resist the urge to roll over it. Wait until it dries, then sand or paint the messed up area.
- It is best not to overload your roller with paint. Too much paint can drip and run. If that happens, use your damp rag to wipe it up immediately. And remember, you are going to use two coats, right?!
Now that you have completed the first coat (and it is dry to the touch), pull out the sanding block. Lightly sand all the walls. You are just knocking down any bumps (or bugs) and giving your paint layer a little “tooth” for the next coat to adhere to.

Then wipe down your walls with a damp sponge to remove all the sanding dust.

The sanding between coats may seem like overkill to you, but trust me, the sanding step makes a difference! And you wanted to know how to paint like a professional, didn’t you?!
Now, go ahead and paint your second coat of the wall color repeating Steps 1-4 above, for painting a border and rolling the paint inside.
Done? Well, not quite. Remember when I showed you this the other day?

Yes, the wall paint is on the trim. That is okay, I want it like that. I knew I was going to paint the trim and wanted to make sure that the wall color went right up to my trim, it’s all by design baby, trust me.
At this point you have painted the ceiling and all of the walls in your room. If you are sure your walls are dry (at least 1 hour or more), then you can move on to the trim.
Painting the Trim:
Now you can go ahead and tape off the edge of your walls where they meet the moulding. Then use the matte medium trick I showed you HERE (or you can use a small amount of wall color if you like) to seal the edge of the tape on the wall side.

Go ahead and paint all your trim with a 2 1/2″ paint brush dipped in a small bucket of trim paint. I prefer Purdy brushes because they last for years! See my post on cleaning brushes HERE to see how I protect them from wearing out.
Be sure to put two coats of paint on the trim, this will help to keep it looking new and stand up to the “Matchbox Demolition Derby” games that ensue in your home. (What? You don’t have those games in your house? Lucky for your home.)
When the paint has dried partially (don’t wait too long), go ahead and remove all the tape.
If you don’t have any imperfections, you better go play the lottery right now! If you are human and normal you will have a few. No big deal. You can use one of two techniques (I use both).
1.Gently scrape any excess paint off with an x-acto blade.

2. Use a small square artist’s brush and paint over any seepage. I like to shake my can of paint and remove the lid to expose just enough paint on the lid for touch ups.


Horray, you are done! Now you can tell your friends, “I’m sorry I can’t give you the name of my painter, because I painted the room myself!”
Here are the before and after pictures of our half bathroom. I am LOVING the results. I have a few more tutorials for you from this project. I promise, they will come in due time.

Before – Beech Wood Vanity

After- Painted Vanity Black

Before – Towel Ring on Wall

After – New Towel Hook on Wall

DIY – Vintage Soap Sign

Before – Shutter on Wall behind Door

I would love to know if you paint a room using my Painting Like a Pro tutorial. And how it worked for you!
Other Steps in this Series:


Hi! How did you paint behind the toilet?
Incredible that after all that, there is no mention of the paint brand and color.
That lighter color is so pretty and makes it look so much more elegant and big! Thanks for sharing. I’ll be remodeling my guest bathroom soon!
Dang, I wish I had seen this a year ago when I bought my house! I couldn’t figure out why my trim paint ALWAYS seeped up under the tape and onto my wall!! No one ever mentioned sealing it with the wall color…genius!
Great job. We had a vanity in our bathroom that we decided to keep – similar to yours. I too wanted it black but what we did was sanded the old finish off the wood…then we used vinegar with rusty nails in it – left it for 24 hours to make the solution. I used a paint brush, and painted on the solution. The wood turns a lovely black ebony colour (different woods, different results) with the wood grain still visible. I’m not sure if these attachments will work but it will give you an idea of what we did if they do…the pic of the chair – was done the same way.
/Users/samullin/Desktop/Bathroom.jpg
/Users/samullin/Desktop/313817_10150289536476403_1760167747_n.jpg
/Users/samullin/Desktop/303200_10150289536081403_1806790954_n.jpg
Sam, thanks for your comment. Sadly I couldn’t see your pictures. Do you want to try emailing them to me?
I have trouble blending in corners I painted with brush and then switching to roller and getting good coverage and blend. Yes,I use Benjamin Moore paint. Any suggestipns?
Hey Sweetheart,
love, Love, LOVE your creations!!!! You have ispired me to get up off my “perverbial diseased duff” and get back to what I love doing: Creating and Sharing with Others!!!! So, Thanks a TON!!
I do have one question about the Matte Medium you refer to regarding painting your bathroom baseboards. I dont have what you speak of, however, I do have Matte Modge Podge (I ADORE Modge Podge)!!!!! Will that work? I am in the middle of painting and redesigning my Master Walk-in Closet, and am right in the middle of painting.
Oh, and by the way, do you have or know anyone who may have any ideas re: making my own chandelier to hang from my closet light fixture? I am experimenting right now. I sent you a message via Pinterest I believe, and mentioned I would LOVE to pick your brain. Or rather, pick each others, (that doesn’t sound right either, LOLLLLLLL) Let me start over. I would love to share ideas with you! Thanks again, for the inspiration!! Hope to hear from you soon. Feel free to call me if you like. I will call you right back so that its on my dime. #480-200-7825
Keep Creating!! XOXOXO Kristina
Thank you! My hubs and I just moved into our first house, and I’m itching to paint, but never have before. I didn’t know where to start, but I did know that the last people were sloppy and I hate almost every room color in the house! Your tutorials have helped me feel a little less intimidated. But, it seems like a lot of work. Is it as much work as it sounds? Considering I have 3 children ages 3 and under who have very “helpful” hands and carry everything off into oblivion?
Also, any tips on removing wallpaper? (top border if that makes a difference.
Thank you SOOO much for all the amazing work that went into this fabulous series. I learned so, so much! I’ll be linking.
What paint color did you use? I LOVE that color!
Rebecca,
I wish I had an exact match for you, but because it was a custom mix, here are the closest colors:
It is a cross between Sherwin Williams Rain SW6219 (too blue) and Quietude SW 6212 (too green). Or Sherwin Williams Aqua-Sphere SW 7613 but about 15% lighter.
I hope that helps!
You’ve mentioned the matte medium trick before. Wish I knew that years ago when I attempted to do stripes.
I like the new color. Very pretty and changes the feel.
Love the change in your bathroom and the details. We moved into a house and the previous owners were a little sloppy with the painting on portions of the trim. What’s the best way to move dried paint that’s been on hard wood trim for years?
Monique,
Here are a few things you can try. Use a razor blade, x-acto or very sharp chisel to gently scrape the paint off. You might want to try heating up the paint with a hair dryer first to make it a little more pliable.
Otherwise, you will have to resort to some harsh chemicals. I had some luck using ammonia on a paper towel and then using a paint scraper to remove some old drips. If the ammonia doesn’t work you could try turpentine or mineral spirits, but they all have very strong odors and should be used in a ventilated area.
If all else fails, you might need to use Citristrip, but brush it on that one area. The problem is that it will likely take any polyurethane off as well.
Good luck.
Your tips are great!
Did that rag come in handy? I know mine did when I was doing the entry way and one of the kittens jumped toward me and I got too much paint on the edger.
Cherie, yes, rags are a must when I paint. Must be my inner Jackson Pollock showing through.
I really love the old crate above the toilet. Did you make the cubby compartments yourself, or did you get it like that? Thanks!
Ahh Julie, what sharp eyes you have! I found the bread crate on the side of the road and used old shipping palette boards to make the shelves. I have a tutorial for that coming up. You will just have to wait and see ;-D.