The last few years I found myself up late on December 24th frantically wrapping presents, not exactly the way to get into the spirit! This year I knew I wanted to do it differently. These are the three things I wanted to happen:
- I wanted to spend some time being creative while wrapping the presents.
- Find some time to spend with friends that didn’t involve eating cookies (I have to admit, I’ve gained 10 lbs. since I began blogging, I’ll refer to it at the new blogger’s bloat.)
- And finally, give myself time to really get creative and then share the results with my readers.
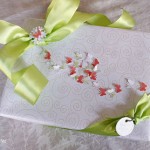
My genius plan was to have a girlfriend get together and wrapping party. So, I invited four girlfriends to come chat and wrap.
Unfortunately a stomach bug, an out-of-town hubby, and life with kids put a damper on everyone’s plans except Renee’s. Despite our small numbers, we still had fun talking, catching up and wrapping some creative packages!
Over the next few days I’ll share with you the tutorials. I hope you get some ideas for your gifts (if you still haven’t wrapped yours). And I hope you don’t spend the evening of December 24th wrapping them all by yourself.
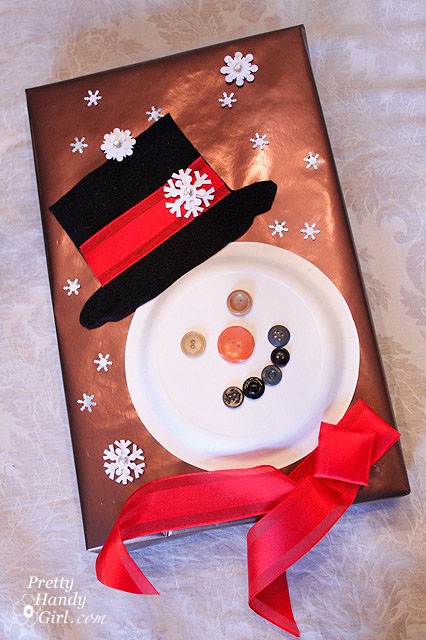
Snowman Present
Materials:
Black felt or black construction paper
Cake size paper plate
Buttons (2 eyes, 1 nose, 5-6 mouth)
Red Ribbon
Snowflake stickers, snowflake paper punch, and/or other embellishments
Wrapping paper
Elmer’s glue
Hot Glue Gun
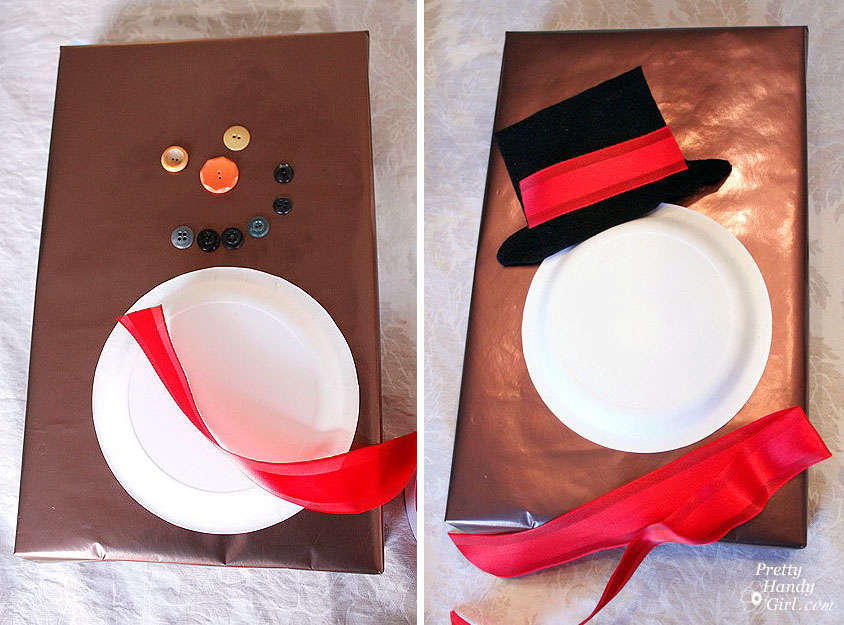
Start by wrapping your present as you would normally.
Preheat your hot glue gun.
Then cut out your black felt or construction paper in the shape of a hat. Feel free to use this template or make your own.
Cut a piece of red ribbon for the brim of your snowman’s hat. Then gather your snowman pieces and lay them out on your package.
Use the hot glue gun to glue the cake plate upside down to the package.
Then glue the brim ribbon to the hat.
Glue your hat on the package letting the brim overlap the cake plate.
Cut another piece of ribbon for your snowman’s scarf and fold it in half. From the folded edge, you will want to fold about 2 inches back on itself. This will be your snowman’s scarf knot. Play with the scarf and “knot” until you like how it looks, then use the hot glue to affix it to the gift box.
Use some more hot glue to adhere the buttons to the cake plate.
Then embellish your package with snowflake stickers, etc. Besides the stickers, I used the snowflake hole punch to punch many little flakes. Then I glued them with a small dot of elmer’s glue.
“Frosty the Snowman!”
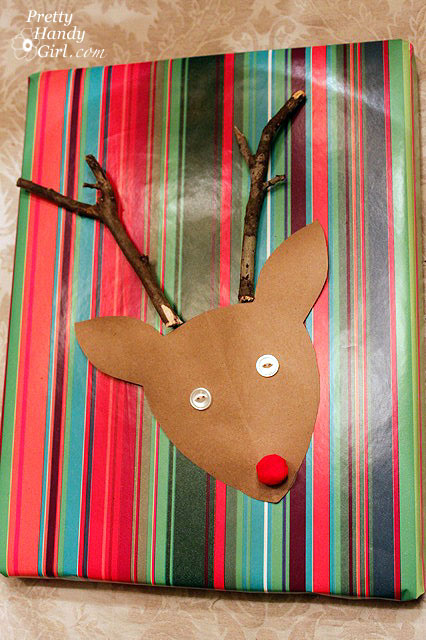
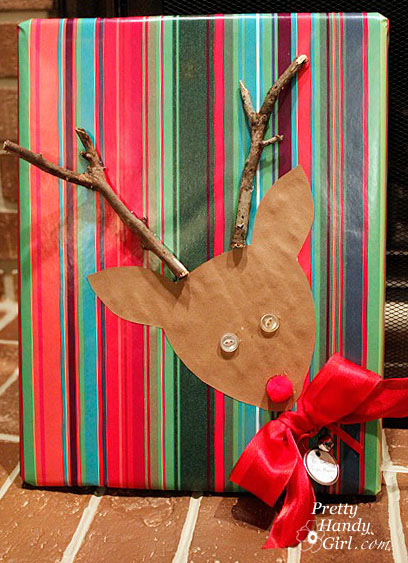
Rudolf Gift Wrap
Materials:
Two twigs
Brown craft paper or paper bag
Two buttons for eyes
1 Red pom pom
Red Ribbon
Snowflake stickers or hole punches
Jingle bell
Elmer’s glue
Hot glue gun
Preheat your hot glue gun.
Wrap your present as you normally would.
Cut out a reindeer head from the craft paper or a paper bag. Feel free to use this template or make your own.
Lay out your reindeer pieces on the package where you want them.
Coat the back of the reindeer head with Elmer’s glue and attach it to your gift.
Using your hot glue gun, run a thick line of glue onto the back of your twigs and attach them over the reindeer head.
Use hot glue to attach the eyes and nose.
Tie a bow with your red ribbon. Attach a gift tag and jingle bell to the bow and then hot glue it to the package.
Finish off decorating your gift by adding paper punch snowflakes with elmer’s glue and/or stickers.
“Rudolf the Red Nose Reindeer!”
Side note: I bought the paper punch, stickers, and embellishments in the scrap-booking aisle at Target. And our Costco has the biggest spools of wired ribbon I’ve ever seen.
Be sure to check back these last few days before Christmas because I have SIX days of creative gift wrappings to share with you! Head on over to
Day #2.


Adorable! Who's going to want to open those? They're perfect!
How cute…I don't think I would want to open the present without preserving the wrapping first.
It's so much fun finding different ways to wrap gifts.
love that reindeer so cute and simple!
Oh, so nice! Maybe I won't hold off until the last minute this year. This actually looks like fun.
So re-creating these this weekend!! Love it!!
Such cute embellishments! Very creative!
I love, love, love your gift wrapping ideas! Those are just insanely cute! It's so much fun to make your gifts look unique. I just adore that snowman and will be adorning my sister-in-laws snowman wall quilt with that! Too Too Cute!
They are all so beautiful! I struggle so much with just the wrapping, I can't imagine being able to make them all gorgeous! I love your ideas to make them extra special!
Uh.. these would actually constitute a GIFT, nevermind wrapping paper! How beautiful!
Donna
http://funkyjunkinteriors.blogspot.com/
Those are seriously cute! I'm always the lone wrapper in my house. I would've come over:)