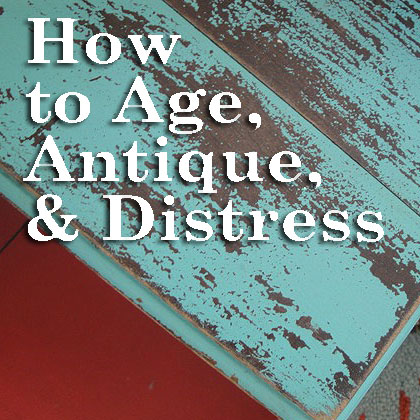
Aging is so Distressing – Techniques for Antiquing Furniture
Well, despite the fact that I am starting to feel my age, this post will help you achieve that beautiful well worn, loved, aged and antique look on furniture and decor items. This is something you can do to new furniture or to give old furniture a new rustic look.
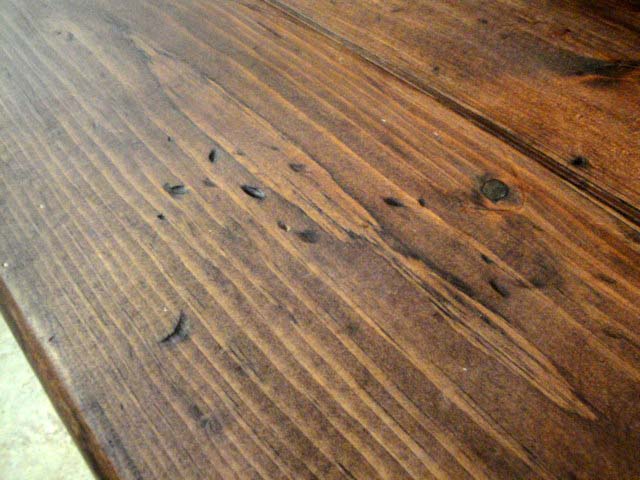
Aren’t these layers of paint, scratches and wear marks art to your eyes?
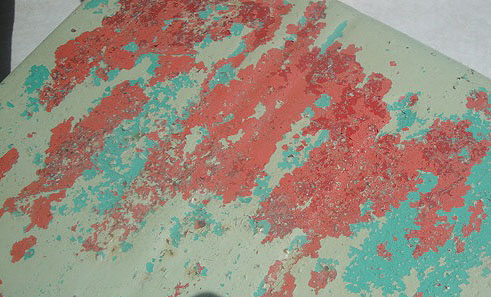
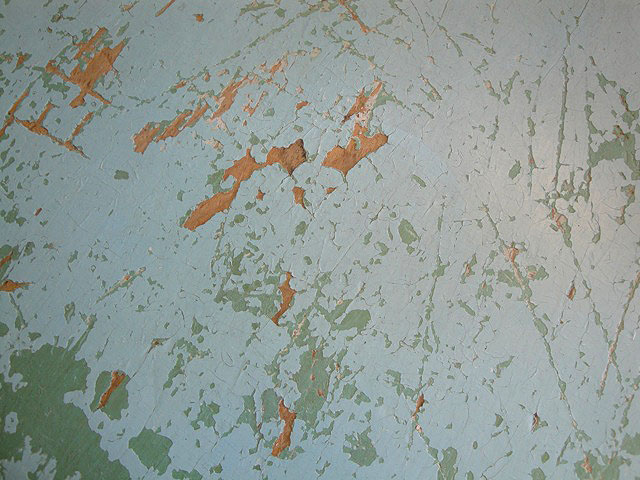
Nothing shows character like chipping paint and multiple revealed layers on metal.

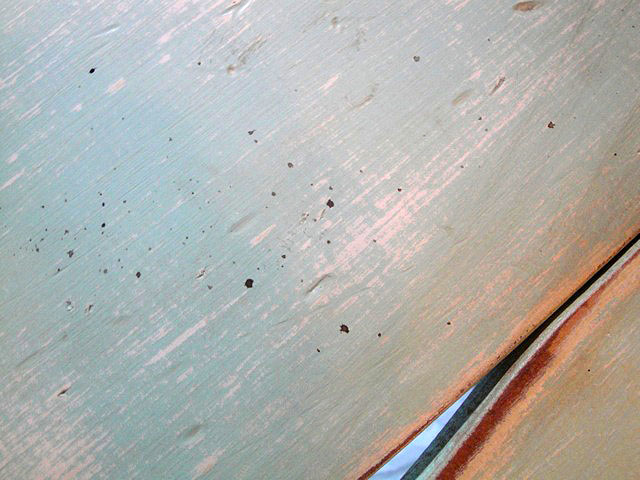
Weathered paint worn thin and rubbed off give a table character!
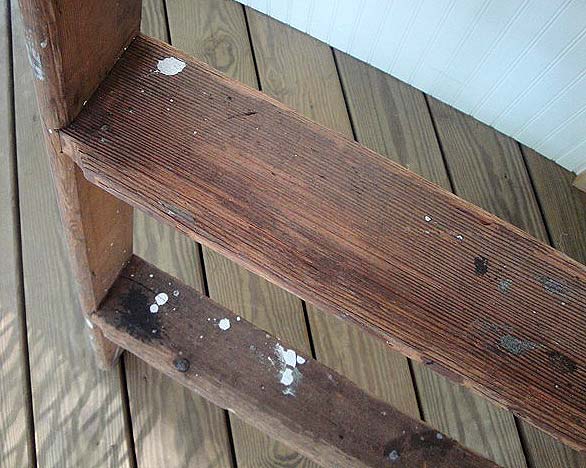
Paint splotches on an old ladder beg to tell stories of the projects it has seen.

And you can’t forget rust, love that beautiful brown patina!
I have been experimenting with several techniques to add age to “newer” pieces of furniture. Here are a few ways to add some character through distressing. (This post contains affiliate links. To learn more read my disclosure page.)
Distress Marks:
Achieving a worn look can be as easy as adding dings and scratches. This process can also be a great stress reliever! Grab some chains and let’s work out some of that pent up aggression!
Materials:

Throwing a chain at wood gives you those elliptical dents. Dragging the sharp edges of a pry bar across wood will give it some deep grooves. Set a screw on its side and lightly hammer it into the wood. Finally a few random hammer marks here and there finish off the worn look.
This is the same technique I used on my mudroom bench.
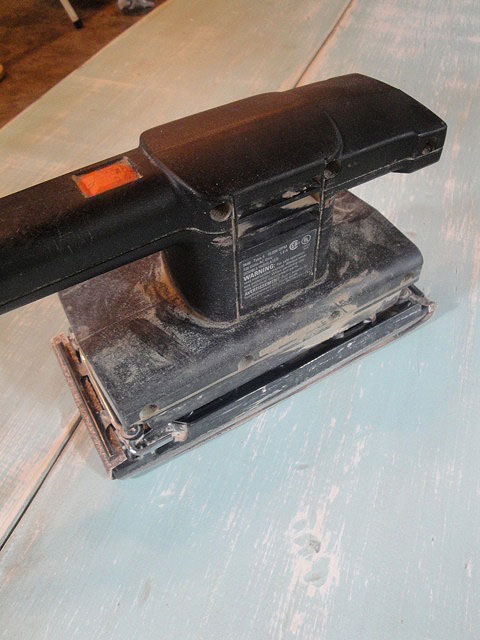
Sanding through layers:
The easiest way to add some age to a piece of furniture is to expose layers of paint. Whether you paint a few contracting colors on yourself or you sand a pre-finished piece, sanding is one of my favorite ways to add age. A note of caution: Before you begin sanding, always check for the presence of lead paint. You can learn more about how to detect lead paint in this post.
Materials:
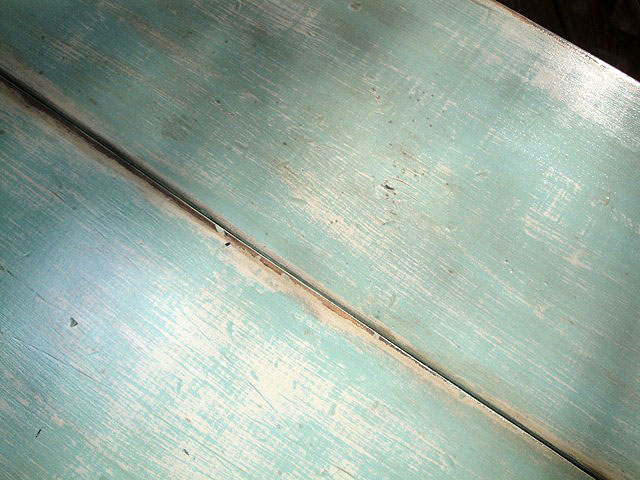
You’ll get the best results using 150 grit sand paper (but use whatever you have on hand). Attach it to your power sander and go to town on the furniture! Work in areas that would normally get a lot of use or abuse. Corners and edges of furniture usually take more abuse. Table center is a good place to show signs of worn paint. Be sure to move the sander around and be random rather than symmetrical. A good example of a sanded finish can be seen on this Trashy Coffee Table.
A table that was previously painted white received a sea-inspired blue layer of paint on top of the white. (You could always add a third color if you want more colors showing through.) Sand through the layers of paint down to the bare wood in spots. The challenge with a new piece of wood is it lacks the deeper darker color tone of antique lumber. Unfortunately, when new wood is exposed, it will look blonde and – well – brand spankin’ new. Read on to learn how I solve this problem.
Faking Age with Stain:
I have a trick up my sleeve for creating those darker wood tones in seconds! Ready to learn my secret?
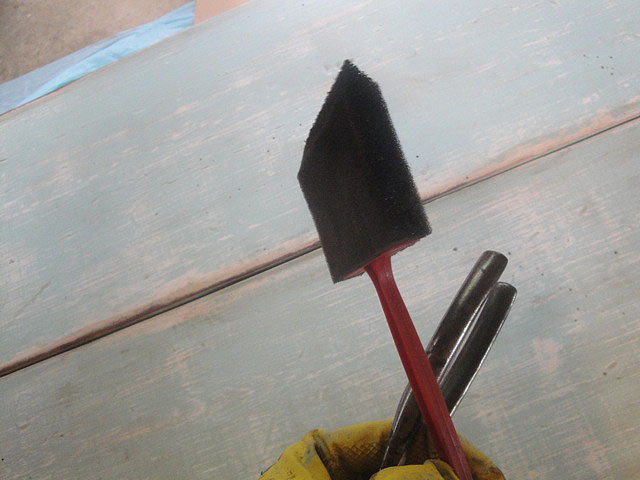
Materials:
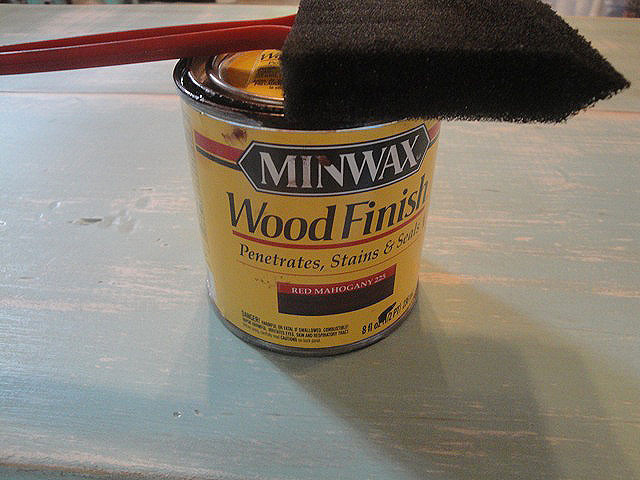
- Rubber Gloves
- Dark Stain (Minwax Red Mahogany
or Minwax Early American
)
- Foam Brush
- Clean dry rag
To hide the look of new blonde wood, carefully paint some wood stain onto the bare wood spots.
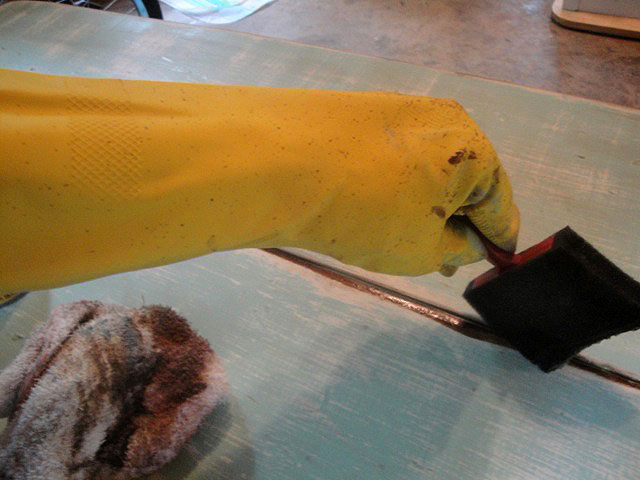
Wipe off any excess immediately with a dry rag.
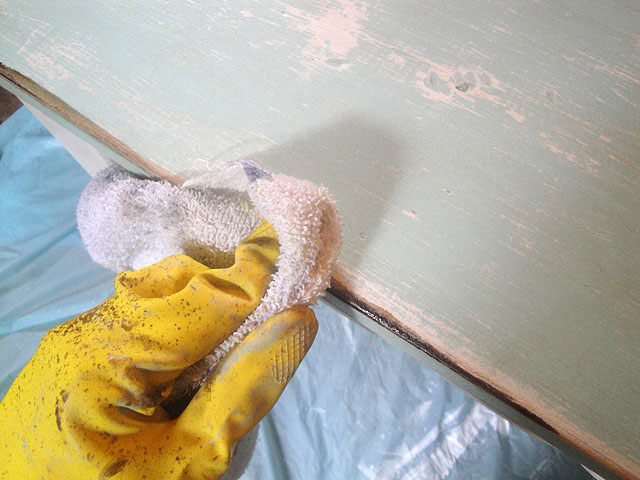
If you desire darker wood repeat painting and wiping off the excess.
My two favorite stains for aging are Minwax Red Mahogany and Minwax Early American
, but any dark color stain would work just as well.
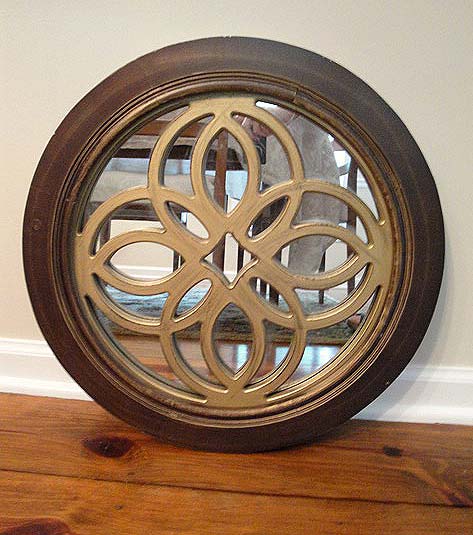
“Tea” Stains:
You can use the same dark stain to give your object a faux “tea stain”. This antique gold 80’s mirror is easily transformed with spray paint and some stain.
Materials:
- Sanding block
- Spray paint (Rust Oleum Heirloom White)
- Rubber Gloves
- Dark Stain (Minwax Red Mahogany
- Chip Brush
- Clean dry rag
If you use regular white spray paint, it will be difficult to “dirty” your object. Instead I like to use Rust Oleum Heirloom White which gives a soft antique white look. (FYI, I used Rust-Oleum Oil Rubbed Bronze
for the inside decorative design.)
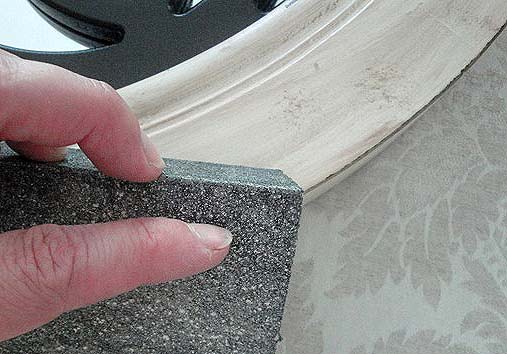
After the paint dries, hand sand some of the edges to expose the stained wood beneath.
Use a dry brush technique* to brush on the stain and wipe the excess off immediately. *Keep your brush dry by dipping in the stain and wipe off your brush on a rag before using it.
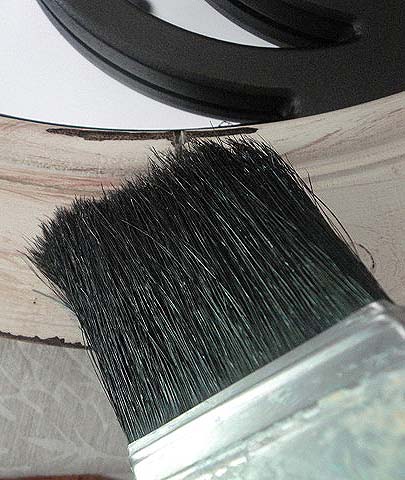
For the best results, use an old shaggy brush or rough up your chip brush. The rattier the brush the better because anywhere the stain lands is where it will remain.

The end results are pretty tea stains and peek-a-boo dark wood below.
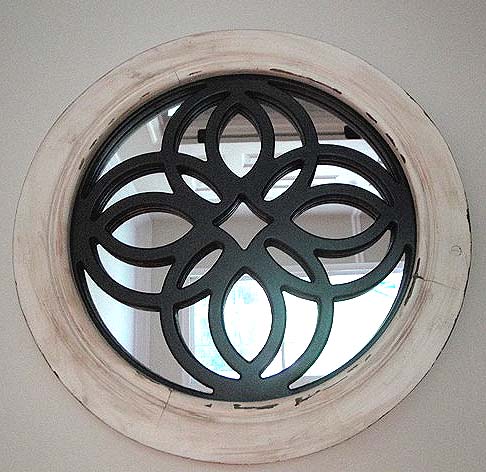
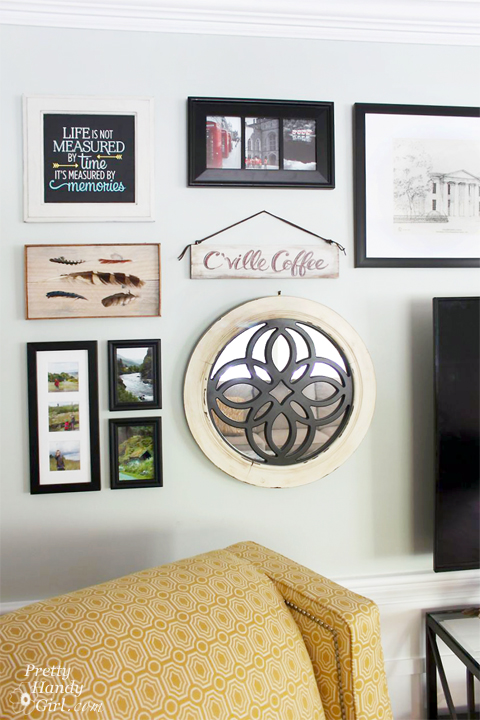
A totally new look for that sad 80’s mirror. It fits in nicely on our living room gallery wall.
Glazing:
Do the permanency of stains scare you? Have no fear, one of the more forgiving ways to give your object an antique tone is to use a glaze.
Materials:
- Chip Brush
- Clean dry rag
- Van Dyke glaze (brown tones)
- Pitch Black (gray tones)
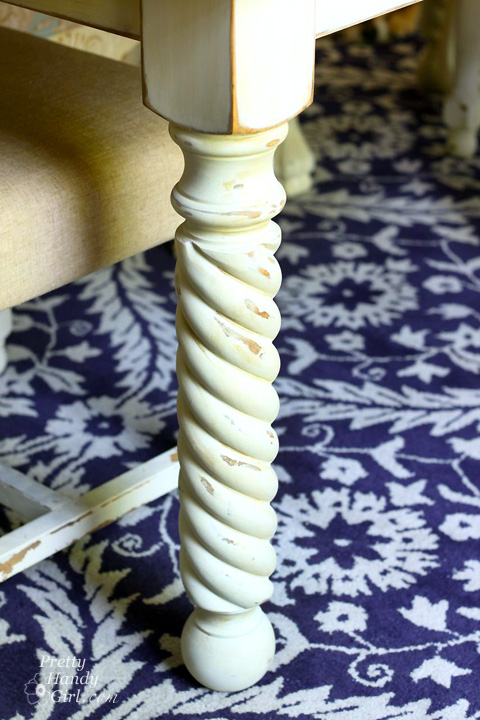
Glazes add depth and dimension to furniture that has a detailed profile. Glazes can be used on everything from kitchen cabinet doors to table legs and picture frames. But, don’t let that limit the places you can use glazes.
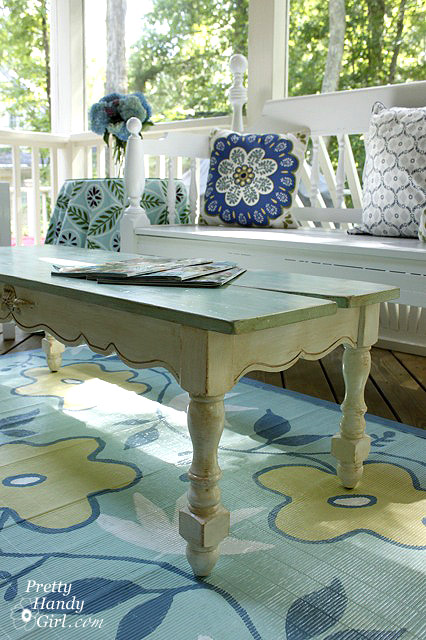
The table legs on my DIY Farmhouse Table have Van Dyke glaze on it that accentuates the rope turns.
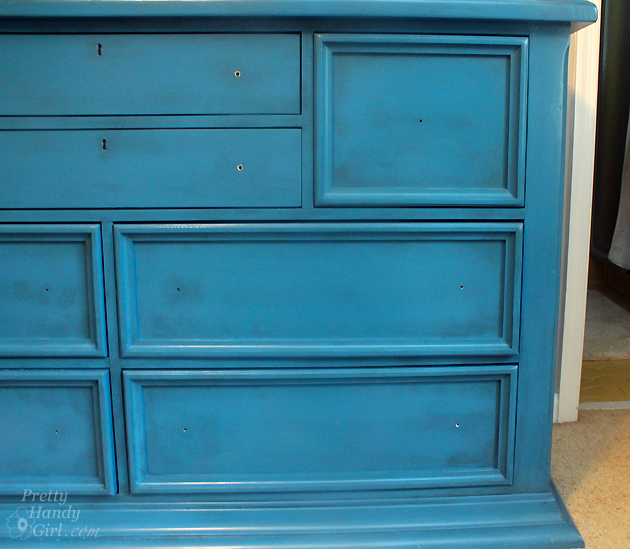
This dresser needed more than a coat of paint to give it an attractive new look. I added black glaze for pretty gray tones.
Simply brush on the glaze (again use a ratty almost dry brush.) Push more glaze into the gouges and crevices to show off the details.

Wipe off any excess with a clean dry rag.
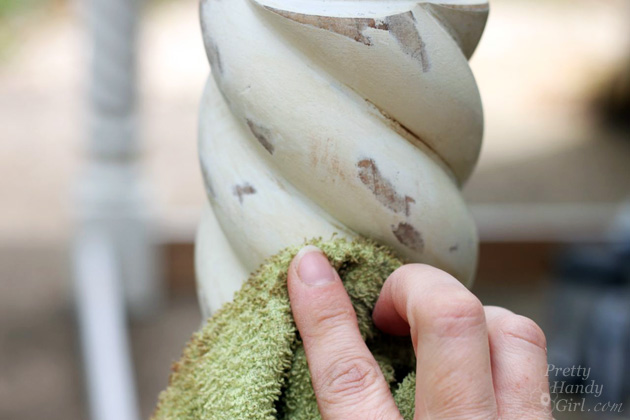
The glaze stays wet for longer than the wood stains. It can be wiped off immediately if you make a mistake. Once you like the look, let the glaze dry to permanence.
When working with black glaze, use the same technique of wiping on and blotting off. The black glaze gives you more gray tones and gave this picture frame a dirty distressed look:
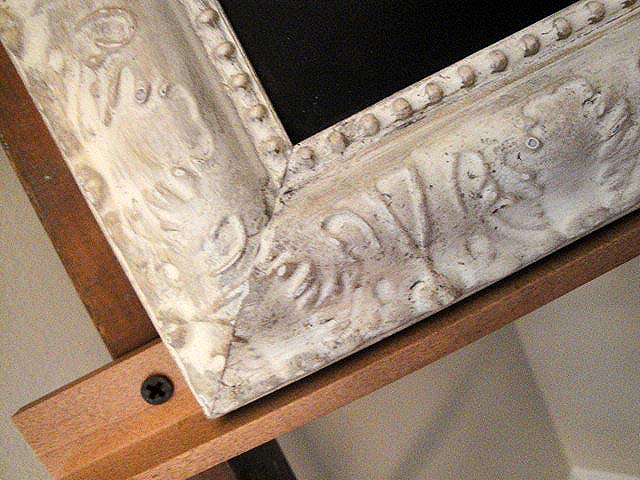
It may take a while to build up the glazing. But, you end up with a really nice final product.
Spattering:
Another technique I like is adding paint or stain spatters. This is easy to do, but if you aren’t wearing protective clothing you might give yourself some freckles.
Materials:
- Rubber Gloves
- Dark Stain (Minwax Red Mahogany
- Foam Brush
- Screwdriver or stick to tap against
Dip a foam brush into the stain and wipe off any excess. Then gently tap the brush on a stick or handle of something sturdy. (A large screwdriver or other solid object works well.) This time I don’t wipe the stain off. Let it dry a little then dab up any excess.
With these techniques, you can take a plain painted side table from this:
To a more sophisticated antiqued older sister:
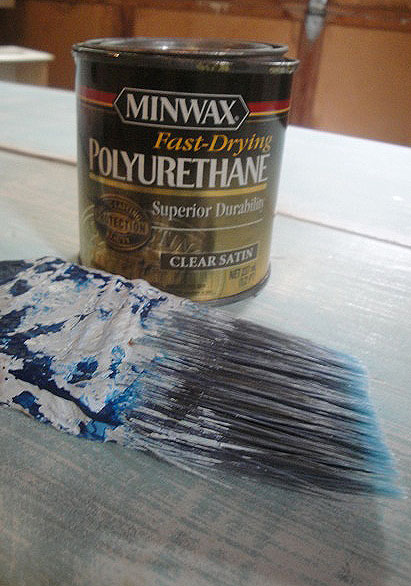
Protective Coating:
Once you have achieved the antiqued look you like, be sure to put a protective coating over your furniture. I prefer using Minwax Oil-Based Polyurethane. This adds the perfect age to furniture. (If you use new oil-based poly, it will yellow in a few years time.) If you don’t like the yellowing effect, stick to Minwax Satin Polycrylic.
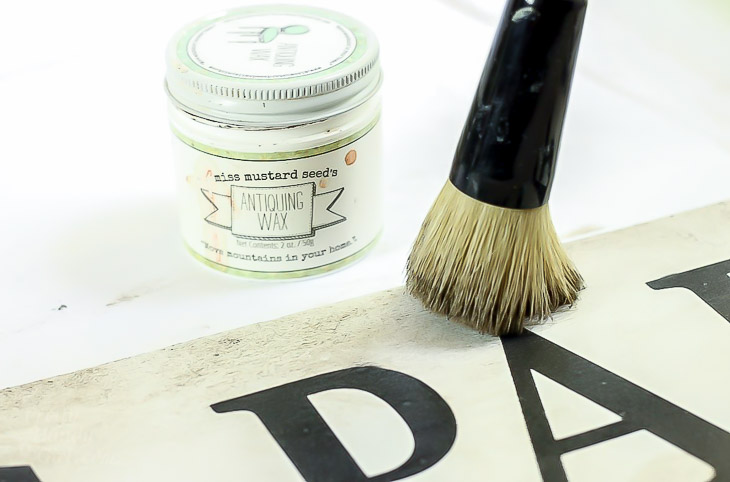
You can also use a good quality furniture wax for a satin finish. Or use an antiquing wax
to really give it an old appearance.
Now, don’t be distressed, grab some sandpaper and a brush and give your furniture an age boost!
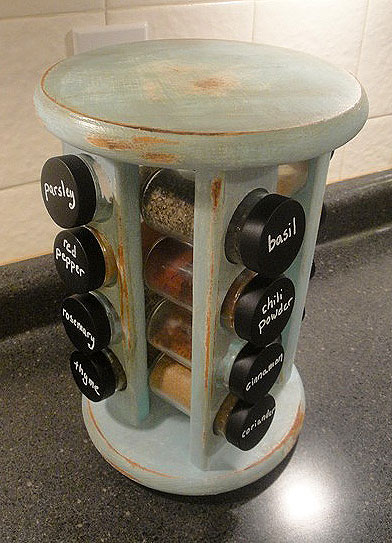
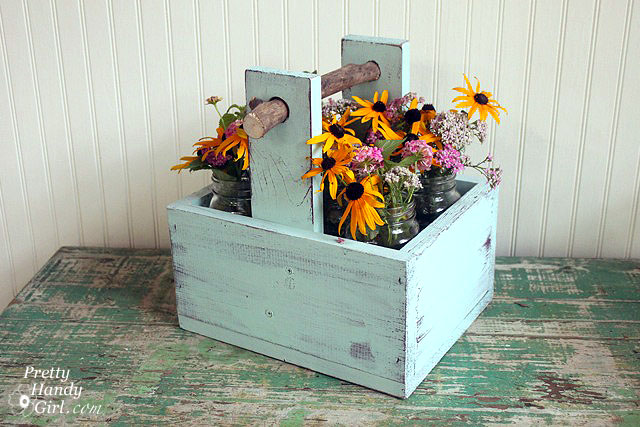
Yard Sale spice rack turned rustic! Chalkboard lids tutorial here.
Watch a live tutorial to see how I accomplished an aged paint look on this trough. And be sure to subscribe to my YouTube channel to get notifications when a new video is uploaded.
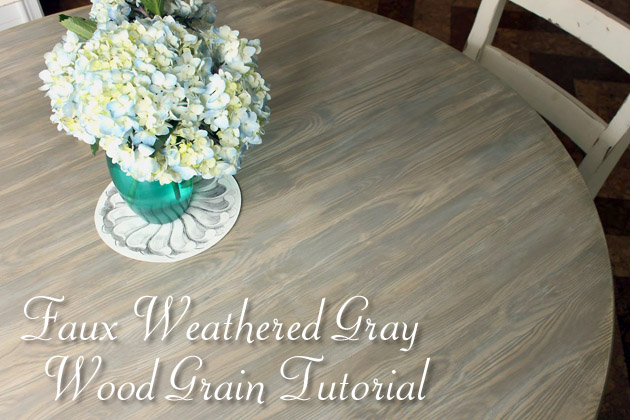
Now that you have some aging and distressing techniques under your belt, you can push your skills by trying your hand at some more complicated techniques! Like creating a faux wood texture on surfaces following this tutorial.
![]()
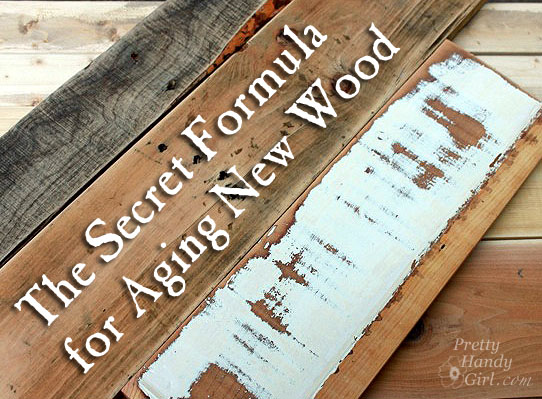
As a follow up to this post, I divulged my top secret recipe for making new wood look old!
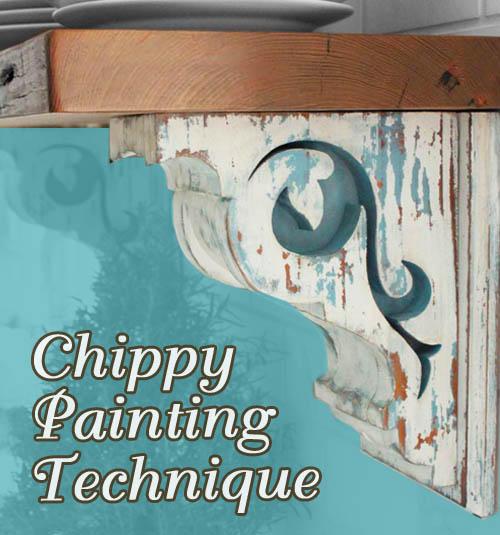
And how to get the true chippy paint look:
You may also want to check out my gallery of rustic and distressed projects!

Or follow me on Twitter, Facebook, Instagram, or Pinterest so you can be the first to know what I’m working on next!
Brittany your website is awesome! So many valuble tecniques to distres wood. Thank you!
I love these ideas, and plan to use them, because I have a few pieces that I want them to look old. By the way, I love anything antique, even it was created to look that way. Thanks for sharing.
oh, yes, I did the ‘speckled’ look on one of my pieces and little did I realize that I was also ‘speckling’ my freshly painted cupboards just above!
…now maybe I’ll have to antique those freshly painted cupboards, too!
Thank you so much for sharing:)
Thank you for sharing your techniques! You’re going to make my projects much easier. Thanks!
Love the gallery of work on your lounge wall Brittany! Looks lovely and cosy 🙂
Carly D x
Thanks Carly, I have tutorials for several of those pieces like the feather art: https://prettyhandygirl.com/diy-feather-art/ and the chalkboard sign: https://prettyhandygirl.com/upcycled-cabinet-door-chalkboard-art/
I find myself unable to leave your blog! I can’t stop reading it! I must say you have a very unique voice in writing, which I personally appreciate. Thanks again Brittany!
Thanks for the tips, especially about checking for lead paint. I’ve been restoring old country furniture in Romania this summer, and doing a LOT of hand sanding, and never thought about checking for lead. And who knows what’s in that old Romanian paint? Now I’ll be more careful!
Thanks for this! you have answered my question to the alternative to dark wax with glaze instead I reallllllly do not like wax I have too many little ones that make everything icky – wax is not suitable for our lifestyle! love Chalk paintin’!
Can’t wait to see these techniques.
We need to up date my kitchen cabinets on the cheap from sad to fab
1950 10 x10 kitchen gets 3rd paint job
Counter top is fine however floor is a also in great need
I entered my email to subscribe to your tutorials and it didn’t work. Can you please add me to your list. many thanks, Liz
Hello. can metal window frames (like the kinds Jeldwen makes) be given a distressed look? we’re building a garden shed in the backyard. I don’t want it to look to polished. But I’m not sure if only wood can be distressed.
I was inspired by your post and have painted three items since reading it. Thank you! Although I didn’t do a key step of using a powersander, I felt like there was power in just trying for the first time, because now I know I really won’t have to buy most basic wooden furniture items (there’s so much on the street!).
Love reading your ideas. I am looking at a coffee table to paint white with a distressed look. It is a medium light, almost rose colored wood…..& I believe it is a laminate. (I haven’t seen it in person, yet). If it is a laminate, would I prime, paint white, scuff a bit with sand paper, & use the dark stain technique on the scuffs? I want to give it a beachy look. It has a glass top & a shelf underneath. My plan is to cover the shelf with rough sawn wood, painted white,… & then glue some random beach finds, like starfish, shells, & sand dollars, to be viewed thru the glass. Thanks for any helpful comments & tips 🙂
Patricia, I think your plan sounds like a good one. Another option would be to paint a dark brown color and then paint the white. That way when you sanded through you’d reveal the dark brown. It’s hard to say what’s beneath the laminate. It could be wood, press board or plastic ;-(
Well, never mind! I searched for the glaze and found nothing, but then I found your link on another page. It worked and took me right to the product! Thanks for including the links!
Where can I buy those glazes? My husband asked about colored glaze at Home Depot, and the clerk looked at him as if he had sprouted a second head on the spot! I know Lowe’s sells Valspar products, but I can’t find the glaze on their website. Thanks! I can’t wait to try these techniques on an old end table!
Great great great info and ideas!! Thank you for sharing, I can’t wait to try this!
Hi
thanks for this article
I have become addicted to distressing. I’ve done 8 or 9 projects recently. I was wondering tho how to get a multi level look that ive seen in some furniture stores. The only thing that partially worked was to paint one coat put candle wax over that then paint another coat etc…then CAREFULLY try to scratch off parts of each layer.
THANK YOU! I have been wracking my brain for weeks on how to darken a kitchen island top I am having built for our kitchen. I do not want any waxes, stains or oils on it that will block the woods natural antimicrobial properties…. Tea Staining! perfect, Whew…
Can you tell me about aging Stainless Silverware? I have some newer pieces that I would like to look old?
Bernice, look for a product called rub n’ buff in your local craft store or order it online. I comes in loads of colors including Patina and Ebony which would look good on the silver. See how to use it here: https://prettyhandygirl.com/2013/05/rubbed-bronzing-cabinet-hardware.html
Hi
I have a couple of old chairs I have sanded down to paint layers and some bare wood. Can I apply the polyurethyne directly to the bare wood or should I stain it first?
Thanks
I would apply the polyurethane as your last step. It will protect the wood and paint. If you apply it first you won’t be able to stain because the poly will seal the wood.
Thanks, I have one more question. Does the bare wood need to be stained at all, or can I leave the wood bare and apply the polyurethane over it? I haven’t decided whether I want to stain the wood or not…
Yes, you can add Polyurethane over plain wood, but this would prevent you from staining it later on.
Love your work! We are about to distress a coffee table by painting and then sanding/staining. Does it matter what type of paint we use (i.e. oil based or latex…and if latex, what finish)? Thank you so much for sharing your secrets!!!
Rebecca, it is all personal preference. I prefer to work with latex because it cleans up easier (soap and water) and it dries fast. If you want a rustic look, steer clear of the gloss finishes. I prefer Satin or Semi-gloss if on something that will get a lot of use (kitchen table). Best of luck and be sure to browse some of my other distressing technique tutorials: https://prettyhandygirl.com/aging-antiquing-distressing-projects
Thanks for the step by step. I am trying this for 1st time. I have a cabinet and took one of the doors to test the colors on. I painted yellow eggshell over a walnut stain. then I painted a dark blue. When I sand the blue , I cannot get the yellow to come through. It goes almost straight to the walnut stain. What am I doing wrong? thanks again.
Barbara, here are a few things to try. Make sure you paint at least two layers of the yellow. Then you can rub the side of a candlestick on the areas that you want to show through before painting the dark blue. It sounds like it will be beautiful when you are done! I like yellow and blue together.
I’m trying to create this look on a wall. Any ideas? The wall is “flat”, no texture.
Brandy, that’s a tough question. The rustic distressed look works best on wood. Maybe distress wood and attach it to your wall?
Great post! I have tried many of these techniques and they always work! Thanks!
how do you cover nails or nail holes when making furniture so that they look natural. Is it best to paint, sand, etc. and then put together or put together first.
thanks…what awesome information you have shared.
Kathy, if you are painting, you can countersink the nails and fill them with wood putty. No one will know the difference. If you are staining, sometimes you can see the putty, but if you have sanded it to the wood, it should only be a smalle circle. There are light and dark wood putties you can try. I recommend building the piece first, then sand and paint after it is done. That way you won’t run the risk of nicking your paint job.
Wow, girl you are good!! I have tried so many ways of distressing and have tried it on so many different pieces of furniture and I have the absolute hardest time getting it just right. I think my problem is I don’t know how much to distress. For instance when I”m using glaze I can’t ever seem to get the “strokes” right. Is there a certain way that you go about brushing on the stain (up and down, side to side and how much should you brush on). I am just amazed at how good you are!! WELL DONE!!! 🙂
~ Jessica
Great post! Love the idea’s! Ever tried Webster’s Chalk Paint Powder? It’s a cheap alternative to chalk paint; however, it’s a powder you mix in to any kind of paint you have and BAM- chalk paint! Gives furniture a vintage, matte look. You should check it out!
You recommend 2 different glazes to use in distressing furniture and then you say that they’re not your favorite aging technique! Well, what IS your favorite technique??
Donna, I meant, I’m not a huge fan of glazes. I prefer to sand and stain. However, I recently mixed the mocha and the asphaltum glazes by Valspar to get a darker black/brown color and definitely like that glaze!
As for a favorite, it just depends on the piece of furniture. Some I like to sand, some I don’t it just depends. That’s why I shared so many in this post so you can choose your favorites ;-).
Hi Brittany~Ok……i think i get it!! I think after reading and re-reading your article and your response i’ll try mixing the 2 Valspar glazes……i wasn’t sure which one to use anyhow. I got both and tried them on a sample and couldn’t decide. I’ll keep you posted. Thanks for your help……and your patience!!!
You recommend 2 different glazes and then say they’re not your favorite aging technique. Well, what IS your favorite technique? I thought that was what your article was about…..i’m confused!
Before spray painting your stained project did you lightly sand so the paint would adhere to the stain?
Geraldine, yes, I will always rough up any furniture with a fine grit sandpaper. Then if I’m painting (spray or latex) I use a primer before painting.
I tried the paint on paint method but found sanding to be difficult. It took such a delicate touch to expose the undercoat of paint rather than the wood. Also, after sanding the paint tends to look a little scratched. But I don’t want to use the poly. Too shiny. Is there something else I can use to buff it up at bit. I’ve heard some people use Minwax but I’m not sure if that is a good idea. I’ve seen some pieces that look more rubbed than sanded. How does that differ in technique?
Annie Sloan Chalk paint is also a GREAT way to apply different colors, then sand off for varying tones and colors when distressing.
Thank you for this post!I work in the paint department at lowes and had a customer ask me today how to do some of these techniques. I had just browsed over your entry and gave her some techniques but also refered her to it. Also, just an fyi lots of stores are discontinuing the Valspar Asphaltum glaze. My store has already phased it out but the mocha is still a stock item! Lots of colors can be mixed into our translucent glaze mixing base so you can use any color glaze youd like!
Hey there! Found your blog just in the nick of time … I have a room divider (raw douglas fir) being put in at my new office and I meant to stain the wood but then made the mistake of painting it with primer … I thought all was lost but it looks like maybe I can salvage it trashy coffee table style. … So – do I just get the sander and go to town on the white primer I just painted on and then stain, or paint with another color, then sand and paint? … I would love for the wood grain to show through but is it too late to go for that? . .
I love this idea. I have a question though. Have you distressed a vinyl table? The legs are wood so that wouldn’t be hard but the actual table top is what I’m worried about. It has that nasty vinyl strip on the edge of it as well that I know could last through an ice age. This table has been in the family since the early 80’s so I don’t think any hard feelings will be touched but if you have any tips or ideas on how to go about this table please enlighten me. Thank you!
Wow awesome blog!! I just transformed a lime green and teal dresser into a mocha brown (I used some paint from a room I did). I then took your idea form the “Make Me Beautiful” blog you had previously and covered it with leftover white paint I had. I plan on tea staining it with some leftover stain, so ultimately the whole dresser cost me nothing!! It looks fabulous thus far and I’m super excited about trying the other distressed tricks you have provided 🙂
My friend just did a old cabinet with a glass door ,painted it lime green,then turquoise over it dry brush effect,I look so good
I love this look and I have been reading tons of blogs trying to figure out how to reach it and by far your way is the best for me. It’s fast and easy and the results are awesome! Thanks so much 🙂
Great ideas. Now I know just how to finish off an old child’s dresser, it didn’t look quite “done” and I will be sure to use some of your techniques to get it to a better place. 🙂
Does this work for MDF (medium-density fibreboard)?
Marsha, which technique? Most will work, I wouldn’t recommend the sanding or hammering technique where you will expose the wood.
So, you wouldn’t recommend sanding and staining the exposed parts? How about tea staining?
I wouldn’t because MDF is glued wood pulp fibers, so I don’t think it will look good. But, maybe try a small test spot.
Great post Brittany 🙂 I’m actually working on distressing more of my pieces these days. Love the tips!
THANK YOU IMMENSELY for every single one of these tips & tricks… I’ve just recently taken on several projects & this post is going to come in very handy! Thanks again =)
Thanks for the tips! I spent a good part of a long weekend last year painstakingly restoring our rather old and large dining room table and all 8 chairs! Last week my 14 year old daughter and her friend dyed their hair electric blue and dropped it (more like smeared lol) on my beautiful restored table!!! Yikes!! So now I am going to use your ideas to distress it and move it into our country kitchen! Wish me luck!!
Hi,
Can you tell me how to make metal, (not galvanized) and iron, fresh from the farm, look cool? Right now it is just plain rusty. I would think with all of the unique things I gathered from my dad’s farm, I could make them look very appealing and even repurpose them. Any suggestions?
Thanks!
Cherry, I haven’t created anything with that technique. But, I am working on a little tool caddy that I want to try to paint to look like galvanized aged metal. So, stay tuned 😉
Where is the tutorial for the window preping?
This is very beneficial to grab the ideas for painting antique furniture and I like this transformation and distressed furniture So i appreciate this post.
Hi! love your blog! Question, i have a light wood end table and i want to paint it antique white and add some dark wood stain so it looks like darker wood is showing thru. Your tips for faking a stain are great! Do i paint, then sand some edges and areas, brush on the stain, then wipe? or should i stain first, then paint? Don’t want to mess this up! LOL!
thanks!
kelli.
Kelli,
You could go either way. If it was me, I would stain first. Then after the stain has dried, follow up with a paint that doesn’t require a primer like Annie Sloan Chalk Paint. Then sand through to the stain. If you accidentally get down to the wood, you can add the stain afterwards. But, if you want a very aged looking white look, I’d go with the stain afterwards. It will make it kind of dirty white.
This is VERY helpful! Thank you so much! I am wanting to redo my dresser. It is an espresso wood stain and i want to make it white washed, distressed. Any tips on that? Thank you, again!
Kenzie,
Thank you for your comment. I think it depends if you want the wood to show through after distressing it. If you do, I would recommend using Annie Sloan chalk paint or a paint that doesn’t require a primer and then sand through it. If you don’t want the wood to show through, I’d use a primer to be sure that your paint adheres well to the stained surface. Regardless of the route you take, you should sand and scuff up the surface to give the paint a surface to adhere to. Take a look at some of my other aging and distressing paint projects here: https://prettyhandygirl.com/aging-antiquing-distressing-projects
I absolutely love the look of antiqued/ distressed furniture. This tutorial is perfect. thank you!
…..I am itching to tackle my kitchen cabinets. They are wood painted white (more than once) no clue what’s under the layers. Any experience or advice on this project?
Yay! I’m glazing/distressing a desk today, this is perfect! I saw this on pinterest, then saw on your sidebar that you’ll be a speaker at SNAP–me too! Hopefully we get to chat!
have you checked out Annie Sloan paint? So easy to use and no stripping or undercoats or top coats or primer. Check out drab2fab.com or Anniesloan.com You’ll love it!
Interesting,thank you.
I love your blog/site!!! I love the fact that you show how to do things step-by-step!!!! Thank you
I have a dilema about my kitchen table. It is 2 years old with matching chairs. The chairs match and have harder wood than the table. My table is a soft veneer wood surface with beautiful dark knots, stain spatter, slight distressing. The problem is the wood is so soft I have homework(letters and numbers – deep) and horrible unattractive and uneven dents and scrapes etched into the entire surface including the 2 leafs it comes with. I would like to keep it the same color, but I don’t know what to do about the dents, some are so deep they can’t sand out. Any ideas on what to do? or how to make all the dents and scrapes even? Help!
Jen, thank you for your comment. It sounds like there is no perfect solution to your dilemma, but that doesn’t mean it is hopeless.
The only way to truly eliminate dents and scratches (too deep to sand) is to fill them with wood putty. BUT, then you have to stain it to “try” to match the original stain. That isn’t going to be easy and you may end up making the scratches and dents more noticeable.
If you think you can sand out the majority of the scratches, again you will need to try to match the stain. But, it will be easier to stain the sanded wood and have it match then trying to stain wood putty (which doesn’t have the same properties of the wood.)
If it were me, and I truly loved the table but couldn’t live with the dents and scratches. I would strip and sand down the entire table surface. Then re-stain it so that the whole surface would be the same stain color. THEN, to protect from further damage, I’d have glass or plexi-glass cut to fit on top of the table to protect from future damage.
I wish I had a better answer for you. Good luck!
Brittany
The mocha glaze is amazing!!! It is great especially if you prime with white. I was afraid when I sanded placed down they would look weird white, but i was able to get some wood to show up and then the glaze just aged the whole look!!!
THank you so much for the tips 🙂
its all about distressing furniture.
Brittany,
I had to chuckle at your distressing techniques; they're the same ones I heard about years ago
from a friend who worked for a company that turned new furniture into "instant" antiques.
Another good technique: tie one end of a rope to a piece of furniture you want to "age",
tie the other end to the bumper of a truck and drive around in a gravel parking lot!.
http://john-pagliuca.artistwebsites.com/
These are great! I'm loving your latest posts. I'll be linking.
I'm featuring this fabulous tutorial on my blog tomorrow!
I love your tour of different aging methods! I will definitely be trying the spatter method (I have freckles already).
Amazing what a little "distress" can do to a cheaper piece! Very impressed!
I have found that wet coffee grounds rubbed onto the wood also give an aged look. I've used it on signs to give them a "dirty, old" look. I'll try anything once…or five times until I get the "look". Thanks for all your tips!
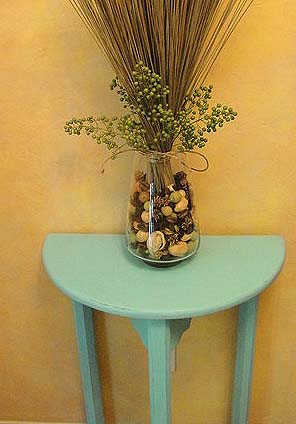
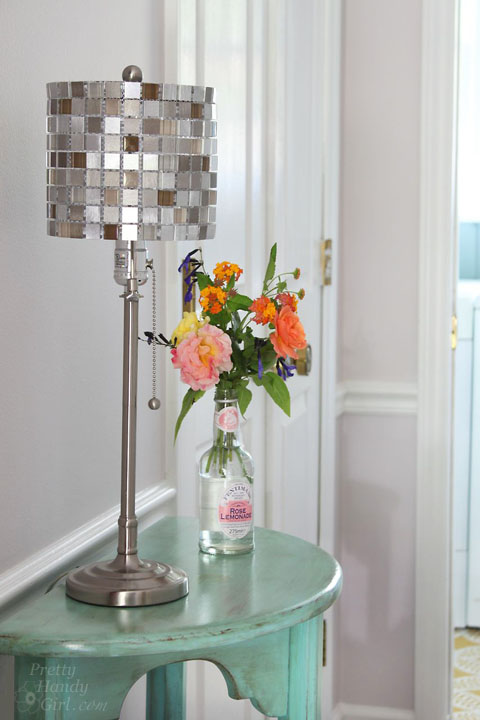
I am one of those blog readers that scans the pictures first and then goes back and rereads. I love the turquoise side table and spice turner thing. . . beautiful!!! Can't wait to read the post and see how you did it!!!
Thank you for the great tips. I've bookmarked this page!
It is amazing how there are always more things to learn about painting & distressing furniture. Thanks!!!
Great tips. I have that same spice carousel in my kitchen (hiding in the cupboard). I think I'll try painting it this weekend – thanks for the idea.
Thanks for the great tips! I always want to distress things, but then I get so nervous about it!!!
love it! thanks for sharing 🙂
Thank you for sharing you tips!
Thank you for sharing all those techniques! I am new to this whole thing and have wondered how some of these techniques work.